background image

Please read these Operating 
Instructions before using the unit 
and save for future reference.

This model is designed to be 
used only in the U.S.A.
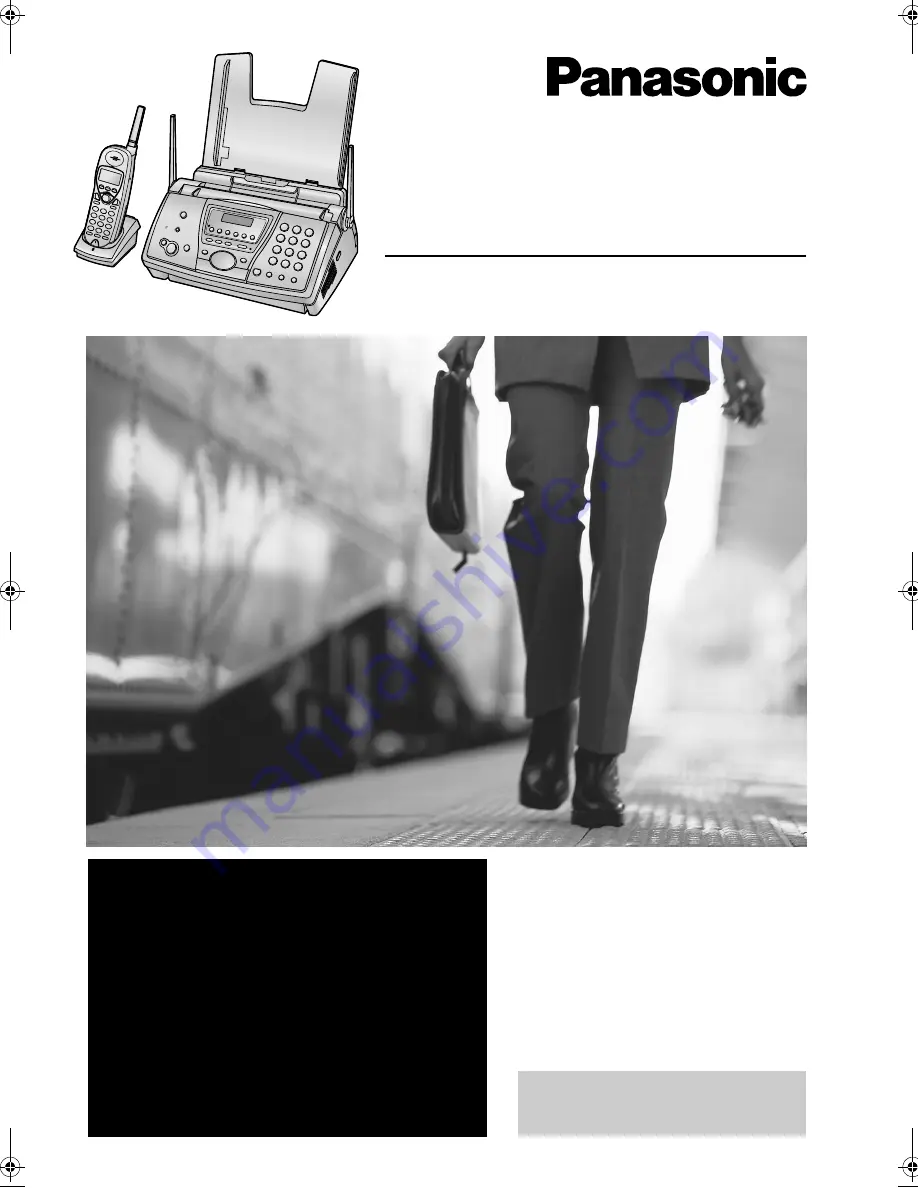
2.4 GHz Expandable

Cordless Phone System and Fax

Operating Instructions

Model No.


KX-FPG381

FOR FAX ADVANTAGE ASSISTANCE:
— PHONE CALL

1-800-HELP-FAX (1-800-435-7329)

— E-MAIL TO

[email protected]

for customers in the U.S.A. or Puerto 
Rico

— REFER TO 

www.panasonic.com

for customers in the U.S.A. or Puerto 
Rico

0519_FPG381

PDF

  Page 1  Monday, May 19, 2003  6:46 PM

Summary of Contents for KX-FPG381

Page 1: ...nly in the U S A 2 4 GHz Expandable Cordless Phone System and Fax Operating Instructions Model No KX FPG381 FOR FAX ADVANTAGE ASSISTANCE PHONE CALL 1 800 HELP FAX 1 800 435 7329 E MAIL TO consumerproducts panasonic com for customers in the U S A or Puerto Rico REFER TO www panasonic com for customers in the U S A or Puerto Rico ...

Page 2: ... Location of Controls How to use the operating instructions When following operating instructions always keep the front cover page next page open so that you will find easy reference to the buttons OPEN ...

Page 3: ...B HELP M PRIVACY D CONF F HOLD E REDIAL PAUSE T COPY J LOCATOR INTERCOM A SET K DIGITAL SP PHONE R MAILBOX G STOP L ERASE P MEMO N TONE I FAX START K MENU Q TRANSFER A FLASH CALL WAIT S MUTE U VOLUME O A B C D E I K P S T R Q J L M O N F G H U B C E D H G F I J A Buttons CONF FUNCTION E FLASH CALL WAIT I HOLD CLEAR H INTERCOM TRANSFER H Navigator LOUD SEARCH F OFF G PAUSE REDIAL J Soft keys A SP P...

Page 4: ... machine you should complete the instructions on page 29 to page 32 L Note that the images of copied or received documents will remain on the used ink film Use discretion when disposing of the used ink film L Do not rub or use an eraser on the printed side of recording paper as the print may smear Energy Star L As an ENERGY STAR Partner Panasonic has determined that this product meets the ENERGY S...

Page 5: ... service center when service is required Opening or removing covers may expose you to dangerous voltages or other risks Incorrect reassembly can cause electric shock when the unit is subsequently used 13 Unplug this unit from power outlets and refer servicing to an authorized service center when the following conditions occur A When the power cord is damaged or frayed B If liquid has been spilled ...

Page 6: ...bracelets and keys or the battery ies and or conductor may overheat and cause burns L Charge the battery ies provided with or identified for use with this product only in accordance with the instructions and limitations specified in this manual NOTICE L Operating near 2 4 GHz electrical appliances may cause interference Move away from the electrical appliances L Consult the manufacturer of any per...

Page 7: ...ise free operation we recommend the following A Placing the unit away from electrical appliances such as a TV radio personal computer or another cordless phone B Placing the unit in a HIGH and CENTRAL location with no obstructions such as walls C Raising the antennas vertically Note L If you are using the handset near a microwave oven which is being used noise may be heard from the receiver or the...

Page 8: ...34 3 2 Answering phone calls 35 Automatic Dialing 3 3 Storing names and telephone numbers into the navigator directory 36 3 4 Making a phone call using the navigator directory 37 3 5 Editing a stored item 38 3 6 Erasing a stored item 38 3 7 Copying the directory 39 Caller ID 3 8 Caller ID service 40 3 9 Viewing and calling back using caller information 41 3 10 Caller ID number auto edit feature 43...

Page 9: ...e handset registration 77 9 2 Re registering the handset 77 10 Help Error Messages 10 1 Error messages Reports 79 10 2 Error messages Display 79 Frequently Asked Questions 10 3 When a function does not work check here 83 Jams 10 4 Recording paper jams 88 10 5 Document jams sending 90 Cleaning 10 6 Document feeder cleaning 90 10 7 Thermal head cleaning 91 11 General Information Printed Reports 11 1...

Page 10: ...hipping and transportation of the unit No Item Part number 1 Quantity Specifications 1 Power cord PFJA1030Z 1 2 Telephone line cord PQJA10075Z 1 3 Cordless handset 1 4 Battery cover PQKK10126Z1 1 5 Battery N4HKGMA00001 P P511 1 6 Belt clip PQKE10340Z1 1 7 Charger unit Charger PQLV30013YS AC adaptor KX TCA1 G KX TCA1 1 8 Paper tray PFKS1088Z1 1 9 A4 paper guide PFKS1089Z1 1 j Ink film 10 meters lon...

Page 11: ...nication page 49 is not possible with this model To place an order online for customers in the U S A ONLY Visit our web site http www panasonic com fpg381 L For questions regarding online orders E mail specialty panasonic com Telephone 1 866 888 2929 To place an order by fax replacement film and batteries only Fax 1 800 237 9080 Include your name shipping address and telephone number credit card t...

Page 12: ...To stop an operation or programming L To clear a digit page 31 M HELP L To print a quick reference page 27 N MEMO L To record a memo message page 62 O NAVIGATOR VOLUME L To search for a stored item page 38 page 51 L To select features or feature settings during programming page 68 L To navigate to the next operation L To adjust volume page 28 P ERASE L To erase messages page 63 Q MENU L To initiat...

Page 13: ... stop an operation or programming H HOLD CLEAR INTERCOM TRANSFER L To put a call on hold page 34 L To clear a digit page 37 L To page or locate another handset page 45 L To transfer a call page 46 I FLASH CALL WAIT L To access special telephone services such as call waiting page 40 or for transferring extension calls L The flash time can be changed feature 72 on page 72 or page 75 J PAUSE REDIAL L...

Page 14: ... This icon will be displayed when you are using the directory features page 36 4 PRIVACY icon L This icon will be displayed when the call privacy mode is ON page 48 The base unit and other handsets cannot join your conversation 5 Battery icon L This icon shows the battery strength page 20 6 Extension number L This number indicates the handset s extension number assigned to it during registration p...

Page 15: ...green button 1 on the right side of the unit OR Release the back cover by pushing in the green lever 2 in the unit 3 Open the back cover 1 4 Insert the gear of the blue core 1 into the left slot of the unit 2 Insert the rear ink film roll 3 L The ink film is safe to touch and will not rub off on your hands like carbon paper 5 Turn the gear of the blue core 1 in the direction of the arrow until the...

Page 16: ...ly we recommend the use of Panasonic replacement film See page 9 for accessory information L We cannot be responsible for any damage to the unit or degradation of print quality which may occur from the use of non Panasonic replacement film 1 Open the covers see steps 1 to 3 on page 13 2 Pull out the blue gear 1 and remove the used ink film 2 Remove the used core 3 3 Remove the stoppers 1 and tags ...

Page 17: ...per tray to the back of the unit Note L Change the recording paper size to A4 feature 16 on page 69 1 10 Recording paper The unit can hold Up to 30 sheets of 60 g m2 to 80 g m2 16 lb to 21 lb paper Up to 20 sheets of 90 g m2 24 lb paper No more than 20 sheets of legal paper Please read the note for recording paper page 95 for important information regarding recording paper For superior results we ...

Page 18: ... battery needs to be replaced Please use only Panasonic batteries See page 9 for accessory information L Only use rechargeable batteries If you install non rechargeable batteries and start charging them the batteries may leak electrolyte 1 Press the arrow on the battery cover firmly and slide the cover 2 Remove the old battery Insert the new battery and close the cover see the battery installation...

Page 19: ...he direction of the arrow 2 1 14 Headset optional Plugging an optional headset into the handset allows to have hands free phone conversations Please use only a Panasonic headset See page 9 for accessory information To connect an optional headset to the handset L Model shown is KX TCA88 1 2 To switch to the speakerphone while using the headset Press SP PHONE To return to the headset press TALK ...

Page 20: ...r lightning For additional protection we recommend the use of a surge protector If you use this unit with a computer or subscribe to an xDSL service Fax transmission reception may be disturbed or you may hear interference noise during telephone conversation A filter to prevent this is provided from your service company Please attach the filter to the telephone line cord of the fax machine 2 1 2 Ch...

Page 21: ...0 435 7329 2 2 Wall mounting the charger The charger can be wall mounted Install screws 1 using the wall template below Mount the charger 2 slide it down 3 then slide down to the right 4 until it is secured Wall Template 2 45 cm 31 32 2 45 cm 31 32 1 4 3 2 ...

Page 22: ...using the reception booster feature page 34 L If your Panasonic battery is fully charged and the 2 way radio mode page 49 is used the battery should last up to 4 5 hours while in use in conversation it should last up to about 12 hours while not in use off the charger Note L Once the battery is fully charged you do not have to place the handset on the charger after every use Placing the handset on ...

Page 23: ...etup Guide as a reference Case 1 TAM FAX page 22 Case 2 Distinctive Ring 1 phone line with 2 or more phone numbers page 23 Case 3 TEL ONLY page 24 Case 4 FAX ONLY page 26 1 Press MENU 2 Press then 0 0 QUICK SETUP PRESS SET 3 Press SET PRINT SETUP YES SET NO STOP 4 Press SET again to print the Quick Setup Guide L If you do not wish to print it press STOP 5 Press A or B repeatedly to display the des...

Page 24: ...ss MENU Note L You can change the ring setting in TAM FAX mode feature 06 on page 69 or page 75 2 5 3 How to receive calls When receiving calls the unit works as a fax and answering machine L If the call is a phone call the unit will record a voice message automatically L If a fax calling tone is detected the unit will receive the fax automatically Note L Do not connect an answering machine to the...

Page 25: ... YES SET NO STOP 5 Press SET again to print the Quick Setup Guide L If you do not wish to print it press STOP 6 Press A or B repeatedly to display the following SELECT A SETUP DIST RING 7 Press SET L The AUTO ANSWER indicator turns ON 8 Press MENU Note L You can change the ring setting in TAM FAX mode feature 06 on page 69 or page 75 2 6 3 How to receive calls If the number assigned for phone call...

Page 26: ... document reception is required a fax calling tone slow beep is heard or no sound is heard press FAX START L The fax machine will start fax reception With the handset 1 Lift the handset and press TALK or SP PHONE to answer the call 2 When document reception is required a fax calling tone slow beep is heard or no sound is heard press 9 default fax activation code firmly L The fax machine will start...

Page 27: ...x Advantage assistance call 1 800 435 7329 L The fax machine will start fax reception Note L To receive fax documents using the extension telephone you must set the remote fax activation to ON feature 41 on page 71 beforehand ...

Page 28: ...PRINT SETUP YES SET NO STOP 4 Press SET again to print the Quick Setup Guide L If you do not wish to print it press STOP 5 Press A or B repeatedly to display the following SELECT A SETUP FAX ONLY 6 Press SET L The AUTO ANSWER indicator turns ON 7 Press MENU Note L You can change the ring setting in feature 06 page 69 2 8 3 How to receive faxes Just leave it When the other party sends a fax the fax...

Page 29: ...selected item will be printed Volume 2 10 Adjusting handset volume 2 10 1 Ringer volume 4 levels high medium low off are available Make sure the handset is not being used 1 Press CONF FUNCTION 2 Scroll to Ringer setting by pressing v or e and press 3 Press at Ringer volume 4 Press v or e to select the desired volume 5 Press the right soft key SAVE To turn the ringer OFF Press v repeatedly until Of...

Page 30: ... Press SET RINGER OFF L If set to OFF the base unit will not ring for external calls and for internal calls it will ring at the low level L To turn the ringer back ON press A Ringer tone L You can select the base unit ringer tone from one of 6 patterns for external calls feature 17 on page 69 2 11 2 Speaker volume 8 levels high to low are available While using the speakerphone press A or B 2 11 3 ...

Page 31: ...r PM Example 10 15 PM 12 hour clock entry 1 Press 1 0 1 5 2 Press repeatedly to display PM 6 Press the right soft key SAVE L If 3 beeps sound the setting is not correct Start again from step 4 7 Press OFF to exit the program To check the date and time Repeat steps 1 to 3 L The date and time will be displayed When finished press OFF 2 12 2 Using the base unit 1 Press MENU SYSTEM SETUP PRESS NAVI 2 ...

Page 32: ...r ID will reset the clock after the first ring if the adjusted time is incorrect L If the time has not previously been set Caller ID will not adjust the clock L Caller ID will automatically adjust the clock for daylight saving time 2 13 Your logo The logo can be your company division or name 1 Press MENU SYSTEM SETUP PRESS NAVI 2 Press or repeatedly to display the following YOUR LOGO PRESS SET 3 P...

Page 33: ...rrect character 2 Press STOP L To erase all of the digits press and hold STOP 3 Enter the correct character To select characters using A or B Instead of pressing the dialing buttons you can select characters using A or B 1 Press A or B repeatedly to display the desired character 2 Press to move the cursor to the next space L The character displayed is selected 3 Return to step 1 to enter the next ...

Page 34: ... STOP 3 Enter the correct number Option 2 15 Registration of additional handsets You can expand this unit by adding up to 7 additional handsets A maximum of 8 handsets can be registered at the base unit Generally a maximum of 3 extensions can operate at a time If 3 other extensions are in use such as conducting an external internal call you may not be able to use your unit The included handset is ...

Page 35: ... complete L The registered number 1 to 8 will be shown on the top right of the display Example Extension number 2 Note L To stop registration press OFF on the handset and press MUTE on the base unit L To cancel a handset registration see page 77 L To re register a handset to a different base unit of the same model see page 77 L The maximum number of extensions that can be used at once may decrease...

Page 36: ...free phone calls 1 Lift the handset and press SP PHONE 2 Dial the telephone number 3 When the other party answers talk into the microphone 4 When finished talking press OFF or place the handset on the charger To put a call on hold Press HOLD CLEAR twice L IN USE will flash on the display Hold will be displayed L To release the hold press TALK or SP PHONE on the handset or DIGITAL SP PHONE on the b...

Page 37: ...dditional minutes on hold the line will be disconnected To redial the last number dialed from the base unit Press DIGITAL SP PHONE then press REDIAL PAUSE 3 2 Answering phone calls 3 2 1 Using the handset 1 Lift the handset and press TALK L You can also answer a call by pressing any dialing button 0 to 9 or Any key talk feature 2 When finished talking press OFF or place the handset on the charger ...

Page 38: ...n the system has additional handsets page 32 each handset can have its own directory To use a directory first store the items then see page 37 to make a phone call 3 3 1 Using the handset Make sure the handset is not being used 1 Press CONF FUNCTION 2 Press at Save directory 3 Enter up to 16 characters for a name See the character table on page 36 for details 4 Press v 5 Enter up to 22 digits for ...

Page 39: ...nting the telephone number list page 93 Note L If SPACE 5 DIRS is displayed only 5 more items can be stored To correct a mistake 1 Press or to move the cursor to the incorrect character number 2 Press STOP L To erase all of the digits press and hold STOP 3 Enter the correct character number 3 4 Making a phone call using the navigator directory Before using this feature program the desired names an...

Page 40: ...lephone number skip to step 7 6 Edit the telephone number For further details see the storing procedure on page 36 7 Press v 8 Press the right soft key SAVE 9 Press OFF 3 5 2 Using the base unit 1 Press or 2 Press A or B repeatedly to display the desired item 3 Press MENU 4 Press L If you do not need to edit the name skip to step 6 5 Edit the name For further details see the storing procedure on p...

Page 41: ... item has been copied Complete will be displayed and a beep will sound L The destination unit display will show DIRECTORY RECEIVING then DIRECTORY RECEIVED L To copy another item repeat steps 6 and 7 8 Press OFF Copying all the directory items 1 Press CONF FUNCTION 2 Scroll to Copy directory by pressing v or e and press 3 Scroll to Copy all items by pressing v or e and press 4 To copy to the base ...

Page 42: ...n can be viewed on the display one item at a time page 41 You can print the Caller ID list page 93 L If the unit is connected to a PBX Private Branch Exchange system you may not receive the caller information Consult your PBX supplier L If the unit cannot receive caller information the following will be displayed OUT OF AREA The caller dialed from an area which does not provide Caller ID service P...

Page 43: ...start dialing automatically Note L After viewing all of the new caller information Received calls will disappear What means The display shows a after you have viewed answered or returned this call L If the same caller calls again the call entry with will be replaced with the new call entry L The base unit and handset and any additional handsets store caller information individually When a call or ...

Page 44: ... to call back the displayed party L The unit will start dialing automatically L To send a fax insert the document FACE DOWN and press FAX START Note L If the unit did not receive name information the base unit display will show NO NAME RCVD L After viewing all of the new caller information RECEIVED CALLS will disappear To change the display of the caller information Press CALLER ID repeatedly afte...

Page 45: ... 4 area codes to be edited according to patterns 1 and 2 To activate this feature you must first set this feature to ON then make an outgoing call from the Caller ID list to a number which you have assigned to one of the auto edit patterns This feature can be turned ON using either the handset or the base unit The default setting is ON 3 10 1 Using the handset L Keep the front cover page open for ...

Page 46: ...ases The telephone number includes data other than numbers i e or The caller information does not include a telephone number 3 12 1 Into the handset L Keep the front cover page open for button locations Make sure the handset is not being used 1 Press v or e repeatedly to display the desired item L If the number requires editing press the right soft key EDIT page 42 2 Press L To stop storing press ...

Page 47: ...ss LOCATOR INTERCOM 2 To page one handset enter its extension number using a dialing button 1 to 8 L The handset will beep for 1 minute L To stop paging press DIGITAL SP PHONE or LOCATOR INTERCOM To page all handsets press 0 L All handsets will beep for 1 minute L You can talk with the handset user who answers first 3 When the paged party answers talk into the microphone 4 To end the intercom pres...

Page 48: ...the transferred call To answer a transferred call with another handset If the paging party announces the transfer the calling extension will be displayed Press TALK SP PHONE or INTERCOM TRANSFER to answer the page Example Handset 1 is calling L After the paging party hangs up the call you can talk to the outside caller If the paging party hangs up before you answer the page Incoming call will be d...

Page 49: ...handset 1 CONFERENCE 01 L To leave the conference press DIGITAL SP PHONE The other two parties can continue the conversation During a conference call L The phone call can be put on hold by pressing HOLD CLEAR on the handset or HOLD on the base unit Internal communications between extensions are not suspended Only the person who placed the call on hold can resume the full conference press CONF FUNC...

Page 50: ... the right soft key SAVE 6 Press OFF 3 17 2 Turning ON the room monitor feature Base unit This allows the base unit to be monitored 1 Press MENU 2 Press then 7 4 3 Press A or B repeatedly to select ON 4 Press SET 5 Press MENU Note L You can turn ON the base unit room monitor feature using the handset page 76 3 17 3 Monitoring a room Using the handset 1 Press INTERCOM TRANSFER 2 Press the right sof...

Page 51: ...croll to 2Way radio mode by pressing v or e then press 3 Press v or e repeatedly to select On 4 Press the right soft key SAVE L The display will show 2Way radio mode To turn the mode OFF Place the handset on the charger L 2Way radio mode will disappear and the mode will turn OFF L You can also turn OFF the mode as follows 1 Press CONF FUNCTION 2 Press v or e repeatedly to select Off 3 Press the ri...

Page 52: ... from the next page To redial the last number 1 Press REDIAL PAUSE 2 Press FAX START L If the line is busy the unit will automatically redial the number up to 2 times L To cancel redialing press STOP To send more than 10 pages at a time Insert the first 10 pages of the document Add the other pages up to 10 at a time before the last page feeds into the unit Pre dialing a fax number You can dial the...

Page 53: ...ple sheets 60 g m2 to 80 g m2 16 lb to 21 lb Note L Remove clips staples or other fasteners L Do not send the following types of documents Use copies for fax transmission Chemically treated paper such as carbon or carbonless duplicating paper Electrostatically charged paper Badly curled creased or torn paper Paper with a coated surface Paper with a faint image Paper with printing on the opposite s...

Page 54: ...ENU repeatedly to display DIRECTORY SET 2 Press L The number in brackets indicates the number of registered items 3 Press A or B repeatedly to display the desired item 4 Press SET L To program other items repeat steps 3 and 4 up to 20 items 5 Press SET Note L If you program the wrong item press STOP after step 4 to erase the item L Confirm the stored items by printing a broadcast programming list ...

Page 55: ...group of items You can also select a one time group of parties to send the same document to After transmission this group will be deleted 1 Insert the document 2 Press 3 Press A or B repeatedly to display ONE TIME BROAD 4 Press SET to start programming the items you want to transmit to 5 Press A or B repeatedly to display the desired item 6 Press SET L To program other items repeat steps 5 and 6 u...

Page 56: ...d To stop receiving Press STOP How to receive faxes with an extension telephone You can receive fax documents using an extension telephone Important L Use a touch tone telephone as the extension telephone 1 When the extension telephone rings lift the handset of the extension telephone 2 When document reception is required a fax calling tone slow beep is heard or no sound is heard press 9 default f...

Page 57: ...ting message 3 The caller presses 9 L The unit will activate the fax function 4 The caller presses the start button to send a document Changing the ring setting in TAM FAX mode You can select from 2 default 3 4 5 6 7 or TOLL SAVER This setting can be changed by feature 06 on page 69 or page 75 TOLL SAVER When you call the unit from a remote location to listen to new messages page 66 the number of ...

Page 58: ...4 Press SET 5 Press MENU How to receive calls If the incoming call is for the fax number the fax machine will ring with the assigned ring pattern and automatically start fax reception If the incoming call is for the phone number the fax machine will keep on ringing in TEL mode the fax machine will record a voice message in TAM FAX mode fax communication will be attempted in FAX ONLY mode 5 3 Using...

Page 59: ...2 4 Press A or B repeatedly to select the ring pattern assigned for fax A Standard ring one long ring B Double ring two short rings C Triple ring short long short rings D Other triple ring short short long rings B D default setting For the ring pattern of B C and D 5 Press SET 6 Press MENU Other triple ring short short long rings D Ring pattern Settings in feature 32 1st ring 2nd ring ...

Page 60: ...t to copy a document but do not want to wait for the unit to print the copy because you need the document for other uses The unit can scan a document into memory release the original document then print the copy To use this feature activate feature 34 page 70 L The document will be fed into the unit and scanned into memory The unit will then print the data If the document exceeds the memory capaci...

Page 61: ...es 1 After step 4 on page 58 enter the number of copies up to 30 2 Press 2 times L COLLATE OFF will be displayed 3 Press A or B repeatedly to display COLLATE ON 4 Press START Example Making 2 copies of a 4 page original document Note L The unit will store the documents into memory while collating the copies If memory becomes full while storing the unit will only print out the stored pages L After ...

Page 62: ...ming page 71 L You can also program a password using the handset page 76 3 Set the unit to TAM FAX mode page 54 7 1 2 When a caller calls 1 Call your unit from a remote touch tone telephone L The TAM FAX greeting message will be played 2 Press and the desired mailbox number 1 2 or 3 L If the caller does not enter a mailbox number the message will be recorded in mailbox 1 3 After your unit announce...

Page 63: ...FAX greeting message feature 54 on page 72 If you change the maximum greeting message time to 60 seconds we recommend that you tell the caller in your TAM FAX greeting message to press 9 before starting fax transmission If you change the maximum greeting message time from 60 seconds to 16 seconds your current greeting message will be deleted When a call is received the pre recorded greeting messag...

Page 64: ... The base unit display will show the total number of recorded messages When the unit has recorded new voice messages The AUTO ANSWER indicator will flash when AUTO ANSWER is turned ON The mailbox icons which contain new messages will flash on the base unit display If only old messages exist in a mailbox The AUTO ANSWER indicator will be lit but will not flash when AUTO ANSWER is turned ON The mail...

Page 65: ...sage To stop playback temporarily Press STOP L To resume playback press the MAILBOX button MAILBOX 1 MAILBOX 2 or MAILBOX 3 whose playback was stopped within 1 minute Slow talk message playback For easier listening of recorded messages you can slow down the playback speed Press the MAILBOX button MAILBOX 1 MAILBOX 2 or MAILBOX 3 whose message is being played L The playback speed will slow down L T...

Page 66: ... on page 71 feature 52 on page 71 or page 76 L The unit will announce Mailbox no and the number of new messages in the mailbox and will play back the new messages L To play all messages in the mailbox press 5 L You can enter the desired direct commands for other functions page 65 L If you do not enter a direct command after playback the voice menu will start page 64 3 Press OFF to end the operatio...

Page 67: ...next message will be played 5 Erasing all messages L All recorded messages in the mailbox are erased L A long beep will sound and the unit will announce Mailbox no no messages 1 Selecting mailbox 1 L Mailbox 1 is selected and the unit announces the number of new messages in mailbox 1 2 Selecting mailbox 2 L If mailbox 2 has a password feature 51 on page 71 or page 76 enter it Mailbox 2 is selected...

Page 68: ...es 4 After 3 seconds the voice menu will start page 67 Follow the menu or enter the direct commands page 65 5 To end remote operation hang up OR To listen to messages in another mailbox press 1 mailbox 1 2 mailbox 2 or 3 mailbox 3 L If the unit announces Enter mailbox password mailbox 2 or 3 has a password feature 51 on page 71 feature 52 on page 71 or page 76 Enter the password Note L The unit wi...

Page 69: ...e will be played 5 Erasing all messages L All recorded messages in the mailbox are erased L A long beep will sound and the unit will announce Mailbox no no messages 0 Turning OFF the answering machine L The unit hangs up and will not answer calls until turned ON again page 54 67 1 Selecting mailbox 1 L Mailbox 1 is selected and the unit announces the number of new messages in the mailbox 2 Selecti...

Page 70: ...layed 5 Press A or B repeatedly to display the desired setting L This step may be slightly different depending on the feature 6 Press SET L The setting you selected is set and the next feature will be displayed 7 To exit programming press MENU Programming by entering the program code number directly You can select a feature by directly entering the program code and a 2 digit number instead of usin...

Page 71: ...1 Press MENU 2 Press then 1 1 3 Enter any 2 digit number 00 99 L The default ID is 11 4 Press SET 5 Press MENU Note L You can also program this feature with the handset page 76 Code 13 Setting the dialing mode DIALING MODE MODE TONE If you cannot make calls change this setting depending on your telephone line service TONE default For tone dial service PULSE For rotary pulse dial service Note L You...

Page 72: ...rinted but the unit will keep a record of the information for the last 50 different callers Code 31 Activating the Distinctive Ring feature DISTINCTIVE RING MODE OFF See page 56 for details Code 32 Setting the ring pattern for fax Distinctive Ring feature FAX RING PATTERN RING B D See page 57 for details Code 34 Setting the quick scan QUICK SCAN MODE OFF This feature is helpful when you want to re...

Page 73: ...NCE MODE ON If you wish to hear voice guidance for fax transmission reception activate this feature ON default You will hear voice guidance OFF Deactivates this feature ERROR To hear voice guidance only when fax transmission reception fails Code 51 Setting the mailbox 2 password BOX2 PASSWORD ID To prevent other users from retrieving your messages program a password for mailbox 2 1 Press MENU 2 Pr...

Page 74: ... 400ms 600ms or 700ms default Note L If the unit is connected via a PBX PBX functions transferring a call etc might not work correctly Consult your PBX supplier for the correct setting L You can also program this feature with the handset page 75 Code 73 Setting incoming call tone INCOMING CALL MODE 2 During an intercom call page 45 or while using the room monitor feature page 48 or while listening...

Page 75: ...orresponding pages for function details 8 4 2 Programmable functions Main menu Sub menu Save directory page 36 Ringer setting Ringer volume page 27 Ringer tone page 74 Incoming call for handset page 74 Date and time page 29 Copy directory Copy 1 item page 39 Copy all items page 39 Initial setting LCD contrast page 74 Auto talk page 74 Room monitor for handset page 48 Caller ID edit page 43 Set tel...

Page 76: ...not being used 1 Press CONF FUNCTION 2 Scroll to Initial setting by pressing v or e and press 3 Scroll to Set base unit by pressing v or e and press 4 Press at Incoming call 5 Press v or e repeatedly to select the desired setting 6 Press the right soft key SAVE 7 Press OFF Note L You can also program the base unit incoming call tone with the base unit feature 73 on page 72 Changing the handset dis...

Page 77: ...f the line mode setting is required by our customer call center or service personnel change the line mode to A Make sure the base unit and the handset are not being used 1 Press CONF FUNCTION 2 Scroll to Initial setting by pressing v or e and press 3 Scroll to Set tel line by pressing v or e and press 4 Scroll to Set line mode by pressing v or e and press 5 Press v or e repeatedly to select the de...

Page 78: ...eing used 1 Press CONF FUNCTION 2 Scroll to Initial setting by pressing v or e and press 3 Scroll to Set answering by pressing v or e and press 4 Scroll to Set mailbox2 3 by pressing v or e and press 5 Select the mailbox by pressing e Mailbox2 or v Mailbox3 L If the password has previously been assigned to the mailbox it is displayed 6 Enter a 2 digit number 00 99 L If you entered a wrong number p...

Page 79: ...rn to the standby mode L To register the handset to another base unit of the same model start from step 5 in the re registering the handset procedure on page 77 or see page 32 L The handset will not work To use it again registration will be required page 32 77 9 2 Re registering the handset If you want to re register the handset to the base unit or a different base unit of the same model you need ...

Page 80: ...eled the handset registration at the previous base unit page 77 the handset number still remains on that base unit memory To erase the handset number from the previous base unit see the base unit operating instructions For this base unit 1 Press MENU 2 Press MUTE 3 Press SET 4 Enter 3 3 5 5 Press SET 6 Enter that handset number 1 to 8 7 Press SET ...

Page 81: ...not fed properly Re insert the document and try again L The other party s fax machine rang too many times Send the fax manually page 50 L The other party s machine is not a fax machine Check with the other party L The number you dialed is not in service PRESSED THE STOP KEY L STOP was pressed and fax communication was canceled OK L Fax communication was successful 10 2 Error messages Display If th...

Page 82: ...nt in memory See the other displayed message instructions to print out the document FAX MEMORY FULL L The memory is full of received documents due to a lack of recording paper or a recording paper jam Install paper page 15 or clear the jammed paper page 88 L When performing memory transmission the document being stored exceeded the memory capacity of the unit Transmit the entire document manually ...

Page 83: ...nnel The base unit will not work So if you make a call use the handset SYSTEM IS BUSY L Radio communication between the handset and the base unit is partially impaired L More than one unit is in use such as conducting an external internal call Try again later L Another user is listening to messages Try again later L You tried to view caller information while a handset user is operating the answeri...

Page 84: ...n of that handset until it is erased from your base unit Erase the handset registration from this unit as follows 1 Press MENU 2 Press MUTE 3 Press SET 4 Enter 3 3 5 5 Press SET 6 Enter that handset number 1 to 8 7 Press SET The name number is an example L When the displayed item was being copied to the destination unit the directory memory was full Copying was stopped If you tried to copy all of ...

Page 85: ... the connections L If you connected the fax machine through a computer modem connect the fax machine directly to a telephone line jack I cannot make calls L The dialing mode setting is wrong Change the setting feature 13 on page 69 or page 74 The unit does not work L Check the settings page 16 and page 18 to page 20 The unit does not ring L The ringer volume is turned OFF Adjust it page 27 28 10 3...

Page 86: ...ith your phone Disconnect it and try again L Other electrical appliances connected to the same outlet may be interfering with the Caller ID information L Telephone line noise may be affecting the Caller ID information L The caller requested not to send his her information page 40 L If a call is being transferred to you the caller information will not be displayed The display exits the Caller ID Li...

Page 87: ...lack of recording paper or a recording paper jam Install paper or clear the jammed paper The handset display is blank L Charge the battery fully page 20 I cannot make a call with the handset L You cannot make a call when the handset is in the remote operation mode Exit the mode by pressing OFF page 64 L If the 2 way radio mode is ON turn it OFF page 49 I cannot make a call even if the line is free...

Page 88: ...rease the number of rings in feature 06 page 69 L The greeting message is too long Record a shorter message page 61 The display shows CONNECTING but faxes are not received L The incoming call is not a fax Change the receiving mode to TAM FAX mode page 54 or TEL mode page 53 A blank sheet is ejected L If a blank sheet is ejected after the received document is printed out the receiving reduction rat...

Page 89: ...ing machine I cannot listen to messages from a remote location L Press the remote operation ID code correctly and firmly feature 11 on page 69 or page 76 L If the unit announces Enter Mailbox password mailbox 2 or 3 has a password Enter the password feature 51 on page 71 feature 52 on page 71 or page 76 L The unit is not in TAM FAX mode Change to TAM FAX mode page 67 Messages in the mailbox do not...

Page 90: ...nd the start time occurs during a power failure transmission will be attempted shortly after power is restored L If any fax documents are stored in the memory they will be lost When power is restored a power down report will be printed out stating which contents in the memory have been erased Jams 10 4 Recording paper jams 10 4 1 When the recording paper has jammed in the unit The display will sho...

Page 91: ...d area on both sides 2 Then close the front cover securely 3 7 Remove the recording paper and straighten Pull the tension plate forward 1 and insert the paper Then push the tension plate back 10 4 2 When the recording paper was not fed into the unit properly The display will show the following CHECK PAPER Remove the recording paper and straighten Pull the tension plate forward 1 and insert the 1 2...

Page 92: ...document carefully 3 2 Close the front cover securely 1 Note L Do not pull out the jammed paper forcibly before opening the front cover Cleaning 10 6 Document feeder cleaning Clean the document feeder in the following cases If misfeeding of the document occurs frequently If smudges or black white lines appear on the original document when transmitting or copying 1 Disconnect the power cord and the...

Page 93: ...aper products such as paper towels or tissues 4 Close the front cover securely 1 5 Connect the power cord and the telephone line cord 10 7 Thermal head cleaning If smudges or black white lines appear on a copied received document check for dust on the thermal head Clean the thermal head to remove the dust 1 Disconnect the power cord and the telephone line cord 2 Open the front cover 1 by pulling u...

Page 94: ...2 5 Clean the thermal head 1 with a cloth moistened with isopropyl rubbing alcohol and let it dry thoroughly Caution L To prevent a malfunction due to static electricity do not use a dry cloth and do not touch the thermal head directly 6 Reinstall the ink film and close the covers see steps 4 to 6 on page 13 7 Connect the power cord and the telephone line cord 2 1 1 2 1 ...

Page 95: ...fter every 30 fax communications feature 22 on page 69 Printer test Allows you to check the print quality of your unit If the test print has a smudge or blurred points or lines clean the thermal head page 91 Broadcast programming list Provides you with names and numbers which are stored in the broadcast memory page 52 Caller ID list Keeps a record of the last 50 different callers of the base unit ...

Page 96: ...15 s page Original mode 2 Scanning density Horizontal 8 pels mm 203 pels inch Vertical 3 85 lines mm 98 lines inch standard resolution 7 7 lines mm 196 lines inch fine photo resolution 15 4 lines mm 392 lines inch super fine resolution Photo resolution 64 levels Scanner type Contact Image Sensor Printer type Thermal Transfer on plain paper Data compression system Modified Huffman MH Modified READ ...

Page 97: ...ding occurs L For proper paper feeding and best print quality we recommend using long grained paper L Do not use paper of different types or thickness at the same time This may cause a paper jam L Avoid double sided printing L Do not use paper printed from this unit for double sided printing with other copiers or printers This may cause a paper jam L To avoid curling do not open paper packs until ...

Page 98: ...ictures and illustrations in these instructions may vary slightly from the actual product Operating environment 5 C 40 C 41 F 104 F Dimentions Approx height 60 mm width 74 mm depth 96 mm 211 32 229 32 225 32 Mass Weight Approx 95 g 0 21 lb Power consumption Standby Approx 0 8 W Maximum Approx 4 0 W Power supply AC adaptor 120 V AC 60 Hz ...

Page 99: ...rouble is experienced with this equipment for repair or warranty information please contact a Factory Servicenter or other Authorized Servicer If the equipment is causing harm to the telephone network the telephone company may request that you disconnect the equipment until the problem is resolved Connection to party line service is subject to state tariffs Contact the state public utility commiss...

Page 100: ...evision reception which can be determined by turning the equipment off and on the user is encouraged to try to correct the interference by one or more of the following measures Reorient or relocate the receiving antenna Increase the separation between the equipment and receiver Connect the equipment into an outlet on a circuit different from that to which the receiver is connected Consult the deal...

Page 101: ...e date is required for Limited Warranty service Carry In or Mail In Service For Carry In or Mail In Service in the United States call 1 800 HELP FAX 1 800 435 7329 For assistance in Puerto Rico call Panasonic Sales Company 787 750 4300 or fax 787 768 2910 Limited Warranty Limits And Exclusions This Limited Warranty ONLY COVERS failures due to defects in materials or workmanship and DOES NOT COVER ...

Page 102: ...rrantor PARTS AND SERVICE WHICH ARE NOT COVERED BY THIS LIMITED WARRANTY ARE YOUR RESPONSIBILITY For product service Call toll free 1 800 HELP FAX 1 800 435 7329 for the location of an authorized servicenter For out of Limited Warranty technical support After the Limited Warranty has expired please contact our Continued Services Technical Support Line at 1 900 555 PANA 1 900 555 7262 for support o...

Page 103: ...55 PANA 1 900 555 7262 for support on a fee basis For hearing or speech impaired TTY users TTY 1 866 741 6422 Web Site www panasonic com for customers in the USA or Puerto Rico ONLY You can purchase parts accessories or locate your nearest servicenter by visiting our Web Site Service in Puerto Rico Matsushita Electric of Puerto Rico Inc Panasonic Sales Company Factory Servicenter Ave 65 de Infante...

Page 104: ...73 80 Reset advanced features 73 A Accessories 8 A4 paper guide 15 Belt clip 16 Paper tray 15 Advanced features 69 AUTO ANSWER setting 73 Auto talk feature 35 74 B Basic features 68 Battery Charge 20 Installation 16 Replacement 16 Broadcast transmission 52 Button description Base unit 10 Handset 10 C Caller ID Calling back 41 Storing 44 Caller ID list 40 70 93 Caller ID number auto edit feature 43...

Page 105: ...tion 70 Reception booster 34 Recording Greeting message 61 Memo message 62 Recording paper 15 95 Recording time for TAM FAX greeting 72 Redialing Base unit 35 50 52 Handset 34 Redial list 34 Registration 32 77 Remote operation From a remote location 66 With the handset 64 Remote operation ID 69 76 Reports Broadcast programming 93 Broadcast sending 52 Caller ID 40 70 93 Journal 51 93 Power down 88 ...

Page 106: ...d with the returned product Any unit that is replaced by Panasonic and not shipped with proper proof of purchase by you will be subject to a minimum 100 00 charge The original unit must be properly packaged in the same manner as the replacement unit utilizing the packing materials provided Damage due to improper or inadequate packing will be charged to you as an out of warranty cost If our 1 800 H...

Reviews: