background image

Please read these operating instructions 
before using the unit and save for future 
reference.

This unit is compatible with Caller ID and 
SMS. To use these features, you must 
subscribe to the appropriate service of 
your service provider.

Operating Instructions

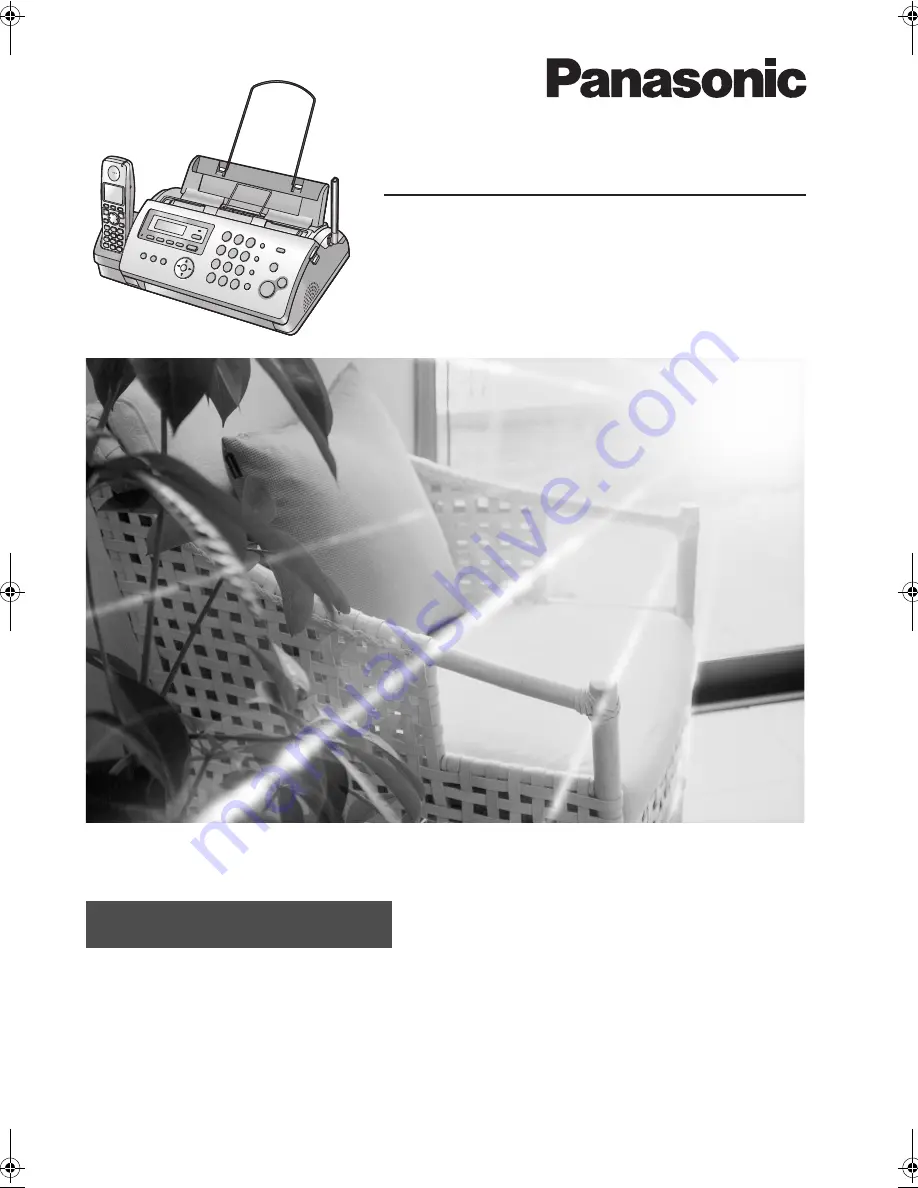
Compact Plain Paper Fax with DECT

Model No.


KX-FC228FX

Charge the battery for about 7 hours 
before initial use.

FC228FX-PFQX2496ZA-en.

PDF

  Page 1  Monday, June 19, 2006  5:37 PM

Summary of Contents for KX-FC228FX

Page 1: ... reference This unit is compatible with Caller ID and SMS To use these features you must subscribe to the appropriate service of your service provider Operating Instructions Compact Plain Paper Fax with DECT Model No KX FC228FX Charge the battery for about 7 hours before initial use ...

Page 2: ...onic Communications Co Ltd declares that this equipment is in compliance with the essential requirements and other relevant provisions of Radio Telecommunications Terminal Equipment R TTE Directive 1999 5 EC Declarations of Conformity for the relevant Panasonic products described in this manual are available for download by visiting http www doc panasonic de Contact Panasonic Services Europe a Div...

Page 3: ...authorised service centre E If the unit has been dropped or physically damaged F If the unit exhibits a distinct change in performance 14 During thunderstorms avoid using telephones except cordless types There may be a remote risk of an electric shock from lightning 15 Do not use this unit to report a gas leak when in the vicinity of the leak SAVE THESE INSTRUCTIONS CAUTION Installation L Never in...

Page 4: ...r or supplier for further information Information on Disposal in other Countries outside the European Union This symbol is only valid in the European Union If you wish to discard this product please contact your local authorities or dealer and ask for the correct method of disposal For Best Performance Location and noise The base unit and cordless handset use radio waves to communicate with each o...

Page 5: ...ge Service 3 12 Using SMS Short Message Service 25 3 13 Turning SMS on off 25 3 14 Storing SMS message centre numbers 25 3 15 Sending a message 25 3 16 Receiving a message 26 3 17 Guide to SMS settings 26 4 Fax Sending Faxes 4 1 Sending a fax manually 27 4 2 Document requirements 28 4 3 Sending a fax using the phonebook and one touch dial 28 4 4 Broadcast transmission 29 Receiving Faxes 4 5 Select...

Page 6: ...t work check here 60 11 Maintenance Jams 11 1 Recording paper jams 67 11 2 Document jams 68 Cleaning 11 3 Document feeder recording paper feeder scanner glass cleaning 69 11 4 Thermal head cleaning 70 12 General Information Printed Reports 12 1 Reference lists and reports Base unit only 71 Specifications 12 2 Specifications 71 13 Index 13 1 Index 73 ...

Page 7: ...bout 90 A4 sized pages Rechargeable batteries 2 Model No Part No P03P 2 rechargeable nickel metal hydride Ni MH batteries AAA R03 size Additional digital cordless handset Model No Part No KX TGA711FX Belt clip Model No Part No KX TCA718EX DECT repeater Model No Part No KX A272 1 To ensure the unit operates properly we recommend using the Panasonic replacement film The ink film is not reusable Do n...

Page 8: ...page 23 K STOP L To stop an operation or programming session L To erase a character number page 55 Press and hold to erase all characters numbers L LOCATOR INTERCOM L To make answer intercom calls page 52 L To page or locate a cordless handset page 52 M PRINT REPORT L To print lists and reports for reference purposes page 71 N MENU L To start or exit programming O PHONEBOOK VOLUME L To adjust volu...

Page 9: ...ar Mute L To mute your voice during a conversation Press again to resume the conversation L To erase a character number page 55 Press and hold to erase all characters numbers J INT Intercom L To page or locate the base unit or another cordless handset page 52 1 5 Display descriptions of the cordless handset Display icons E F D C I J H B A G Display icon Meaning w Within range of a base unit L When...

Page 10: ...tal recording paper guide 4 Paper support 5 Recording paper exit 6 Recording paper entrance 7 Antenna 8 Microphone 9 Front cover j Document entrance k Document exit l Speaker m Green button Back cover release button n Back cover 1 2 7 m n j k l 89 5 6 3 4 1 Charge indicator Ringer indicator Message indicator 2 Receiver 3 Microphone 4 Speaker 1 2 3 4 ...

Page 11: ...film roll into the front left slot of the unit 2 and the white gear of the ink film roll into the rear left slot of the unit 3 L The ink film is safe to touch and will not rub off on your hands like carbon paper L Make sure the blue gear 2 and white gear 3 are installed as shown 5 Turn the blue gear 4 in the direction of the arrow until the ink film is tight 5 and at least one layer of ink film is...

Page 12: ... Paper tray Pull up the metal recording paper guide 1 then install the paper tray 2 L Make sure the arrows on the paper tray and the unit match 1 9 Paper support Hold open the paper support 1 then insert the ends into the holes on the paper tray 2 Correct Incorrect 6 Tight 1 turn No ink film is wrapped around the blue core Slack Crease Reverse 7 1 2 1 2 ...

Page 13: ...Remove all of the installed paper before adding paper 1 11 Battery installation replacement Important L Use only the included rechargeable batteries noted on page 3 7 L When replacing batteries we recommend using the Panasonic rechargeable batteries noted on page 3 7 L Wipe the battery ends S T with a dry cloth L Install the batteries without touching the battery ends S T or the unit contacts 1 Pr...

Page 14: ...e near the product and easily accessible L Be sure to use the telephone line cord included in this unit L Do not extend the telephone line cord Note L If any other device is connected to the same telephone line this unit may disturb the network condition of the device L If you use the unit with a computer and your internet provider instructs you to install a filter 3 please connect the telephone l...

Page 15: ...ormance is reached after a few complete cycles of charge discharge use L Actual battery performance depends on a combination of how often the cordless handset is in use and how often it is not in use standby L Battery operating time may be shortened over time depending on usage conditions and ambient temperature L Even after the cordless handset is fully charged the cordless handset can be left on...

Page 16: ...ordless handset receiver volume While using the receiver press or V Speaker volume While using the speakerphone press or V 2 5 Adjusting base unit volume Ringer volume While the unit is idle press A or B L If there are any documents in the document entrance you cannot adjust the volume Confirm that there are no documents in the entrance To turn the ringer OFF Press B repeatedly to display RINGER O...

Page 17: ...or each Example 10 August 2006 10 15 PM 12 hour clock format 1 Press 1 0 0 8 0 6 1 0 1 5 2 Press repeatedly to select PM 5 j OK 6 Press ih to exit To correct a mistake Press or to move the cursor to the incorrect number and make the correction 2 6 2 With the base unit 1 MENU i 0 1 i SET D 01 M 01 Y 06 TIME 00 00 2 Enter the current date month year hour minute by selecting 2 digits for each Example...

Page 18: ...cter and make the correction L To erase all of the characters press and hold STOP 2 8 Your fax number You can program your fax number so that it appears on the top of each page sent 1 MENU i 0 3 i SET NO 2 Enter your fax number up to 20 digits L To enter a press L To enter a space press L To enter a hyphen press R L To erase a number press STOP 3 SET 4 Press MENU to exit To correct a mistake Press...

Page 19: ...u Press C T L To release the mute press C T To redial the last number dialled from the cordless handset Press C or s i R To redial using the redial list Memory redial The last 10 phone numbers dialled from the cordless handset are stored in the redial list 1 R 2 Press or V to select the desired number 3 C or s To erase numbers in the redial list 1 R 2 Press or V repeatedly to select the desired nu...

Page 20: ...own individual phonebook page 21 L You can copy phonebook items between the base unit and the cordless handset or between two cordless handsets page 54 3 3 1 Storing phonebook items 1 k i j OK 2 New Entry i 3 Enter the name up to 16 characters see page 55 for character entry i j OK 4 Enter the telephone number up to 24 digits i j OK 5 Save i L To program other items repeat steps 3 to 5 6 ih 3 3 2 ...

Page 21: ...honebook You can store 100 items to the base unit phonebook L The cordless handset has its own individual phonebook page 20 L You can copy phonebook items between the base unit and the cordless handset page 53 3 5 1 Storing phonebook items 1 Press MENU repeatedly to display PHONEBOOK SET i 2 Enter the name up to 16 characters see page 55 for character entry i SET 3 Enter the telephone number up to...

Page 22: ...ng an item to a one touch dial key 1 PHONEBOOK 2 Press A or B repeatedly to display the desired item i MENU i 0 3 Press A or B repeatedly to select a desired dial key L When the dial key is already used as a one touch dial key Q is displayed next to the dial key number If you select this dial key you can overwrite the previous assignment 4 SET i SET L To program other items repeat steps 2 to 4 5 S...

Page 23: ...ystem caller information may not be received properly Consult your PBX supplier L If the unit cannot receive caller information the following will be displayed OUT OF AREA The caller dialled from an area which does not provide Caller ID service PRIVATE CALLER The caller requested not to send caller information LONG DISTANCE The caller made a long distance call Missed calls If a call is not answere...

Page 24: ... or s 3 9 2 With the base unit 1 Press CALLER ID 2 Press A or B repeatedly to display the desired item 3 Press CALLER ID repeatedly to display the telephone number 4 Press then edit the number L Press dial key 0 to 9 to add STOP to delete 5 Press SP PHONE L To send a fax insert the document FACE DOWN and press FAX START 3 10 Erasing caller information 3 10 1 With the cordless handset 1 j OK i Call...

Page 25: ...information 1 j OK i SMS i 2 Settings i 3 Message Centre1 or Message Centre2 i 4 Enter edit the number as necessary i j OK 5 Save i i ih Note L If your phone is connected to a PBX you need to add the PBX line access number and a dialling pause to the beginning of the Message Centre 1 phone number 3 15 Sending a message 3 15 1 Writing and sending a new message 1 j OK i SMS i 2 Create i 3 Enter the ...

Page 26: ...ender press C or s 3 16 2 Replying to a message 1 While reading a received message press j OK 2 Reply i 3 Enter a message page 55 i j OK 4 Edit the destination phone number and or press j OK 5 Continue from step 5 3 15 1 Writing and sending a new message page 25 Editing forwarding a message 1 While reading a received message press j OK 2 Edit Message i 3 Continue from step 3 3 15 1 Writing and sen...

Page 27: ...s being fed into the unit Pre dialling a fax number 1 Enter the fax number 2 Insert the document 3 FAX START Sending from memory Quick scan feature To use this feature activate feature 34 page 44 beforehand 1 Insert the document 2 Enter the fax number i FAX START L If the document exceeds the memory capacity transmission will be cancelled and this feature will be turned OFF automatically You must ...

Page 28: ...copy the original document onto A4 or letter sized paper then sending the copied document 4 3 Sending a fax using the phonebook and one touch dial Before using this feature store the desired names and telephone numbers into the base unit s phonebook page 21 and one touch dial page 22 1 Adjust the width of the document guides to fit the actual size of the document 2 Insert the document up to 10 pag...

Page 29: ...to display the desired item you want to erase L To cancel erasing press STOP 4 SET i SET i STOP 4 4 4 Sending the same document to pre programmed parties 1 Insert the document FACE DOWN 2 If necessary press A or B repeatedly to select the desired resolution page 27 i PHONEBOOK 3 Press A or B repeatedly to display BROADCAST i FAX START L After transmission the unit will automatically print a report...

Page 30: ...ted the fax machine will receive the fax automatically 4 5 2 Use only as a fax FAX ONLY mode Your situation You have a separate telephone line just for faxes Setup Set the fax machine to FAX ONLY mode page 33 by pressing AUTO ANSWER repeatedly L The AUTO ANSWER indicator on the base unit turns ON and r appears on the cordless handset display Note L Make sure feature 77 is set to FAX ONLY beforehan...

Page 31: ...ss handset 1 j OK i Answer System i 2 Answer Off i i ih Note L Make sure feature 73 is set to TEL beforehand page 47 How to receive phone calls and faxes with the base unit 1 Press SP PHONE to answer the call 2 When document reception is required a fax calling tone slow beep is heard or no sound is heard press FAX START How to receive calls and faxes with the cordless handset 1 Lift the cordless h...

Page 32: ... connected to the same line will ring 3 The unit will answer the call and try to detect a fax calling tone When a fax calling tone is detected The unit receives the fax automatically without ringing When a fax calling tone is not detected A The unit will ring You may answer the call L Callers will hear a ring back tone different from the one generated by the telephone company L An extension teleph...

Page 33: ... the answering machine may continue answering the call depending on the type of an extension telephone Press STOP on the fax machine to talk with the calling party Receiving a voice message and fax document in one call The caller can leave a voice message and send a fax document during the same call Inform the caller of the following procedure beforehand 1 The caller calls your unit L The answerin...

Page 34: ...x prohibitor list Important L This feature does not work when manual reception is performed 4 9 1 Activating the junk fax prohibitor 1 Press MENU repeatedly to display JUNK FAX PROH i 2 Press A or B repeatedly to select ON i SET 3 Press MENU to exit the program 4 9 2 Storing undesired callers You can register up to 10 undesired numbers from the Caller ID list page 23 if you do not wish to receive ...

Page 35: ...e default setting is OFF L If the document exceeds the memory capacity copying of the exceeded document will be cancelled and this feature will be turned OFF automatically To stop copying Press STOP 5 1 1 More copying features To enlarge a document 1 Insert the document 2 COPY i 3 Press A repeatedly to select 150 or 200 i START L The unit will enlarge the centre of the upper part of the document T...

Page 36: ...e Making 2 copies of a 4 page original document Note L The unit will store the documents into memory while collating the copies If memory becomes full while storing the unit will only print out the stored pages Collated pages Uncollated pages 4 3 2 1 4 3 2 1 1 1 2 2 3 3 4 4 ...

Page 37: ...ng to 60 seconds we recommend that you tell the caller in your TAM FAX greeting message to press 9 before starting the fax transmission If you change the setting from 60 seconds to 16 seconds your current greeting message will be deleted The pre recorded greeting message will be played when a call is received L If you change the maximum recording time of incoming messages to GREETING ONLY page 40 ...

Page 38: ... To skip a message Press to play the next message Voice time day stamp During playback the unit will announce the day of the week and time that each message was recorded If you subscribe to Caller ID service During playback you can call back the displayed name or number using the base unit 1 Press MENU during playback L The base unit stops playback L If you do not need to edit the telephone number...

Page 39: ...e played To skip a message Press to play the next message To stop playback Press 9 If you subscribe to Caller ID service During playback you can call back the displayed name or number using the cordless handset 1 Press j OK during playback 2 Call Back i Note To edit the number before calling back 1 Press j OK during playback 2 Edit and Call i 3 Edit the number i C or s 6 4 3 Erasing recorded messa...

Page 40: ... screen the incoming call To hear an incoming call from the speaker when the answering machine is recording the message 1 j OK i Answer System i 2 Settings i 3 Call Screening i 4 On or Off i i ih Note L You can also program this feature with the base unit feature 67 on page 46 6 5 Operating from a remote location Important L Program the remote operation ID beforehand page 40 or feature 11 on page ...

Page 41: ...Enter the remote operation ID page 40 feature 11 on page 43 within 10 seconds L The receiving mode will be set to TAM FAX or FAX ONLY mode depending on the setting of feature 77 page 47 3 Hang up the handset Note L You cannot turn ON the auto answer setting when the unit is set to TEL FAX mode Key Remote command 1 Repeats a message during playback 1 2 Skips a message during playback 4 Plays new me...

Page 42: ...etails Setting your fax number 0 3 Enter your fax number using the dial keypad See page 18 for details Printing a sending report 0 4 0 OFF Sending reports will not be printed 1 ON A sending report will be printed after every fax transmission 2 ERROR default A sending report will be printed only when a fax transmission fails Changing the ring count in FAX ONLY mode 0 6 1 1 2 2 default 3 3 4 4 5 5 6...

Page 43: ...se unit the setting for the cordless handset will also be changed and vice versa 2 This setting can be changed individually for the base unit and the cordless handset To set the cordless handset ringtone for outside calls see page 49 Feature Feature code Selection Setting the journal report to print automatically 2 2 0 OFF The unit will not print a journal report but will keep a record of the last...

Page 44: ...rogramming press STOP then SET Setting the Caller ID list to print automatically 2 6 0 OFF default The Caller ID list will not be printed automatically but the base unit will keep a record of the information for the last 50 callers 1 ON The Caller ID list will be printed automatically each time the base unit logs 50 callers page 23 Setting the quick scan 3 4 This feature is helpful when you want t...

Page 45: ... 4 1 If you wish to use an extension telephone page 31 to receive faxes activate this feature and program the activation code 0 OFF 1 ON default 1 MENU i 4 1 2 Press 1 to select ON i SET 3 Enter your code from 2 to 4 digits using 0 9 and L The default code is 9 4 SET i MENU Setting the memory reception alert 4 4 To alert you with a beeping sound when a received fax document is stored into memory d...

Page 46: ...ssion or copying 1 NORMAL default Used for normal writing 2 LIGHT Used for dark writing 3 DARKER Used for faint writing Copying phonebook data from the base unit to the cordless handset 5 9 1 1 ITEM default 2 ALL ITEMS See page 54 for details Screeningtheincoming call 1 6 7 To hear an incoming call from the speaker when the answering machine is recording the message 0 OFF 1 ON default Note L You c...

Page 47: ...s this feature allows you to hear connecting tones fax tone ring back tone and busy tone You can use those tones to confirm the status of the other party s machine 0 OFF Deactivates this feature 1 ON default You will hear connecting tones Note L If the ring back tone continues the other party s machine may not be a fax machine or may have run out of paper Check with the other party L The connectin...

Page 48: ...T i SET Note L The ECM selection feature 68 on page 46 will not be reset 1 When this setting is changed using the base unit the setting for the cordless handset will also be changed and vice versa 2 This setting can be changed individually for the base unit and the cordless handset To change the cordless handset LCD display contrast see page 49 Feature Feature code Selection ...

Page 49: ...s ih Cordless handset settings menu Sub menu Feature default setting Time Settings Set Date Time 1 Date and time page 17 Alarm Set the alarm page 51 Ringer Setup Ringer Volume 2 Cordless handset ringer volume Maximum page 16 Ext Ringtone 2 Ringtones for outside calls Ringtone 1 3 Int Ringtone Ringtones for intercom calls Ringtone 3 4 Display Setup Standby Display Standby mode display Off 5 Select ...

Page 50: ...elody ringtones the ringtone will continue to sound for several seconds if the caller hangs up before you answer You may hear a dial tone or no one on the line when you answer a call The preset melodies in this product are used with permission of 2004 M ZoNE Co Ltd 4 The preset melodies in this product are used with permission of 2004 M ZoNE Co Ltd 5 If Off is selected only current date and time a...

Page 51: ...lling certain numbers You can assign up to 6 phone numbers to be restricted and select which cordless handsets base unit will be restricted Storing area codes here will prevent the restricted cordless handsets base unit from dialling any phone number in that area code 1 j OK i Base Unit Setup i 2 Call Options i 3 Call Restrict i 4 Enter 0000 default base unit PIN L If you forget your PIN contact o...

Page 52: ...rdless handset for about 7 hours before initial use 8 2 1 Cancelling a cordless handset A maximum of 6 cordless handsets can be registered to a base unit A cordless handset can cancel its own registration or the registration of another cordless handset that is stored in the base unit This will allow the base unit to forget the cordless handset 1 j OK i Base Unit Setup i 2 Enter 335 3 Cancel Handse...

Page 53: ...set To page the base unit press 0 To page another cordless handset press the desired cordless handset number 3 Base unit Press SP PHONE to answer the page Another cordless handset Press C or s to answer the page 4 Cordless handset To complete the transfer press ih To establish a conference call press 3 Transferring a call without speaking to the base unit user other cordless handset user After ste...

Page 54: ...j OK 2 Copy All i 3 To copy to the base unit press 0 To copy to another cordless handset press the desired cordless handset number you wish to send the cordless handset phonebook item to L When all items have been copied Completed is displayed 4 ih 8 5 2 To the cordless handset using the base unit Copying one phonebook item 1 MENU i 5 9 2 Press 1 to display 1 ITEM i SET 3 Enter the cordless handse...

Page 55: ...characters or numbers Press to switch between uppercase and lowercase To enter another character located on the same dial key press to move the cursor to the next space then press the appropriate dial key 9 1 1 Character entry modes Several character entry modes can be used when entering text The characters that can be entered depend on the entry mode 9 1 2 Characters available in each character e...

Page 56: ...h uppercase and lowercase Cyrillic character table P 9 1 3 When writing SMS messages Alphabet character table ABC Numeric entry table 0 9 Greek character table M Extended character table N L The following are used for both uppercase and lowercase 0 1 2 3 4 6 7 8 9 5 0 1 2 3 4 6 7 8 9 5 ...

Page 57: ...party s fax machine Check with the other party JUNK FAX PROH REJECT L The junk fax prohibitor feature of this unit rejected fax reception MEMORY FULL L The memory is full of received documents due to a lack of recording paper a lack of ink film or a recording paper jam Install paper page 13 install ink film page 11 or remove the jammed paper page 67 NO DOCUMENT L The document was not fed into the ...

Page 58: ...o clear the message FAX IN MEMORY L See the other displayed message instructions to print out the document Received documents are stored in memory due to a lack of recording paper a lack of ink film or a recording paper jam Install paper page 13 install ink film page 11 or remove the jammed paper page 67 You will lose all faxes in memory if the power is removed Check with power connected FAX MEMOR...

Page 59: ...Try again REMOVE DOCUMENT L The document is jammed Remove the jammed document page 68 L Press STOP to eject the jammed paper SERIAL ERROR L There is something wrong with the unit Contact our service personnel TRANSMIT ERROR L A transmission error occurred Try again L If you send a fax overseas try the following Use the overseas transmission mode feature 23 on page 43 Add 2 pauses at the end of the...

Page 60: ...er modem connect the fax machine directly to a telephone line jack The unit does not work L Check the connections page 14 L Make sure that the cordless handset s battery is installed correctly page 13 and fully charge it page 15 The unit does not ring L The ringer volume is turned OFF Adjust it page 16 I cannot make calls L You dialled a call restricted number Remove the number from the call restr...

Page 61: ...cal appliances connected to the same outlet may be interfering with the Caller ID information L Telephone line noise may be affecting the Caller ID information L The caller requested not to send his her information page 23 L Depending on the service of the local telephone company caller information may not be displayed on the cordless handset in TEL FAX mode In this case change the TEL FAX ring se...

Page 62: ...while being used L Disconnect the power cord and turn OFF the cordless handset to reset the unit Connect the power cord turn ON the cordless handset and try again I assigned a phonebook item to a desired category but category ringtones will not sound L You must subscribe to Caller ID service L Set to TEL mode TAM FAX mode or FAX ONLY mode to use SMS features I cannot redial by pressing R L If the ...

Page 63: ...hite lines or smudges appear on their received document L The scanner glass or rollers are dirty with correction fluid etc Clean them page 69 Please do not insert a document before correction fluid has dried completely Documents frequently misfeed L Clean the document feeder rollers recording paper feeder and rubber flap page 69 Problem Cause Solution I cannot receive documents L The ink film is e...

Page 64: ... 45 beforehand L You may have changed the remote fax activation code from 9 default setting Verify the remote fax activation code feature 41 on page 45 L The memory is full of received documents due to a lack of recording paper a lack of ink film or a recording paper jam Install paper page 13 install ink film page 11 or remove the jammed paper page 67 The other party complains that they cannot sen...

Page 65: ...age L The recording time is set to GREETING ONLY Select 1 MINUTE or 3 MINUTES page 40 feature 10 on page 43 L The memory is full Erase unnecessary messages page 38 39 L Make sure there is no other answering machine connected on the same line I cannot operate the answering machine with the cordless handset L Someone is operating the answering machine L You are too far from the base unit Move closer...

Page 66: ...will be lost When power is restored a power down report will be printed stating which documents in memory have been erased FD is displayed L The unit could not connect to the SMS message centre Confirm that the correct SMS message centre numbers are stored page 25 Confirm that SMS is turned ON page 25 FE is displayed L An error occurred while sending the message Try again E0 is displayed L Your te...

Page 67: ...tray beforehand otherwise the paper may misfeed or jam 1 Open the front cover 1 push the green button 2 then open the back cover 3 2 Remove the jammed recording paper 4 3 Turn the blue gear 5 in the direction of the arrow until the ink film is tight 6 and at least one layer of ink film is wrapped around the blue core 7 3 1 2 4 Correct Incorrect 5 6 7 Tight 1 turn No ink film is wrapped around the ...

Page 68: ...13 11 1 2 When the recording paper was not fed into the unit properly The display will show the following CHECK PAPER Remove the recording paper and straighten Insert the paper then press SET to clear the message 11 2 Document jams 1 Open the front cover Remove the jammed document carefully 1 2 Close the front cover securely Note L Do not pull out the jammed paper forcibly before opening the front...

Page 69: ...reen button 2 then open the back cover 3 3 Clean the document feeder rollers 4 and rubber flap 5 with a cloth moistened with isopropyl rubbing alcohol and let all parts dry thoroughly Clean the scanner glass 6 with a soft dry cloth Caution L Do not use paper products such as paper towels or tissues 4 Clean the recording paper feeder roller 7 with a cloth moistened with isopropyl rubbing alcohol an...

Page 70: ...one line cord 2 Open the front cover 1 push the green button 2 then open the back cover 3 3 Remove the ink film 4 4 Clean the thermal head 5 with a cloth moistened with isopropyl rubbing alcohol and let it dry thoroughly Caution L To prevent a malfunction due to static electricity do not use a dry cloth and do not touch the thermal head directly 5 Re install the ink film and close the covers see s...

Page 71: ...ng width 208 mm Effective printing width A4 202 mm Transmission time 1 Approx 12 s page ECM MMR 2 Scanning density Horizontal 8 pels mm Vertical 3 85 lines mm in standard resolution 7 7 lines mm in fine photo resolution 15 4 lines mm in super fine resolution Photo resolution 64 level Scanner type Contact Image Sensor Printer type Thermal Transfer on plain paper Data compression system Modified Huf...

Page 72: ...n objects attached such as tabs or staples Paper which has dust lint or oil stains Paper that will melt vaporize discolour scorch or emit dangerous fumes near 200 C such as vellum paper These materials may transfer onto the fusing roller and cause damage Moist paper L Some paper only accepts print on one side Try using the other side of the paper if you are not happy with the print quality or if m...

Page 73: ...diting 21 Erasing 22 Making a phone call 21 Sending faxes 28 Storing 21 Basic features 42 Battery Charge 15 Installation 13 Performance 15 Replacement 13 BROADCAST LIST 71 Broadcast transmission 29 Button description Base unit 8 Cordless handset 9 C Caller ID Calling back 23 Storing 24 CALLER ID LIST 23 44 71 Caller s recording time 43 Call restriction 51 Call screening 40 46 Call waiting 23 Chain...

Page 74: ...tion 45 Recording Greeting message 37 39 Memo message 38 Recording paper 13 72 Recording time Incoming message 40 43 TAM FAX greeting 46 Redialling Base unit 19 27 28 Cordless handset 19 Redial list 19 Registration 52 Remote operation 40 Remote operation ID 40 43 Repeater 52 Reports Broadcast programming 71 Broadcast sending 29 Caller ID 71 Journal 27 71 Phonebook 71 Power down 66 Printer test 71 ...

Page 75: ...75 Notes ...

Page 76: ...lobal web site http panasonic net Copyright L This material is copyrighted by Panasonic Communications Co Ltd and may be reproduced for internal use only All other reproduction in whole or in part is prohibited without the written consent of Panasonic Communications Co Ltd 2006 Panasonic Communications Co Ltd All Rights Reserved 0436 DECT Cordless Handset 0682 Base Unit ...

Reviews: