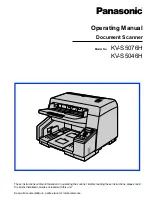
background image

Model No.     

KV-S5076H
KV-S5046H

Operating Manual

Document Scanner

These instructions contain information on operating the scanner. Before reading these instructions, please read 
the Quick Installation Guide enclosed with this unit.

Keep all documentation in a safe place for future reference.

Summary of Contents for KV-S5076H

Page 1: ...ual Document Scanner These instructions contain information on operating the scanner Before reading these instructions please read the Quick Installation Guide enclosed with this unit Keep all documentation in a safe place for future reference ...

Page 2: ...switch function Using the software you can switch the background color of scanned images between white and black Mechanical deskew KV S5076H only In addition to adjusting skewed documents via the software deskew this scanner supports the mechanical deskew function that detects skew in documents before they are scanned and adjusts the document using the feeding mechanism With this function you can ...

Page 3: ...ftware About the Software Help Each software contains help files For details about viewing the help files see To view the help page 22 Software Manual CD ROM Contents Drivers Device Driver TWAIN ISIS Applications Image Capture Plus 1 Utilities User Utility Scan Button Setting Tool Documents 2 Operating Manual Control sheet 3 1 Image Capture Plus is a Panasonic original application for configuring ...

Page 4: ...SB 3 0 interface If you connect the unit to a USB hub it is not guaranteed to work Abbreviations Windows refers to the Microsoft Windows operating system hereafter Windows Windows XP refers to the Microsoft Windows XP operating system hereafter Windows XP Windows Vista refers to the Microsoft Windows Vista operating system hereafter Windows Vista The explanations and screen shots in this manual ar...

Page 5: ...tion in the U S and other countries Adobe and Adobe Reader are either registered trademarks or trademarks of Adobe Systems Incorporated in the United States and or other countries All other trademarks identified herein are the property of their respective owners About Consumables and Optional Accessories Consumables and optional accessories available for this unit are as follows n Consumables Roll...

Page 6: ...ta Background Color 38 Starting Up Scanner Applications Automatically 39 Performing push scan using the LCD KV S5076H only 41 Using Control Sheets 42 About Printing Control Sheets 43 Clearing Paper Jams 45 Clearing Paper Jams 45 Care and Maintenance 48 Cleaning the Outside of the Scanner 48 Cleaning the Inside of the Scanner 49 Cleaning the Conveyor 53 Cleaning the Ion Outlets and Sensors 54 Clean...

Page 7: ...Error Messages KV S5076H only 77 Shading Adjustment 78 Deleting Installed Software 79 Repacking Instructions 80 Specifications 82 Index 84 Operating Manual 7 Table of Contents ...

Page 8: ... completeness or accuracy In case of doubt contact your legal counsel Notice Install your machine near a supervised area to prevent illegal duplication from being made Installation Do not place the unit in direct sunlight in a cold draft or near heating apparatus Do not place the unit near apparatus which generate electronic or magnetic noise Protect the unit from static electricity Do not move th...

Page 9: ...nts and scanned data is the responsibility of the user In particular pay attention to the following points Make sure you have the same number of pages for important documents both before and after scanning and take care not to leave any pages in the scanner Periodically back up important data When having your computer or hard disk serviced or when disposing of your computer or hard disk completely...

Page 10: ... cord appropriate for where you use the unit USB cable Software Manual CD ROM Drivers Applications Utilities Documents Double feed prevention roller Exit support sheet Shading paper Use this paper when performing shading adjustment Roller cleaning paper Quick Installation Guide Note It is highly recommended to keep the original carton and all packing materials They are necessary when repacking 10 ...

Page 11: ...ides Exit tray Exit stoppers Exit extension tray ADF door Manual feed selector Switches the scanning method between continuous scanning Auto and manual scanning Manual Feed tray Control panel For details refer to Control Panel and LED Indicators page 13 Operating Manual 11 L o c a t i o n o f C o n t r o l s Location of Controls ...

Page 12: ...t sold separately or ink cartridge For details about installing an imprinter refer to Installing the Imprinter Unit and Ink Cartridge page 67 Fan exhaust vent AC inlet Power cord Plugs may vary in shape depending on country area USB connector 12 Operating Manual Location of Controls ...

Page 13: ...ed on the LCD Use the cursor button and OK button to select a job Also error codes and messages corresponding to the scanner status are displayed on the LCD E Cursor button KV S5076H only F OK button OK KV S5076H only G Start Stop button START STOP If you set Wait Key for Manual Feed Mode 1 in your application software pushing this button starts scanning During scanning pushing this button stops s...

Page 14: ...eration is performed for a certain period of time the scanner will be turned off automatically Press the power button of the scanner to turn it on You can enable disable the power off feature and change the time until the scanner turns off in User Utility 2 If no operation is performed for 15 minutes or longer the scanner will enter sleep mode automatically to conserve energy Press the Start Stop ...

Page 15: ...250 mm 9 8 in Top view 200 mm 7 9 in 200 mm 7 9 in Notice Do not move the unit immediately from a cold place to a warm place It may cause dew Note It is recommended to move this unit with two persons and holding it by both side grips The weight of this unit is approximately 24 kg 53 lb when packaged or approximately 18 kg 39 5 lb by itself Operating Manual 15 I n s t a l l a t i o n Installation ...

Page 16: ...t 1 Remove all packing tape 2 Push the ADF door release A upwards and open the ADF door B 1 2 3 Use the indents A to pull the double feed prevention roller cover towards you to open it 1 16 Operating Manual Installation ...

Page 17: ...then insert the shaft in the notch Push the shaft on the opposite side C until it clicks into place 1 1 3 2 2 Notice After you install the double feed prevention roller make sure that the shaft is inserted into the tab If the roller is not installed correctly it may cause double feeding or a paper jam Operating Manual 17 Installation ...

Page 18: ...Make sure that the double feed prevention roller cover does not stick up If the double feed prevention roller cover is closed incompletely damage or paper jams can occur 6 Close the ADF door Push both sides of the ADF door down slowly until it clicks into place 18 Operating Manual Installation ...

Page 19: ...t is not used over an extended period of time turn the unit off and unplug the power cord The unit consumes approximately 0 3 W of electricity even when the main unit is turned off Do not turn ON the unit s power before installing the software USB connector To the computer USB Cable To the AC outlet Power cord AC inlet Operating Manual 19 Installation ...

Page 20: ...f Press the power button for more than one second to turn the unit off 2 Insert the Software Manual CD ROM into the CD DVD drive on your computer If you have a feature called Autorun activated the installation process will start automatically The setup window will appear Note If the AutoPlay dialog box is displayed select CDRun exe If the setup window does not appear double click CDRun exe in the ...

Page 21: ...also be installed 7 Follow the instructions on the screen and complete the installation Restart your computer if you are prompted to do so 8 Press the power button A to turn ON the unit s power 1 The LED Green will flash and then turn on If the hardware wizard appears follow the on screen instructions to complete installation Operating Manual 21 Installation ...

Page 22: ...Windows 8 select the Panasonic Document Scanner section on the Apps screen To view the help Note We recommend that you view the help using Internet Explorer 6 0 or later for Windows For Image Capture Plus 1 Select All Programs Panasonic Image Capture Plus Image Capture Plus Help For User Utility or Scan Button Setting Tool 1 Select All Programs Panasonic Scanner Tools 2 Select that item s help Not...

Page 23: ...sheets Landscape orientation 48 307 mm 1 9 12 09 in portrait orientation 70 432 mm 2 8 17 in When feeding one sheet Landscape orientation 48 307 mm 1 9 12 09 in portrait orientation 70 2 540 mm 2 8 100 in 1 1 Using Long Paper you can scan long documents by splitting them into smaller parts For details about Long Paper refer to the Image Capture Plus TWAIN or ISIS help 48 307 mm 1 9 12 09 in When f...

Page 24: ... Newspaper Bank checks Carbonless copy paper Tracing paper Recommended paper Plain paper Documents must also meet the following conditions Curl Feeding direction Less than 10 mm 0 4 in Folding Less than 10 mm 0 4 in Feeding direction 24 Operating Manual Operation ...

Page 25: ... glued documents Document with wet ink or cinnabar seal ink Notes about documents for scanning Depending on the paper type scanning results may be poor when you scan unacceptable documents or even documents that should be acceptable If scanned images are skewed paper jams occur or double feeding occurs try scanning again after doing the following Clean the rollers and sensors Reduce the number of ...

Page 26: ...r stacked together as in a file folder will need to be separated Fan the stack of documents to separate all the edges Hold both ends and bend the documents as shown in the illustration To flatten the documents hold firmly and pull them apart as shown in the illustration 1 2 3 Repeat these steps as necessary 3 Carefully align the documents 26 Operating Manual Operation ...

Page 27: ...irection of the arrow until they stop 2 1 Notice The height of the documents should not exceed the limit mark B on the document guide Exceeding the limit mark may cause a paper jam or skewing When scanning long sheets of paper Pull out the feed extension tray C from the feed tray 3 Operating Manual 27 Operation ...

Page 28: ...ment to be scanned 1 When scanning documents with pages of different sizes at one time see When Scanning Documents with Pages of Different Sizes at One Time page 32 To secure the document guides A lower the document guide lock B 1 2 28 Operating Manual Operation ...

Page 29: ... Raise either the front side A or back side B exit stopper according to the size of the documents 1 2 7 Adjust the exit extension tray A to match the size of the documents 1 Operating Manual 29 Operation ...

Page 30: ...B into the holes C above the exit slot 2 3 9 Open your scanning application and scan the documents For details about the application refer to the help of each application You can also start up applications automatically to scan documents Single Touch Scan For details about Single Touch Scan settings see Starting Up Scanner Applications Automatically page 39 You can also scan documents by selecting...

Page 31: ...elector Continuous scanning Auto Manual scanning Manual Notice When scanning a document manually Manual feed the document 1 sheet at a time When scanning important documents or bound documents feed them manually Note When scanning a document manually Manual the double feed detection function is disabled Operating Manual 31 Operation ...

Page 32: ...ter of the smallest sheet will be fed to the center of the paper feed roller and adjust the document guides accordingly Exiting sheets may become out of order on the exit tray Documents may need to be reordered after they are scanned 1 Slide the document guides selector in the direction shown in the illustration until the A and B marks are aligned The left and right document guides can be moved se...

Page 33: ... the documents sheet by sheet at one corner Align the documents sheet by sheet at one corner as shown below Documents that stick together are not aligned correctly at one corner or are at an angle cannot be fed correctly A B C A Operating Manual 33 Operation ...

Page 34: ...r B If the document is not properly aligned the pages will not be fed correctly A 1 2 3 Notice The height of the documents should not exceed the limit mark C on the document guide Exceeding the limit mark may cause a paper jam or skewing Depending on the types of paper the document may not be fed smoothly In such case reduce the number of sheets of the document 34 Operating Manual Operation ...

Page 35: ...When scanning long sheets of paper Pull out the feed extension tray D from the feed tray 4 5 Adjust the left and right document guides A to the width of the documents A 1 Operating Manual 35 Operation ...

Page 36: ...ment on the feed tray again and adjust the document guide according to the size of the document to be scanned Notice Make sure to align the document pages along one side Make sure that the center of the smallest sheet of the document will be fed to the center of the paper slot To secure the document guides lower the document guide lock 36 Operating Manual Operation ...

Page 37: ...guides selector in the direction shown in the illustration until the A and B marks are aligned 1 2 2 Completely spread apart the document guides 3 Slide the document guides selector in the direction shown in the illustration until the A and B marks are aligned 1 2 Operating Manual 37 Operation ...

Page 38: ...Scanned Data Background Color Using the software you can switch the background color of scanned images between white and black For details refer to the Image Capture Plus TWAIN or ISIS help 38 Operating Manual Operation ...

Page 39: ...n the Desktop screen 2 Select Single Touch Scanning or Touch Free Scanning for the condition to automatically start up the application 3 Select the application to start up Note The set application is enabled for both Touch Free Scanning and Single Touch Scanning For details about the Scan Button Setting Tool refer to the Scan Button Setting Tool help Setting the scanning conditions Scanning condit...

Page 40: ...l Panel Scanners and Cameras select the scanner icon and then click the Properties button If you are using Windows XP Control Panel Scanners and Cameras right click the scanner icon and display the Properties screen 2 Click the Events tab 3 Check that Scan Button Setting Tool is selected as the program to start for each event If an application other than Scan Button Setting Tool is selected change...

Page 41: ...ister jobs in advance For details about registering jobs refer to the Image Capture Plus help The group name is displayed on the first line and the job name is displayed on the second line of the LCD 1 2 1 Place the documents on the feed tray with the side to be scanned facing up 2 Use or of the cursor button A to select a group 3 Use or of the cursor button A to select a job 4 Press the OK button...

Page 42: ...heets from the included CD ROM B S i m p l e x A Documents Control sheet Code Documents Control sheet functions Simplex Duplex Binary 256 level gray Color Dynamic Threshold Dither Error diffusion Function 1 9 Separation Sheet For details about control sheets refer to Detect Control Sheet in the Image Capture Plus TWAIN or ISIS help For details about separation sheets refer to Detect Separation She...

Page 43: ...horizontally Center of the page Example A4 printout Example A3 printout 25 mm 1 in Use the control sheet that is the same size as the document you are scanning Be careful not to get the control sheet dirty Do not fold or crease the control sheet Scanning will not be performed properly For details about control sheets refer to Detect Control Sheet in the Image Capture Plus TWAIN or ISIS help Operat...

Page 44: ...puter If you have a feature called Autorun activated the installation process will start automatically The setup window will appear Note If the AutoPlay dialog box is displayed select CDRun exe If the setup window does not appear double click CDRun exe in the Software Manual CD ROM 2 Select your scanner 3 Select Control Sheet from Documents on the right side of the screen 4 Print the control sheet...

Page 45: ... following procedure CAUTION Do not touch the conveyor immediately after continuous scanning This area becomes very hot and can cause burns Wait until the conveyor s temperature decreases 1 Push the ADF door release A upwards and open the ADF door B Remove any documents from the feed tray 1 2 Operating Manual 45 C l e a r i n g P a p e r J a m s Clearing Paper Jams ...

Page 46: ...paper jam occurs inside the scanner Remove the jammed sheet of paper from the inside of the ADF door When a paper jam occurs at the exit slot Pull the jammed paper from the exit slot A towards the front 1 46 Operating Manual Clearing Paper Jams ...

Page 47: ...3 Close the ADF door Push both sides of the ADF door down slowly until it clicks into place Operating Manual 47 Clearing Paper Jams ...

Page 48: ...d hold the power button for one second or more to turn off the unit s power 2 Clean the outside of the scanner with a soft slightly damp cloth The document feeder A and exit slot B get dirty easily Make sure to clean them 2 1 3 Remove dirt and dust from the fan exhaust vent A with a brush 1 4 Press the power button to turn on the unit s power 48 Operating Manual C a r e a n d M a i n t e n a n c e...

Page 49: ...ately 20 000 sheets have been scanned The time for cleaning may differ depending on documents you scan To maintain proper scanning clean the scanner parts frequently Clean the rollers and sensors if paper jamming or double feeding occurs frequently If double feed detection does not function properly clean the double feed detectors Clean the scanning glass when black or white lines appear on the sc...

Page 50: ...s and scanning glass For details about the roller cleaning paper please refer to the Material Safety Data Sheet MSDS Please ask your Panasonic sales company about obtaining the Material Safety Data Sheet Note If the bag is left opened for a long period of time before using it the alcohol will evaporate Please use the roller cleaning paper immediately after opening the bag To purchase the roller cl...

Page 51: ...Doing so may cause deformation discoloration or damage 2 Press and hold the power button for one second or more to turn off the unit s power 3 Push the ADF door release A upwards and open the ADF door B 1 2 4 Clean the conveyor sensors rollers scanning backgrounds and scanning glasses Clean the parts in the following order conveyor ion outlets and sensors rollers scanning backgrounds scanning glas...

Page 52: ...ress the power button to turn on the unit s power Notice If roller cleaning notifications via the After Clean Roller Counter are enabled after turning on the unit s power reset the After Clean Roller Counter in User Utility to 0 For details refer to the User Utility help 52 Operating Manual Care and Maintenance ...

Page 53: ...C D of the reference plates A B Push E and F in the direction indicated by the arrow to rotate the reference plate on the ADF door side so that you can clean the brush In the same way push G and H in the direction indicated by the arrow to rotate the reference plate on the main unit side to clean the brush 5 6 7 8 3 4 1 2 Operating Manual 53 Care and Maintenance ...

Page 54: ...the center of the inner parts approximately 5 times 1 Notice Do not apply too much pressure on the parts 2 Remove dust from the sensors A B C D E F and reflectors G with a cotton swab Location of Sensors 1 2 2 3 4 5 6 A Waiting sensor B Double feed detector C Slip detect sensor D Starting sensor E Paper sensor F Skew sensor 54 Operating Manual Care and Maintenance ...

Page 55: ...Location of Reflectors 7 7 G Reflectors Operating Manual 55 Care and Maintenance ...

Page 56: ...ction indicated by the arrows in the illustration If you wipe too hard you may damage or misalign the roller For instructions on how to remove the double feed prevention roller see Replacing the Rollers page 61 Wipe dirt off of the other rollers in the directions indicated by the arrows in the illustration Use your finger to rotate the roller and wipe dirt off of the entire surface of the roller I...

Page 57: ...Location of Rollers 3 4 1 2 A Paper feed roller B Separation roller C Free rollers D Double feed prevention roller 5 E Drive rollers Operating Manual 57 Care and Maintenance ...

Page 58: ...in the direction indicated by the arrow to rotate the reference plate on the ADF door side Clean both the white and black backgrounds In the same way push G and H in the direction indicated by the arrow to rotate the reference plate on the main unit side to clean the white and black backgrounds 5 6 7 8 3 4 1 2 58 Operating Manual Care and Maintenance ...

Page 59: ...ing the Scanning Glasses 1 Wipe the scanning glasses A B with the roller cleaning paper page 50 Location of Scanning Glasses 1 A Scanning glass F 2 B Scanning glass B Operating Manual 59 Care and Maintenance ...

Page 60: ... ink cartridge For instructions on installation see Installing the Imprinter Unit and Ink Cartridge page 67 Note To purchase separately sold items contact your dealer When to replace the rollers As a rough guideline we recommend to replace the paper feed roller module and double feed prevention roller after scanning 350 000 sheets of paper 350 000 sheets is based on scanning normal paper Depending...

Page 61: ...ealer to order a Roller exchange kit KV SS060 and replace the paper feed roller module and double feed prevention roller 1 Press and hold the power button for one second or more to turn off the unit s power 2 Push the ADF door release A upwards and open the ADF door B 1 2 Operating Manual 61 Consumables and Optional Accessories ...

Page 62: ...ule in the order indicated by the arrow A B and then pull out the module towards you 1 2 1 4 Open the Roller exchange kit KV SS060 sold separately and take out the new paper feed roller module 62 Operating Manual Consumables and Optional Accessories ...

Page 63: ...owly raise the lever in the direction indicated by the arrow until it clicks into place 3 1 2 3 3 2 2 Notice Make sure that the paper feed roller module s lever is firmly set If the lever is not firmly set the lever or the paper feed roller module might become damaged or might not function correctly Operating Manual 63 Consumables and Optional Accessories ...

Page 64: ...dicated by the arrow lift the double feed prevention roller B in the direction of the arrow Then pull out the right shaft when facing it from the notch in the roller mount 1 2 8 Open the Roller exchange kit KV SS060 sold separately and take out the new double feed prevention roller 64 Operating Manual Consumables and Optional Accessories ...

Page 65: ...t the shaft in the notch Push the shaft on the opposite side C until it clicks into place 1 1 3 2 2 Notice After you install the double feed prevention roller make sure that the shaft is inserted into the tab If the roller is not installed correctly it may cause double feeding or a paper jam Operating Manual 65 Consumables and Optional Accessories ...

Page 66: ...prevention roller cover is closed incompletely damage or paper jams can occur 11 Close the ADF door Push both sides of the ADF door down slowly until it clicks into place 12 Press the power button to turn on the unit s power 13 Reset the After Replace Roller Counter in User Utility to 0 For details refer to the User Utility help 66 Operating Manual Consumables and Optional Accessories ...

Page 67: ...before scanning The printed text will also be scanned 1 Press and hold the power button for one second or more to turn off the unit s power 2 Open the imprinter door 3 Connect the cable Notice Be sure to correctly match the rib with the slot prior to inserting the connector Operating Manual 67 Consumables and Optional Accessories ...

Page 68: ... in the diagram below insert the pins A on both sides into the guides and insert the pins B on both sides into the guides until they are locked by the springs C 1 1 2 2 3 5 Remove the protective tape 68 Operating Manual Consumables and Optional Accessories ...

Page 69: ...tridge exchange position Notice Adjust the position following the label on the imprinter 7 Insert the ink cartridge into the carriage 8 Lock the ink cartridge adjustment lever A 1 Operating Manual 69 Consumables and Optional Accessories ...

Page 70: ...9 Close the imprinter door 10 Press the power button to turn on the unit s power 70 Operating Manual Consumables and Optional Accessories ...

Page 71: ...r button for one second or more to turn off the unit s power 2 Open the imprinter door 3 Move the carriage to the ink cartridge exchange position Notice Adjust the position following the label on the imprinter 4 Pinch the ink cartridge adjustment lever A and lift it 1 Operating Manual 71 Consumables and Optional Accessories ...

Page 72: ...he ink cartridge A 1 For details about installing a new ink cartridge refer to step 5 and after in Installing the Imprinter Unit and Ink Cartridge page 67 72 Operating Manual Consumables and Optional Accessories ...

Page 73: ...m 1 2 in 141 mm 5 6 in 121 mm 4 8 in 109 3 mm 4 3 in 97 5 mm 3 8 in 97 5 mm 3 8 in 83 5 mm 3 3 in 83 5 mm 3 3 in 66 8 mm 2 6 in 66 8 mm 2 6 in 56 5 mm 2 2 in 56 5 mm 2 2 in 45 mm 1 8 in 45 mm 1 8 in 30 8 mm 1 2 in 16 5 mm 0 6 in Document size Document size Center Printing Printing can be set from the Image Capture Plus software and the TWAIN and ISIS drivers For details refer to the Image Capture ...

Page 74: ...the software from the computer page 79 and then install the software again page 20 The scanner is connected via USB hub Do not connect via USB hub There is a problem with the USB cable Make sure to use the included USB cable The unit s power was turned OFF because no operation was performed for a certain period of time Press the power button to turn ON the unit s power Scan speed is slow The scann...

Page 75: ...kness page 23 and scan the copy The length of the paper is too short Make a copy of the document on paper of an acceptable size page 23 and scan the copy The scanning method is set to manual Set the scanning method to continuous scanning Auto with the manual feed selector page 11 The document is not aligned correctly Realign the document page 26 The document set on the feed tray has too many pages...

Page 76: ...sses F and B page 59 The scanning density is uneven The scanning glass is dirty Clean the scanning glasses F and B page 54 The quantity distribution of light varies Adjust shading page 78 The color of the scanned document is extremely different from the original document The settings of the computer monitor are wrong Adjust the computer monitor settings Dark spots or noise appear on the scanned do...

Page 77: ... The paper has jammed in the exit tray area Open the ADF door and remove the paper The sensors are dirty Clean the sensors 1 U18 Paper has been left in the scanner Open the ADF door and remove all the paper left inside The sensors are dirty Clean the sensors 1 U23 A double feed error has occurred Open the ADF door and remove the jammed paper U25 U26 A stapled document has been detected Open the AD...

Page 78: ...ustment Before beginning shading adjustment thoroughly clean the scanning glass F scanning glass B conveyors in the scanning area self cleaning brushes ion outlets and all rollers If you perform shading adjustment while these parts are dirty lines will appear on scanned images Shading adjustment procedure 1 Start the User Utility 2 Click User Shading on the main menu and operate as the image displ...

Page 79: ...s below Software Program Name Device driver Panasonic Document Scanner Device Driver X XX 1 TWAIN KV S5076H KV S5046H TWAIN Driver ISIS KV S5076H KV S5046H ISIS Driver Image Capture Plus Image Capture Plus User Utility Panasonic Scanner User Utility Manuals Panasonic Scanner Manuals 1 X XX and the number that follows a program name are the software version When you upgrade the software the numbers...

Page 80: ...arton and all of the original packing materials The scanner should be handled in the correct horizontal position Required Materials Original scanner carton and packing materials Shipping tape and scissors 1 Unplug the power cord from the outlet and remove the power cord and USB cable from the scanner 2 Remove the exit support sheet 3 Return the exit stoppers and exit extension tray to their origin...

Page 81: ...anner 5 1 4 2 3 A Joint B Power cord C USB cable D Double feed prevention roller E Software Manual CD ROM Quick Installation Guide Shading paper Roller cleaning paper Exit support sheet Operating Manual 81 Appendix ...

Page 82: ...g brushes Available Available Ionizer Available Mechanical deskew Available dpi dots per inch 1 The scanning speed differs depending on the host computer the operating system the application the measuring method the quantity of data in the image and the paper type The scanning speed depends on a measuring method of Panasonic 2 Scan quality cannot be guaranteed for documents with a non standard siz...

Page 83: ...0 3 W or less 0 3 W or less Power consumption For AC220 240 V models Scanning 90 W or less 90 W or less Ready 30 W or less 30 W or less Sleep 1 2 W or less 1 2 W or less Power OFF 0 3 W or less 0 3 W or less Operating Environment Temperature 10 35 C 50 95 F Humidity 20 80 RH Storage Environment Temperature 0 40 C 32 104 F Humidity 10 80 RH 1 The power requirement differs depending on the country a...

Page 84: ...F Fan exhaust vent 12 48 Feed extension tray 11 27 Feed tray 11 27 Feed tray capacity 82 I Imprinter door 12 67 Imprinter unit 60 67 Ink cartridge 60 67 Installation location 15 Ionizer 82 L LCD 13 41 LED Green 13 14 LED Red 13 14 Limit mark 27 34 M Manual feed selector 11 31 Mechanical deskew 2 82 O OK button 13 41 Operating Environment 83 Optional accessories 60 P Paper 82 Paper feed roller modu...

Page 85: ...e Install 20 Uninstall 79 Software Manual CD ROM 3 10 20 Specifications 82 Stapled document detection 2 25 82 Start Stop button 13 Starting up applications automatically Single Touch Scanning 39 Touch Free Scanning 39 Storage Environment 83 T Troubleshooting 74 U USB cable 10 19 USB connector 12 User Utility 3 14 66 W Weight 83 Operating Manual 85 Index ...

Page 86: ...PNQX6283ZA DD1013HS0 Panasonic System Networks Co Ltd 2013 ...

Reviews: