


Reviews:
No comments
Related manuals for JU-253-T

FlashPen "Piko"
Brand: Hama Pages: 4

DJNA-351010
Brand: IBM Pages: 2
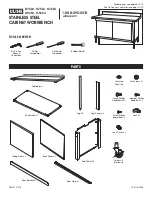
H-7562
Brand: U-Line Pages: 18

StorNext QD7000
Brand: Quantum Pages: 29

STD2401LW
Brand: Quantum Pages: 88

Biometric Hard Drive
Brand: LaCie Pages: 44

SM192
Brand: Campbell Pages: 30

Toolland MP99
Brand: Velleman Pages: 4

Que! M5
Brand: QPS Pages: 9

Wicher CD32
Brand: 7-BIT Pages: 4

DLT 1
Brand: Quantum Pages: 3

DS-HSZ22-AA
Brand: DEC Pages: 94

03BUT0606-V1
Brand: Mercia Garden Products Pages: 9

Medalist 1010
Brand: Seagate Pages: 42

AS2 Series
Brand: SAJ Pages: 42

Storage Library T24
Brand: Tandberg Data Pages: 6

3663602497981
Brand: Magnusson Pages: 24

51024U2
Brand: Maxtor Pages: 2


