background image

© Panasonic Corporation, 2014. 
Unauthorized copying and distribution is a violation
of law.

Order Number PEWT1410R72CE

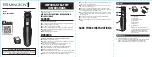
(Household) Hair Dryer

Model No.

EH-ND61

Model No.

EH-ND62

CIS

TABLE OF CONTENTS

PAGE

PAGE

1 Warning

--------------------------------------------------------------

2

2 Specifications

-----------------------------------------------------

2

3 Troubleshooting Guide

-----------------------------------------

3

4 Disassembly and Assembly Instructions

----------------

4

5 Wiring Connection Diagram

----------------------------------

6

6 Schematic Diagram

----------------------------------------------

7

7 Exploded View and Replacement Parts List

------------

8

Summary of Contents for EH-ND61

Page 1: ...er PEWT1410R72CE Household Hair Dryer Model No EH ND61 Model No EH ND62 CIS TABLE OF CONTENTS PAGE PAGE 1 Warning 2 2 Specifications 2 3 Troubleshooting Guide 3 4 Disassembly and Assembly Instructions 4 5 Wiring Connection Diagram 6 6 Schematic Diagram 7 7 Exploded View and Replacement Parts List 8 ...

Page 2: ...ng point is 50 70 F 30 40 C higher Please use a soldering iron with temperature control and adjust it to 750 20 F 400 10 C In case of using high temperature solder ing iron please be careful not to heat too long Pb free solder will tend to splash when heated too high about 1100 F 600 C 2 Specifications ...

Page 3: ...3 3 Troubleshooting Guide Refer to Wiring Connection Diagram ...

Page 4: ...APPING SCREW at HOUSING A by flat blade screwdriver and two TORX SCREWS at HANDLE by Driver 3 Take off an AIR OUTLET GRILL and an AIR OUTLET RING by rotating method as below 4 Take off HANDLE AB then take out CLICK RING and SWIVEL RING method as below 5 Take off HOUSING A method as below 6 Take off a MOTOR HEATER BLOCK ASS Y method as below ...

Page 5: ...3 Install SWIVEL RING on HANDLE A and install CLICK RING on HOUSING A then install HANDLE AB on HOUSING AB method as below 4 Insert an AIR OUTLET GRILL into an AIR OUTLET RING by fix position as below 5 Insert an AIR OUTLET RING into main body by fix posi tion as below 6 Tightening screw both two TORX SCREWS and a TAP PING SCREW as below ...

Page 6: ...6 5 Wiring Connection Diagram ...

Page 7: ...7 6 Schematic Diagram ...

Page 8: ...8 7 Exploded View and Replacement Parts List 7 1 Exploded View for EH ND61 All parts are supplied from PMFTH AP through PLAP ...

Page 9: ...ATURAL 1 5 EHND61SRTW SWIVEL RING 1 6 EHND61MH86BW MOTOR HEATER BLOCK 1 B2 PLUG Include 5 Insulation Tubes 7 EHND61AORHW AIR OUTLET REGULATOR GRAY 1 8 EHND61AOGW AIR OUTLET GRILL 1 9 EHND61AORW AIR OUTLET RING 1 10 EHND61SNZBW SET NOZZLE BLACK 1 11 EHND61MSW MAIN SWITCH 1 Include 5 Insulation Tubes 12 EHND61MSPBW MAIN SWITCH PLATE BLACK 1 13 EHND61T2004W TAPPING SCREW 2 0 4 BLACK 1 EHND6186S03W OP...

Page 10: ...10 7 3 Exploded View for EH ND62 All parts are supplied from PMFTH AP through PLAP ...

Page 11: ...HND62SRTW SWIVEL RING 1 6 EHND62MH86BW MOTOR HEATER BLOCK 1 B2 PLUG Include 5 Insulation Tubes 7 EHND62AORHW AIR OUTLET REGULATOR GRAY 1 8 EHND62AOGW AIR OUTLET GRILL 1 9 EHND62AORW AIR OUTLET RING 1 10 EHND62SNZPW SET NOZZLE VIVID PINK 1 11 EHND62MSW MAIN SWITCH 1 Include 5 Insulation Tubes 12 EHND62MSPPW MAIN SWITCH PLATE PINK 1 13 EHND62T2004W TAPPING SCREW 2 0 4 SILVER 1 14 EHND62DFBW DIFFUSER...

Reviews: