background image

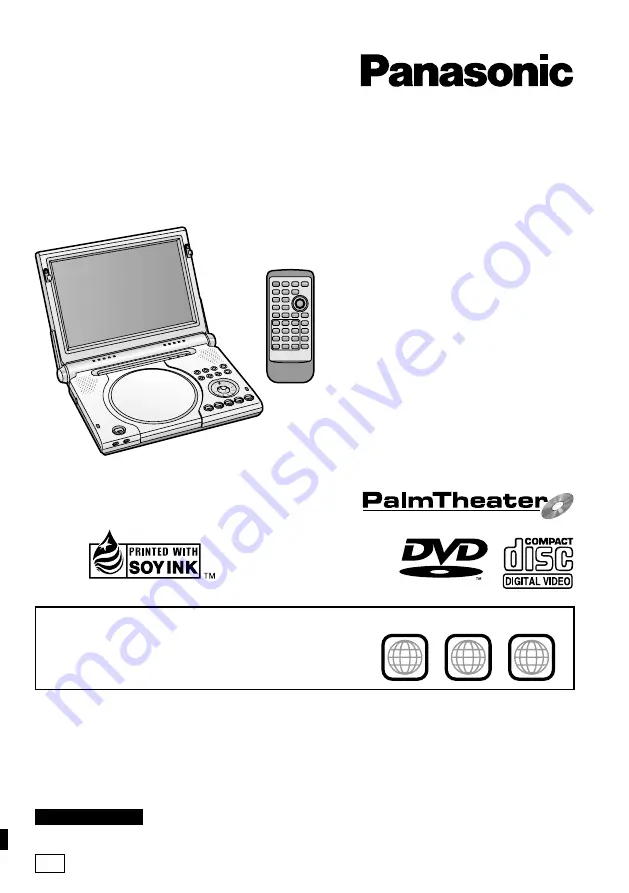
Portable DVD AUDIO/VIDEO Player

Operating Instructions

Model No.

DVD-LA95

The region number of this unit is “1”.
You can play DVD-Video marked “1”, “ALL”, or
with a region number including “1”.

RQT6025-Y

1

ALL

2

4

1

Example:

Dear customer

Thank you for purchasing this product.
For optimum performance and safety, please read these instructions carefully.
Before connecting, operating or adjusting this product, please read these instructions 
completely. Please keep this manual for future reference.

For U.S.A. Only

The servicenter list and warranty can be found on pages 51 and 52.

This manual was printed with soy based ink.

AUDIO/VIDEO

PP

p

Summary of Contents for DVDLA95PP - PORTABLE DVD PLAYER

Page 1: ...e Dear customer Thank you for purchasing this product For optimum performance and safety please read these instructions carefully Before connecting operating or adjusting this product please read these instructions completely Please keep this manual for future reference For U S A Only The servicenter list and warranty can be found on pages 51 and 52 This manual was printed with soy based ink AUDIO...

Page 2: ...p ment and receiver Connect the equipment into an outlet on a circuit different from that to which the receiver is connected Consult the dealer or an experienced radio TV technician for help Any unauthorized changes or modifications to this equipment would void the user s authority to operate this device This device complies with Part 15 of the FCC Rules Operation is subject to the following two c...

Page 3: ...CH Play On 1 ON Stop Off OFF Pause Skip 9 Pause Stop Slow Search 6 5 Skip 9 Cursor jockey 3 4 2 1 ENTER Numbered buttons Play 1 c Disc lid OPEN button d Standby Í indicator e Charge CHG indicator f Headphone Ë jack Main Unit Remote Control a 9 inch wide screen LCD b Stereo speakers Although it is not labeled ENTER the cursor jockey on the remote control functions the same as the cursor jockey on t...

Page 4: ... parentheses when asking for replacement parts Note The included AC power supply cord and AC adaptor are for use with this unit only Do not use them with other equipment Table of contents Getting Started Accessories 04 IMPORTANT SAFETY INSTRUCTIONS 06 Listening caution 07 Basic Operations Basic play 12 When a menu screen appears 13 Resume function 13 Skipping 14 Advanced Operations Changing soundt...

Page 5: ...he picture 19 Adjusting the brightness 19 Adjusting color intensity 19 Playing the programs recorded on DVD RAM 20 Selecting programs to play DIRECT NAVIGATOR 20 Using the play list menu to play specific scenes 21 Using On Screen Menu Icons 22 Common procedures 22 Shuttle screen 23 Icons for disc information 24 Icons for unit information 25 Using headphones 34 Watching video from a video camera 35...

Page 6: ...s accessories specified by the manufacturer 12 Use only with the cart stand tripod bracket or table specified by the manufacturer or sold with the apparatus When a cart is used use caution when moving the cart apparatus combination to avoid injury from tip over 13 Unplug this apparatus during lightning storms or when unused for long periods of time 14 Refer all servicing to qualified service perso...

Page 7: ...y pack with equipment other than the specified player 1 Do not use the player outside if it is snowing or raining The built in battery and battery pack are not waterproof 1 Do not get dirt sand liquids or other foreign matter on the terminals 1 Do not touch the plug terminals i and j with metal objects 1 Do not disassemble remodel heat or throw into fire 2 Button type battery Lithium battery 1 Ins...

Page 8: ...s must meet the following conditions for this unit to be able to play them It may not be possible to play some discs due to the condition of the recording 8 RQT6025 Getting Started Disc information Discs that can be played Disc type DVD RAM DVD R DVD Audio DVD Video Video CD Audio CD Logo 1 ALL 2 4 1 Type Capacity Recording format Non cartridge discs Discs that can be removed from their cartridges...

Page 9: ...market Do not place or store discs in the following places Locations exposed to direct sunlight Humid or dusty locations Locations directly exposed to a heat vent or heating appliance Playing CD R RW and MP3 This unit can play CD R and CD RW if they are formatted as CD DA digital audio or video CD and finalized a process that allows CD R and CD RW to be played on compatible equipment It may not be...

Page 10: ...ways AC adaptor see below Built in battery page 11 Optional car adaptor page 34 Optional battery pack page 35 Using the AC adaptor When the unit is not going to be used for a long time The unit consumes 0 9 W when in standby mode To conserve power disconnect the AC power supply cord from the AC outlet Note Refer to IMPORTANT SAFETY INSTRUCTIONS on page 6 Note Do not expose the remote control signa...

Page 11: ... battery Lithium ion battery pack Note Refer to IMPORTANT SAFETY INSTRUCTIONS on pages 6 and 7 Approximate recharging and play times Actual times depend on operating conditions Recharging Front of this unit The CHG indicator lights The Í indicator goes out 1 2 Built in battery Bottom of the unit Bottom of the unit Note After detaching the built in battery take care when handling the unit To attach...

Page 12: ...ng the unit on and off with the remote control Press Í POWER You cannot use the remote control to turn the unit on when it is being powered by the battery To see the elapsed play time Press DISPLAY to show the on screen menu icons page 24 Auto power off function The unit automatically turns off after being stopped for 15 minutes 5 minutes when the battery is being used Note If appears on the LCD T...

Page 13: ...pen the disc lid The unit saves the position even when you switch the unit to standby except when playing a play list page 21 CD VCD DVD V DVD A RAM Press PLAY to Preview Chapters When a menu screen appears Press the numbered buttons to select an item Or Use 3 4 2 1 to highlight an item and press ENTER Selecting a 2 digit number e g 25 S10 2 5 Other buttons used to operate menus Read the disc s in...

Page 14: ...rt play You cannot move backwards with Video CD during frame by frame and slow motion Frame by frame viewing and slow motion only work on the moving picture parts of DVD Audio 2 6 Backward 9 1 5 Forward Slow motion OOn the main unitN While paused Turn the shuttle dial OOn the remote controlN While paused Press 6 or 5 The picture stills again when you release the shuttle dial Fast forward and rewin...

Page 15: ...ber and press ENTER You can also select groups with the remote control s numbered buttons or GROUP 3 Use 3 4 to select the track number and press ENTER The selected group and track begin to play Playing all the groups in succession page 17 DVD A Remote control only 1 1 G T Playing bonus groups Some discs contain bonus groups To enjoy these groups you may have to enter a password Refer to the disc ...

Page 16: ...ks subtitle languages and angles only by using the disc s menus Soundtrack and subtitle languages can be set before play with the initial settings page 36 Disc Audio and Subtitle or is displayed instead of the language number in circumstances such as when no language is recorded on the disc Some discs allow you to set angles before multi angle scenes are played Read the instructions that come with...

Page 17: ...X MENU RETURN DISPLA Y VOL CHG Speaker Speaker or This unit Television Distance A 3 or 4 times distance A Seating position Note V S S will not work or will have less effect with some discs V S S may cause distortion with some discs Turn V S S off if this occurs Output from this unit will be in stereo two channels when V S S is on The speakers on this unit will not produce any discernable effect SP...

Page 18: ... groups with the numbered buttons 3 Press 1 Play Play now begins in random order To exit the random mode Press PLAY MODE while stopped until the random play screen disappears Note If you select bonus groups on DVD Audio during random play you will have to enter a 4 digit password page 15 DVD Audio only Changing the play sequence CD VCD DVD A PLAY MODE ENTER RETURN 6 1 5 Choose a group and track th...

Page 19: ...ppear in the picture when the mode is switched to ZOOM but this is not an indication of malfunction Adjusting the brightness 1 Press BRIGHT on the main unit 2 Move 3 4 so points to BRIGHT 3 Use 2 1 to adjust the brightness j5 dark 5 light 4 Press BRIGHT to clear the display Power consumption increases with the level of brightness Adjusting color intensity 1 Press COLOUR on the main unit 2 Use 2 1 ...

Page 20: ...essary To enter a 2 digit number e g 25 S10 2 5 3 Press 1 Play or ENTER Play of the program that was playing in the background continues To clear the program list Press TOP MENU The unit returns to the condition it was in before you called up the program list To display information about a selected program 1 Select the program steps 1 and 2 then use 1 to select Contents on the right side of the li...

Page 21: ... 4 2 1 to select Next and press ENTER Select Prev to move back You can also select a page of play list scenes by entering the page number with the numbered buttons The page numbers appear at the top right of the screen To enter a number e g 25 2 5 ENTER e g 111 1 1 1 ENTER To display information about a selected play list 1 Select the play list steps 1 and 2 2 Use 1 to select Contents on the right...

Page 22: ... Digital Î ENG ON 1 1 AB 1 2 3 OFF r100 j100 4 Use 3 4 to select the setting Items with 3 or 4 above and below can be changed by 3 4 Some items require different opera tions Read the explanations on the following pages Press ENTER if the setting does not change after using 3 4 To clear the icons Press RETURN until they clear To change the position of the icons You can lower the position of the ico...

Page 23: ...h 6 Backward 5 Forward VCD DVD V DVD A RAM DVD V DVD A RAM Shuttle screen There are 5 speeds for both backward and forward slow motion and search The numbers on either side of the shuttle screen indicate the maximum speeds of the search Slow motion only works on the moving picture parts of DVD Audio ...

Page 24: ...g the time display Track elapsed time l l Track remaining time l Disc group remaining time Audio mode LR L R J VCD RAM CD VCD DVD A RAM DVD V DVD A DVD V CD VCD DVD A DVD V DVD A RAM RAM ENG ON 1 ENG 1 ON ON PBC Page 1 Content Soundtrack a Soundtrack language See a below for language abbreviations b Audio signal type See b at right for details Karaoke DVD only Karaoke vocal on off Solo OFF or ON D...

Page 25: ...ont leftiFront rightiCenter Icon Content V S S mode page 17 SP V S S Dolby Digital DTS MPEG LPCM 2 channel or over only HP V S S Dolby Digital MPEG LPCM 2 channel or over only V S S level page 17 SP 1 HP 1 SP 2 HP 2 SP OFF HP OFF J Dolby Digital DTS 3 channel or over only Dialogue Enhancer ON OFF The volume of the dialogue from the center channel is raised when you select ON DVD V VCD DVD V RAM Au...

Page 26: ...layed instead of G You cannot use repeat play to repeat an entire DVD Video or to repeat all the play lists on a DVD RAM When a Video CD has playback control 1 During play press 2 Press the numbered buttons to select a track and start play 3 Select a repeat mode To return to menu play press twice to cancel resume then press 1 Play To repeat programmed tracks 1 Program the tracks and start play pag...

Page 27: ...he desired point to mark the eleventh point and beyond While the marker icon is highlighted first select the group of 10 1 Use 2 1 to highlight the marker pin icon 2 Use 3 4 to select 11 20 you can select the next group of 2 10 when the current group is full To recall a marker 2 1 ENTER To erase a marker 2 1 CANCEL This feature only works if the elapsed playing time of the disc is shown Time page ...

Page 28: ...als page 29 Connect digitally and use the decoder in another piece of equipment page 30 Connect to an analog amplifier or system component page 31 Connect to a digital amplifier or system component page 31 Digital connection Analog connection Digital connection Analog connection Settings pages 41 43 Speaker setting Select Multi channel PCM Down Conversion Dolby Digital DTS Digital Surround Change ...

Page 29: ...if V S S is on page 17 VIDEO 5 1CH OUT AUDIO OPT OUT CENTER SUB WOOFER SURROUND FRONT R L R L This unit Right side black black black white red white red white red Stereo connection cables Ensure the terminals are correct when making connections Speakers If you have not connected a subwoofer you should connect front speakers that are capable of producing bass under 100 Hz if possible Example Connec...

Page 30: ...hat cannot handle signals from DVD Video VIDEO 5 1CH OUT AUDIO OPT OUT OPTICAL INPUT AV amplifier Decoder Optical fiber cable Do not bend when connecting Speakers If you have not connected a subwoofer you should connect front speakers that are capable of producing bass under 100 Hz if possible This unit Right side Example Connecting 6 speakers Optical digital audio input terminal Amplifier ...

Page 31: ...onnect center and sur round speakers See the operating instructions for the other equipment for connection procedures Turn V S S off Surround effects will not work correctly if V S S is on page 17 Optical fiber cable Do not bend when connecting Optical digital audio input terminal VIDEO 5 1CH OUT AUDIO OPT OUT LINE IN R L Audio input terminal white black This unit Right side 2 channel analog ampli...

Page 32: ...video input terminal for the best picture clarity possible S video video input terminal Note The unit s speakers do not have magnetic shielding Do not place the unit near televisions personal computers or other devices easily influenced by magnetism Volume may be lower when playing DVDs than when playing other discs or during TV broadcasts If you turn the volume up reduce it again so that a sudden...

Page 33: ...y software is shown on a regular television 4 3 with the above operation If you have a widescreen television 16 9 use the television s picture modes Disc ACTION SELECT ENTER RETURN Audio Subtitle Menus Ratings English English Automatic Level 8 ACTION Still Mode Automatic 16 9 TV Aspect Video ENTER RETURN SELECT 3 Use 3 4 to select TV Aspect and press ENTER 4 Use 3 4 to select the item and press EN...

Page 34: ...the following settings 3 V S S OFF page 17 3 PCM Down Conversion Yes page 41 3 Dolby Digital DTS Digital Surround PCM page 41 Using an optional car adaptor Part number DY DC95 Note Read the car adaptor s operating instructions carefully In the interests of the traffic safety do not perform operations on the unit or view video software while driving a vehicle Do not rest the unit directly on your l...

Page 35: ...om of the unit Bottom of the unit DC IN 9V LOCK UNLOCK 1 2 Approximate recharging and play times Actual times depend on operating conditions Fit the battery pack firmly so it clicks into place To recharge When the unit is off Connect to the household AC outlet while the battery pack is attached page 10 Brightness is factory preset to 0 To change the LCD brightness page 19 To detach 1 Slide the lat...

Page 36: ... levels 0 to 7 have been selected TV Aspect page 33 Choose the setting to suit your television and preference Still Mode Specify the type of picture shown when paused Speaker Setting Choose the settings to suit your audio system and the listening environment pages 42 and 43 DVD V DVD A DVD V DVD V DVD A DVD V DVD A DVD V DVD A Options English French Spanish Original 2 Other 3 Automatic 4English Fr...

Page 37: ...e audio signals on discs that do not have copyright protection page 41 Dolby Digital Digital output of Dolby Digital signals page 41 DTS Digital Surround Digital output of DTS Digital Surround signals page 41 D Range Compression Dolby Digital Only Change the dynamic range for late night viewing Audio during Search Choose whether to have sound during search Menu Language Choose the preferred langua...

Page 38: ... turned off Common procedures Changing initial settings See pages 36 and 37 for menu and option details 1 Press ACTION to show the menus MENU is also effective when stopped unless a DVD RAM is loaded The screen shows the disc settings menu first Disc ACTION SELECT ENTERRETURN Audio Subtitle Menus Ratings English English Automatic Level 8 3 Use 3 4 to select the item you want to change and press EN...

Page 39: ...llow the on screen instructions When setting ratings when level is 8 When changing ratings when level is set to 0 to 7 The password screen is shown when you select Ratings 1 Input your 4 digit password with the numbered buttons and press ENTER The password screen is shown when you select levels 0 to 7 1 Input a 4 digit password with the numbered buttons and press ENTER 1 If you enter a wrong numbe...

Page 40: ...elorussian 7577 Cambodian 6765 Catalan 9072 Chinese 6779 Corsican 7282 Croatian 6783 Czech 6865 Danish 7876 Dutch 6978 English 6979 Esperanto 6984 Estonian 7079 Faroese 7074 Fiji 7073 Finnish 7082 French 7089 Frisian 7176 Galician 7565 Georgian 6869 German 6976 Greek 7576 Greenlandic 7178 Guarani 7185 Gujarati 7265 Hausa 7387 Hebrew 7273 Hindi 7285 Hungarian 7383 Icelandic 7378 Indonesian 7365 Int...

Page 41: ...t Output as is Down sampled to 48 kHz or 44 1 kHz The equipment cannot output signals of 88 2 kHz or more if the setting is No and the equipment is unable to handle these signals Note Some equipment cannot handle 88 2 kHz signals even though they can handle 96 kHz signals Read the equipment s operating instructions carefully Signals are down sampled to either 48 kHz or 44 1 kHz despite the above s...

Page 42: ... 4 2 1 to select the item and press ENTER 2 Use 3 4 to select the setting and press ENTER Icon examples Surround speaker L Large When the speaker supports low frequency under 100 Hz reproduction Small Select when the speaker does not support low frequency reproduction ACTION SELECT ENTER RETURN m s m s d B 0 d B d B L Exit Test LS R SW C RS d B 0 0 0 0 0 b a c a a L a L c b R c R a c a Front L Cen...

Page 43: ...e b Channel balance c Front B C A Listening Position Front Subwoofer Center Surround L Surround R R L 1 Use 3 4 2 1 to select Test and press ENTER 1 A test signal is output from the front left speaker and proceeds clockwise 2 Use 3 4 to adjust the volume of the center and surround speakers so they are the same apparent volume as the front speakers between j3 dB and i3 dB 1 The front speakers canno...

Page 44: ... is made up of 2 alter nating fields so the picture may appear blurred but overall quality is high A field still is not blurred but it has only half the information of a frame still so picture quality is lower I P B MPEG 2 the video compression standard adopted for use with DVD Video codes frames using these 3 picture types I Intra coded picture I picture This is the standard picture and is a comp...

Page 45: ...ound close to the original when played back Title Chapter DVD Video are divided up into large sections titles and smaller sections chapters The numbers allocated to these sections are called title numbers and chapter numbers Track This is the smallest division on DVD Audio CD and Video CD and usually equates to a single song Apparatus Claims of U S Patent Nos 4 631 603 4 577 216 and 4 819 098 lice...

Page 46: ...ff after it has been stopped for about 15 minutes 5 minutes when the unit is powered by battery to conserve power Turn the unit on again You are using the unit in a place that is too hot or too cold The built in battery and battery pack can only be recharged when the unit is off The charging time increases if the built in battery or battery pack is warm and charging may not be possible under some ...

Page 47: ...le the unit is stopped press and hold backward and 1 ON on the main unit for about 3 seconds until the message Initialized disappears from the LCD then turn the unit off Separate the unit from mobile phones if they are being used close to each other The speakers are off if the LCD is closed or headphones are connected R Turn up the volume Check all connections and settings M P R S Y Check input mo...

Page 48: ...onnections S Ensure the input setting is correct S Select a picture mode other than OFF no picture C Ensure the power of the connected equipment is on Make sure the LCD off switch is not being held down 3 Check connections P Check that the television is on Check that the input mode on the television is correct Check the settings in Video TV Aspect Q The LCD is constructed with precision technology...

Page 49: ...earing after H depends on the problem Turn the unit off and on again Alternatively turn the unit off disconnect the power source AC or battery reconnect the power and turn the unit on again If the service numbers fail to clear note the service number and contact a qualified service person Note The following do not indicate malfunction A sound is heard from the AC adaptor during recharging The buil...

Page 50: ...me characteristics as the original parts Unauthorized substitutes may result in fire electric shock or other hazards 4 Safety check After repairs or service ask the servicer to perform safety checks to confirm that the unit is in proper working condition Product information For product information or assistance with product operation In the U S A contact the Panasonic Customer Call Center at 1 800...

Page 51: ...e A San Diego CA 92123 FLORIDA 3700 North 29th Avenue Suite 102 Hollywood FL 33020 GEORGIA 8655 Roswell Road Suite 100 Atlanta GA 30350 ILLINOIS 9060 Golf Road Niles IL 60714 1703 North Randall Road Elgin IL 60123 Pick up Drop off only MASSACHUSETTS 60 Glacier Drive Suite G Westwood MA 02090 MINNESOTA 7850 12th Avenue South Airport Business Center Bloomington MN 55425 OHIO 2236 Waycross Road Civic...

Page 52: ...r normal maintenance The warranty does not cover damages which occurred in shipment or failures which are caused by products not supplied by the warrantor or failures which result from accident misuse abuse neglect mishandling faulty instal lation misapplication improper set up adjustments operation or maintenance alteration modification power line surge lightning damage interference commercial us...

Page 53: ... Industrial Park Carolina Puerto Rico 00985 Panasonic Canada Inc 5770 Ambler Drive Mississauga Ontario L4W 2T3 www panasonic ca C 2001 Matsushita Electric Industrial Co Ltd Printed in Japan RQT6025 Y F0801EH0 Specifications Operating temperature range i5 to i35 oC i41 to i95 oF Operating humidity range 5 90 RH no condensation Discs played DVD RAM DVD VR compatible DVD Video DVD Audio Compact disc ...

Page 54: ...tous ou dont le code régional inclut 1 RQT6025 Y 1 ALL 2 4 1 Exemple Cher client Nous vous remercions d avoir arrêté votre choix sur cet appareil Pour en tirer un rendement optimal lire attentivement le présent manuel Il est recommandé de lire attentivement le présent manuel avant d utiliser l appareil Conserver ce manuel Ce manuel a été imprimé avec de l encre à base de soja AUDIO VIDEO PP q ...

Page 55: ...UTILISATION DE COMMANDES OU LE RECOURS À DES RÉGLAGES AUTRES QUE CEUX INDIQUÉS DANS CE MANUEL PEU VENT PRÉSENTER DES RISQUES D EXPOSITION À DES RADIATIONS NE PAS OUVRIR LE BOÎTIER TOUTE RÉPARATION DOIT ÊTRE FAITE PAR UN PERSONNEL QUALIFIÉ ET NON PAR L USAGER RISQUEDECHOCELECTRIQUE NEPASOUVRIR ATTENTION Le symbole de l éclair dans un triangle équilatéral indique la présence d une tension suffisamme...

Page 56: ...rrupteur 1 ON Arrêt Interrupteur jOFF Touches du curseur 3 4 2 1 DISPLAY VOL Touche d entrée Retour Écran Déplier cette page lors de la lecture du manuel afin de localiser les commandes c Touche d ouverture OPEN d Voyant de mise en attente Í e Voyant de recharge CHG f Prise de casque d écoute Ë Appareil principal Télécommande a Grand écran à cristaux liquides de 9 po b Haut parleurs stéréo Bien qu...

Page 57: ...ur secteur inclus ne doivent être utilisés qu avec cet appa reil Ne pas les utiliser avec d autre équipement Table des matières Mise en route Accessoires 04 IMPORTANTES MISES EN GARDE 06 Protection de l ouïe 07 À propos des disques 08 Opérations de base Lecture de base 12 Si un menu s affiche 13 Fonction de poursuite 13 Saut 14 Opérations avancées Sélection de la bande son de la langue des sous ti...

Page 58: ...es enregistrés DVD RAM 20 Utilisation de DIRECT NAVIGATOR navigateur direct pour sélectionner les programmes de lecture 20 Utilisation du menu de la liste de lecture pour la lecture de scènes données 21 Menus à icônes utilisation 22 Procédures communes 22 Écran de repérage proportionnel 23 Icônes de renseignements sur les disques 24 Icônes de renseignements sur le lecteur 25 Utilisation de l adapt...

Page 59: ...èrement attention à ses extrémités de branchement y compris sa fiche 11 N utiliser que les accessoires ou périphériques recommandés par le fabricant 12 N utiliser l appareil qu avec une baie support trépied ga barit d installation etc recommandée par le fabricant ou vendu avec l appareil 13 Débrancher cet appareil lors d un orage ou en cas de non utilisation prolongée 14 Confier l appareil à un te...

Page 60: ... pas utiliser l appareil à l extérieur s il neige ou s il pleut Le bloc batterie et le bloc batterie en option ne sord pas à l épreuve de l eau 1 Éviter toute poussière sable liquides ou saleté sur les bornes 1 Ne pas toucher aux bornes i et j avec un objet métallique 1 Ne pas tenter de démonter ou remonter le bloc batterie Ne pas le jeter au feu 2 Pile de type bouton Pile au lithium 1 Insérer en ...

Page 61: ...Disques DVD RAM Les disques DVD RAM doivent remplir les conditions suivantes pour que cet appareil puisse en faire la lecture Il se peut que la lec ture de certains disques ne soit pas possible à cause des conditions d enregistrement À propos des disques Disques compatibles Type de disque DVD RAM DVD R DVD Audio DVD Vidéo CD Vidéo CD Audio Logo 1 ALL 2 4 1 Type Capacité Format d enregis trement Di...

Page 62: ...es sur le marché Ne pas ranger les disques Dans les endroits exposés au soleil Dans un endroit humide ou poussiéreux Près d une source de chaleur Lecture de disques CD R RW et MP3 Cet appareil peut prendre en charge des disques CD DA audio numérique et CD Vidéo ainsi que des disques CD R et CD RW finalisés Toutefois il pourrait être impossible de lire certains disques CD R et CD RW selon l état de...

Page 63: ... voir ci dessous Bloc batterie intégré page 11 Adaptateur pour voiture en option page 34 Bloc batterie de rechange en option page 35 Alimentation sur secteur En cas de non utilisation prolongée L appareil consomme 0 9 W en mode d attente Pour réduire la consommation d énergie débran cher l adaptateur secteur de la prise de courant Nota Se reporter à la section IMPORTANTES MISES EN GARDE à la page ...

Page 64: ...0 minutes 2 heures 1 heure 30 minutes Écran du lecteur fermé 3 heures 30 minutes 3 heures 30 minutes 3 heures 30 minutes Lecture Plein Faible Recharger Alimentation sur bloc batterie intégré Bloc batterie rechargeable aux ions de lithium fourni Nota Se reporter à la section IMPORTANTES MISES EN GARDE aux pages 6 et 7 Durée approximative de recharge et autonomie de lecture La durée réelle dépend de...

Page 65: ... peut être mis en marche au moyen de la télécommande lorsque l appareil fonction ne sur le bloc batterie Affichage de la durée écoulée de lecture Appuyer sur DISPLAY pour afficher les icônes de menu à l écran page 24 Fonction de coupure automatique Le lecteur est automatiquement mis hors marche s il est laissé plus de 15 minutes dans le mode arrêt 5 minutes avec le bloc batterie Nota Si apparaît à...

Page 66: ...supprimé de la mé moire si le couvercle du disque est ouvert L appareil sauvegarde la position même s il est commuté en mode d attente sauf lors de la lecture d une liste de lecture page 21 CD VCD DVD V DVD A RAM Appuyez sur PLAY pour prévisualiser le chapitre Si un menu s affiche Sélectionner une rubrique avec les touches numériques Ou Utiliser 3 4 2 1 pour mettre une rubrique en surbrillance pui...

Page 67: ...puyer sur 1 Lecture pour la lecture en reprise Avec CD vidéo il est impossible de faire une recherche en arrière pendant une avance image par image ou un lecture ralentie L avance image par image et le ralenti ne fonctionnent que sur les parties d images animées du disque DVD Audio 2 ou 6 Sens arrière 9 1 ou 5 Sens avant Ralenti OSur l appareil principalN Dans le mode pause Tourner le cadran d acc...

Page 68: ...ner le numéro de groupe et appuyer sur ENTER Il est possible de sélectionner les groupes avec les touches numériques de la télécommande ou la touche GROUP 3 Utiliser 3 4 pour sélectionner le numéro de plage et appuyer sur ENTER La lecture du groupe et de la plage sélectionnés commence Lecture en séquence de tous les groupes page 17 DVD A Télécommande seulement 1 1 G T Lecture des groupes prime Cer...

Page 69: ... prise de vue ne peut se faire que par leurs menus La sélection de la bande son et de la langue des sous titres peut aussi être faite au moment du paramétrage initial page 36 Disque Audio dialogues et Sous titres L indication ou s affiche en lieu et place du numéro de la langue dans les situations où la langue sélectionnée n est pas enregistrée sur le disque Sur certains disques il est possible de...

Page 70: ...e A Position d écoute Nota L effet ambiophonique virtuel peut ne pas fonctionner ou avoir moins d effet avec certains disques Avec certains disques le mode V S S peut engendrer de la distorsion Dans un tel cas mettre le mode V S S hors circuit Le signal de sortie de cet appareil est en stéréo deux voies lorsque le mode V S S est en circuit Il n y a pas d effet discernable sur les haut parleurs de ...

Page 71: ...ce à partir d une plage sélectionnée au hasard Pour quitter le mode lecture aléatoire En mode arrêt appuyer sur PLAY MODE jusqu à ce que l écran de lecture aléatoire ne soit plus affiché Nota Si un groupe prime est sélectionné sur un disque DVD Audio pendant la lecture aléatoire il faudra entrer un mot de passe à 4 chiffres page 15 DVD Audio seulement Modification de la séquence de lecture CD VCD ...

Page 72: ...es horizontales peuvent apparaître sur l image dans le mode ZOOM cela n est le signe d aucun problème de fonctionnement Réglage de la luminosité 1 Appuyer sur la touche BRIGHT de l appareil 2 Déplacer 3 4 afin que la soit vis à vis BRIGHT 3 Utiliser 2 1 pour régler la lumi nosité j5 foncé 5 clair 4 Appuyer sur BRIGHT pour effacer l affichage La consommation d énergie augmente avec le niveau de lum...

Page 73: ... est pas néces saire Pour saisir un numéro à deux chiffres ex 25 S10 2 5 3 Appuyer sur 1 Lecture ou ENTER La lecture du programme en arrière plan continue Effacement de la liste des programmes Appuyer sur TOP MENU L appareil retourne à l état précédant l appel de la liste des programmes Affichage de l information sur un pro gramme sélectionné 1 Sélectionner le programme étapes 1 et 2 puis utiliser...

Page 74: ... sélectionne Suivant et appuyer sur ENTER Sélectionner Prec pour revenir en arrière Il est également possible de sélectionner une page de scènes de liste de lecture en saisissant le numéro de page au moyen des touches numériques Les numéros de page apparaissent à droite de l écran Pour saisir un numéro ex 25 2 5 ENTER ex 111 1 1 1 ENTER Affichage de l information sur une liste de lecture sélection...

Page 75: ... 3 OFF r100 j100 4 Utiliser 3 4 pour sélectionner le paramètre Seules les rubriques identifiées par le symbole 3 ou 4 peuvent faire l objet d un paramétrage Certaines rubriques nécessitent des opérations différentes Voir les détails aux pages suivantes Appuyer sur ENTER dans le cas où le paramètre ne serait pas modifié après avoir appuyé sur 3 4 Pour effacer des icônes Appuyer sur RETURN jusqu à c...

Page 76: ... repérage proportionnel L utilisateur a le choix parmi cinq paliers de vitesse pour le ralenti et la recherche et ce dans un sens ou dans l autre Les chiffres se trouvant de chaque côté de l écran de repérage proportionnel indiquent les vitesses maximum de la recherche La lecture ralentie ne fonctionne qu avec les parties comportant des images animées sur les DVD Audio ...

Page 77: ... les abréviations des langues Affichage ou non des sous titres ON Oui OFF Non Numéro de prise de vue avec pilotage de la lecture seulement Lecture par menu Confirme l activation ou la désactivation du pilotage de la lecture PBC par menu Numéro d image fixe L image choisie est montrée pendant la lecture DVD A VCD DVD V DVD A DVD V DVD A RAM DVD V DVD A DVD V DVD V DVD A RAM T 2 C 2 1 46 50 1 ENG 3 ...

Page 78: ...iAvant droit 3 Avant gaucheiAvant droitiCentre Icône Description Mode V S S page 17 SP V S S Dolby Digital DTS MPEG LPCM 2 canaux ou plus seulement HP V S S Dolby Digital MPEG LPCM 2 canaux ou plus seulement Niveau V S S page 17 SP 1 HP 1 SP 2 HP 2 SP OFF Non HP OFF Non J Dolby Digital DTS 3 canaux ou plus seulement Optimisation des dialogues ON Oui OFF Non Le volume des dialogues du canal central...

Page 79: ... la place de G Il est impossible d utiliser la lecture en reprise pour répéter un disque DVD Vidéo en entier ou pour répéter toutes les listes de lecture sur un disque DVD RAM Lecture de CD vidéo avec commande de lecture 1 Pendant la lecture appuyer sur 2 Appuyer sur les touches numériques pour sélectionner une plage et lancer la lecture 3 Sélectionner un mode de lecture en reprise Pour revenir à ...

Page 80: ...es suivants Pendant que l icône du marqueur est en surbrillance sélectionner d abord le groupe de 10 1 Utiliser 2 1 pour mettre l icône d épingle 1 du marqueur en surbrillance 2 Utiliser 3 4 pour sélectionner 11 à 20 il est possible de sélectionner 1 le prochain groupe de 10 lorsque le groupe en cours est plein Pour rappeler un marqueur 2 1 ENTER Pour effacer un marqueur 2 1 CANCEL Cette caractéri...

Page 81: ...o 5 1 canaux page 29 Effectuer un raccordement numérique et utiliser le décodeur intégré à un autre appareil page 30 Connecter à un amplificateur ou autre appareil analogique page 31 Connecter à un amplificateur ou autre appareil numérique page 31 Connexion numérique Connexion analogique Connexion numérique Connexion analogique Réglages pages 41 43 Haut parleurs Sélectionner Multicanal Conv abaiss...

Page 82: ...nt en circuit page 17 VIDEO 5 1CH OUT AUDIO OPT OUT CENTER SUB WOOFER SURROUND FRONT R D L G R D L G Cet appareil côte droit noir noir noir blanc rouge blanc rouge blanc rouge Câbles de raccordement stéréo Prendre soin à faire les raccordements appropriés Enceintes En l absence d une enceinte d extrêmes graves s assurer que les enceintes avant sont en mesure de reproduire les fréquences de moins d...

Page 83: ...arge les signaux d un lecteur DVD Vidéo VIDEO 5 1CH OUT AUDIO OPT OUT OPTICAL INPUT Amplificateur AV Décodeur Câble à fibres optiques Ne pas plier lors du raccordement Enceintes En l absence d une enceinte d extrêmes graves s assurer que les enceintes avant sont en mesure de reproduire les fréquences de moins de 100 Hz Cet appareil côte droit Exemple Raccordement de 6 enceintes Prise d entrée audi...

Page 84: ...t de canal centre Se reporter au manuel afférent aux enceintes utilisées Désactiver la fonction V S S Autrement l effet ambiophonique ne pourra fonction ner correctement page 17 Câble à fibres optiques Ne pas piler lors du raccordement Prise d entrée audio numérique optique VIDEO 5 1CH OUT AUDIO OPT OUT LINE IN R D L G Prise d entrée audio blanc noir Cet appareil côte droit Amplificateur analogiqu...

Page 85: ...our obtenir une image de qualité optimale Prise d entrée S vidéo vidéo Nota Les haut parleurs de cet appareil ne sont pas blindés Ne pas placer l appareil près de téléviseurs ordinateurs ou tout autre appareil affecté par un champ magnétique Pendant la lecture d un disque DVD le volume peut être plus bas que lors d une télédiffu sion ou de la lecture d autres disques Si le volume est monté s assur...

Page 86: ...iseur à grand écran est utilisé 16 9 faire appel aux modes de cadrage de téléviseur Disque ACTION SELECT ENTER RETURN Audio dialogues Sous titres Menus du disque Restriction par classe Anglais Anglais Automatique Niveau 8 ACTION Mode d arrêt sur image Automatique 16 9 Image télé Vidéo ENTER RETURN SELECT 3 Utiliser 3 4 pour sélectionner Image télé puis appuyer sur ENTER 4 Utiliser 3 4 pour sélecti...

Page 87: ...iophonie virtuelle V S S OFF page 17 3 Conv abaissement PCM PCM page 41 3 Dolby Digital DTS Digital Surround PCM page 41 Utilisation de l adaptateur pour voiture vendu séparément Pièce numéro DY DC95 Nota Lire attentivement les instructions d utilisation de l adaptateur pour voiture Pour des raisons de sécurité routière ne pas effectuer de réglage sur l appareil ou visionner un disque vidéo pendan...

Page 88: ... UNLOCK 1 2 Durée approximative de recharge et autonomie de lecture La durée réelle dépend des conditions d utilisation Pousser sur le bloc batterie jusqu à ce qu il s enclenche en place Pour recharger avec le contact coupé Brancher l adaptateur secteur avec le bloc batterie en place page 10 La luminosité est réglée à 0 Pour ajuster la luminosité de l écran DCL page 19 Dégagement du bloc batterie ...

Page 89: ...oisi Image télé page 33 Sélectionner le format en fonction du téléviseur et selon ses préférences Mode d arrêt sur image Choisir le type d image lors d un arrêt sur image Haut parleurs Sélectionner les réglages en fonction de l équipement audio et des propriétés acoustiques de la salle d écoute pages 42 et 43 DVD V DVD A DVD V DVD V DVD A DVD V DVD A DVD V DVD A Options Anglais Français Espagnol V...

Page 90: ... Sélectionner la façon d émettre les signaux audio avec les disques sans protection des droites d auteur Dolby Digital Sortie numérique avec DVD enregistrés avec codage Dolby Digital page 41 DTS Digital Surround Sortie numérique avec DVD enregistrés avec codage DTS Digital Surround page 41 Compression dynamique Dolby Digital seulement Modification de la dynamique pour écoute discrète Recherche ave...

Page 91: ... Voir les détails sur les menus et les options aux pages 36 et 37 1 Appuyer sur ACTION pour afficher les menus La touche MENU peut également être utilisée en mode arrêt sauf si un DVD RAM est inséré Le menu des réglages du disque s affiche en premier Disque ACTION SELECT ENTER RETURN Audio dialogues Sous titres Menus du disque Restriction par classe Anglais Anglais Automatique Niveau 8 3 Utiliser ...

Page 92: ... niveau de restriction niveau 8 Lors de la modification du niveau de restriction entre 0 et 7 L écran de saisie du mot de passe s affiche sur sélection de la rubrique Restriction par classe 1 Entrer votre mot de passe à quatre chif fres au moyen des touches numériques puis appuyer sur ENTER L écran de saisie du mot de passe s affiche lorsqu un niveau entre 0 et 7 a été programmé 1 Entrer un mot de...

Page 93: ...ulgare 7577 Cambodgien khmer 6765 Catalan 9072 Chinois 7579 Coréen 6779 Corse 7282 Croate 6865 Danois 6983 Espagnol 6979 Espéranto 6984 Estonien 7079 Féringien 7074 Fidjien 7073 Finnois 7082 Français 7089 Frison 7168 Gaélique d Écosse 7176 Galicien 6789 Gallois 7565 Géorgien 6976 Grec 7576 Groenlandais 7178 Guarani 7185 Gujarati 7265 Haoussa 7387 Hébreu 7273 Hindi 7876 Hollandais 7285 Hongrois 737...

Page 94: ... quelle Conversion à 48 kHz ou 44 1 kHz Le composant ne peut pas émettre des sig naux de 88 2 kHz ou plus si le réglage est sur Non et qu il ne peut pas prendre en charge ces signaux Nota Certains appareils ne peuvent pas traiter les signaux de 88 2 kHz même s ils acceptent les signaux de 96 kHz Lire attentivement les instructions d utilisation de l appareil Les signaux sont convertis sur 48 kHz o...

Page 95: ...ctionner la rubrique puis appuyer sur ENTER 2 Utiliser 3 4 pour sélectionner le paramètre puis appuyer sur ENTER Exemple d icônes Enceinte ambiophonique L G Grande Lorsque l enceinte peut reproduire les basses fréquences inférieures à 100 Hz Petite Lorsque l enceinte ne peut pas reproduire les basses fréquences ACTION SELECT ENTER RETURN m s m s d B 0 d B d B L Quitter Essai LS R SW C RS d B 0 0 0...

Page 96: ...s Centrale Ambiophonique L G Ambiophonique R D R D L G 1 Utiliser 3 4 2 1 pour sélectionner Essai et appuyer sur ENTER 1 Un signal d essai est émis dans l enceinte avant gauche et les autres en sens horaire 2 Utiliser 3 4 pour régler le volume dans les enceintes centrale et ambio phonique pour obtenir le même niveau sonore apparent que celui dans les enceintes avant entre j3 dB et i3 dB 1 Aucun ré...

Page 97: ...ra sont codées intégralement sans aucune référence aux images voisines de la séquence vidéo Les images Intra con stituent les images de référence à partir des quelles est réalisé le décodage et offrent la meilleure qualité Il est recommandé d utiliser ce type d image lors des réglages à l écran P Les images Prédictives Les images Prédictives sont codées à partir de l image I ou P précédente à l ai...

Page 98: ...ent à une pièce musicale Programme C est une division d un disque DVD RAM Taux d échantillonnage Il s agit du nombre d échantillons sonores qui sont pris à chaque seconde lors de sa conversion en un signal numérique La fréquence d échantillon nage s exprime en kHz Plus la fréquence d échantillonnage est élevée plus le signal numérique reproduit fidèlement le son signal sonore original Titre Chapit...

Page 99: ...économiser l énergie Établir le contact à nouveau Si l appareil est utilisé dans un endroit trop chaud ou trop froid Le bloc batterie intégré ou le bloc batterie en option ne peuvent être rechargés que lorsque le contact est coupé sur l appareil La durée de la charge augmente si le bloc batterie intégré ou le bloc batterie en option est chaud et la charge peut être impossible dans certains cas Att...

Page 100: ...se de l écran DCL puis couper le contact sur l appareil Éloigner l appareil des téléphones cellulaires s ils sont utilisés à proximité Les haut parleurs sont hors circuit si l écran est rabattu ou si un casque d écoute est branché R Monter le volume Vérifier tous les raccordements et les paramètres M P R S Y Vérifier s il y a lieu le mode d entrée sélectionné sur les autres appareils La plage peut...

Page 101: ...e réglage d entrée est correct S Sélectionner un mode d affichage à l exception de OFF pas d image C S assurer que les appareils externes sont sous tension S assurer que le commutateur de fermeture d écran DCL n est pas maintenu enfoncé 3 Vérifier les raccordements P S assurer que le téléviseur est en marche Vérifier que le mode d entrée du téléviseur est correct Vérifier les réglages sous la rubr...

Page 102: ...re H identifie la nature du problème Couper puis rétablir le contact Alternativement couper le contact débrancher la source d alimentation adaptateur secteur ou bloc batterie rebrancher puis rétablir le contact Si le problème persiste noter le numéro de code et communiquer avec technicien qualifié Nota Les conditions suivantes ne sont le signe d aucune anomalie L adaptateur secteur émet un bruit p...

Page 103: ...mandées par le fabricant ou dont les caractéristiques sont les mêmes L utilisation de pièces de rechange non autorisées peut causer un incendie des chocs électriques ou d autres dangers 4 Vérification de sécurité Demander au technicien qui a réparé l appareil de soumettre ce dernier à des vérifications pour s assurer qu il peut être utilisé en toute sécurité Demande d informations Pour toutes répa...

Page 104: ...nées techniques Plage de température i5 à i35 oC i41 à i95 oF Plage d humidité de fonctionnement Humidité relative de 5 90 sans condensation Disques compatibles DVD RAM DVD VR compatible DVD Vidéo DVD Audio Disque compact CD DA CD Vidéo CD R CD RW Disques formatés CD DA CD Vidéo MP3 DVD R DVD Vidéo compatible Système de format NTSC Écran à cristaux liquides Grand écran α Si de 9 po à cristaux liqu...

Reviews: