background image

TQBS0146

Getting started

Watching broadcasts

Recording

Playing back video

Editing video

Copying video

Photo and Music

Network

With Other Equipment

Other functions

Setup

Reference

Thank you for purchasing this product.
Please read these instructions carefully before using this 
product, and save this manual for future use.

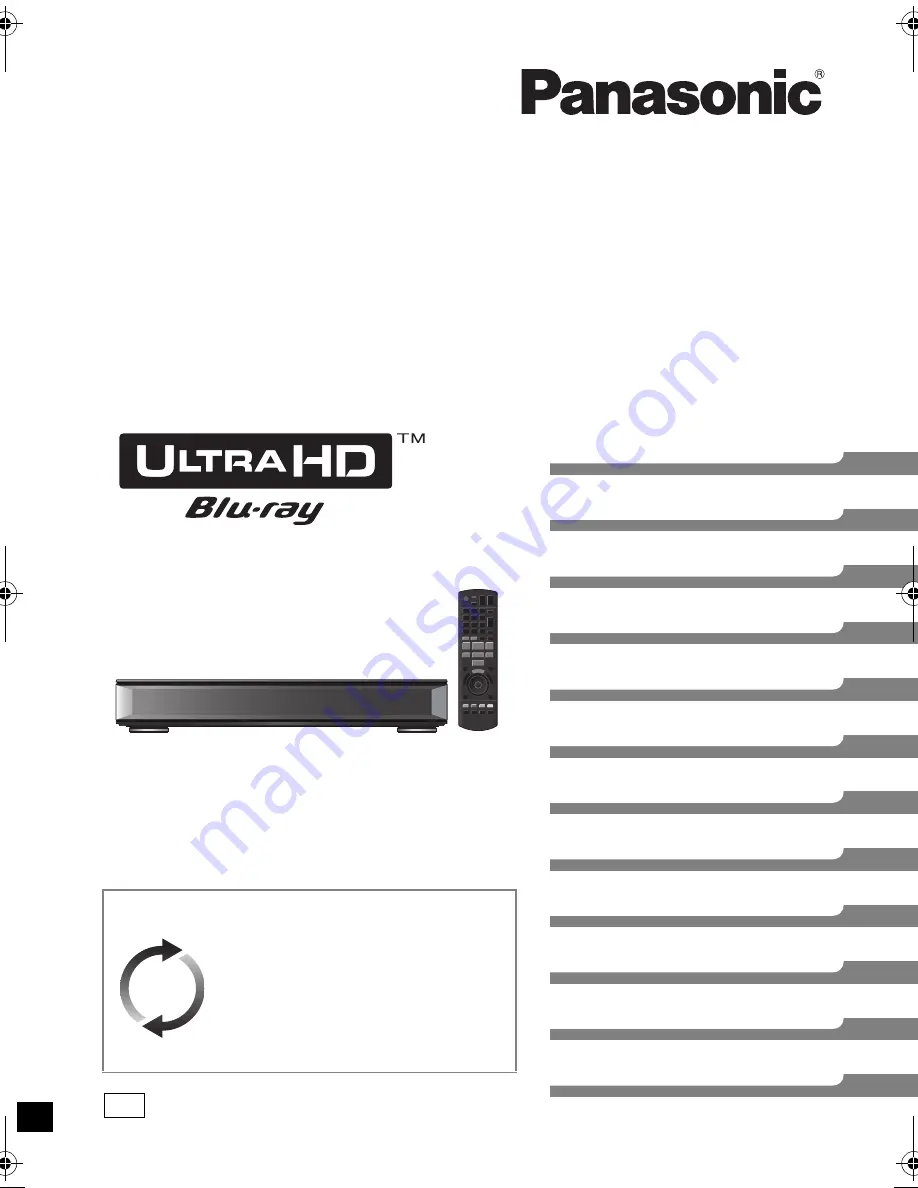
Operating Instructions

Blu-ray Disc™ Recorder

Model No. 

DMR-UBT1

Software (Firmware) Update

To support the latest features, it’s very 
important you install the latest updates 
to maintain proper operation of your unit.
For details, refer to “Software 
(Firmware) Update” (

>

68) or

http://panasonic.jp/support/global/cs/ 
(This site is in English only.)

until 
2017/08/17

GL

DMR-UBT1GL_eng.book  1 ページ  2017年7月25日 火曜日 午後1時45分

Summary of Contents for DMR-UBT1

Page 1: ...ead these instructions carefully before using this product and save this manual for future use Operating Instructions Blu ray Disc Recorder Model No DMR UBT1 Software Firmware Update To support the latest features it s very important you install the latest updates to maintain proper operation of your unit For details refer to Software Firmware Update 68 or http panasonic jp support global cs This ...

Page 2: ...by yourself Refer servicing to qualified service personnel Do not let metal objects fall inside this unit Do not place heavy items on this unit AC mains lead To reduce the risk of fire electric shock or product damage Ensure that the power supply voltage corresponds to the voltage printed on this unit Insert the mains plug fully into the socket outlet Do not pull bend or place heavy items on the l...

Page 3: ...ose to flame Do not leave the battery ies in a car exposed to direct sunlight for a long period of time with doors and windows closed Do not take apart or short circuit Do not recharge alkaline or manganese batteries Do not use batteries if the covering has been peeled off Remove batteries if you do not intend to use the remote control for a long period of time Store in a cool dark place When disp...

Page 4: ...33 Playing back video Playing content 4K content etc on the HDD 35 Playing contents on the media 38 Operation during play 40 4K Networking 43 Playback menu 44 Editing video Deleting Editing programmes 47 Copying video Copying programmes 50 Photo and Music Photo 57 Music 60 Network Network Service 62 TV Anytime 62 Home Networking DLNA 63 With Other Equipment Copying the HD Video AVCHD 66 Other func...

Page 5: ...id subjecting to vibration and shock Even after the unit is switched to standby mode the HDD continues operating for a short time The registration of the USB HDD may be cancelled in the process of repairing this unit You can use the USB HDD again by re registering but all recorded content already on the USB HDD will be lost In such cases the recorded content data cannot be recovered This unit may ...

Page 6: ... Open close disc tray 7 Standby on switch Í I Touch to switch the unit from on to standby mode or vice versa In standby mode the unit is still consuming a small amount of power These icons work just by touching the icons Do not place any objects on or around the icons When inserting the media ensure that it is facing the right way up About SD card USB device While writing to reading from the media...

Page 7: ...tor 8 Remote control signal indicator 9 Disc indicator Recording indicator REC lights up while recording is in progress 1 flashes when the first timer recording standby is activated or recording is paused and lights up while recording is in progress In the same way as 1 2 lights up or flashes for the second recording Rear 1 AC IN terminal 10 2 Cooling fan 3 USB port DC 5 V 500 mA This port support...

Page 8: ...41 10s Skip approx 10 seconds backward 60s Skip approx 1 minute forward 6 Basic operations for recording and play REWIND LIVE TV PAUSE LIVE TV 24 7 Show Information 22 36 40 8 Selection OK Frame by frame 41 9 Show Video Menu Top Menu Pop up Menu 35 41 Show OPTION menu 44 47 58 Colour buttons red green yellow blue Use in accordance with instruction on the screen Select audio 22 41 To delete unwante...

Page 9: ...t in 4K HDR format a TV that supports HDCP2 2 4K 50p 60p 4 4 4 and HDR signal is necessary To enjoy Ultra HD Blu ray Disc featured with High Dynamic Range HDR If you see a message about HDR compatible issue while an Ultra HD Blu ray Disc is played back please check your TV settings as follows An example of the message This player is not connected to a HDR compatible TV 1 If you are using a Panason...

Page 10: ...ell Network connection 12 Network setting 14 Antenna connections Enjoying video and audio with a 4K compatible TV VHF UHF RF IN This unit s rear panel Household mains socket AC 220 to 240 V 50 Hz AC mains lead supplied Connect only after all other connections are complete To the Aerial Aerial cable RF coaxial cable supplied HDMI This unit s rear panel HDMI cable 18 Gbps ...

Page 11: ...plifier receiver that does not display ARC on the HDMI terminal it is necessary to connect the TV and the amplifier receiver with a digital audio cable to enjoy the TV audio on the amplifier receiver Enjoying 4K or 3D video by connecting a non 4K compatible amplifier Enjoying audio with an amplifier connected to the COAXIAL terminal To enjoy audio with an amplifier connected to the COAXIAL termina...

Page 12: ...tion may take some time e g 4 Clock is set automatically If the clock setting screen appears set the time manually 80 Clock 5 Set the connection setting for the 4K TV When connected to a 4K 50p or 60p compatible TV connection setting to 4K TV below is displayed The screen above does not appear for a non 4K compatible TV Proceed to Step 6 1 Press OK to start the setting A black screen appears for a...

Page 13: ...nnecting this unit to a non 4K compatible TV and completing Easy Setting set 4K 50p 60p Output to 4K 50p 60p 4 4 4 or 4K 50p 60p 4 2 0 76 4K 50p 60p Output Is this message displayed correctly OK RETURN Yes No 4K 50p 60p Output Connection check is finished Cannot connect with 4K Please check if the HDMI connected device and cable are compatible with 4K Move on to the next setting Select Yes for the...

Page 14: ...press OK If your Network name is not displayed search again by pressing the red button on the remote control Stealth SSID 2 will not be displayed Enter manually by using Wireless Settings 77 If your wireless network is encrypted Encryption Key Input Screen will be displayed Input the encryption key of your network WPS PUSH button If your Wireless router supports WPS PUSH button you can easily perf...

Page 15: ...eless network environment wireless networks SSID for which you do not have usage rights may be displayed however using these networks may be regarded as illegal access After performing network settings on this unit the settings encryption level etc of the Wireless router might change When you have trouble getting online on your PC perform the network settings on your PC in accordance with the sett...

Page 16: ... 3D photo AAC ALAC DSD FLAC MP3 WAV WMA External hard disk drive USB HDD 19 USB_HDD Video 1 AVCHD AVCHD 3D 2 3 MKV MP4 MPEG2 JPEG MPO 3D photo AAC ALAC DSD FLAC MP3 WAV WMA Ultra HD Blu ray BD V Video BD Video BD RE BD RE DL BD RE Video AVCHD AVCHD 3D 2 JPEG MPO 3D photo BD R BD R DL BD R Video AVCHD AVCHD 3D 2 JPEG MPO 3D photo MKV DVD Video 4 DVD V Video DVD RAM RAM Video JPEG MPO 3D photo AVCHD...

Page 17: ...to AAC ALAC DSD FLAC MP3 WAV WMA RW RW Video AVCHD 2 Audio CD CD DA CD Music CD including CD R RW MKV JPEG MPO 3D photo AAC ALAC FLAC MP3 WAV WMA SD Cards SD MP4 MPEG2 JPEG MPO 3D photo AVCHD AVCHD 3D 2 USB memory USB AVCHD AVCHD 3D 2 3 MKV MP4 MPEG2 JPEG MPO 3D photo AAC ALAC DSD FLAC MP3 WAV WMA 1 It cannot be recorded directly Only compatible with copying from the built in HDD 2 Recorded with A...

Page 18: ...vels 1 TS only 2 Unsupported for contents with HEVC video codec The video file and subtitle text files are inside the same folder and the file names are the same except for the file extensions Some files may not be played back even if they have these extensions Information about contents Media Maximum programmes HDD 3000 BD RE BD R 200 DVD RAM DVD R DVD RW 99 R RW 49 Media Maximum programmes HDD 3...

Page 19: ...d in FAT12 FAT16 FAT32 or NTFS file system The USB device over 2 TB is not usable The USB port on the rear of the unit supports USB 2 0 High Speed and the USB port on the front supports to USB 3 0 Super Speed This unit does not recognise USB HDDs other than those in which the size of one sector is 512 bytes or 4096 bytes For details consult the dealer of your USB HDD This unit supports USB mass st...

Page 20: ...8 cm disc Only playback or copy to the HDD is possible Discs that cannot be played DVD RAM in a cartridge 2 6 and 5 2 GB DVD RAM 12 cm DVD Audio Super Video CD Super Audio CD Video CD Operation and sound quality of CDs that do not conform to CD DA specifications copy control CDs etc cannot be guaranteed Notes for the SD cards Compatible SD card SD Memory Card from 8 MB to 2 GB FAT12 and FAT16 form...

Page 21: ...AVCHD 35 Video MP4 MKV 38 Photo 57 Music 60 Home Networking DLNA allows you to watch the contents and broadcasts This unit can be used both as Server and Client Miracast 65 DLNA Client 63 Media Renderer 64 Wi Fi Direct 65 You can change the unit s settings of Digital TV Tuning Sound Display Connection Network etc in the menu Basic Settings 71 HDMI Connection Settings 76 TV Anytime 62 Wallpaper Per...

Page 22: ...ormation screen Press EXIT To change Category Press the blue button To register your favourite channels 71 To switch between the current programme and the next programme Press 2 1 To switch to another channel Press 3 4 then press OK When appears in Channel Information Press STTL Press again to hide subtitle When appears in Channel Information 1 Press TEXT 2 Use 3 4 2 1 number buttons or colour but...

Page 23: ...GUIDE to switch between Landscape view and Portrait view Page up down Press CH W X To view a programme list for another day Press the green button Previous or the yellow button Next To see programme information Press STATUS To set a timer Recording using the TV Guide System 27 To find the programmes 28 Selection of channel is made easy by creating a Favourite of the channels you watch often 71 Fav...

Page 24: ...the display information Press EXIT Temporary save stops in the following cases When switching to other channels or other screen When the unit has started recording using all tuners When performing PAUSE LIVE TV or REWIND LIVE TV for more than 8 hours This may vary depending on the HDD free space These functions do not work in the following cases When the clock is not set When all tuners are being ...

Page 25: ...ode after recording in DR mode 48 Picture Quality Change To check to see if the recording mode change is finished 49 To cancel the recording mode change 49 Programmes in the original picture quality DR mode will be deleted after their recording mode is changed It takes about the same amount of time as recording to change the recording mode When the HDD does not have enough remaining space the reco...

Page 26: ... VIDEO MENU red is displayed on the recording programme 2 Select the programme then press OK Operation during Recording To check the recording programme To stop recording When recording two programmes Following screen appears 1 Select the programme then press OK 2 Select Yes then press OK REC2 HDD REC1 OTR AUTO 5 Recording programme displayed on the TV Recording programme not displayed on the TV S...

Page 27: ...et the start and finish time to make the timer recording work successfully 73 Timer Record Start Buffer Timer Record Stop Buffer If the screen for selecting single or series timer recording appears To edit the timer recording on the TV Guide screen 1 Select the programme to edit then press the red button 2 Select Timer Rec Edit then press OK 3 Go to step 3 on page 28 Manually programming timer rec...

Page 28: ...roadcaster e g delayed start The Guide Link function may not work correctly if you manually change the start time or the stop time over 10 minutes To use this function set Guide Link to ON 29 If the same episode has already been set for series timer recording at a different time or on another channel Repeat programmes Series Timer Rec will not be selectable Programmes recorded using Series Timer R...

Page 29: ...ress the yellow button 4 Go to step 3 on page 28 Manually programming timer recording Timer recording options Timer Recording TUE 03 01 2017 XXXXX 154 04 DR Channel 1 WED 04 01 Day Date Stop XXXXX XXXXX Start Programme Name DR XP Mode OFF Subtitles Time Remaining Guide Link OFF Date e g Timer recording from Channel Information Notes on timer recording When you programme successive timer recordings...

Page 30: ...ete Total 3 32 Timer Recording 154 04 DR Time Remaining TUE 03 01 2017 XXXXX Info Keyword List Resolve overlap New Timer Programme MON 13 01 MON 13 01 XXXX XXXX XXXX XXXX XXXX XXXX XXXX XXXX MON 13 01 TUE 07 01 DR HG DR DR OK OK Guide Guide e g Screen icons Red Timer recording standby is activated Grey Timer recording standby is deactivated Red Currently recording programme A part or all of the pr...

Page 31: ...ecify Search Conditions and Recording Settings To activate select Set Recording Settings Search Conditions e g Keyword Recording conditions Search Conditions Keyword 1 16 Input the keyword to be registered Refer to Entering text 70 Default keyword is the programme title selected on the TV Guide screen If the programme title includes its episode number etc delete the number before registering the t...

Page 32: ... standby mode Press the yellow button F Blue Recording has already been set with a different Keyword F Red Timer recording standby is activated Priority order of Keyword Recording 1 A programme that is already being recorded 2 Timer Recording 3 Keyword Recording programmes will be recorded in ascending order from keyword number 1 to 16 4 A programme that starts first Programmes set for timer recor...

Page 33: ... Limitation information Registering of a USB HDD will format the USB HDD and all the content already recorded will be deleted Up to eight USB HDDs can be registered on this unit If you have already registered eight USB HDDs it will be necessary to delete one or more of them before registering a new USB HDD Registered USB HDDs cannot be used with devices other than this unit Certain non recommended...

Page 34: ...ars Press OK 7 The confirmation screen appears Press OK To cancel all USB HDD registrations 73 It is not possible to play back the content on the USB HDD whose registration has been cancelled You can check the registration number of the USB HDD on the Video Menu 35 Disconnecting without following this procedure may result in the loss of recorded content from the USB HDD or the internal HDD 1 Press...

Page 35: ... Select Video AVCHD then press OK The AVCHD tab appears on the Video Menu screen right To play video files Select Video MP4 MKV then press OK The video list screen appears 38 4 Select the programme then press OK Playing back video Contents on HDD Recorded programmes can be played OK RETURN Video AVCHD Recorded Programmes Video MP4 MKV Photo Music Video Menu screen e g e g Time Remaining HD 154 04 ...

Page 36: ...m 76 Radio programme 3D contents Recorded in 1080 50p contents Recorded in 1080 60p contents Programme is restricted by Child Lock Parental Rating 72 Programme has been recorded in Series timer recording Programme has been recorded in Series timer recording and has not yet been played Keyword recording programme which has not yet been played Grouped Keyword recording programmes Keyword recording p...

Page 37: ...ION in step 3 above 2 Select Remove from Keyword Record then press OK 3 Select Remove then press OK If you select keywords before copying you can copy all the programmes contain the keywords For information on copy operations refer to Copying programmes 50 Editing the grouped programmes Playback from Chapter View Press OK to start playing from the selected chapter Selected chapter can be edited vi...

Page 38: ...s recorded in each media Video list screen Screen icons Folder Video files Video files 4K Copy to SD card is not available Move to the parent folder Parent Folder Video Menu Video Folder 01 Folder 02 video01 mpeg video02 mpeg video03 mpeg video04 mpeg HDD Page 0001 0003 Select Copy Delete Play RETURN Page Up Page Down Play 08 02 2013 XXXXX 08 02 2012 XXXXX 08 02 2011 XXXXX 08 02 2010 XXXXX For dat...

Page 39: ...s OK 6 Press OK You can restrict Internet access when BD Live functions are used 72 BD Live When Pure Sound mode is set to On this unit cannot use BD Live functions 72 Video list screen Video Menu screen e g BD RE Parent Folder Video Menu Video Folder 01 Folder 02 video01 mpeg video02 mpeg video03 mpeg video04 mpeg Page 0001 0003 Select Copy Play RETURN Page Up Page Down Play 08 02 2013 XXXXX 08 0...

Page 40: ...Press 1 a1 3 to restart from the stopped position Discs Only previous stopped position is memorised The position may be cleared if the tray is opened or the unit is switched to standby mode Press and hold 1 a1 3 Press again to return to normal speed MKV MP4 and MPEG2 Quick View is not effective Quick View is not effective when playing back the DVD RW disc Quick View may not work when recording in ...

Page 41: ...ramme But the programme in the grouped programmes will be skipped 36 Press AUDIO It will switch depending on the contents recorded every time it is pressed 1 Press STTL 2 Press OK 3 Select On or Off then press OK If you want to switch the subtitle language select it in the Basic Operation menu 44 BD V DVD V MKV Display with Subtitle Settings in the Basic Operation menu 44 Slow motion The speed inc...

Page 42: ...ort 4K resolution this unit applies Dynamic Range Conversion 2 to HDR signals to output them in 2K resolution When connected to a TV or terminal that does not support HDR this unit applies Dynamic Range Conversion 2 to HDR signals to output them In addition depending on the disc it may not be possible to output content in 2K resolution or perform playback correctly 1 HDCP is a technology designed ...

Page 43: ...d with digital cameras and other 4K compatible devices to the HDD of this unit and play them back Compatible 4K content MP4 MKV and MPEG2 TS 4K 50p and 60p bit rate up to 100 Mbps resolution up to 3840k2160 50p 60p 4096k2160 50p 60p JPEG MPO resolution 3840k2160 Photos with a resolution greater than 3840k2160 are played back in 3840k2160 Preparation Connect a 4K compatible TV to this unit 10 4K vi...

Page 44: ...Basic Operation Soundtrack Show or change the soundtrack Audio Selection Switch in the case of multiple audio Audio Channel Change audio LR L R during playback Subtitles Subtitle Settings Turn the subtitle on off and change the language depending on the media Subtitles Subtitle Style Subtitle Position Subtitle Luminance Subtitle Language Select the subtitle language in the case of multiple languag...

Page 45: ...icture Type Sharpness Adjustment Noise Reduction Luminance Colour Adjustment Bandwidth Limitation Normal Dynamic Range Conversion Adjustment Reset to Default Picture Settings 24p 25p Conversion Off Progressive Auto Set 1 ture Type arpness Adjustment se Reduction minance Colour Adjustment ndwidth Limitation Norma a a Norma a a Norma a Normal l namic Range Conversion Adjustment set to Default Pictur...

Page 46: ...ty preferences DSD LPF Setting Select the settings that suit your sound quality preferences Dialogue Enhancer The volume of the centre channel is raised to make dialogue easier to hear High Clarity Sound Stop processing signals that affect the audio quality or turn off the front panel display to make the audio quality clearer Select whether or not to output images This setting is able to switch by...

Page 47: ...idental deletion 1 Select Set up Protection or Cancel Protection in Edit then press OK 2 Select Yes then press OK appears when setting the protection HDD USB_HDD BD RE BD R RAM 1 Select Partial Delete in Edit then press OK 2 Press OK at the start point and end point to delete You can find the desired point by using play search etc 40 3 Select Continue then press OK Select Next then press OK to del...

Page 48: ...he picture quality change options then press OK Picture Quality 19 USB_HDD You cannot select XP SP and LP mode Subtitles Automatic Subtitles will be recorded if they are included in the programme Off Subtitle will not be recorded Timing Now A picture quality change starts immediately after step 6 Time recordings cannot be made while a picture quality change is in progress During standby A picture ...

Page 49: ...start a new chapter while viewing the programme 1 Press the green button 2 Press OK at the point you want to divide Repeat this step 3 Press RETURN to go to Chapter View screen To delete the chapter 1 Select the chapter then press the red button Multiple selection 47 2 Select Delete then press OK To combine chapters Delete chapter mark 1 Select the chapter then press OPTION 2 Select Combine Chapte...

Page 50: ...ess the yellow button A check mark is displayed Repeat this step Press the yellow button again to cancel 5 Press the blue button The copy direction selection screen is displayed Select the copying direction then press OK 6 Select Yes then press OK If you select No you can change the selection right To change the selection 7 Set other settings then press OK 51 Setting the copying options 8 Select Y...

Page 51: ...ons Automatic Standby after Copy On This unit is turned to standby mode when it is not operated for approximately 5 minutes after completing copy Subtitles Automatic Subtitles will be recorded if they are included in the programme Finalise On DVD R DVD RW R The discs become play only and you can also play them on other DVD equipment Create Top Menu On RW You can play the disc on other DVD equipmen...

Page 52: ...pt HDD USB_HDD 1 Insert a disc The menu screen appears 38 2 Select Copy then press OK Copy HDD Disc 1 2 3 Source Destination Cancel All Copy Direction Picture Quality Create List Start Copying HDD Disc Keep Select the copy direction RETURN 0 Information of the copy destination BD RE Copy restricted programmes can be copied on to disc e g HDD The programmes will be copied in the order of the copyin...

Page 53: ...e step 2 Repeat this step to select programmes Move Change the order of items on the copying list Select the programme to move before step 2 Select the destination then press OK The amount of time needed for a picture quality change is the same as the length of the programme to be copied About other screen icons 36 Editing the copying list Copy 1 2 3 Cancel All Copy Direction Picture Quality Creat...

Page 54: ...n progressive It may not display correctly in 3D when a copied 3D programme is played back In such a case change the Signal Format during the playback of the programme 43 3D information may not be copied If you want to copy 3D AVCHD video to the disc in 3D use BD R or BD RE and must use Copy Keep Picture Quality The position of the chapter might shift slightly Maximum number of chapters on the dis...

Page 55: ...playback will be copied Select the multiple audio with Audio Selection in the Basic Operation menu 44 Select the subtitles with Subtitle Language in the Basic Operation menu 44 2 Press OPTION 3 Select Copy Programme Playing then press OK 4 Select Start then press OK Copying will start from the beginning of the programme regardless of the playing position To stop copying Press and hold RETURN for 3...

Page 56: ... video may not be copied correctly 1 On the video list screen Select the file or folder Multiple selection 50 2 Press the blue button 3 Select Yes then press OK To stop copying Press and hold RETURN for 3 seconds About the screen icons Refer to Screen icons 38 All files in the folder will be copied The names of folders files cannot be changed after they are copied to the HDD We recommend that you ...

Page 57: ...58 HDD To display or exit the Calendar screen Press Playing photos 1 HDD 1 Press FUNCTION MENU 2 Select Photo in Contents on HDD then press OK Except HDD 1 Insert or connect the media The menu screen appears 38 2 Select View Photos then press OK Photo play option Graphic Display Level You can change the 3D position of the screen display etc during the 3D photo playback Photo Menu Start Slideshow Y...

Page 58: ...n is not available during the 3D photo playback Slideshow OK RETURN Start Slideshow Interval Transition Effect Repeat Play Normal Fade On Music Selection No background music Background Music No List Shuffle BGM Off Editing photos 1 On the Photo Menu screen To edit the folder Select the folder To edit the photo 1 Select the folder then press OK 2 Select the photo to edit To select multiple folders ...

Page 59: ...DVD R R CD HDD SD USB_HDD SD USB HDD BD RE BD R RAM 1 On the Photo Menu screen To copy the folder Select the folder then press the blue button To copy the photo 1 Select the folder then press OK 2 Select the photos to copy then press the blue button To select multiple folders or photos Press the yellow button when selecting the folder or photo A check mark is displayed Repeat this step Press the y...

Page 60: ...sic in Contents on HDD then press OK The music list screen appears 3 Go to step 3 left Playing music file on the media Playing music CD CD DA Music Menu No Track Name Play Time Track List 01 02 03 04 05 CD 3 43 0 02 Track 1 e g Playing music file on the media 2 Select Play Copy Music then press OK The music list screen appears 3 Select the item then press OK Repeat this step if necessary Playback ...

Page 61: ...n press the yellow button A check mark is displayed Repeat this step Press the yellow button again to cancel While copying no other operations can be performed Timer recordings will not proceed All files in the folder will be copied Up to 1000 files can be copied at once HDD 1 On the music list screen Select the file or folder Multiple selection above 2 Press the red button 3 Select Yes then press...

Page 62: ...hen the audio is distorted For information about other disclaimers 90 Disclaimer TV Anytime Operations such as the ones below can be performed from anywhere with a smartphone or tablet installed with Media Center App Setting a recording Watching TV with this unit s tuner Playing back programmes recorded on this unit Use the Media Center App to complete user registration to use these functions For ...

Page 63: ... unit 2 Select the item then press OK The programmes with access restriction e g copy restriction signals sent from broadcasters are not available for this function If video frames are dropped change the following settings Conversion Setting for DLNA 78 Resolution Setting for DLNA 78 Files not on the HDD cannot be played back Playing back 3D video recorded on this unit may not work properly 3D pho...

Page 64: ... Operate the Digital Media Controller compatible equipment To exit from Home Network Media Renderer screen Press RETURN Playable contents Container Video codec Audio codec Example of file extension XP SP LP FR 1 MPEG2 Dolby Digital Linear PCM DR HG HX HE HL HM 1 MPEG2 H 264 HEVC MPEG HE AAC Dolby Digital Container Video codec Audio codec Example of file extension AVCHD 1 H 264 Dolby Digital mts MP...

Page 65: ...reen of your TV Compatible with AndroidTM device ver 4 2 and above and Miracast certified For information on whether the smartphone etc supports Miracast contact the manufacturer of the device 1 Press FUNCTION MENU 2 Select Miracast in Home Network then press OK 3 Operate the Miracast compatible equipment To exit from Miracast Press EXIT Using Home Networking DLNA with Wi Fi Direct 5 When selected...

Page 66: ...t Copy to HDD or Copy to Blu ray Disc then press OK 4 Select a programme stored on the video camera then press the yellow button A check mark is displayed Repeat this step Press the yellow button again to cancel 5 Press OK 6 Select Start then press OK Videos recorded in a signal format different from the TV System setting of the unit cannot be copied to the unit To stop copying Press and hold RETU...

Page 67: ...ollowing operations make it possible to keep the power of the unit on and to play music continuously When the unit is directly connected to an amplifier receiver 1 While playing music Press OPTION 2 Select TV Power Off then press OK Sound may be discontinued for several seconds when the power to the TV is turned off Other functions Easy control only with Panasonic TV s remote control You can opera...

Page 68: ...ideo AVCHD to DVD R or DVD R DL 56 BD RE BD R RAM Select Yes then press OK e g To release the protection Repeat the same steps The screen icon will be switched to Off You cannot operate the unit until the update is complete Don t remove the AC mains lead during the update Removing the AC mains lead while the update is in progress may damage the unit Update software firmware of this unit To update ...

Page 69: ...n displayed on the confirmation screen approximately four times longer You cannot finalise discs recorded on other manufacturer s equipment DVD R DVD RW R If you finalise discs recorded on Panasonic equipment other than this unit the background selected as Top Menu may not be displayed Discs finalised on this unit may not be playable on other players due to the condition of the recording Delete al...

Page 70: ...sappears Preparation Show the Enter Programme Name screen etc 1 Select a character then press OK Repeat this step to enter other characters 2 Press Finish Writing appears then the screen returns to the previous screen and so on To end partway Press RETURN Text is not added The maximum number of characters depends on the media Create Top Menu HOLD function Entering text Red Enter Symbols Green Ente...

Page 71: ...ng HDD Disc USB HDD Picture Sound Display Connection Network Others To delete channels Select the channel in the Favourites column then press OK Yellow Delete all channels To change the name of the Favourites list 1 Press the red button in the Favourites column 2 Press 3 4 2 1 to select a character then press OK Repeat this step to enter other characters Red Delete a character Blue Delete all char...

Page 72: ...hod of 3D compatible video software Soundtrack Select the audio language Enter a code with the number buttons when you select Other 89 Language code list Subtitles Select the language for subtitle Enter a code with the number buttons when you select Other 89 Language code list Menu Select the language for disc menus Enter a code with the number buttons when you select Other 89 Language code list B...

Page 73: ... for 3 seconds to show the following settings Delete all programmes Delete all recorded programmes and AVCHD on the built in HDD Delete does not work if one or more programmes are protected Delete all videos MP4 MKV Delete all videos MP4 MKV on the built in HDD Delete all photos Delete all photos on the built in HDD Delete all music Delete all Music on the built in HDD Format HDD Formatting delete...

Page 74: ... DVD R DVD RW R and RW Digital Audio Output PCM Down Conversion Check the sampling frequencies supported by the coaxial input of the connected device If the device does not support certain sampling frequencies set the appropriate frequency setting On 48kHz The maximum sampling frequency of signals is limited to 48 kHz Choose if the connected device does not support signals with a sampling frequenc...

Page 75: ... Select whether or not to turn on off the front panel display Set an option for video playback and audio playback Audio Delay Mis sync between the video and audio is corrected by delaying the audio output Audio Type for Digital Broadcast If the programme has more than one track Dolby Digital etc you can set priorities This setting will give effect in the following conditions The default setting wh...

Page 76: ...Images will not be output correctly with an HDMI cable that does not support 18 Gbps To connect to a TV that supports 4K 50p 60p 4 4 4 8 bit or 4K 50p 60p 4 2 2 12 bit select 4K 50p 60p 4 4 4 To connect to a TV that supports 4K 50p 60p 4 2 0 8 bit select 4K 50p 60p 4 2 0 24p Output When playing BD Video recorded in 24 frames this unit displays each frame at 1 24 second intervals the same interval ...

Page 77: ... will automatically be selected only when the TV supports Contents Type Flag Network Easy Network Setting Press OK to start Easy Network Setting 14 Network Settings LAN Connection Mode Select the LAN connection method When not using wireless LAN when turning it off select Wired Wireless Settings This allows to set and check the connection settings of the Wireless router Search for wireless network...

Page 78: ...password for this unit is initialized 62 When you initialize the device password you will not be able to use TV Anytime To use the TV Anytime again you must re register to the service Home Network Settings You can set the DLNA Server function 63 Home Network function You can switch between enable disable of the DLNA Server and DMR Media Renderer function If On is selected the setting for Quick Sta...

Page 79: ...t to standby mode automatically When the unit is not operating the unit will be turned to standby mode once the set time has passed Automatic Standby after OTR On This unit is turned to standby mode when it is not operated for approximately 5 minutes after completing Automatic Stop or Recording Time 25 Automatic Standby after Copy On This unit is turned to standby mode when it is not operated for ...

Page 80: ...ons 2 Enter the new 4 digit PIN with the number buttons Make a note of PIN in case you forget it e g 3 Press OK OK Remember the PIN PIN Entry 0 0 0 0 System Update Software Update in Standby When you set this unit to standby mode software firmware updates 68 are downloaded automatically at the time you have specified Software Update Now Internet Refer to Software Firmware Update 68 Software Licenc...

Page 81: ...econds when it is turned off 2 Press and hold OK the yellow button and the blue button at the same time for more than 5 seconds 00 RET is displayed on the front panel display 3 Repeatedly press 1 right until 06 FTO is displayed on the front panel display 4 Press OK The remote control does not work The remote control and main unit are using different codes Change the code on the remote control Remo...

Page 82: ...onds Set the item again When Dolby Digital Plus Dolby TrueHD and DTS HD audio are not output properly select Yes in Default Settings and make proper settings 80 The connected TVs are changed Reset the setting as follows 1 While the unit is on press and hold OK the yellow button and the blue button on the remote control at the same time for more than 5 seconds 00 RET is displayed on the front panel...

Page 83: ...udio Output to On 77 Cannot change audio channel You cannot change the audio channel if Digital Audio Output is set to Bitstream 74 There is no sound coming out Refer to Connection 9 11 to check the audio output settings suited to the connections of your device Cannot record Cannot copy Some broadcasts are copyright protected You cannot record to the disc by pressing the REC or timer recording The...

Page 84: ... or inserted press and hold OK and the yellow and blue buttons simultaneously for more than 5 seconds 00 RET is displayed on the front panel display 2 Repeatedly press 1 right until 03 VL is displayed on the front panel display 3 Press OK INIT is displayed on the front panel display Image for the Quick View is not smooth Image may not be played back smoothly in case of high definition contents Can...

Page 85: ...g playback Use 802 11n 2 4 GHz or 5 GHz Wireless router Simultaneous use with a microwave cordless telephone etc at 2 4 GHz may result in connection interruptions or other problems On the Wireless Settings screen 77 the continuous lighting of at least four Reception indicators is the target for a stable connection If three or fewer indicators are lit or the connection is being interrupted change t...

Page 86: ...rding starts 68 The media is not supported The software firmware is being updated You cannot operate the unit until the update is complete 68 An error has occurred in the antenna s power supply Check to see if the antenna s cable core and braided wire shield are in contact with each other The unit is hot The unit switches to standby for safety reasons Wait for about 30 minutes until the message di...

Page 87: ...I output 19 pin type A 1 pc Internal HDD capacity 2 TB TV system Tuner System DVB T Country Australia Channel Coverage VHF 6 12 UHF 27 69 Other terminals USB Port Type A Front 1 pc DC 5 V Max 900 mA Super Speed USB USB 3 0 Rear 1 pc DC 5 V Max 500 mA High Speed USB USB 2 0 SD Card Slot 1 pc LAN Ethernet Port 1 pc 10BASE T 100BASE TX Wireless LAN Standard compliance IEEE802 11a b g n Frequency rang...

Page 88: ...uality 282 hours 3 hours 20 min 6 hours 40 min DR SD quality 529 hours 6 hours 30 min 13 hours Recording time of DR mode may vary depending on the bit rate of broadcasting High Definition HD quality estimated bit rate is 15 Mbps Standard Definition SD quality estimated bit rate is 8 Mbps Recording Mode picture quality HDD BD RE BD R 2 TB Single Layer 25 GB Dual Layer 50 GB HG 315 hours 4 hours 8 h...

Page 89: ...7282 Czech 6783 Danish 6865 Dutch 7876 English 6978 Esperanto 6979 Estonian 6984 Faroese 7079 Fiji 7074 Finnish 7073 French 7082 Frisian 7089 Galician 7176 Georgian 7565 German 6869 Greek 6976 Greenlandic 7576 Guarani 7178 Gujarati 7185 Hausa 7265 Hebrew 7387 Hindi 7273 Hungarian 7285 Icelandic 7383 Indonesian 7378 Interlingua 7365 Irish 7165 Italian 7384 Japanese 7465 Javanese 7487 Kannada 7578 K...

Page 90: ...of content on this or any other device may require permission from the owner of the copyright or other such rights in that content Panasonic has no authority to and does not grant you that permission and explicitly disclaims any right ability or intention to obtain such permission on your behalf It is your responsibility to ensure that your use of this or any other device complies with applicable ...

Page 91: ...ncode video in compliance with the AVC Standard AVC Video and or ii decode AVC Video that was encoded by a consumer engaged in a personal activity and or was obtained from a video provider licensed to provide AVC Video No license is granted or shall be implied for any other use Additional information may be obtained from MPEG LA L L C See http www mpegla com This product is licensed under the VC 1...

Page 92: ...Ready Final Product Labeling This product contains technology subject to certain intellectual property rights of Microsoft Use or distribution of this technology outside of this product is prohibited without the appropriate license s from Microsoft MS PlayReady End User Notices Content owners use Microsoft PlayReady content access technology to protect their intellectual property including copyrig...

Page 93: ...or In addition to your rights under this warranty Panasonic products come with consumer guarantees that cannot be excluded under the Australian Consumer Law If there is a major failure with the product you can reject the product and elect to have a refund or to have the product replaced or if you wish you may elect to keep the goods and be compensated for the drop in value of the goods You are als...

Page 94: ... DVD Video 38 E Easy setting 13 Entering text 70 F Favourites 71 Finalise 69 Format Disc 69 HDD 73 SD Card 69 USB HDD 73 FUNCTION MENU 21 H HDD Format 73 Media information 16 HDR 9 76 Home Networking DLNA 63 78 Client 63 Media Renderer 64 Server 63 78 K Keyword Recording 31 37 L Language code list 89 Lens cleaner 5 M Manual Tuning 71 Media Renderer 64 Menu screen 38 Miracast 65 MKV 38 MP4 38 Music...

Page 95: ...Top Menu 70 Create Top Menu 70 Troubleshooting guide 81 Messages 86 Tuning Channel List 71 Manual Tuning 71 Parental Rating 72 Signal Condition 72 TV Anytime 62 TV Guide Operation 23 Timer recording 27 TV System 76 U Ultra HD Blu ray 38 42 USB HDD External HDD Cancellation of all USB HDD Registrations 73 Disconnection 34 73 Format 73 Media information 16 19 Registration 34 73 USB memories Media in...

Page 96: ...ls are only valid in the European Union and countries with recycle systems If you wish to discard this product please contact your local authorities or dealer and ask for the correct method of disposal Inside of product Panasonic Corporation http www panasonic com p TQBS0146 F0717YT0 Panasonic Corporation 2017 ...

Reviews: