CMS EZ BELLS, Operating Manual
Introducing CMS EZ BELLS - the perfect solution for simplified bell management. With our comprehensive Operating Manual, you can effortlessly set up and control your bells. Download this user-friendly manual for free at manualshive.com and discover a hassle-free way to manage your bell system efficiently.
Share
Download


Reviews:
No comments
Related manuals for EZ BELLS

UBD-M9000
Brand: Samsung Pages: 21

UBD-M7500
Brand: Samsung Pages: 81

BD-J5500
Brand: Samsung Pages: 48

BD-D5250C
Brand: Samsung Pages: 3

MWD200FG
Brand: Magnavox Pages: 38

CSD-SL15
Brand: Aiwa Pages: 8

C-1D
Brand: Teac Pages: 13

Iaudio M3
Brand: Iaudio Pages: 209

PerfectWave SACD Transport
Brand: PS Audio Pages: 24

PD707B
Brand: Olin Pages: 26

Trio TCH843
Brand: Mach Pages: 16

NP-H750
Brand: Teac Pages: 4

NS-WBRDVD3
Brand: Insignia Pages: 40

JD-VD143
Brand: jWIN Pages: 16

O!PLAY BDS-500
Brand: Asus Pages: 53
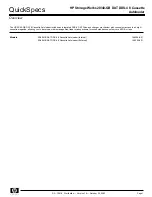
StorageWorks 20/40-GB DAT DDS-4
Brand: HP Pages: 5

Stremium WAS6050
Brand: Philips Pages: 3

Streamium WAS6050/12
Brand: Philips Pages: 3


