background image

Dear customer 

Thank you for purchasing this product. 
For optimum performance and safety, please read these instructions carefully.

Before connecting, operating or adjusting this product, please read the instructions completely.
Please keep this manual for future reference.

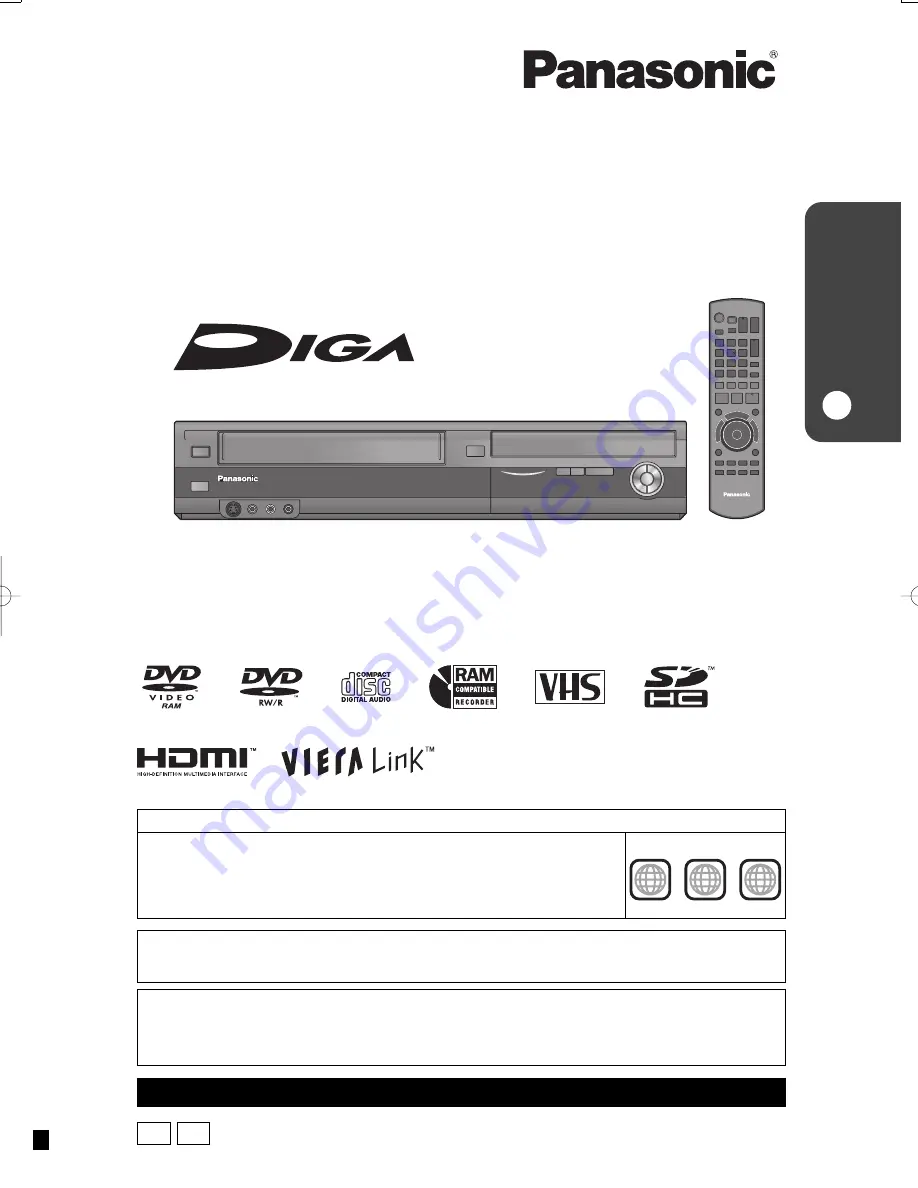
Operating Instructions

DVD Recorder

Model No. 

DMR-EZ485V

DMR-EZ48V

Region number supported by this unit

Region numbers are allocated to DVD players and DVD-Video according to where they are sold.

The region number of this unit is “

1

”.

The unit will play DVDs marked with labels containing “

1

” or “

ALL

”.

Example: 

1

ALL

2

4

1

[For\U.S.A.]only]

The warranty can be found on page 94.

[For\Canada]only]

The warranty can be found on page 95.

La referencia rápida en español se encuentra en la página 96−99.

P

PC

RQT9056-P

Basic Operations

P15

If you have any questions contact

In the U.S.A.: 1-800-211-PANA(7262)
In Canada: 

1-800-561-5505

DMR-EZ48VP.indb   1

DMR-EZ48VP.indb   1

2007/12/13   20:42:19

2007/12/13   20:42:19

Summary of Contents for DMR-EZ485VK

Page 1: ...on number supported by this unit Region numbers are allocated to DVD players and DVD Video according to where they are sold The region number of this unit is 1 The unit will play DVDs marked with labels containing 1 or ALL Example 1 ALL 2 4 1 For U S A only The warranty can be found on page 94 For Canada only The warranty can be found on page 95 La referencia rápida en español se encuentra en la p...

Page 2: ...e grounding system of the building as close to the point of cable entry as practical The socket outlet shall be installed near the equipment and easily accessible The mains plug of the power supply cord shall remain readily operable To completely disconnect this apparatus from the AC Mains disconnect the power supply cord plug from AC receptacle THE FOLLOWING APPLIES ONLY IN THE U S A FCC Note Thi...

Page 3: ...ust Cigarette smoke also can cause malfunction or breakdown Maintenance To clean the unit Wipe with a soft dry cloth Never use alcohol thinner or benzine to clean the unit Before using chemically treated cloth carefully read the instructions that came with the cloth To clean the DVD lens Dust and dirt may adhere to the unit s lens over time possibly making it impossible to record or play discs Use...

Page 4: ...hange or Delete Programs 27 To release the unit from recording standby Before recording starts 27 Recording from an External Device 28 Recording from a VCR etc 28 Recording from a DV Camcorder 29 Advanced Disc Playback 30 Zoom in on video 30 Menu Screens on the TV 30 Selecting Recordings to Play 30 Search 30 Skip 30 Direct Play 30 Quick View Play 1 3 31 Slow motion Play 31 Frame by Frame Viewing 3...

Page 5: ... an S Video Cable for Better Video S Video Cable not included 70 Using Component Video Cables for Better Video Component Video Cables not included 71 Using an Audio Cable for Better Sound Audio Cable not included 72 Using an Optical Digital Audio Cable for Better Sound Optical Digital Audio Cable not included 72 Using an HDMI High Definition Multimedia Interface Cable 72 SD Card and USB Memory Inf...

Page 6: ...ts during TV mode and it goes out during VCR mode You can switch the mode by using VCR TV 16 Main display section Tape indicator Progressive indicator This indicator lights up when you select 24p in Progressive 24p 51 Scheduled recording indicator 19 On When a scheduled recording program is registered and a recordable disc or tape is inserted Flashes The scheduled recording indicator flashes when ...

Page 7: ...rding mode 18 Transmission window TV and Set Top Box operations 68 Channel select TRACKING V LOCK 16 38 Input select TV IN1 IN2 DV 28 Sub channel access for digital broadcasts 16 Favorite 16 Skip 1 minute forward 31 Show scheduled recording list 19 Show FUNCTIONS window 42 Return to previous screen Select VCR TV 16 Create chapters 31 Show status messages 39 Start Flexible Recording 26 Remote Contr...

Page 8: ...O O COMPONENT VIDEO OUT DVD VHS COMMON OUT DVD PRIORITY OUT IN1 DVD VHS COMMON OUT VIDEO R AUDIO L VHF UHF RF IN AUDIO IN VIDEO IN R L 2 1 3 4 Cable from the wall or antenna signal Red White Yellow Rear of TV To a household AC outlet AC 120 V 60 Hz step step step step Rear of this unit Red White Yellow The connection diagrams represent typical installations These diagrams may not work with certain...

Page 9: ...on the rear of your TV and cable box may not appear as shown below Please read terminal labels carefully to ensure correct connections VHF UHF RF IN AUDIO IN VIDEO IN R L RF OUT RF IN VHF UHF AC IN OPTICAL VIDEO R AUDIO L PR PB DIGITAL AUDIO OUT PCM BITSTREAM S VIDEO VIDEO VIDEO R AUDIO L R AUDIO L O COMPONENT VIDEO OUT DVD VHS COMMON OUT DVD PRIORITY OUT IN1 DVD VHS COMMON OUT VIDEO R AUDIO L VID...

Page 10: ...dditional coaxial cable and audio video AV cable are required Note The terminals on the rear of yourTV and satellite receiver may not appear as shown below Please read terminal labels carefully to ensure correct connections VHF UHF RF IN AUDIO IN VIDEO IN R L AC IN OPTICAL VIDEO R AUDIO L PR PB DIGITAL AUDIO OUT PCM BITSTREAM S VIDEO VIDEO VIDEO R AUDIO L R AUDIO L O COMPONENT VIDEO OUT DVD VHS CO...

Page 11: ...Interface Cable You can enjoy high quality picture and audio by changing the audio video AV cable connection between this unit and your TV as shown on pages 8 to 10 and by doing the following Set HDMI Priority and HDMI Audio Output to On 65 66 The default setting is On Regarding HDAVI Control function When connecting with a Panasonic TV VIERA or a receiver equipped with HDAVI Control function link...

Page 12: ...s for details Turn Quick Start on On Off Quick Start Setting Quick Start Function to select On or Off then OK Does this unit get its TV signal via RF IN Example Antenna Cable TV or Cable Box connected to the unit s RF IN Yes No Automatic Clock and Channel Settings Automatic Clock and Channel Settings to select Yes or No then OK When connecting the cable from the wall cable TV or antenna to the uni...

Page 13: ...Set Clock Manually SAT AM Month Day Year Hour Minute 1 1 12 00 2000 DST Time Zone Off EST OK to change the setting Repeat steps 7 8 to change other items OK to confirm new date and time The clock starts Notes The automatic clock setting can take a few minutes The channel and clock settings apply to both DVD and VHS drives Time Zone EST Eastern Standard Time GMT 5 CST Central Standard Time GMT 6 MS...

Page 14: ...VIERA Link then OK Acquires the following information from the TV VIERA The types of transmission Channel Map Closed caption When the settings are complete the time confirmation screen is displayed Tips If you do not want to acquire the setting information from the VIERA television Press to select Set Channels without VIERA Link or Set No Channels with this unit then press OK in step 2 When connec...

Page 15: ... may cause this unit to stop operating Such USB devices cannot be used on this unit Confirm that uSb USB appears on the unit s display when a compatible USB memory is inserted while stopped If a USB memory being accessed is pulled out then the data may be damaged OPEN CLOSE to open the tray Insert a disc Press OPEN CLOSE again to close the tray Insert label up Insert a cassette The unit turns on a...

Page 16: ...or on this unit s display does not light up By pressing VCR TV again the TV indicator on this unit s display will light up and you can watch TV directly without passing the signal through this unit TV mode POWER POWER SLOW SEARCH SCHEDULE OK F U N C T I O N S TV VIDEO PAUSE STOP 3 2 1 6 5 4 9 8 7 0 RECMODE RETURN SUB MENU CM SKIP D I R E C T N A V A I G A T A A O R DISPLAY AUDIO REC DRIVE SELECT F...

Page 17: ... 37 38 for detailed information on playback of video cassette VHS Insert a cassette Play starts automatically if you insert a cassette with the accidental erasure tab removed Stopping Play Press STOP Pausing Play Press PAUSE Press again to restart play POWER DVD VHS to turn the unit on HELLO appears on the unit s display DRIVE SELECT to select the VHS drive The VHS indicator lights up on the unit ...

Page 18: ...ions to this unit Example AV input CH3 or CH4 RAM If the disc is protected release protection 52 VHS Ensure accidental erasure tab is intact Pausing Recording Press PAUSE Press again to restart recording Stopping Recording Press STOP Refer to Important Notes for Recording 23 and Advanced Recording 24 26 for detailed information on recording RAM R R DL RW V R R DL RW VHS Digital broadcasts cannot b...

Page 19: ... C T I O N S TV VIDEO PAUSE STOP 3 2 1 6 5 4 9 8 7 0 RETURN SUB MENU CM SKIP D I R E C T N A V A I G A T A A O R DISPLAY AUDIO DRIVE SELECT CHAPTER CREATE INPUT SELECT DELETE FAVORITE CH CH PLAY VOL DVD VHS VCR TV TRACKING V LOCK SKIP INDEX REW FF TIME SLIP JET REW RESET OK Channel No Date On Check Off Drive Mode ScheduleList DVD VHS 5 4 Fri 6 11 PM Remaining Recording Time 0 33 XP 2 00 SP OK New ...

Page 20: ...ying in the middle However you cannot stop finalizing after it has started When copying multilingual broadcast program R R DL RW V R R DL RW Before starting copy try playing the VHS and pressing AUDIO and then select audio track that you want to copy Audio can also be switched during copy Copying Recordings PLAY to copy without finalizing If you press STOP you can cancel copying On the main unit W...

Page 21: ...FUNCTIONS 2 Press to select Copy then press OK COPY Navigator screen appears 3 Press to select DVD to VHS then press OK When you start copying from the selected recording 1 Press DRIVE SELECT to select the DVD drive 2 Press DIRECT NAVIGATOR RAM When the Album View screen is displayed press A to switch to the Recordings screen 3 Press to select the recording you want to start then press OK 4 Go to ...

Page 22: ...een to select the recording then OK FUNCTIONS DVD RAM Cartridge Protection Off Disc Protection Off OK Program Playback Delete Other Functions Copy With the unit stopped to select Delete then OK Tips To return to the previous screen Press RETURN To view other pages Press to select Previous or Next then press OK You can also press to view other pages Multiple editing Select with then press PAUSE Rep...

Page 23: ...come read only and can no longer be used for recording DVD RW can be reused after finalizing Whether DL discs recorded on this unit can be played on other DVD players will depend entirely on the capabilities of that player 100 compatibility is not guaranteed CHG SEARCH ENTER OFF MENU RETURN TOP MENU DISPLAY VOL ON A SURROU ND MONITOR MODE PICTURE MODE REPEAT OPEN DC IN 9V I CD SEQUENTIAL DISC DOUB...

Page 24: ... automatically activate VP mode The tape length must be set correctly 66 Select Tape Length Picture distortion may occur when SP switches to EP AUTO Mode may not function on some tapes Digital broadcasts cannot be recorded directly to video tape To record digital broadcasts use an external connection to a set top box or other equipment 28 Recording Mode Durations SP You can record the length shown...

Page 25: ...eral minutes to format the disc DVD RAM may take up to a maximum of 70 minutes Selecting Audio Channels to record AUDIO A to select the audio Stereo SAP Mono Changing during recording changes the recorded sound Stereo Main audio stereo If the broadcast is Mono SAP audio will be monaural even if you select Stereo mode SAP Secondary audio program SAP When you record SAP main audio is also recorded I...

Page 26: ...Messages in the Setup menu is set to Automatic 62 both Play and Rec indicators will be displayed on the status message screen for several seconds RAM Allows playback from the beginning of what you are recording Simultaneous Record and Playback When recording to DVD RAM to select the recording to play then OK If the Status Messages in the Setup menu is set to Automatic 62 both Play and Rec indicato...

Page 27: ...record because the disc is write protected there is no more space left disc the number of possible recordings has reached its maximum disc Overlap When the date and time overlap with another scheduled recording only a part of the program can be recorded disc When the drive is set to VHS is displayed POWER DVD VHS The unit turns on and on the unit s display goes out The scheduled recording list can...

Page 28: ...able RAM R R DL RW V R R DL RW Perform steps 1 5 left Start play on an external device REC to start recording the program from an external device PAUSE to start recording the program from the external device Perform steps 1 5 left PLAY to locate the point on the tape where you want to insert the recording PAUSE when you reach that point REC to put the unit in recording standby Start play on the ex...

Page 29: ... DV Cable RAM R R DL RW V R R DL RW Turn ON the DV equipment and pause play where you want to begin recording DV connection detected Cancel Record to DVD OK DV camcorder connection Start recording to select Rec then OK Recording from a DV Camcorder Tips When recording finishes The confirmation screen appears Press OK to finish DV camcorder recording To stop recording Press STOP The confirmation sc...

Page 30: ...otection Digital broadcasts etc It cannot be played because data is damaged Currently recording One time only recording restriction 91 CPRM During playback you can access specific recordings or scenes through direct entry of the numbered buttons e g 5 0 5 15 1 5 MP3 e g 5 0 0 5 15 0 1 5 JPEG e g 5 0 0 0 5 15 0 0 1 5 3 2 1 6 5 4 9 8 7 0 DELETE RESET DIRECT NAVIGATOR Recordings Previous Page 02 02 N...

Page 31: ...Play Stereo DVD RAM RAM RW VR and DivX Stereo Mono L Mono R RAM RW VR When playing an analog multilingual broadcast you can choose between Main Audio and SAP Audio Main Audio SAP Audio DVD V This allows you to change items like the audio channel number and the soundtrack language 50 Soundtrack 1 ENG e g English is the selected language Changing Audio during Playback AUDIO A to select the audio Not...

Page 32: ...ect Properties then OK Playlist information e g length and date is shown Playlist Properties to select the playlist then SUB MENU RAM RW VR You cannot create or edit playlists on this unit However you can play a playlist that has been created or edited on other equipment View Chapters to select View Chapters then OK to select the playlist then SUB MENU to select the chapter then OK Tips To return ...

Page 33: ...he screen shown below is displayed when you insert a disc containing MP3 files DivX video contents and still pictures JPEG e g OK Playback mode is set to DivX To play another type of files please select playback mode from Menu in FUNCTIONS 1 Press OK to exit the screen 2 Press FUNCTIONS 3 Press to select Menu then press OK 4 Press to select MP3 Music then press OK You can proceed to step below Tra...

Page 34: ... an action or press RETURN to Exit USB Media Device Operations Go to DivX Menu Play MP3 Go to Album View Copy pictures Press to select Go to Album View then press OK You can proceed to step below R R DL CD The screen shown below is displayed when you insert a disc containing MP3 files DivX video contents and still pictures JPEG e g OK Playback mode is set to DivX To play another type of files plea...

Page 35: ...ctures Control Panel FUNCTIONS Rotate Right Rotate Left Zoom In OK to select Rotate Right or Rotate Left then OK While playing a picture SUB MENU Slideshow with soundtrack From the Album View screen to select an album then SUB MENU Slideshow w SNDTRK SNDTRK Folder to select Slideshow w SNDTRK then OK It is possible to play MP3 music recorded on a USB memory during a Slideshow Tips To select an MP3...

Page 36: ...deo Audio Display DivX Registration TV Screen OK VHS DivX R Video On Demand Your registration code is XXXXXXXX To learn more visit www divx com vod Setup Channel 8 alphanumeric characters After playing DivX VOD content for the first time a new registration code is then displayed in DivX Registration Do not use this registration code to purchase or rent DivX VOD content If you use this code to purc...

Page 37: ...AY to restart normal playback TIME SLIP JET REW Fast forward Rewind Slow playback Cue Review Jet Search Jet Rewind Allows to quickly review a portion of the video just played or cue later portions of the tape Allows high speed search of video in forward or reverse direction Video tapes will rewind to the beginning of the tape at higher speed VHS Index Search System VISS The unit automatically reco...

Page 38: ... on a tape recorded on other equipment Adjusting the playback picture Adjust the vertical synchronization to stop the picture from shaking while paused Vertical Locking Adjustment Notes This function may not work with some tapes You can also adjust vertical synchronization with CH on the main unit While paused TRACKING V LOCK CH or TRACKING V LOCK CH Repeat until the shaking stops To return to the...

Page 39: ...This indicator is only displayed when playing a tape in this unit s VHS drive while recording a program on the DVD drive The items displayed may differ depending on the operating conditions Display examples Current media Shows current recording or play status Channel information Status of the other drive The current date and time Elapsed play time Recording mode Remaining recording time and record...

Page 40: ...n the DVD drive the TV does not automatically turn on Power off link When you turn the TV off this unit is also automatically turned off This unit automatically turns off even if the FUNCTIONS screen the status message or the on screen menu is displayed during playback Even if the TV is turned off this unit will not turn off at the same time under the following conditions when you press REC and th...

Page 41: ...w is displayed above Top menu is displayed 30 Menu is displayed 30 Select the DVD VHS SD or USB drive Rotate the still pictures 35 Set Favorite list is displayed 16 Enlarge or shrink the video or the still picture 35 Zoom In Using the Control Panel Using the Control Panel you can operate search backward search forward stop etc with the TV remote control Perform steps 1 and 2 of Using the SUB MENU ...

Page 42: ... automatic recording function DV Camcorder Rec 55 You can change the unit s settings using Setup menu Setup 52 You can manage discs through formatting finalizing and other operations DVD and Card Management FUNCTIONS Window 20 You can copy recordings using COPY Navigator Copy Entering Text 48 You can copy still pictures Copy New Pictures When viewing the Name screen _ Recording Name 1 2 3 4 5 A B ...

Page 43: ...Recording information is shown e g date time No 01 Date 1 1 2007 Mon Channel 12 Start 1 02 PM Rec Time 1 00 SP Football Properties OK Accessing the Recording View Delete Recording Editing Operations to Recordings Notes You cannot edit during recording or copying R R DL Management information is recorded in unused sections when you edit discs The available space on these discs decreases each time y...

Page 44: ...ording View 43 to select Yes then OK The lock symbol appears when the recording is protected 10 10 27 Mon 07 08 8 10 27 Mon DIRECT NAVIGATOR Recordi DVD RAM RAM Use to prevent accidental erasure of recordings Setup Protection Cancel Protection to select Setup Protection or Cancel Protection then OK Perform steps 1 4 of Accessing the Recording View 43 Tips For quicker editing Use Search 30 Slow mot...

Page 45: ...fer to Chapter Operations right You can go back to the Recordings Screen Combine Chapters Delete Chapter Create Chapter View Recordings Accessing the Chapter View to select Create Chapter then OK DIRECT NAVIGATOR Create Chapter DVD RAM Create Exit 0 43 21 Play 08 Picture Video B A Perform steps 1 7b of Accessing the Chapter View left Create Chapter OK at the point you want to divide to select Exit...

Page 46: ... SNDTRK Add Picture Create Album Edit Album Copy to DVD Album Name Delete Album Set Protection Cancel Protection e g SD Editing a still picture You can go back to the Album View screen Set Protection Album View Delete Picture Cancel Protection Refer to Album Picture Operations right Tips To view other pages Press to select Previous or Next then press OK You can also press to view other pages Multi...

Page 47: ...elect Delete then OK to select Delete Album or Delete Picture then OK Set Protection Cancel Protection Set protection to prevent pictures from being accidentally deleted Perform steps 1 4 of Accessing the Album Picture View 46 to select Set Protection or Cancel Protection then OK to select Yes then OK The lock symbol appears when the still picture or the album is protected Notes Even if you set pr...

Page 48: ...erted Select an action or press RETURN SD Card Operations Go to Album View Copy pictures When you insert an SD card or USB memory the menu may be displayed Press RETURN to exit the screen e g SD OK SD Card inserted Select an action or press RETURN SD Card Operations Go to Album View Copy pictures to select Copy pictures then OK Copy New Pictures Copy from SD card Copy to DVD Copy New Pictures Copy...

Page 49: ...or 3 seconds To return to the previous screen Press RETURN Deleting Still Pictures Delete Navigator to select Delete then OK DELETE Navigator Album View Previous Page 02 02 Next DVD RAM 008 0 7 2 26 2007 Total 1 2 26 2007 Total 2 OK Select Press OK to go to Picture View SUB MENU 007 Picture Video B A 101_DVD 102_DVD RAM When the Recordings screen is displayed press B to switch to the Album View sc...

Page 50: ...Off to cancel Play Menu Subtitle RAM R R DL RW V R R DL RW RW VR Only disc that contain subtitle on off information Turn the subtitle on off Subtitle on off information cannot be recorded using this unit If the subtitles overlap the closed captions recorded on discs turn the subtitles off DVD V Turn the subtitle on off and select the language below Soundtrack Subtitle language DivX Turn the subtit...

Page 51: ...ound effect if you are using 2 front speakers L R only Turn off if it causes distortion Natural Emphasis Off Dialog Enhancer Dolby Digital 3 channel or more only including a center channel RAM R R DL RW V R R DL RW DVD V RW VR and DivX When On the volume of the center channel is raised to make dialogue easier to listen Video Menu Audio Menu Other Menu Language code list Enter the code with the num...

Page 52: ...s The disc name is displayed in the DVD MANAGEMENT window With finalized discs and RW the name is displayed on the Top Menu RAM Perform preparation steps 1 4 of Accessing the Management Menus left select Disc Protection then OK to select Yes then OK Protection of cartridge disc or card RAM With a cartridge With the write protect tab in the protect position you cannot record to edit format or delet...

Page 53: ...matting cannot be performed RW V RW VR You can format only as DVD Video format on this unit RAM Pressing RETURN during format will cancel the process The disc must be reformatted if you do this RAM SD The disc or card cannot be formatted if the write protect tab or switch 52 is switched to PROTECT or LOCK Release the protection to continue The message Unable to format appears when trying to format...

Page 54: ...nd mode of recording Tips After you have finished recording and try to eject the disc a screen asking if you want to finalize the disc appears 25 Finalizing to select desired item then OK DVD s Top Menu The Top Menu appears first First Recording The disc content is played without displaying the Top Menu Selecting Whether to Show the Top Menu First to select Playback will start with then OK to sele...

Page 55: ...nnels without VIERA Link OK to complete Set Channels Manually Perform steps 1 3 of Accessing the Setup Menu left to select Channel then to select Set Channels Manually then OK to select channel You can also select channels with the numbered buttons You can also press to skip several lines Adding and Deleting Channels After selecting a channel above step 6 to select the Add Del column to select Add...

Page 56: ...D L S V TV MA L S V TV NR Viewable Viewable Viewable Viewable Display For details about ratings 67 Parental Rating List to move to Set then to select the rating item then to select the limitation The limitation options that appear depend on the rating you select in step 6 Select Viewable or Off to cancel U S TV Rating U S TV program ratings MPAA Rating U S movie ratings CELR Rating Canadian Englis...

Page 57: ... unexpected and possibly confusing results may occur and you may not receive emergency bulletins or any of the following types of programming Emergency Bulletins Such as EAS messages weather warnings and others Locally originated programming News Political Public Service Announcements Religious Sports Weather Off Timer Select how long the unit remains on when it is not being used Perform steps 1 3...

Page 58: ...Clock Settings 57 step 5 Adjust the time zone 1 or 1 if it was not set correctly with auto clock setting You can set this menu only after Set Clock Automatically is completed left to select 1 or 1 then OK Quick Start 1 Sec Quick Start for Recording on DVD RAM From the power off state recording on DVD RAM starts about 1 second after first pressing the DVD VHS POWER and then sequentially pressing RE...

Page 59: ...rohibits play of all DVD Video Changing ratings When level 0 to 7 is selected Unlock Recorder Change Password Change Level Temporary Unlock Audio Language After selecting Settings for Playback left step 5 to select Audio Language then OK to select English French Spanish Original Other then OK Subtitle Language After selecting Settings for Playback left step 5 to select Subtitle Language then OK to...

Page 60: ... the black level of the input signal to select Output Level Composite SVideo then OK Output Level Composite SVideo After selecting Black Level Control above step 5 to select Lighter or Darker then OK Adjusts the black level of the output signal from the VIDEO OUT and S VIDEO OUT terminal Dynamic Range Compression Perform steps 1 3 of Accessing the Setup Menu 55 DVD V Dolby Digital only Change the ...

Page 61: ...h a sampling frequency of 96 kHz or 88 2 kHz Signals are converted to 48 kHz or 44 1 kHz despite the settings if the signals have a sampling frequency of over 96 kHz or 88 2 kHz or the disc has copy protection to select Digital Audio Output then OK to select On or Off then OK On Signals are converted to 48 kHz or 44 1 kHz Choose when the connected equipment cannot process signals with sampling fre...

Page 62: ...ds audio L1 R1 Stereo 2 Records added audio such as narration L2 R2 subsequent to original recording Mix Records both Stereo 1 and Stereo 2 Incorrect settings can cause noise to be output which can be harmful to your ears and speakers and audio will not be recorded properly on media such as mini discs to select DTS then OK DTS After selecting Digital Audio Output 61 step 5 Choose whether to output...

Page 63: ...then OK CC1 4 Information related to pictures Appears at bottom of screen T1 4 Textual information Appears over entire screen Digital Closed Caption settings After selecting On left step 7 to select Digital then OK to select the item then OK Primary Primary Language Secondary Secondary Language Service 3 Service 3 Language Service 4 Service 4 Language Service 5 Service 5 Language Service 6 Service...

Page 64: ...nnect the unit If this unit is connected to an amplifier etc via an HDMI cable with HDMI Priority set to On the video will be fixed to 480i Turn it Off and set it again If the TV Aspect is set to 4 3 left then 480i or 480p can only be selected to select Pan and Scan Stretch to fit or Letterbox Shrink to fit then OK Pan and Scan Stretch to fit Video recorded for a widescreen is played with the side...

Page 65: ...ly to a 1080p compatible HDTV If this unit is connected to an HDTV through other equipment it must also be 1080p compatible 24p Output for DVD Video to select 24p Output for DVD Video then OK When this unit is connected to a TV supporting 1080 24p output via an HDMI cable this unit displays each frame at 1 24 second intervals the same interval originally shot with the film camera After selecting F...

Page 66: ...select HDMI RGB Output Range then OK Effective when connected to a device that only supports RGB output After selecting Functions of HDMI 65 step 5 to select Standard or Enhanced then OK Enhanced When the black and white images are not distinct HDMI Audio Output to select HDMI Audio Output then OK After selecting Functions of HDMI 65 step 5 to select On or Off then OK Off Audio is output from an a...

Page 67: ... accompanying parent or adult guardian NC 17 No one 17 and under admitted X Adults only CELR Rating Canadian English Ratings E Viewable Blocked Exempt Exempt programming includes news sports documentaries and other information programming talk shows music videos and variety programming CELR Off CELR Rating is set to off C Programming intended for children under age 8 No offensive language nudity o...

Page 68: ...morex 0016 0106 0150 0154 0178 0179 0463 Mitsubishi 0014 0019 0093 0098 0150 0155 0178 0331 0358 0836 0868 1250 Norcent 0748 0824 1089 Optoma 0887 Orion 0179 0236 0463 1463 Philips 0054 0690 1154 1454 Philips Magnavox 0020 0024 0028 0030 0036 0054 0096 0179 0186 0187 0230 0386 0690 0706 0802 1154 1254 1454 Pioneer 0038 0166 0172 0679 0866 Polaroid 0765 0865 1262 1276 1314 1316 1326 1327 1328 1341 ...

Page 69: ...005 1170 1505 1775 Dishpro 0775 1005 1505 1775 Echostar 0775 1005 1170 1505 1775 Expressvu 0775 1775 GE 0392 0566 General Instrument 0869 GOI 0775 1775 Goodmans 1246 Hisense 1535 Hitachi 0819 1250 HTS 0775 1775 Hughes 0749 1442 1749 Satellite Receiver Continued Manufacturer Code Hughes Network Systems 0749 1142 1442 1443 1444 1749 iLo 1535 Janeil 0152 Jerrold 0869 JVC 0775 1170 1775 LG 1226 1414 M...

Page 70: ...uring DVD recording or DVD scheduled recording Connection Options for Improved Playback Quality You can enjoy a high quality picture by using the following terminals for connection VIDEO terminal SVIDEO terminal COMPONENT VIDEO terminal Standard Quality Picture High quality Picture Using an S Video Cable for Better Video S Video Cable not included The S VIDEO OUT terminal provides a more vivid pic...

Page 71: ...ve is connected to an amplifier etc then turn HDMI Priority in the Setup Menu to Off before connecting the HDMI cable 65 AC IN PR Y PB R AUDIO VIDEO VIDEO R AUDIO L L S VIDEO A AU COMPONENT VIDEO OUT DVD VHS COMMON OUT COMPONENT VIDEO IN INPUT 1 AUDIO IN VIDEO R AUDIO L VIDEO O S VIDEO DVD PRIORITY OUT DVD VHS COMMON OUT VIDEO R AUDIO L COMPONENT VIDEO OUT PR Y PB AUDIO IN VIDEO IN R L RF OUT RF I...

Page 72: ...le unit an uncompressed digital audio and video signal is transmitted enabling you to enjoy high quality digital video and audio with just one cable When connecting to an HDMI compatible HDTV High Definition Television the output can be switched to 1080p 1080i or 720p HD video Notes If connecting to equipment that is only compatible with 2 channel output audio with 3 channels or more will be down ...

Page 73: ...n on a digital camera etc 34 48 A card adaptor included with the miniSD Card microSD Card is necessary Type Standard symbol File format Playing Copying Instructions USB memory USB MP3 You can play MP3 files recorded onto the USB memory using a computer 33 Still pictures JPEG You can play and copy still pictures taken on a digital camera etc 34 48 You can copy still pictures to from DVD RAM discs o...

Page 74: ...compatible DVD players R DL and R DL can be played back only on equipment compatible with these discs 2 For further information 23 Important Notes for Recording Use of Panasonic discs is recommended For available recording times for different discs under different recording modes see DVD Recording Modes and Estimated Disc Recording Time on page 24 Formatting and or recording initializing constrain...

Page 75: ... Media Care RAM Use cartridges to protect them from scratches and dirt Storing media Do not place or store media in the following locations Direct sunlight Very dusty or humid areas Near a heat source Places that undergo extreme shifts in temperature condensation can occur Where static electricity or electromagnetic waves occur Keep the Memory Card out of reach of children to prevent swallowing Di...

Page 76: ... be playable Images recorded at a very high resolution may take a long time to display English alphabetical characters and Arabic numerals are displayed correctly Other characters may not display correctly The display order on this unit may differ from how the order is displayed on a computer Depending on how you create the disc writing software files tracks and folders groups may not play in the ...

Page 77: ...s which have been recorded in one of the following standards CD DA MP3 DivX and still pictures JPEG Close the session or finalize the disc after recording This unit can recognize up to 99 folders groups and 999 files tracks on a disc with MP3 or still pictures JPEG 300 folders and 200 files on a disc with DivX 75 76 You cannot write to a CD R or CD RW with the unit Continued on next page Setup Pag...

Page 78: ...cording DVD change the Digital Audio Output settings to the following via the Setup menu PCM Down Conversion On Dolby Digital PCM DTS PCM However only As long as digital recording from the disc is permitted As long as the recording equipment is compatible with 48 kHz sampling frequency 61 You cannot record MP3 signals Can I switch to SAP during recording With DVD RAM and a video cassette you can a...

Page 79: ...nt You can format the disc when the format confirmation screen is displayed 25 53 is displayed on the unit s display This unit is confirming that it is connected with equipment compatible with HDAVI Control F74 The HDMI connection could not be authenticated due to a transfer malfunction Consult the dealer where the unit was purchased F75 The HDMI connection could not be authenticated due to an int...

Page 80: ...The card is not inserted If this message is displayed while a compatible card is already inserted turn off the unit remove the card then re insert the card 15 The card inserted is not compatible or the card format does not match 73 76 No VHS cassette There is no video cassette in the tape deck when playing or recording TV programs Insert a video cassette 15 Now recording on DVD To watch the VHS pl...

Page 81: ...3 Default setting CH 4 OFF For connections with the audio video cable set the RF output channel to OFF RF Output Channel Press the channel up down buttons to select a RF Output Channel Ch 3 OK Press and hold for more than 5 seconds The RF output channel number displays on the unit s display OK to finish Notes When you set the RF output channel to CH 3 or CH 4 Video from this unit can be viewed on ...

Page 82: ... A or refer to the Product information on page 93 if you reside in Canada Page Troubleshooting Guide The display is dim Change Front Display in the Setup menu 63 12 00A is flashing on the unit s display Set the clock 57 The recording time display the copying process display and the displayed recording times of MP3s are different from the actual time Times shown may disagree with actual times R R D...

Page 83: ... warm U59 appears on the unit s display Wait until U59 disappears One of the unit s safety devices may have been activated Reset the unit as follows Press I POWER on the main unit to switch to off If the unit doesn t switch to off reset the unit 81 To restore the unit if it freezes U88 is displayed and the disc cannot be ejected The unit is carrying out the recovery process Do the following to eje...

Page 84: ...n see the VIERA operating instructions 3 Switch the VIERA input to HDMI connection with this unit and after this unit s screen is displayed check that HDAVI Control is working The contents of the USB memory cannot be read Check that the USB memory is inserted correctly 15 The format of the USB memory or of its contents is not compatible with the unit The contents on the USB memory may be damaged 7...

Page 85: ...devices Status messages do not appear Select Automatic in Status Messages in the Setup menu 62 The black or gray background does not appear Select On in Black Background Analog in the Setup menu 62 The 4 3 aspect ratio picture expands left and right Screen size is wrong If you connect an HDMI cable set HDMI Output Display Aspect in the Setup menu to Normal 65 Check the settings for TV Aspect 4 3 T...

Page 86: ...connected devices When the DIGITAL AUDIO OUT terminal is used for audio output and the unit is connected to the television with an HDMI cable set HDMI Audio Output to Off in the Setup menu 66 Depending on the connected equipment the sound may be distorted if this unit is connected with an HDMI cable Cannot switch audio You cannot change the audio type when a DVD R DVD R DL DVD RW DVD Video format ...

Page 87: ...enu and turn this unit s closed captions on 63 If connecting with the DVD VHS COMMON output terminals closed caption cannot be displayed by this unit while playing tape Make the settings and display on a TV that supports Closed Captioning Subtitles are not recorded on the disc Set Subtitle in the Disc menu to On 50 Angle cannot be changed This function depends on software availability Angles can o...

Page 88: ...corders The broadcast you are trying to record is copy protected Recording Issues DVD Recording Scheduled Recording Copying External Input Page On screen display indicators for video cassette playback do not appear Select Automatic in Status Messages in the Setup menu Press STATUS to show the on screen display indicators for video cassette playback The on screen indicator for video cassette playba...

Page 89: ...ot copy DVD to VHS A video cassette without the accidental erasure prevention tab is inserted Use a video cassette with an accidental erasure prevention tab Some DVDs on the market including rental DVD are copy protected to prevent illegal reproductions Copy protected DVDs cannot be properly recorded You cannot use the copying function when the FUNCTIONS window the Scheduled Recording List screen ...

Page 90: ...e with a damp cloth and then wipe dry 75 Disc may be defective or of poor quality You tried formatting a disc that is not compatible with the unit 53 RW Discs created on a computer may not be formatted Cannot create chapters The unit writes the chapter division information to the disc when you turn it off or remove the disc The information is not written if there is an interruption in the power Th...

Page 91: ... Field Field A frame still shows 2 fields so there may be some blurring between them but picture quality is generally better A field still shows less picture information so it may be rougher but there is no blurring HDMI High Definition Multimedia Interface Unlike conventional connections it transmits uncompressed digital video and audio signals on a single cable This unit supports high definition...

Page 92: ...f pixels 34 34 to 6144 4096 Regional Code 1 Clock unit Quartz controlled 12 hour digital display Operating temperature range 5 C to 40 C 41 F to 104 F Operating humidity range 35 to 80 RH no condensation Dimensions W H D 430 mm 84 mm 345 mm 1615 16 35 16 135 8 Mass Weight Approx 5 4 kg 11 90 lbs Recordable discs DVD RAM 2X SPEED Ver 2 0 2 3X SPEED Ver 2 1 2 5X SPEED Ver 2 2 DVD R SL 1X SPEED Ver 2...

Page 93: ...e back or the bottom of the unit Please note them in the space provided below and keep for future reference MODEL NUMBER SERIAL NUMBER User memo DATE OF PURCHASE DEALER NAME DEALER ADDRESS TELEPHONE NUMBER Manufactured under license from Dolby Laboratories Dolby and the double D symbol are trademarks of Dolby Laboratories DTS is a registered trademark of DTS Inc and DTS 2 0 Digital Out is a tradem...

Page 94: ...NOT LIABLE FOR INCIDENTAL OR CONSEQUENTIAL DAMAGES RESULTING FROM THE USE OF THIS PRODUCT OR ARISING OUT OF ANY BREACH OF THIS WARRANTY As examples this excludes damages for lost time travel to and from the servicer loss of media or images data or other recorded content The items listed are not exclusive but are for illustration only ALL EXPRESS AND IMPLIED WARRANTIES INCLUDING THE WARRANTY OF MER...

Page 95: ...batteries are also excluded from coverage under this warranty This warranty is extended to the original end user purchaser only A purchase receipt or other proof of date of original purchase is required before warranty service is performed THIS EXPRESS LIMITED WARRANTY IS IN LIEU OF ALL OTHER WARRANTIES EXPRESS OR IMPLIED INCLUDING ANY IMPLIED WARRANTIES OF MERCHANTABILITY AND FITNESS FOR A PARTIC...

Page 96: ...esté conectada a un televisor Panasonic VIERA que admita señales HDAVI Control 3 y esté correctamente configurado éste automáticamente recopilará la información de configuración del televisor Siga los mensajes que le aparecerán en pantalla TRACKING V LOCK CH para seleccionar una salida RF en el canal número Conexión sin cable de audio vídeo Cuando vea la pantalla delantera de la unidad seleccione ...

Page 97: ...gital Modo Antena p ej 3 1 3 1 OK 13 1 1 3 1 OK Modo Cable TV p ej 1 1 1 1 OK 15 1 1 5 1 OK VCR TV para ver el video desde este aparato El indicador TV en el panel delantero de este aparato no se ilumina Al oprimir VCR TV de nuevo el indicador TV en el panel delantero de este aparato se iluminará y podrá ver la TV directamente sin tener que pasar la señal a través del mismo modo TV RAM R R DL RW V...

Page 98: ... del canal seleccionado Modo Des Act 4 1 KPO SD Modo Surf Todos Canal Entrada Fecha Frecuencia Nombre Ingrese el canal Entrada Unid GRABACIÓN PROGRAMADA DVD VHS 5 4 Jue 6 11 PM Tiempo grabación restante 0 33 XP 2 00 SP 4 1 OK Suprim Número SUB MENU OK Repita los pasos 2 a 4 para programar otras grabaciones Preparación RAM Si el disco está protegido libere la protección VHS Asegúrese de que la pest...

Page 99: ...ipal COPYING COPYING Oprima y mantenga oprimiendo por alrededor de 3 segundos La copia automáticamente se detiene cuando la reproducción del disco finaliza o cuando la cinta llega al final RAM R R DL RW V R R DL RW Borrado de grabaciones con el navegador de borrado BORRAR Navegador DRIVE SELECT para seleccionar el dispositivo DVD para seleccionar Borrar y luego OK para seleccionar la grabación y l...

Page 100: ...revention tab 15 External Device 28 29 Finalize 25 54 91 Flexible Recording 26 Format 25 53 91 FR Flexible Recording Mode 24 FUNCTIONS Window 42 HDAVI Control 40 41 HDMI 11 65 72 91 Jet Rewind 37 JPEG 34 76 91 Language code list 51 on screen 62 soundtrack 50 subtitle 50 Menu DivX 36 MP3 33 on screen 50 Pictures 34 Setup 55 Mode recording 24 still mode 60 MP3 33 76 91 Noise reduction NR DNR 51 Line...

Reviews: