background image

 Before connecting, operating or adjusting this product, please read

the instructions completely.

More detailed instructions 
on the operation of this 
camera are contained in 
“Owner’s Manual for advanced features 
(PDF format)” in the supplied CD-ROM. 
Install it on your PC to read it.

VQT3N40

PP

For USA and Puerto Rico assistance, please call: 1-800-211-PANA(7262) or, 
contact us via the web at: http://www.panasonic.com/contactinfo

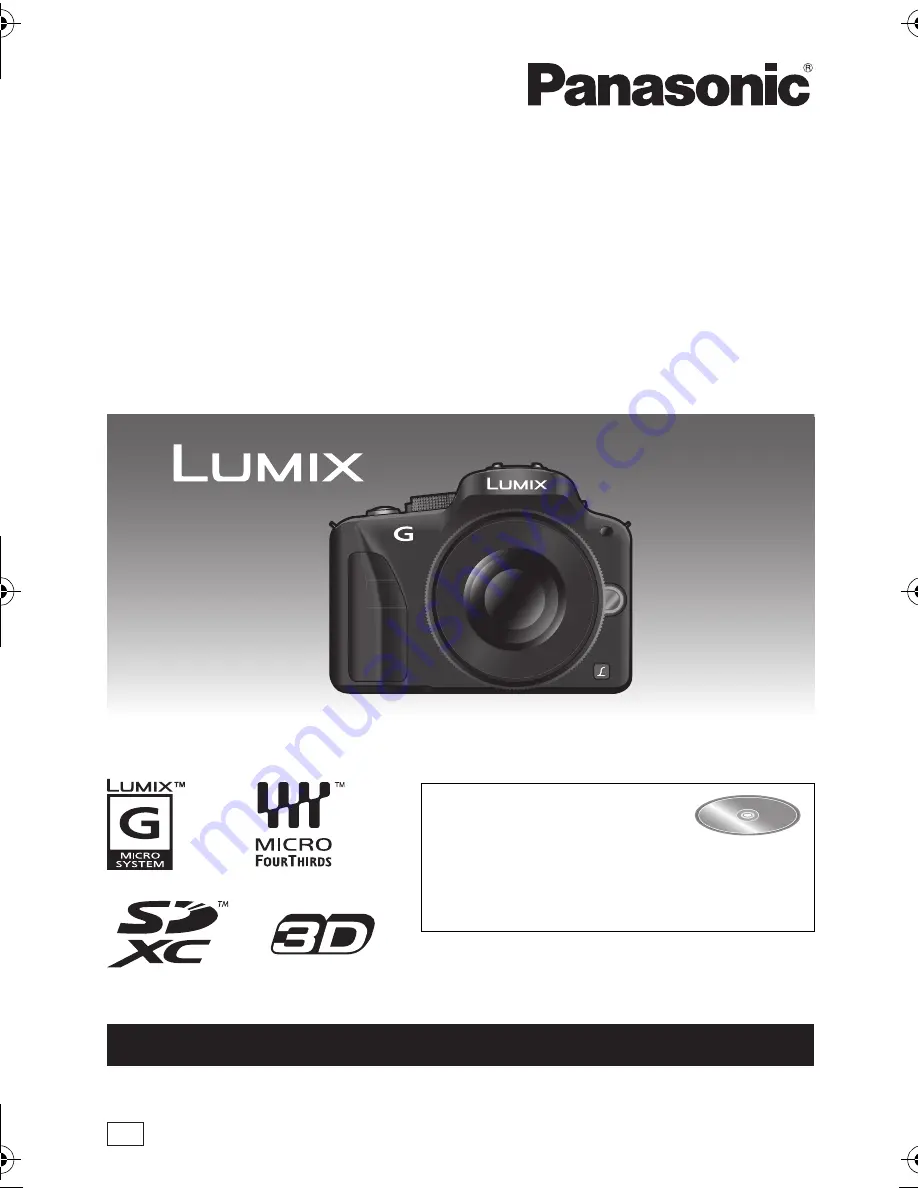
Basic Owner’s Manual

Digital Camera/

Lens Kit/Double Zoom Lens Kit/Body

Model No. 

DMC-G3K/DMC-G3W

DMC-G3

until 
2011/5/11

DMC-G3K&G3W&G3PP-VQT3N40_eng.book  1 ページ  2011年4月29日 金曜日 午後12時13分

Summary of Contents for DMC-G3KK

Page 1: ...ontained in Owner s Manual for advanced features PDF format in the supplied CD ROM Install it on your PC to read it VQT3N40 PP For USA and Puerto Rico assistance please call 1 800 211 PANA 7262 or contact us via the web at http www panasonic com contactinfo Basic Owner s Manual Digital Camera Lens Kit Double Zoom Lens Kit Body Model No DMC G3K DMC G3W DMC G3 ...

Page 2: ...oadcast material for purposes other than your own private use may infringe copyright laws Even for the purpose of private use recording of certain material may be restricted Information for Your Safety A lithium ion battery that is recyclable powers the product you have purchased Please call 1 800 8 BATTERY for information on how to recycle this battery WARNING TO REDUCE THE RISK OF FIRE ELECTRIC ...

Page 3: ...ures Reorient or relocate the receiving antenna Increase the separation between the equipment and receiver Connect the equipment into an outlet on a circuit different from that to which the receiver is connected Consult the dealer or an experienced radio TV technician for help FCC Caution To assure continued compliance follow the attached installation instructions and use only shielded interface c...

Page 4: ...eyes Rinse eyes thoroughly with water and then consult a doctor CAUTION Danger of explosion if battery is incorrectly replaced Replace only with the same or equivalent type recommended by the manufacturer Dispose of used batteries according to the manufacturer s instructions Warning Risk of fire explosion and burns Do not disassemble heat above 60 xC 140 oF or incinerate CAUTION DO NOT INSTALL OR ...

Page 5: ...y be damaged or pictures may be distorted by strong magnetic fields created by speakers or large motors Electromagnetic wave radiation generated by microprocessors may adversely affect this unit disturbing the pictures and or sound If this unit is adversely affected by electromagnetic equipment and stops functioning properly turn this unit off and remove the battery or disconnect AC adaptor DMW AC...

Page 6: ...ording using Intelligent Auto Plus Mode 29 Taking Pictures with Defocus Control Function 30 Taking Pictures with Your Favorite Settings Program AE Mode 31 Recording Motion Pictures 32 Playing Back Pictures Motion Pictures 33 Playing Back Pictures 33 Playing Back Motion Pictures 34 Deleting Pictures 36 Setting the Menu 37 Setting menu items 37 Compensating the Exposure 40 Taking Pictures by Specify...

Page 7: ...hed to the interchangeable lens at the time of purchase 9 Lens Rear Cap This is attached to the interchangeable lens at the time of purchase 10 Battery Pack Indicated as battery pack or battery in the text Charge the battery before use 11 Battery Charger Indicated as battery charger or charger in the text 12 AV Cable 13 USB Connection Cable 14 Body Cap This is attached to the camera body at the ti...

Page 8: ...pplied in DMC G3W only double zoom lens kit product 10 11 12 13 14 DMW BLD10PP DE A93B K1HY08YY0016 K1HY08YY0015 VKF4385 15 16 17 18 VFF0805 VFC4634 VGQ0C14 2 3 4 5 1 6 7 8 9 H FS045200 VYC0986 VYF3201 VFC4315 H FS014042 VYC1009 VYF3201 VFC4315 DMC G3K 1 DMC G3W 2 ...

Page 9: ... button 12 Motion picture button 13 Camera ON OFF switch 14 Rear dial 15 DISP Fn1 button 16 Eye Cup 17 Touch panel LCD monitor 18 Q MENU Fn2 button Delete Return button 19 MENU SET button 20 Cursor buttons 3 ISO 1 WB White Balance 2 AF Mode button 4 DRIVE MODE button This button in picture record mode will allow the user to select between the following options Single Burst Auto bracket Self timer ...

Page 10: ...5 DC coupler cover When using an AC adaptor ensure that the Panasonic DC coupler DMW DCC9 optional and AC adaptor DMW AC8PP optional are used Always use a genuine Panasonic AC adaptor DMW AC8PP optional It is recommended to use a fully charged battery or AC adaptor when recording motion pictures If while recording motion pictures using the AC adaptor and the power supply is cut off due to a power ...

Page 11: ...0 Focus ring 41 Wide 42 Zoom ring 43 Contact point 44 Lens fitting mark 45 O I S switch H FS014042 LUMIX G VARIO 14 42 mm F3 5 5 6 ASPH MEGA O I S H FS045200 LUMIX G VARIO 45 200 mm F4 0 5 6 MEGA O I S 38 39 40 41 42 43 44 40 41 42 45 39 38 43 44 ...

Page 12: ... pens Do not operate with your fingernails Wipe the LCD monitor with dry soft cloth when it gets dirty with finger prints and others Do not scratch or press the LCD monitor too hard About the Stylus pen It is easier to use the stylus pen supplied for detailed operation or if it is hard to operate with your fingers Only use the supplied stylus pen Do not place it where small children can reach Touc...

Page 13: ...ith the Four Thirds mount specification can be used by using the mount adaptor DMW MA1 optional Leica mount specification lens When you use the M mount adaptor or R mount adaptor DMW MA2M DMW MA3R optional you can use Leica M Mount or Leica R Mount interchangeable lenses For certain lenses the actual distance at which the subject is in focus may differ slightly from the rated distance When using a...

Page 14: ... them Do not put your hands inside the mount Align the lens fitting marks C red marks on the camera body and the lens and then rotate the lens in the direction of the arrow until it clicks Do not press the lens release button D when you attach a lens Do not try to attach the lens when holding it at an angle to the camera body as the lens mount may get scratched Detach the lens cap Attaching a lens...

Page 15: ...n remove Always attach the body cap to the camera body so that dirt or dust does not get inside Attach the lens rear cap so that the lens contact point does not get scratched Note It is recommended to attach the lens cap or attach the MC Protector optional to protect the lens surface when carrying Detaching a lens from the camera body ...

Page 16: ... Insert the lens hood into the lens with the short sides at the top and bottom and turn in the direction of the arrow until it stops A Fitting to the mark To attach the lens hood that came with the interchangeable lens H FS045200 Insert the lens hood into the lens and turn in the direction of the arrow until it stops Note When temporarily detaching and carrying the lens hood attach the lens hood t...

Page 17: ...hen pass it through the stopper Pass the end of the shoulder strap through the hole on the other side of the stopper Pull the other side of the shoulder strap and then check that it will not come out Perform steps 1 to 4 and then attach the other side of the shoulder strap Note Use the shoulder strap around your shoulder Do not wrap the strap around your neck It may result in injury or accident Do...

Page 18: ... are dirty In this case wipe them with a dry cloth It has been found that counterfeit battery packs which look very similar to the genuine product are made available to purchase in some markets Some of these battery packs are not adequately protected with internal protection to meet the requirements of appropriate safety standards There is a possibility that these battery packs may lead to fire or...

Page 19: ... a Panasonic SD Memory Card 2 GB Using the supplied battery Starting recording 30 seconds after the camera is turned on Recording once every 30 seconds with full flash every second recording Turning the camera off every 10 recordings and leaving it until the temperature of the battery decreases The number of recordable pictures varies depending on the recording interval time If the recording inter...

Page 20: ...nly the maximum recordable time for 2 GB is displayed on the screen Playback when using the LCD monitor When the interchangeable lens H FS014042 is used Recordable time Approx 110 min Actual recordable time Approx 55 min When the interchangeable lens H FS045200 is used Recordable time Approx 100 min Actual recordable time Approx 50 min When the interchangeable lens H FS014042 is used Recordable ti...

Page 21: ...Battery Being careful about the battery orientation insert all the way until you hear a locking sound and then check that it is locked by lever A Pull the lever A in the direction of the arrow to remove the battery Card Push it securely all the way until you hear a click while being careful about the direction in which you insert it To remove the card push the card until it clicks then pull the ca...

Page 22: ...o vibration impact or static electricity perform the operation again Please confirm the latest information on the following website http panasonic jp support global cs dsc This Site is English only Note Keep the Memory Card out of reach of children to prevent swallowing About cards that can be used with this unit Remarks SD Memory Card 8 MB to 2 GB Use a card with SD Speed Class with Class 4 or hi...

Page 23: ...tch the settings by continuously touching 3 4 Touch CANCEL to cancel the date and time settings without setting a date and time To set the display order and the time display format Touch STYLE to display the settings screen for setting display order time display format Touch SET to set Touch SET in the confirmation screen The clock can be setup with the following procedure at the time of purchase ...

Page 24: ...de by rotating the mode dial Align a desired mode with part A Rotate the mode dial slowly and surely to adjust to each mode To select Intelligent Auto Mode Press button will light up when it is switched to Intelligent Auto Mode The Recording Mode selected by the mode dial is disabled while the button is lit ...

Page 25: ... by the aperture value you set Shutter Priority AE Mode The aperture value is automatically determined by the shutter speed you set Manual Exposure Mode The exposure is adjusted by the aperture value and the shutter speed which are manually adjusted Custom Mode Use this mode to take pictures with previously registered settings Scene Mode This allows you to take pictures that match the scene being ...

Page 26: ...focus A Aperture value B Shutter speed Aperture value and shutter speed are displayed It will flash in red if the correct exposure is not achieved except when set to flash When the image is correctly focused the picture will be taken since the FOCUS PRIORITY is set initially to ON Press the shutter button fully push it in further and take the picture AB ...

Page 27: ... either the most recently used of Intelligent Auto Mode or Intelligent Auto Plus Mode At the time of purchase the mode is set to Intelligent Auto Mode button will light up when it is switched to Intelligent Auto Mode button is turned off during recording to prevent the light reflecting on glass or similar but this is not a malfunction button is turned off and the camera is switched to Recording Mo...

Page 28: ...hat camera shake is minimal when the Scene Mode has been identified as the shutter speed will be slower than normal Take care not to move the camera while taking pictures An optimum scene for the specified subject will be chosen when set to AF tracking When FACE RECOG is set to ON and the face similar to the registered face is detected R is displayed in the top right of and When FACE RECOG is set ...

Page 29: ... Press 1 to select and then press MENU SET 1 Press the rear dial to display the setting screen Each press of the rear dial switches among brightness setting Defocus Control and end operation 2 Touch the slide bar to set Setting can also be performed by rotating the rear dial 1 Press 1 to display the setting screen 2 Touch the slide bar to set This will adjust the color of the image from red color ...

Page 30: ... viewfinder press the rear dial several times to display the Defocus Control setting screen Touch the slide bar to set Setting can also be performed by rotating the rear dial Recording of pictures or motion pictures It is also possible to record a picture by touching Defocus Control operation can be ended by touching When using the viewfinder pressing the rear dial will end the Defocus Control ope...

Page 31: ...rture value and shutter speed without changing the exposure This is called Program Shift You can make the background more blurred by decreasing the aperture value or record a moving subject more dynamically by slowing the shutter speed when taking a picture in Program AE Mode 1 Press the shutter button halfway and display the aperture value and shutter speed value on the screen 2 While the values ...

Page 32: ...tures continuously with AVCHD is 13 hours 3 minutes 20 seconds Screen will only display up to 13 hours 3 minutes 20 seconds However the recording may stop before that depending on the remaining battery level Motion picture recorded continuously in MOTION JPEG is up to 2 GB Only the maximum recordable time for 2 GB is displayed on the screen Screen here is an example of when the Recording Mode is s...

Page 33: ... image by pressing 2 1 of the cursor button Speed of picture forwarding rewinding changes depending on the playback status You can forward or rewind pictures continuously by keeping your finger on the left or right sides of the screen after forwarding rewinding a picture Pictures are displayed reduced in size To finish playback Press again press the motion picture button or press the shutter butto...

Page 34: ...y Playing Back Motion Pictures Press Select a picture with a Motion Picture icon and then touch to play back A Motion picture icon B The motion picture recording time After playback starts the elapsed playback time is displayed on the screen For example 8 minutes and 30 seconds is displayed as 8m30s Some information recording information etc is not displayed for motion pictures recorded in AVCHD P...

Page 35: ...ast forward Frame by frame rewind while pausing Frame by frame forward while pausing Increase volume level Reduce volume level About fast forward rewind playback Touch during playback to fast forward touch to fast rewind The fast forward rewind speed increases if you touch again The display on the screen changes from 5 to Touch to resume normal playback speed When using a high capacity card it is ...

Page 36: ...ng Pictures Once deleted pictures cannot be recovered Press To delete a single picture Select the picture to be deleted and then touch Touch DELETE SINGLE Confirmation screen is displayed Picture is deleted by selecting YES ...

Page 37: ...ssing 3 4 2 1 or by rotating the rear dial Menu Description of settings REC This menu lets you set the aspect ratio number of pixels and other aspects of the pictures you are recording MOTION PICTURE This menu lets you set the REC MODE REC QUALITY and other aspects for motion picture recording CUSTOM Operation of the unit such as displaying of the screen and button operations can be set up accordi...

Page 38: ...m at the very bottom and press 4 or rotate the rear dial right to move to the next screen Press MENU SET or the rear dial Depending on the menu item its setting may not appear or it may be displayed in a different way Select the settings by pressing 3 4 or by rotating the rear dial The figure on the right is an example of setting I DYNAMIC from OFF to HIGH Press MENU SET or the rear dial to set or...

Page 39: ...g to other menus e g Switching to the SETUP menu from REC menu 1 Press 2 A Menu toggle icon 2 Press 4 or rotate the rear dial to select the SETUP menu icon 3 Press 1 or the rear dial Select a menu item next and set it A or or ...

Page 40: ...al to compensate the exposure A Exposure Compensation value B EXPO METER The Exposure Compensation value can be set within a range of j5 EV to i5 EV When recording motion pictures the Exposure Compensation value can be set within a range of j3 EV to i3 EV Select 0 to return to the original exposure Rotate the rear dial to display the EXPO METER However it does not appear in Mode Underexposed Prope...

Page 41: ... will switch between aperture setting operation and Exposure Compensation operation every time the rear dial is pressed When you want to take a sharp picture of a fast moving subject set with a faster shutter speed When you want to create a trail effect set to a slower shutter speed Set the mode dial to Rotate the rear dial to set the shutter speed It will switch between shutter speed setting oper...

Page 42: ... and shutter speed It will switch between aperture setting operation and shutter speed setting operation every time the rear dial is pressed A Manual Exposure Assistance Manual Exposure Assistance The Manual Exposure Assistance is an approximation We recommend checking the pictures on the playback screen Manual Exposure Mode The exposure is adequate Set to faster shutter speed or larger aperture v...

Page 43: ...er or Adobe Reader 7 0 or later to browse or print the Owner s Manual PDF format Insert the CD ROM containing the Owner s Manual supplied click A and then follow the messages on the screen to install Compatible OS Windows XP SP3 Windows Vista SP2 Windows 7 You can download and install a version of Adobe Reader that you can use with your OS from the following Web Site http get adobe com reader othe...

Page 44: ... 680 000 pixels Primary color filter Digital Zoom Max 4k Extended Tele Conversion Except for the maximum picture size for each aspect ratio ON OFF simple enlargement compatible with lenses from other manufacturers Focus Auto Focus Manual Focus Face Detection AF Tracking 23 area focusing 1 area focusing Pinpoint Touch focus area selection possible Shutter system Focal plane shutter Burst recording ...

Page 45: ...e priority AE A Shutter priority AE S Manual exposure M AUTO Exposure Compensation 1 3 EV Step j5 EV to i5 EV Metering Mode Multiple Center weighted Spot LCD monitor 3 0q TFT LCD 3 2 Approx 460 000 dots field of view ratio about 100 Touch panel Viewfinder Color LCD Viewfinder Approx 1 440 000 dots field of view ratio about 100 with diopter adjustment j4 to i4 diopter Flash Built in pop up flash GN...

Page 46: ...to QVGA 320k240 pixels 30 frames sec Quality RAW RAWiFine RAWiStandard Fine Standard MPOiFine MPOiStandard Recording file format Still Picture RAW JPEG based on Design rule for Camera File system based on Exif 2 3 standard DPOF corresponding MPO Motion pictures with audio AVCHD QuickTime Motion JPEG Interface Digital USB 2 0 High Speed Analog video audio NTSC Audio line output monaural Terminal RE...

Page 47: ...diaphragm Aperture range F3 5 Wide to F5 6 Tele Minimum aperture value F22 Lens construction 12 elements in 9 groups 1 aspherical lens In focus distance 0 3 m 0 99 feet to from the focus distance reference line Maximum image magnification 0 16k 35 mm film camera equivalent 0 32k Optical Image Stabilizer Available O I S switch None Setting of the STABILIZER is done in REC menu Mount Micro Four Thir...

Page 48: ...nts in 13 groups no aspherical lens In focus distance 1 0 m 3 28 feet to from the focus distance reference line Maximum image magnification 0 19k 35 mm film camera equivalent 0 38k Optical Image Stabilizer Available O I S switch Available Switching ON OFF Mount Micro Four Thirds Mount Angle of view 27x Wide to 6 2x Tele Filter diameter 52 mm 2 05 inch Max diameter Approx 70 mm 2 76 inch Overall le...

Page 49: ...M30 Interchangeable Lens H VS014140 H FS014042 H FS014045 H FS045200 H F007014 H ES045 H H020 H F008 H H014 H FS100300 H FT012 Mount Adaptor DMW MA1 DMW MA2M DMW MA3R Class 10 64 GB SDXC Memory Card Class 10 32 GB SDHC Memory Card Class 10 16 GB SDHC Memory Card Class 10 8 GB SDHC Memory Card Class 10 4 GB SDHC Memory Card Class 4 16 GB SDHC Memory Card Class 4 8 GB SDHC Memory Card Class 4 4 GB S...

Page 50: ... optional accessories compatible with that lens 3 Use if the attached lens is in contact with the tripod pedestal Read P13 for information about other lenses that can be used Refer to P18 for information about the battery charging time and the number of recordable pictures NOTE Accessories and or model numbers may vary between countries Consult your local dealer Refer to catalogues Web pages for m...

Page 51: ...RY ORDER OFFICE 20421 84th Avenue South Kent WA 98032 Ship To Mr Mrs Ms First Last Street Address City State Zip Phone Day Night 4 Shipping information UPS delivery requires complete street address Please photocopy this form when placing an order 3 Method of payment check one Check of Money Order enclosed NO C O D SHIPMENTS VISA MasterCard Make Check or Money Order to PANASONIC ACCESSORIES Please ...

Page 52: ...roduct with new or refurbished parts b replace it with a new or a refurbished equivalent value product or c refund your purchase price The decision to repair replace or refund will be made by the warrantor During the Labor warranty period there will be no charge for labor During the Parts warranty period there will be no charge for parts This Limited Warranty excludes both parts and labor for non ...

Page 53: ...ation set up adjustments misadjustment of consumer controls improper maintenance power line surge lightning damage modification introduction of sand humidity or liquids commercial use such as hotel office restaurant or other business or rental use of the product or service by anyone other than a Factory Service Center or other Authorized Servicer or damage that is attributable to acts of God THERE...

Page 54: ... 9pm Saturday Sunday 10am 7pm EST For hearing or speech impaired TTY users TTY 1 877 833 8855 Accessory Purchases United States and Puerto Rico Purchase Parts Accessories and Instruction Books online for all Panasonic Products by visiting our Web Site at http www pstc panasonic com Or send your request by E mail to npcparts us panasonic com You may also contact us directly at 1 800 332 5368 Phone ...

Page 55: ...55 ENG VQT3N40 ...

Page 56: ...marks or registered trademarks of Apple Inc used under license therefrom Adobe is a trademark or registered trademark of Adobe Systems Incorporated in the United States and or other countries Mac and Mac OS are trademarks of Apple Inc registered in the U S and other countries Windows and Windows Vista are either registered trademarks or trademarks of Microsoft Corporation in the United States and ...

Reviews: