background image

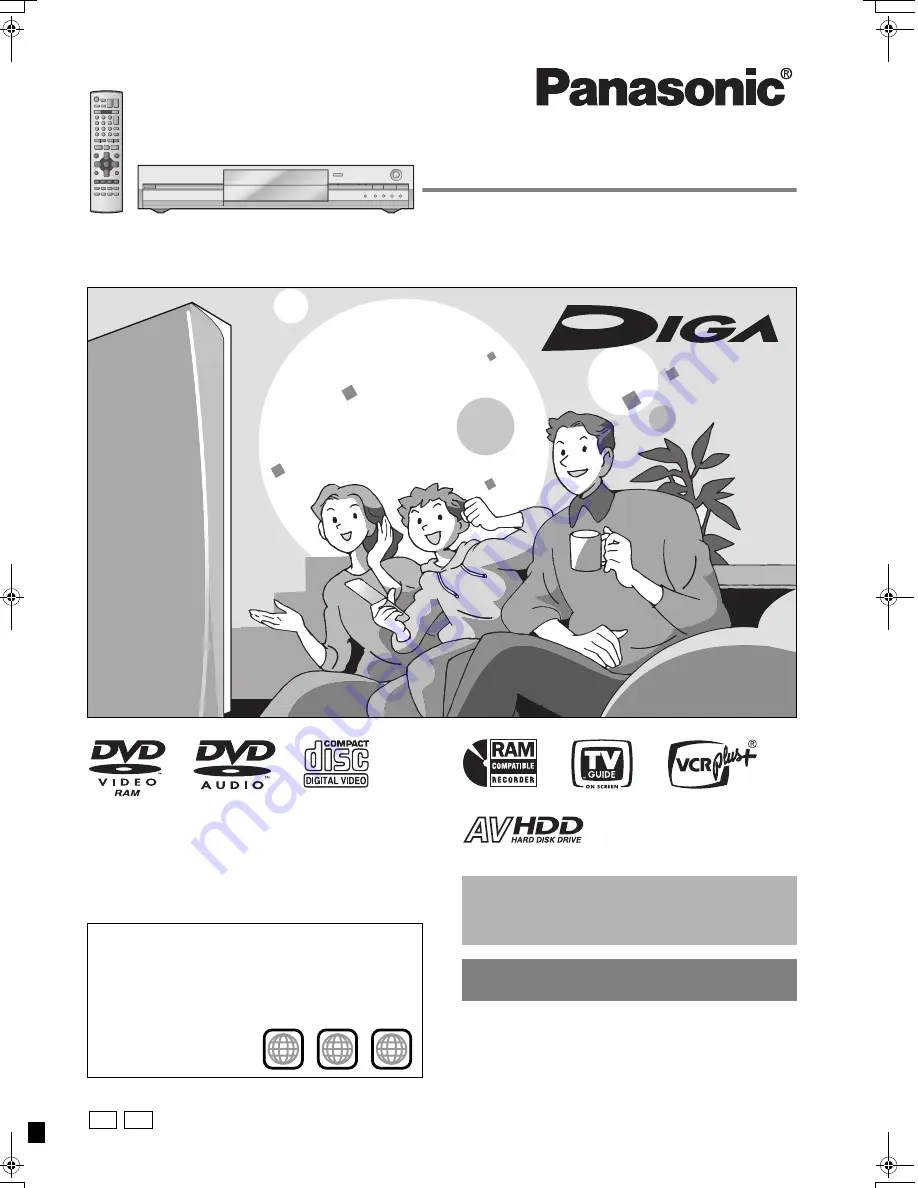
Operating Instructions

DVD Video Recorder

Model No.

DMR-E85H

Dear customer

Thank you for purchasing this product. For optimum performance 
and safety, please read these instructions carefully.

Before connecting, operating or adjusting this product, please read 
these instructions completely.
Please keep this manual for future reference.

Region number supported by this unit

Region numbers are allocated to DVD players and software 
according to where they are sold.

The region number of this unit is “1”.

The unit will play DVDs marked with labels containing “1” or 
ALL”.

Example:

1

ALL

2

4

1

[For\U.S.A.]only]

The warranty can be found on page 52.

[For\Canada]only]

The warranty can be found on page 53.

La referencia rápida en español se puede encontrar 
en la página 54.

PC

7305en.book  1 ページ  2004年3月4日 木曜日 午後7時39分

Summary of Contents for DIGA DMR-E85

Page 1: ...ompletely Please keep this manual for future reference Region number supported by this unit Region numbers are allocated to DVD players and software according to where they are sold The region number of this unit is 1 The unit will play DVDs marked with labels containing 1 or ALL Example 1 ALL 2 4 1 For U S A only The warranty can be found on page 52 For Canada only The warranty can be found on pa...

Page 2: ...isk of electric shock to persons CAUTION CAUTION TO REDUCE THE RISK OF ELECTRIC SHOCK DO NOT REMOVE SCREWS NO USER SERVICEABLE PARTS INSIDE REFER SERVICING TO QUALIFIED SERVICE PERSONNEL The exclamation point within an equilateral triangle is intended to alert the user to the presence of important operating and maintenance servicing instructions in the literature accompanying the ap pliance RISK O...

Page 3: ...t Service 48 Troubleshooting guide 49 Limited Warranty ONLY FOR U S A 52 Limited Warranty ONLY FOR CANADA 53 Index Backcover This DVD Video recorder records high quality images to rapid random access capable HDD Hard disk drive or DVD RAM This has resulted in many new features that out perform older tape formats The following information summarizes a few of these features Instant recording You no ...

Page 4: ...ssories call the dealer from whom you have made your purchase 1 Remote control EUR7721KG0 1 AC power supply cord K2CB2CB00006 1 75 coaxial cable VJA1125 For use with this unit only Do not use it with other equipment 2 Batteries for remote control 1 Audio video cable K2KA6CA00001 1 IR Blaster K2ZZ04C00001 U S A only Product Registration Card Please complete and return the included product registrat...

Page 5: ...e 17 25 Show television program list page 19 Change recording mode page 16 Start recording page 16 Show status messages page 29 Create chapters Green button for television program list page 26 19 Main unit PULL OPEN OPEN CLOSE REC x1 3 TIME SLIP POWER CH L2 S VIDEO IN VIDEO IN AUDIO IN R L MONO TIME SLIP HDD DVD DRIVE SELECT HDD DVD Connection for camcorder etc page 18 Skip the specified time Disp...

Page 6: ... 15 W Television Video cassette recorder Camcorder This unit Amplifier Cable TV box satellite receiver To L2 input terminals front To L1 input terminals rear From AUDIO OUT terminals or DIGITAL AUDIO OUT terminal From OUT1 or OUT2 terminals To L3 input terminals rear Before moving the unit ensure the disc tray is empty Failure to do so will risk severely damaging the disc and the unit Do not place...

Page 7: ...IDEO R AUDIO L VIDEO S VIDEO OUT1 OUT2 VHF UHF RF IN RF OUT VHF UHF RF IN VIDEO OUT VHF UHF RF IN R L AUDIO OUT COMPONENT VIDEO IN AUDIO IN R L S VIDEO IN VIDEO IN 3 2 1 4 L To the antenna E Outdoor antenna D Cable TV F Indoor antenna B Television M Audio Video cable K Antenna cable I To household AC outlet AC 120 V 60 Hz X Video cassette recorder R Cooling fan O Component video cable Connecting a...

Page 8: ... VIDEO S VIDEO R AUDIO L VIDEO S VIDEO OUT1 OUT2 VHF UHF RF IN RF OUT VHF UHF RF IN VIDEO S VIDEO RF R L AUDIO AUDIO IN R L S VIDEO IN VIDEO IN OUT IN D 75 coaxial cable B This unit L From antenna or cable TV jack K Cable TV box satellite receiver C Audio video cable A Television C Audio video cable I S Video cable H Connect to either this unit s RF IN terminal or L3 terminal F Use L3 not L1 J Set...

Page 9: ...OUT OPTICAL IN AUDIO IN R L Optical digital audio cable Do not bend sharply when connecting Insert fully with this side facing up Audio cable This unit Red White Red White Connect an amplifier with a built in decoder displaying these logo marks using an optical digital audio cable and change the settings in Digital Audio Output page 42 You cannot use DTS Digital Surround decoders not suited to DVD...

Page 10: ... in the TV Guide On Screen system Other languages cannot be displayed TV Guide On Screen system This unit downloads a free television program list from a TV station and displays the list on the television screen The list offers you many convenient functions such as timer recording page 19 and so on page 23 This unit is not compatible with TV Guide On Screen systems broadcast by satellite Downloadi...

Page 11: ...ss 3 4 to change the setting 5 Press ENTER The clock starts 6 Press SETUP DST Daylight Saving Time ON or OFF If you select ON the clock is advanced one hour starting at 2 a m on the first Sunday in April and ending at 2 a m on the last Sunday in October TIME ZONE shows the time difference from Greenwich meantime GMT EST Eastern Standard Time l GMT j5 CST Central Standard Time l GMT j6 MST Mountain...

Page 12: ...ct operation If your television brand is not listed or if the code listed for your television does not allow control of your television this remote control is not compatible with your television To exit the screen Press SETUP To return to the previous screen Press RETURN Selecting television type 4 3 standard aspect television 16 9 widescreen television POWER VOLUME CH INPUT SELECT DVD POWER TV TV...

Page 13: ...or 3 and press ENTER 5 To change the code on the remote control While pressing ENTER press and hold the numbered button 1 2 or 3 for more than 2 seconds 6 Press ENTER When the following indicator appears on the unit s display Change the code on the remote control to match the main unit s step 5 To exit the screen Press SETUP To return to the previous screen Press RETURN When other Panasonic produc...

Page 14: ...e 17 Recording modes and approximate recording times You can perform chasing playback or Time Slip page 17 You can record digital broadcasts that allow One time only recording You can transfer dub a recorded title to a CPRM compatible DVD RAM however the title is erased from the HDD page 46 DVD RAM 4 7 GB 9 4 GB 12 cm 5z 2 8 GB 8 cm 3z RAM Re writable discs for backup use You can record up to 16 h...

Page 15: ...a play list will not increase the amount of time When HDD SLP SLEEP appears in the display The HDD has automatically gone into SLEEP mode in order to extend the life of the HDD Press HDD to activate While in SLEEP mode play or recording may not begin right away because the HDD takes time to be re activated If there is no disc in the unit the HDD will go into SLEEP mode after there has been no oper...

Page 16: ...ecording Press Recorded as 1 title until the position where stopped HDD When continuously recording for long durations titles are automatically divided every 8 hours DVD R It takes about 30 seconds for the unit to complete recording management information after recording finishes To pause recording Press Press again to restart recording Title is not split into separate titles To specify a time to ...

Page 17: ...title and press ENTER Time Slip indicator on the main unit lights To exit the Direct Navigator screen Press DIRECT NAVIGATOR 1 Press TIME SLIP Time Slip indicator on the main unit lights You will hear the playback audio 2 Press 3 4 to select the time and press ENTER Press TIME SLIP to show the play images in full Press again to show the play and recording images To stop play Press To stop recordin...

Page 18: ... input terminals If the audio output of the other equipment is monaural connect to L MONO The S VIDEO terminal achieves a more vivid picture than the VIDEO terminal 1 While stopped Press INPUT SELECT to select the input channel for the equipment you have connected e g If you have connected to L2 input terminals select L2 2 Press REC MODE to select the recording mode XP SP LP or EP Using Flexible R...

Page 19: ...hen the recording drive is DVD and there is not enough remaining space recording automatically switches to the HDD page 21 Relief Recording 4 Press TV GUIDE Returns to the television screen The unit is not off To save power turn the unit off by pressing Í DVD POWER When using the cable TV box make sure the cable TV box is turned on To check change or delete the program page 22 To utilize TV Guide ...

Page 20: ...he cable TV box make sure the cable TV box is turned on Notes on timer recording page 21 To cancel recording when recording has already begun Press then ENTER within 5 seconds You can also press and hold on the main unit for more than 3 seconds to stop recording Manually programming timer recordings POWER VOLUME CH INPUT SELECT DVD POWER TV TV VIDEO 1 HDD DVD 2 3 4 5 6 7 8 0 9 CM SKIP AUDIO PAGE D...

Page 21: ...CORD REMOVE FREQUENCY INFO 87 NWBG SP HDD R R RW RW R 11 00 11 55 Notes on timer recording F lights on the unit s display to indicate that the unit is in timer recording standby F flashes when the unit cannot go to timer recording standby Timer recordings are activated regardless of whether the unit is turned on off Timer recordings begin when the set time is reached even when recording or when pl...

Page 22: ...CH INPUT SELECT DVD POWER TV TV VIDEO 1 HDD DVD 2 3 4 5 6 7 8 0 9 CM SKIP AUDIO PAGE DRIVE SELECT CH CANCEL VCR Plus SKIP STOP PAUSE PLAY x1 3 SLOW SEARCH FUNCTIONS ENTER DIRECT NAVIGATOR TOP MENU RETURN SUB MENU CHAPTER SETUP Info PROG CHECK TV GUIDE REC MODE ERASE REC STATUS TIME SLIP DISPLAY DUBBING DUBBING PROG CHECK Í DVD POWER 3 4 2 1 ENTER CHAPTER TV GUIDE PAGE X CH W Info Numbered buttons ...

Page 23: ...nd press 4 3 Press 3 4 to select and press ENTER Customizing the channel line up 1 Press 3 several times to select LISTINGS 2 Press 2 1 to select SETUP and press 4 3 Press 3 4 to select Change channel display and press ENTER 4 Press 3 4 to select the channel Press PAGE X CH W to skip one screen To hide the channel Press CHAPTER Green to select OFF To change the channel number Press the numbered bu...

Page 24: ...TER Some items can also be selected using the numbered buttons VCD Press the numbered buttons to select the item e g 5 0 5 15 1 5 To return to the menu screen DVD A Press TOP MENU DVD V Press TOP MENU or SUB MENU VCD Press RETURN POWER VOLUME CH INPUT SELECT DVD POWER TV TV VIDEO 1 HDD DVD 2 3 4 5 6 7 8 0 9 CM SKIP AUDIO PAGE DRIVE SELECT CH CANCEL VCR Plus SKIP STOP PAUSE PLAY x1 3 SLOW SEARCH FU...

Page 25: ... to normal speed This does not work if the setting is Off in Search Audio PLAY k1 3 page 41 Slow motion HDD RAM DVD R DVD A Motion picture parts only DVD V VCD While paused press 6 or 5 On the main unit press and hold D or E The speed increases up to 5 steps Press 1 PLAY to restart play Forward direction only VCD The unit will pause if slow motion play is continued for 5 minutes Frame by frame HDD...

Page 26: ...disc tray while DVD drive is selected When the recording mode is XP and Audio for XP Recording is set to LPCM page 42 When DVD R High Speed Recording is set to On page 41 Editing operations during play Erase HDD RAM DVD R 1 Press ERASE 2 Press 2 1 to select Erase and press ENTER A title cannot be restored once it is erased Make certain before proceeding You cannot erase while recording or transfer...

Page 27: ... 0 9 No GROUP No Selected group G Group no T Track no in the group TOTAL Track no Total tracks in all groups Using the tree screen to find a group Tips for making MP3 discs Discs must conform to ISO9660 level 1 or 2 except for extended formats Compatible compression rate between 32 kbps and 320 kbps Compatible sampling rate 16 kHz 22 05 kHz 24 kHz 32 kHz 44 1 kHz and 48 kHz Maximum number of track...

Page 28: ...Menu Item Setting Disc menu Setting the disc content Sound track HDD RAM DVD R The disc s audio attributes appear DVD A DVD V Select the audio and language below Audio attribute Language Subtitle HDD RAM DVD R Only discs that contain subtitle on off information DVD A DVD V Turn the subtitle on off and select the language below Language Subtitle on off information cannot be recorded using this unit...

Page 29: ... Progressive page 46 Select ON to enable progressive output Select OFF if the picture is stretched horizontally When progressive output is on closed captions cannot be displayed Transfer When Progressive above is set to ON Select the method of conversion for progressive output to suit the type of material being played page 46 Film and video Auto1 normal Detects 24 frame per second film content and...

Page 30: ...f one chapter You can divide a title into multiple chapters HDD RAM page 26 Create chapters page 31 Divide Chapter You can change the order of chapters and create a play list HDD RAM Titles are divided into about 5 minute chapters after finalizing page 39 DVD R POWER VOLUME CH INPUT SELECT DVD POWER TV TV VIDEO 1 HDD DVD 2 3 4 5 6 7 8 0 9 CM SKIP AUDIO PAGE DRIVE SELECT CH CANCEL VCR Plus SKIP STO...

Page 31: ...ct Exit and press ENTER 3Press 2 1 to select Divide and press ENTER To confirm the division point Press 3 4 to select Preview and press ENTER The unit plays 10 seconds before and after the division point To change the division point Restart play and press 3 4 to select Divide then press ENTER at the point you want to change Note The divided titles retain the name and CPRM property page 46 of the o...

Page 32: ... arrange the chapters page 30 to create a play list Transferring dubbing page 35 a play list will create a title Play lists are not recorded separately so this doesn t use much capacity Editing play lists doesn t modify the recorded data Creating play lists POWER VOLUME CH INPUT SELECT DVD POWER TV TV VIDEO 1 HDD DVD 2 3 4 5 6 7 8 0 9 CM SKIP AUDIO PAGE DRIVE SELECT CH CANCEL VCR Plus SKIP STOP PA...

Page 33: ...y List View Select Play Previous 01 01 Next SUB MENU 01 Create 10 27 Mon 0 30 HDD Copy Enter Name Change Thumbnail Create Properties Edit Chapter View Erase Refer to Play list operations PLAY LIST Chapter View Select Previous 01 01 Next SUB MENU 08 10 27 Mon 0 30 001 002 Play HDD Move Chapter Divide Chapter Combine Chapters Erase Chapter Play List View Add Chapter Refer to Chapter operations Play ...

Page 34: ...TOP MENU can be previewed in Display in DVD R TOP MENU window HDD RAM Characters Title 64 Play list 64 Disc 64 DVD R Characters Title 44 Disc 40 POWER VOLUME CH INPUT SELECT DVD POWER TV TV VIDEO 1 HDD DVD 2 3 4 5 6 7 8 0 9 CM SKIP AUDIO PAGE DRIVE SELECT CH CANCEL VCR Plus SKIP STOP PAUSE PLAY x1 3 SLOW SEARCH FUNCTIONS ENTER DIRECT NAVIGATOR TOP MENU RETURN SUB MENU CHAPTER SETUP Info PROG CHECK...

Page 35: ...same transferring dubbing list You can transfer dub your favorite titles and play lists to an archive disc Transferring dubbing a play list will create a title When you want to re edit finalized content on a DVD R etc When you want to play a transferred dubbed disc on other equipment you must finalize the disc after transferring dubbing page 39 46 Before recording to HDD set DVD R High Speed Recor...

Page 36: ...Press 3 4 to select Create list and press 1 2 Press 3 4 to select New entry and press ENTER 3 Press 3 4 2 1 to select Title or Play List tab and press ENTER 4 Press 3 4 2 1 to select the titles or play lists and press ENTER When transferring dubbing to DVD R using high speed mode only items indicated with can be registered Repeat step 2 4 as necessary To erase add or move items from the list page ...

Page 37: ...nal picture and audio quality cannot be exactly replicated Titles and play lists that can be transferred dubbed in high speed mode to DVD R page 41 Title with One time only recording restriction Titles erased from the HDD by recording restrictions after transferring dubbing Title or play list contains still picture s Still picture s cannot be transferred dubbed Dubbing list Data size recorded to t...

Page 38: ...ss FUNCTIONS 2 Press 3 4 2 1 to select DISC SETTING and press ENTER 3 Press 3 4 to select the operation and press ENTER To exit the screen Press RETURN several times To return to the previous screen Press RETURN Note Once the disc has been formatted the contents cannot be restored Check carefully before proceeding The contents on the disc are erased when you format it even if you have set title or...

Page 39: ...enu or Title 1 and press ENTER Top Menu The top menu appears first Title 1 The disc content is played without displaying the top menu page 46 Finalize DVD R You can play DVD R on compatible DVD players by finalizing them on this unit effectively making them into DVD Video that complies with DVD Video standards Set TOP MENU and Select First play above before finalizing the disc 1 Press 2 1 to selec...

Page 40: ... the TV Guide On Screen system Antenna System 2 Select to suit the type of antenna you are using TV CATV Auto Channel Setting 1 page 43 j Preset Channel Captions 2 page 44 j Manual Channel Captions 2 page 44 j Set Up Off Timer Select how long the unit remains on when it is not being used 2 hr 6 hr Off Remote Control Code page 13 Set Code 1 Set Code 2 Set Code 3 Auto Clock Setting 1 page 43 Manual ...

Page 41: ...ording Off Reduces the ghosting that occurs when recording fast moving images Hybrid VBR Resolution page 46 VBR Automatic The resolution is automated to provide efficient recording with less block noise HDD RAM Fixed The resolution is fixed to ensure that there is no loss of source picture resolution while recording Still Mode Select the type of picture shown when you pause play page 46 Frames and...

Page 42: ...ent displaying the DTS logo PCM When connecting to equipment not displaying the DTS logo Audio for XP Recording Choose the audio type when recording or transferring dubbing with XP mode Dolby Digital page 46 LPCM page 46 The picture quality of LPCM recordings may be lower than that of normal XP mode recordings The audio recording becomes Dolby Digital even if you selected LPCM when using a recordi...

Page 43: ...Eastern Standard Time l GMT j5 CST Central Standard Time l GMT j6 MST Mountain Standard Time l GMT j7 PST Pacific Standard Time l GMT j8 AST Alaska Standard Time l GMT j9 HST Hawaii Standard Time l GMT j10 For other areas xx hr If the Auto Clock Setting does not start automatically select Auto Clock Setting from the Set Up tab If the time was not set correctly use manual clock setting page 11 or t...

Page 44: ...o delete the channel number press CANCEL Repeat steps 4 and 5 to enter other channels 6 Press ENTER 3 Press 3 4 to select Manual Channel Captions and press ENTER 4 Press 3 4 to select the channel and press 1 Channels are only displayed if they contain a station and if preset captions have not been added 5 Press 3 4 to select the first character and press 1 You can choose from the following charact...

Page 45: ...75 Component video output 480P 480i Y 1 0 Vp p 75 PB 0 7 Vp p 75 PR 0 7 Vp p 75 Others Regional code 1 Clock unit Quartz controlled 12 hour digital display Operating temperature range 5 oC 40 oC 41 oF 104 oF Operating humidity range 10 80 RH no condensation Power supply AC 120 V 60 Hz Power consumption 35 W Dimensions Approx 430 W k79 H k274 D mm Approx 1615 16q W k31 8q H k1013 16q D excluding pr...

Page 46: ...ssion method that compresses audio to approximately one tenth of its size without any considerable loss of audio quality You can play MP3 you have recorded onto CD R and CD RW Pan Scan Letterbox In general DVD Video are produced with the intention that they be viewed on a widescreen television 16 9 aspect ratio so images often don t fit regular 4 3 aspect ratio televisions Two styles of picture Pa...

Page 47: ... RW Please tell me about CD R and CD RW compatibility with this unit You can play CD R and CD RW on this unit that are created using a compatible format You cannot write to a CD R or CD RW with this unit 14 27 Can I record from a commercially purchased video cassette or DVD Most commercially sold video cassettes and DVD are copy protected therefore recording is usually not possible Can a DVD R rec...

Page 48: ...overy process You cannot operate the unit while it is recovering SELF CHECK appears on the unit s display No disc The disc may be upside down Please change the disc There may be a problem with the disc Press OPEN CLOSE on the main unit to remove it and check it for scratches or dirt The unit turns off automatically after you open the tray 15 This is a non recordable disc The unit cannot record on ...

Page 49: ...t Automatic in Status Messages in the SETUP menu 42 The blue background does not appear Select On in Blue Background in the SETUP menu 42 The 4 3 aspect ratio picture expands left and right Screen size is wrong Use the television to change the aspect If your television does not have that function set Progressive in the Video menu to OFF Check the settings for TV Type 4 3 TV Settings for DVD Video ...

Page 50: ... the number of titles has reached its limit Erase unwanted titles You cannot record on finalized DVD R discs Due to peculiarities of DVD R you may be unable to record onto them if you either insert and remove the disc or switch the unit on and off while a disc is loaded a total of fifty times A DVD R recorded on this unit may not be recordable on other Panasonic DVD recorders 14 39 14 39 26 31 39 ...

Page 51: ...s This occurs between chapters and with partially deleted titles on finalized DVD R that have been transferred dubbed using the high speed mode DVD Video is not played Some DVD Video cannot be played when you change the ratings level 41 Alternative soundtrack and subtitles cannot be selected The languages are not recorded on the disc You may have to use the disc s menus to select languages No subt...

Page 52: ...damage that is attributable to acts of God THERE ARE NO EXPRESS WARRANTIES EXCEPT AS LISTED UNDER LIMITED WARRANTY COVERAGE THE WARRANTOR IS NOT LIABLE FOR INCIDENTAL OR CONSEQUENTIAL DAMAGES RESULTING FROM THE USE OF THIS PRODUCT OR ARISING OUT OF ANY BREACH OF THIS WARRANTY As examples this excludes damages for lost time travel to and from the servicer loss of media or images data or other recor...

Page 53: ...S FOR A PARTICULAR PURPOSE IN NO EVENT WILL PANASONIC CANADA INC BE LIABLE FOR ANY SPECIAL INDIRECT OR CONSEQUENTIAL DAMAGES In certain instances some jurisdictions do not allow the exclusion or limitation of incidental or consequential damages or the exclusion of implied warranties so the above limitations and exclusions may not be applicable WARRANTY SERVICE For product operation and information...

Page 54: ...l orden numerado B Televisión C Cuando haga esta conexión asegúrese de conectar los cables de audio a los terminales de entrada de audio correspondientes del televisor D TV por cable E Antena exterior F Antena interior G Cable de alimentación de CA Conecte solamente después de haber terminado todas las otras conexiones H Rojo Blanco Amarillo I A una toma de CA de casa CA 120 V 60 Hz J 75Cable coax...

Page 55: ...a ilustración que aparece en la página 12 de la sección en idioma inglés 1 Pulse SETUP 2 Pulse 3 4 para seleccionar Display y pulse 1 3 Pulse 3 4 para seleccionar On screen Language y pulse ENTER 4 Pulse 3 4 para seleccionar Español y pulse ENTER 5 Pulse 2 6 Pulse 3 4 para seleccionar Pantalla TV y pulse 1 7 Pulse 3 4 para seleccionar Tipo TV y pulse ENTER Aspecto 4 3 Aspecto 16 9 Televisor de asp...

Page 56: ...6 on screen 42 sound track 28 subtitle 28 40 LPCM 46 Menu MP3 27 on screen 28 SETUP 40 Mode recording 17 Still Mode 41 MPEG DNR 29 MP3 27 Noise redction NR Integrated DNR 29 MPEG DNR 29 Line in NR 41 3D NR 29 One Touch Transfer dubbing 36 On screen language 42 menus 28 Status messages 29 PCM Down Conversion 42 Picture 29 Play list 32 Progressive 29 46 Properties play list 33 title 31 Protection ca...

Page 57: ...s or channel information Without this information program based recordings cannot be made However timer recordings can be made if manually entered Step 2 Setting up the TV Guide On Screen System After connecting your DVD Recorder as described on page xx we now need to enter some information about how you receive TV broadcasts If further assistance is needed contact Panasonic s Customer Call Center...

Page 58: ... arrow keys on the remote select the country you live in and press the ENTER key to continue 3 Using either the numeric keypad or the UP DOWN arrow keys on the remote enter your zip code Press the ENTER key to continue 3 ...

Page 59: ...res you to use a cable box select Yes using the UP DOWN arrow keys press ENTER and proceed to the next step If you are not required to use a cable box select No then press ENTER and proceed to Step 11 6 If you re using a cable box you ll now be asked a series of questions that will set up the IR Blaster The IR Blaster is a device that will allow your DVD recorder to communicate with your cable box...

Page 60: ...timum video quality For cable boxes without Audio Video outputs select the appropriate channel to receive the cable box signal Press the ENTER key to proceed 8 Verify that the IR Blaster is connected and positioned properly This device allows your DVD Recorder to communicate with your cable box It s very important that the IR Blaster is connected properly 5 ...

Page 61: ...e to be repeated numerous times Once your cable box properly responds to the DVD Recorder select Yes using the UP DOWN arrow keys and press ENTER 11 The confirmation screen should now be displaying all of the setting made These include your zip code how you receive TV programming and information about your cable box if one is being used If all is correct select Yes using the UP DOWN arrow keys and...

Page 62: ... to capture the channel lineup and program data This will only take place when the unit is placed into the STANDBY mode While the unit is ON Press the Power button to place the unit in STANDBY mode The front panel display will briefly display Bye and the time will be displayed It s VERY important especially during the first 7 days of use that the unit is placed into standby mode when you aren t us...

Page 63: ...s unplugged and loss of power occurs 2 If a cable box is used and the cable box was turned off or if a cable signal outage occurred A loss of program data due to one of the above conditions would not indicate a technical problem with your unit Once the power and signal is restored the unit will resume to capture program data when in the standby mode TV Guide On Screen System Operating Modes and Fe...

Page 64: ...he RECORD action button to schedule the selected show for recording NOTE This feature only allows for recording ONCE and if you would like to change the frequency for recording regularly or weekly please follow the instructions for the SCHEDULE MENU 3 Once the selected show has been set for recording a confirmation message and a red circle R will appear on the screen next to the selected show 4 On...

Page 65: ...schedule a show for one time viewing NOTE This feature only allows for viewing ONCE and if you would like to change the frequency for viewing regularly or weekly please follow the instructions for the SCHEDULE MENU 3 A heart shaped icon will appear on the screen next to the scheduled show to provide confirmation that the selected show has been set under FAVORITES FAVORITE RECORD Program Cancellati...

Page 66: ...Main Menu use the LEFT RIGHT buttons on the Remote to select SORT 2 Press the DOWN arrow key to move into the Main Category section 3 Select the desired category by using the LEFT RIGHT buttons on the remote 4 Confirm selection by using Channel DOWN 5 Select sub categories by pressing UP DOWN or LEFT RIGHT 6 Confirm by selecting OK 7 Use the channel UP DOWN buttons to scroll through the scheduled ...

Page 67: ...t the FREQUENCY button to choose REGULARLY WEEKLY DAILY or OFF Note By Selecting OFF keeps the show to remain in schedule and inactive until the frequency is changed To edit the START END Time of a scheduled program Recording 1 Use the UP DOWN buttons to select desired program 2 Press the ENTER button on the remote 3 Use numeric buttons 0 9 on the remote to set Start Early and End Late By this can...

Page 68: ...d download times 1 From the Main Menu Bar use the LEFT RIGHT arrow keys on the remote to select PROMOTIONS 2 Press the DOWN arrow key to move into the Feature Menu 3 Use the UP DOWN buttons to select desired promotional panel Once highlighted the graphic will be displayed to the left on the Information Box 4 Use the INFO key or LEFT RIGHT arrow keys to display additional text 5 Press the INFO key ...

Page 69: ... to highlight Change Channel Display 3 Press Enter now you will be in the Channel Editor Screen To Turn a channel ON or OFF 1 Use the UP DOWN arrow buttons on the remote to highlight the channel 2 Select the ON OFF Green action button To reassign a channel 1 Use the UP DOWN arrow buttons on the remote to highlight the channel 2 Use the keypad on the remote 0 9 to change the assigned channel number...

Page 70: ...off for several consecutive hours immediately after initial setup However to insure that all complete data is captured a 24 hour waiting period is recommended 7 Q I completed the initial set up for my TV Guide On Screen hours ago but when I try to turn it on a screen message tells me to input the correct set up information What s wrong Answer There are three possibilities 1 Initial set up was done...

Page 71: ... Settings appears select No repeat setup process Follow the on screen prompts and input the correct information Channel Lineups and Listings 1 Q I ve noticed that certain local channels are not displayed in the program guide why Answer The actual channels your TV Guide On Screen System displays is determined by market penetration in your local area In addition data for local programming which is n...

Page 72: ...cessarily Cable TV subscribers receive channel data for all available channels your cable TV provider offers In order to view all the channels you d also have to subscribe to all the channels If you are connected to an off air antenna the channel data you receive often represents a viewing area larger than you would typically be able to receive Your location the type of TV antenna you are using an...

Page 73: ...nswer Yes there can be a short delay from the time the user selects a channel to the time the cable box changes 2 Q My cable box will not change channels with TV Guide On Screen system What s wrong Answer There are four possibilities 1 The cable box has no remote capability and is incompatible 2 The incorrect cable box brand code was selected during the TV Guide On Screen initial set up On the TV ...

Page 74: ...confirmation message will appear on the screen and an R will appear next to the scheduled title 2 Q Why won t my Recorder change channels or it changes to the wrong channel Answer There are two possibilities o The user selected the incorrect channel lineup On the remote press the GUIDE key highlight LISTINGS then use the RIGHT LEFT arrow keys to highlight Setup Use the DOWN arrow key to highlight ...

Page 75: ...RLY basis does it count as five Answer No whether a program is scheduled ONCE REGULARLY or WEEKLY it only counts as one show in the RECORD stack memory 8 Q Why does my SCHEDULE screen only show the channel number of the show I m recording instead of the title Answer The time slot and channel for the scheduled program may have not yet received listings information Once updated information is receiv...

Reviews: