Panasonic CF-WEB194AC, Service Manual
The Panasonic CF-WEB194AC Service Manual is available for free download on our website. This comprehensive manual provides detailed instructions and information to assist users in maintaining and troubleshooting their Panasonic CF-WEB194AC. Download it now from our website to access this valuable resource for your device.
Share
Download


Reviews:
No comments
Related manuals for CF-WEB194AC

CA76669
Brand: La Crosse Technology Pages: 13

U442-DOCK5-GY
Brand: Tripp Lite Pages: 42
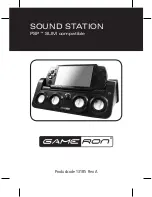
SOUND STATION FOR PSP SLIM
Brand: GAMERON Pages: 40

U3-D8510
Brand: Magic Control Technology Pages: 8

291528
Brand: Auriol Pages: 167

GMX100
Brand: Gill Pages: 144

43231
Brand: Lindy Pages: 8

SPK331i
Brand: Gembird Pages: 14

1002UU02
Brand: Honeywell Pages: 9

BA812E
Brand: Oregon Scientific Pages: 2

BAA898HG
Brand: Oregon Scientific Pages: 14

BA-116
Brand: Oregon Scientific Pages: 9

AWS888
Brand: Oregon Scientific Pages: 21

SMARTDESIGN Series iC50
Brand: iHome Pages: 16

92656
Brand: Hama Pages: 32

EWS-2100
Brand: Hama Pages: 33

00186369
Brand: Hama Pages: 178

FS 40 H
Brand: brennenstuhl Pages: 100


