Palsonic TFTV6040BR, Instruction Manual
The Palsonic TFTV6040BR is a high-quality LED TV with a sleek design and vibrant display. Make the most of your viewing experience by downloading the Instruction Manual for free from manualshive.com. This comprehensive manual will guide you on how to set up and operate your new TV effortlessly.
Share
Download


Reviews:
No comments
Related manuals for TFTV6040BR

20MC4206 - Tv/dvd Combination
Brand: Magnavox Pages: 64

20MC4206 - Tv/dvd Combination
Brand: Magnavox Pages: 64

19MD357B - Hook Up Guide
Brand: Magnavox Pages: 3

20MC4304 - Tv/dvd/vcr Combination
Brand: Magnavox Pages: 80
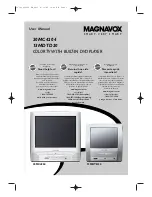
13MDTD20 - Dvd-video Player
Brand: Magnavox Pages: 60

27MDTR20 - Tv/dvd/vcr Combination
Brand: Magnavox Pages: 4

LEV40A317FHD
Brand: Teac Pages: 2

155G-GB-1B-FTCDU-UK
Brand: Blaupunkt Pages: 26

MV13N2
Brand: Toshiba Pages: 2

MV13N2
Brand: Toshiba Pages: 56

MV13K3CR
Brand: Toshiba Pages: 62

MV13K2
Brand: Toshiba Pages: 70

SD-P5000
Brand: Toshiba Pages: 84

LCDVD2454A
Brand: Curtis Pages: 48

DF-7150D
Brand: Daewoo Pages: 31

CD130MW8
Brand: Magnavox Pages: 90

DVR4175
Brand: GoVideo Pages: 38

DVR4000
Brand: GoVideo Pages: 64


