Osada Premiu Plus, User Manual
The Osada Premiu Plus is a versatile and user-friendly product that comes with a free User Manual for easy setup and operation. You can download the manual from manualshive.com to access detailed instructions and troubleshooting tips. Ensure smooth usage of your Osada Premiu Plus with this comprehensive manual.
Share
Download


Reviews:
No comments
Related manuals for Premiu Plus
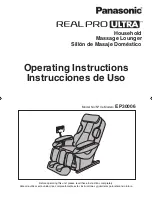
EP30006KU - Real Pro Ultra Massage Chair
Brand: Panasonic Pages: 50

FMVH-2
Brand: Vitalcare Pages: 4

5903641991223
Brand: MASSAGGIO Pages: 40

Berkeley
Brand: Dynamic Pages: 16

smart profile
Brand: Clarisonic Pages: 116

POWERGLIDE iWMG18
Brand: iHome Pages: 6

SHIATSUMASSAGE LOUNGER iWST26
Brand: iHome Pages: 8

PM10-GB
Brand: Salter Pages: 2

OxySonic Eye Spa ST243
Brand: Pretika Pages: 12

Obus Forme HMC1
Brand: Conair Pages: 2

HM9CSC
Brand: Conair Pages: 2

CVSW32BA
Brand: Conair Pages: 2

BodyBenefits BMS9PC
Brand: Conair Pages: 6

FB10SC
Brand: Conair Pages: 6

FM6C
Brand: Conair Pages: 8

Body Benefits
Brand: Conair Pages: 8

QUATTROMED V
Brand: Casada Pages: 39

Tecnovita ZENTROMAX YM921
Brand: BH Pages: 38


