

This Quick Reference Guide provides instructions to use the Cell Counter model R1. For detailed instructions, please refer to the user manual in the supplied USB memory.
Using the R1 with Trypan Blue Stain
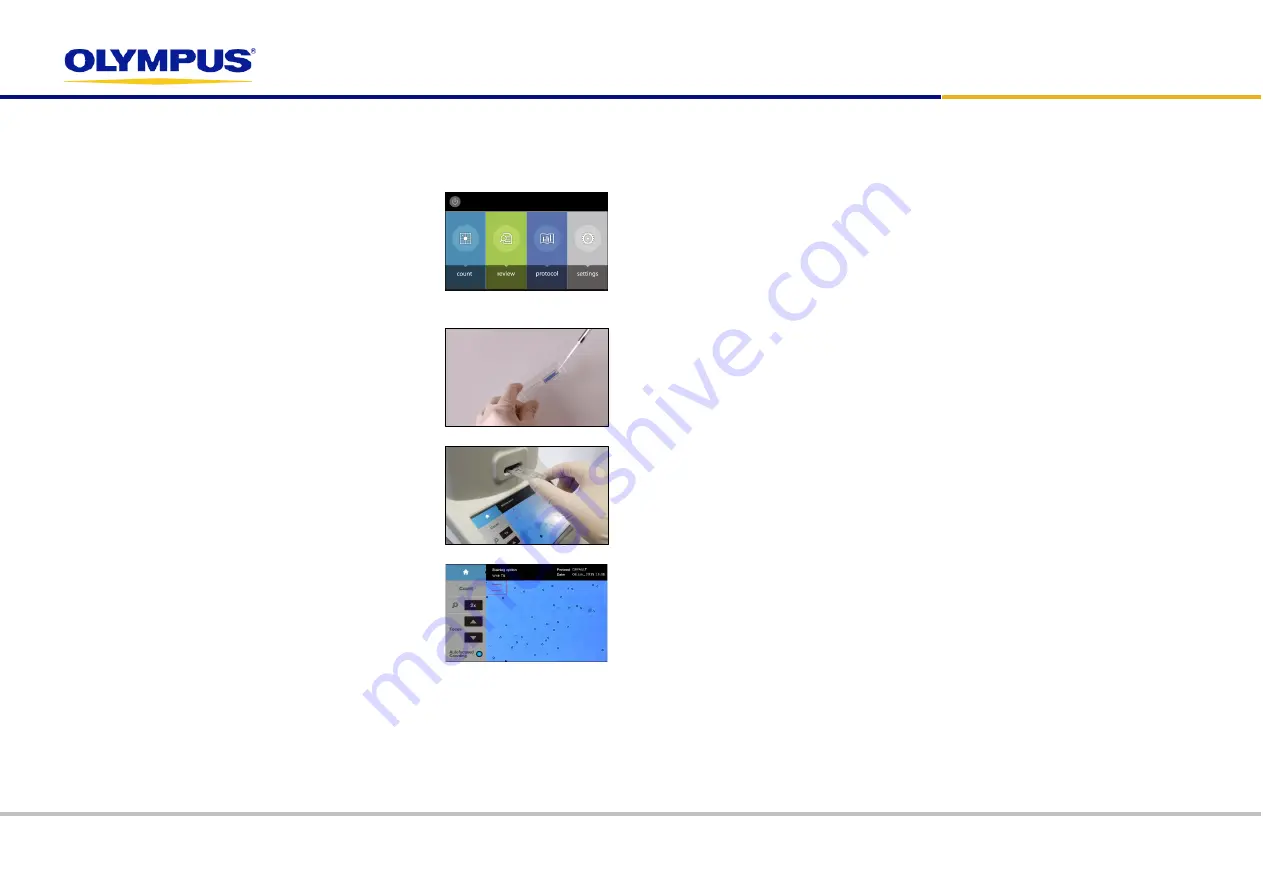
1. Select protocol
•
Select
protocol
from the main menu.
•
Select the DEFAULT or desired protocol.
•
Make sure the dilution factor is set to 2 to count with
trypan blue.
•
Press
Load
to apply the selected protocol.
2. Prepare & load sample
•
Mix 10 µL cell suspension with 10 µL trypan blue.
Pipette gently.
•
Open a new Cell Counting Slide.
•
Hold the Cell Counting Slide by its edges and load
10 µL of the cell sample into a sample chamber.
3. Insert slide
•
Insert the Cell Counting Slide face up and sample-
side first into the counting slide port of R1.
!
Important!
Do not insert the Cell Counting Slide
facedown.
4. Count cells
•
Select
count
from the main menu.
•
Make sure the staining option is “With TB”.
•
Press the circle next to
[Autofocused Counting]
.
The circle will turn blue when the autofocus is
activated.
•
Press
[Count]
.
Results
1. Save and print results
•
Insert a USB memory.
•
Press
[Save/Print]
in the Results screen.
•
Select the desired saving options (analyzed image, raw image, report).
•
Name the count with the onscreen keyboard. Press
Add Date/Time
to add the date
and time to the name.
•
Press
Save
. A folder will be created to contain the generated files.
•
Press
to get a printed report of the cell count results.
2. Image View
•
Press
[Image]
to view the captured image of the analyzed cell sample.
•
Press the magnifier button to zoom in and out of the image.
•
Press
Tag
to label what was counted as live cells with green circles and dead cells
with red circles.
3. Histogram and Gating
•
Press
[Histogram & Gating]
to see a graphical representation of the cell count
results.
•
Press
Total/
on
. The button will become
Live/
on
and display the size distribution of
only live cells. Press
Live/
on
. The button will become
Dead/
on
and display the size
distribution of only dead cells.
•
Select a light grey limit icon. Press the arrows to alter the size limits.
•
Press
Apply
to set the size gating limits. The count results will adjust accordingly.
•
Press
Cell number
to change the Y-axis to
Cell Concentration
.
•
Press
Cluster Map/off
to change it to
Cluster Map/on
and show the distribution of
cell clusters.
4. Dilution Calculations
•
Press
[Dilution]
to view the dilution calculator.
•
Press
[Total]
to change the current concentration to
[Live]
, the concentration of live
cells in the cell suspension.
•
Input the values into the blanks for the desired final concentration and volume.
•
Press
Calculate
to receive directions for dilution.
Cell Counter model R1
QUICK REFERENCE GUIDE
AX8818 Ver01


