background image

OKTOBER CAN SEAMERS           
Model 7  
Operation Manual 


   Original Version.  January 14, 2020 

Oktober Can Seamers 5 Colfax St. NE, Grand Rapids, MI 49505 

Summary of Contents for 7

Page 1: ...OKTOBER CAN SEAMERS Model 7 Operation Manual Original Version January 14 2020 Oktober Can Seamers 5 Colfax St NE Grand Rapids MI 49505...

Page 2: ...located in the accessories box that comes with the seamer by threading them into the holes located on the roller housings ATTENTION Make sure the locking spring washer wavy washer is between the handl...

Page 3: ...em Never reach into area around the upper chuck and rollers while operating The rollers can pinch or draw in fingers and objects and cause injury Never remove the top cover while operating The spinnin...

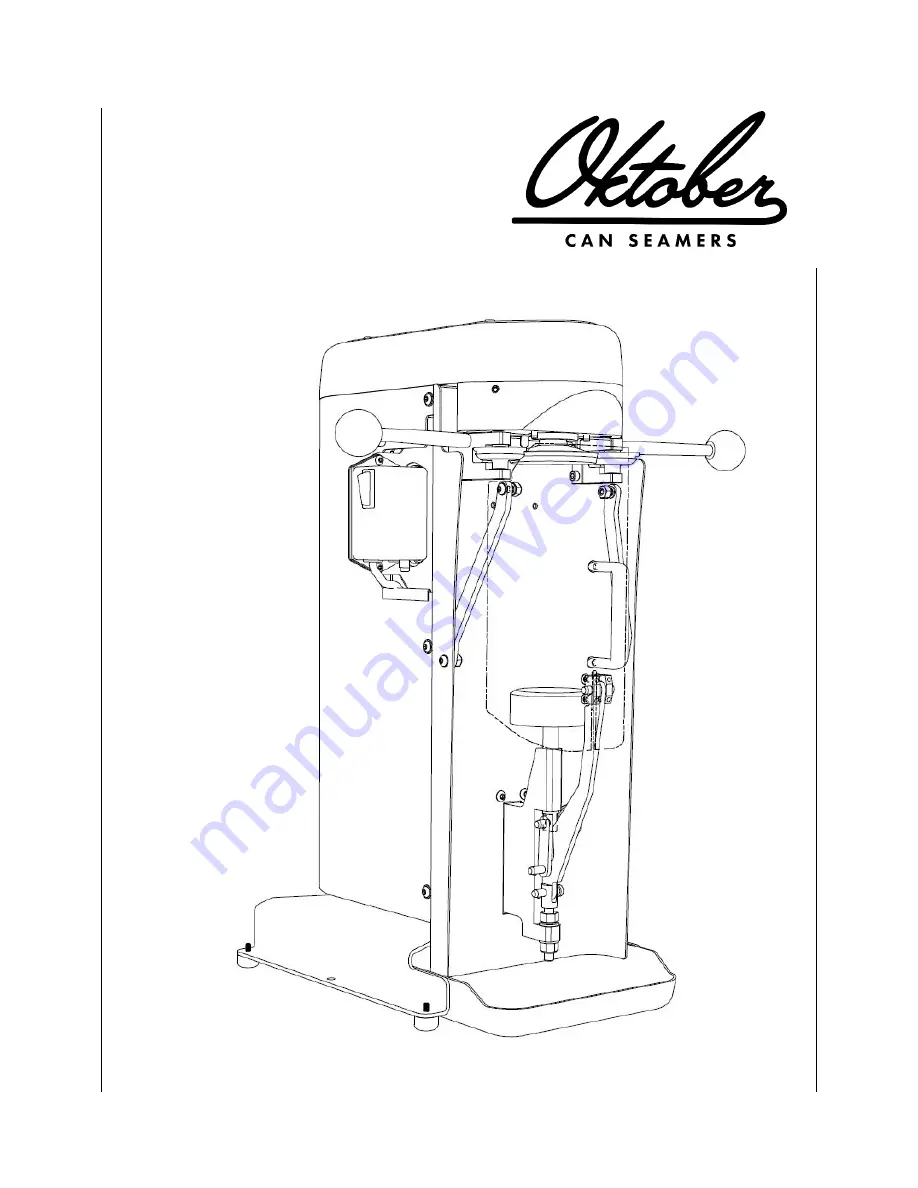
Page 4: ...MODEL 7 SEAMER DIAGRAM...

Page 5: ...Comes with lower adapters for 19 2oz and 16oz cans E Size 206 ends Comes with lower adapters for 24oz cans F Size 209 ends Comes with lower adapters for 1000ml cans G Size 300 ends Comes with lower ad...

Page 6: ...ul tip The can guides two extended screws below the upper chuck are designed to hold the can upright and in the correct position to close the splash guard door Set the can onto the lower adapter and l...

Page 7: ...e power switch to the on position The can will start to spin 6 Rotate the first operation lever right side of the seamer when facing it until the roller makes contact with the edge of the can end 7 On...

Page 8: ...ter off the base shaft bearing and use a rag and warm water to wipe down the bearing washer s and wave spring see diagram above Dry them off and add a dab of grease into the bearing and rub some onto...

Page 9: ...on the Oktober website When measuring the seam thicknesses the calipers should be parallel to the inside taper of the can as shown below rather than parallel to the straight sides of the can Make sur...

Page 10: ...02 ends 074in 078in Size 206 ends 074in 078in Size 300 ends 104in 112in 2 Place the can back into the seamer and run the second operation Remove the can and measure the final seam thickness as shown S...

Page 11: ...he seam out of the can body as shown Start from the notch that you cut with the nippers 6 Measure the cover hook length in at least 3 places around the inside lip of the removed seam Cover Hook Length...

Page 12: ...7 Measure the body hook length in at least 3 positions around the perimeter of the can Body Hook Length Size 200 and 202 ends 055in 075in Size 206 ends 060in 080in Size 300 ends 072in 088in...

Page 13: ...e accessed with the back cover still attached to the seamer through access slots The nut requires a 3 8in wrench and the screw requires a 5 32in allen key To decrease the operation seam thickness loos...

Page 14: ...he vertical position locking screw The roller assembly should now be free to move up and down Position the roller above the chuck as shown by rotating the operation lever to the hard stop position All...

Page 15: ...urns Note the lower nut s function is to take up play in the base adjuster The upper nut is used to set the actual base force You will need an un seamed can and end to set the base force Turning the u...

Page 16: ...move the top cover Remove the drive belt by pushing an edge of it off the large pulley and spinning that pulley by hand The belt should slide off easily loosen the set screw located on the side of the...

Page 17: ...See diagram below Reassemble the washers and spring washer and pulley as shown Make sure the concave side of the spring washer faces down Thread on the Locknut and tighten it by hand Lightly tighten t...

Page 18: ...sure the brass washers are oriented as shown below Loosely re tighten the roller assembly retaining nut until you feel a slight drag when rotating the roller assembly arm DO NOT OVERTIGHTEN Base Shaf...

Page 19: ...new oil into the bearing and its axle Re assemble as described above Troubleshooting Can does not spin when seamer is turned on Sometimes during shipping the motor gets displaced enough for the drive...

Page 20: ...ther the thermal overload switch located on the bottom of the motor or circuit breaker white button located on the backside of the electrical box has tripped You will need to remove the seamer s back...

Page 21: ...correctly Check to ensure that the wave spring and washer are located properly under the lower adapter see MODEL 7 SEAMER DIAGRAM The base force clamping pressure will not be correct without the sprin...

Page 22: ...etal but the bit will use friction to spin the threads out the other side of the hole When replacing the handle with a new one make sure to tighten it in using the nut between the handle and the black...

Reviews: