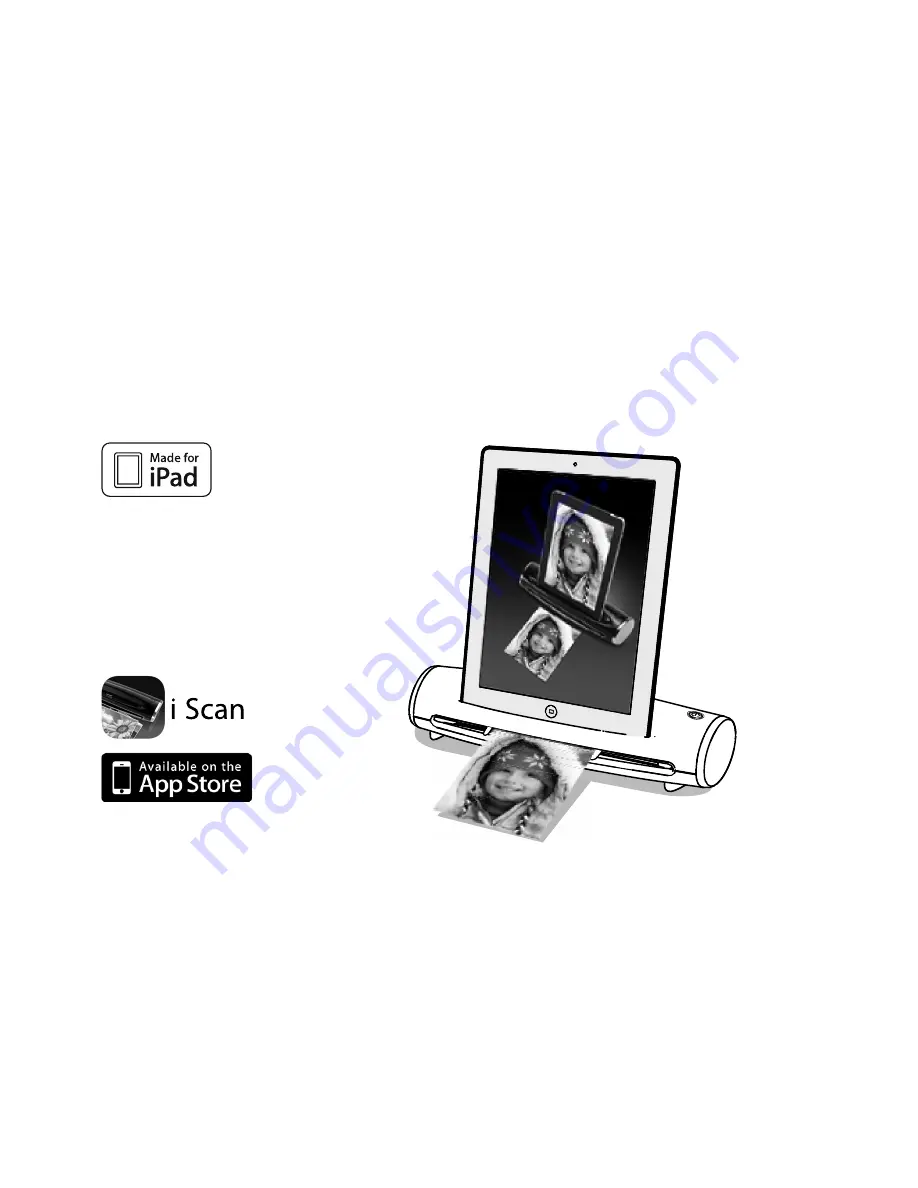
background image

Docking Scanner

User Guide

Work with


The "Made for iPad" logo means 
that an electronic accessory 
has been designed to connect 
speci

fi

 cally to iPad and has been 

certi

fi

 ed by the developer to meet 

Apple performance standards. 
Apple is not responsible for 
the operation of this device or 
its compliance with safety and 
regulatory standards. Please note 
that the use of this accessory 
with iPad may affect wireless 
performance. 

Works with

-

Scanner App

All trademarks are the property 
of their respective owners and all 
rights are acknowledged.

v1.1

Summary of Contents for iScanner

Page 1: ...y the developer to meet Apple performance standards Apple is not responsible for the operation of this device or its compliance with safety and regulatory standards Please note that the use of this ac...

Page 2: ...ee tea etc Be carefully to keep it without dropping it or strong impact Operate the scanner on a level well grounded work surface free of excessive vibration Don t open the scanner case alone without...

Page 3: ...verview 6 Power Source 7 Power On Off 8 Connect to iPad 8 Download Install Scanner App i Scan App 9 Scan 10 Save 10 App Launch Message on iPad iOS 5 11 Tips Hints 12 Specifications 14 Appendix 1 Calib...

Page 4: ...4 Quick Getting Started 1 Attach USB Cable iPad supplied USB Power Adapter 2 Turn on Power 3 Dock iPad 4 Install i Scan App from App store 5 Insert Photo and Scan 6 Preview and Save...

Page 5: ...5 Unpack The following items should include in your packaging Scanner USB Cable Calibration Sheet Roller Cleaner 5 x7 Quick Start Guide Lens Cleaner Photo Protective Sleeve Quick Start Guide...

Page 6: ...6 Overview iPad Dock Connector Feed Slot Exit Slot Stand Mini USB port for power input only Paper Guide Power Button Front Rear Paper Guide Power LED...

Page 7: ...th your iPad packaging 1 Connect the small end of the USB cable to the mini USB port of the scanner 2 Connect the other end of the USB cable to the iPad supplied USB Power Adapter 3 Connect the iPad s...

Page 8: ...n the power LED is blinking Wait until the blinking stops Check the battery level in the upper right corner of your iPad Home screen Make sure it is above 20 at least when docked If not please charge...

Page 9: ...p icon will then appear on the iPad Home screen Make sure that your iPad is connected to a Wi Fi network before you download and install applications Refer to iPad user guide to activate the WiFi conn...

Page 10: ...starts with the real time preview on the iPad s screen 4 When the photo document is displayed fully on the iPad s screen the scan is completed Save Tap the button The image will be saved to your iPad...

Page 11: ...ability to auto launch the i Scan app when your iPad is docked and turned on If your iPad is running on iOS 5 the message on the right will pop up asking if you want to launch the app tap Allow App L...

Page 12: ...docked iPad in place while charging Make sure the unit is turned off Once the power is turned off the docked iPad starts charging The scanned image is poor Please clean and calibrate the scanner if th...

Page 13: ...buttons nor unplug iPad and the power source If the scanner is not working properly e g the busy icon remains for a long time try forcing i Scan app to close reconnect the power and then restart iPad...

Page 14: ...240V 0 45A 0 45A 50 60 Hz Output 5 1V 2 1A by iPad supplied USB Power Adapter Power Consumption 10 5W Maximum 5V 2 1A File Format JPEG Dimensions 308 x 111 x 72 mm 12 1 x 4 4 x 2 8 W x D x H Weight 6...

Page 15: ...to time Remove the film on the calibration sheet before use Make sure the calibration sheet is clean and free of dust before use 1 Tap the screen 2 Choose Settings Calibrate 3 Insert the calibration s...

Page 16: ...ing use a photo protective sleeve to help Remove the film on the photo protective sleeve before use Place the photo inside the protective sleeve as illustrated below Make sure the sealed end of the pr...

Page 17: ...leaner and lens cleaner are clean and free of dust before use Use a roller cleaner 1 Tap the screen 2 Choose Settings Clean 3 Hold the grip handle of the roller cleaner with the sponge side facing DOW...

Page 18: ...cleaner with the sponge side facing DOWN 3 Insert firmly the lens cleaner with the fabric side facing UP into the exit slot 4 Pull the lens cleaner all the way to the end of the exit slot 5 Move the l...

Page 19: ...s supplied to the mini USB port constantly Power LED indicator Scanner Status USB Power Adapter On Steady Blue Ready for use Pluged Off No light iPad Charging Pluged OFF The USB Power Adapter is the a...

Reviews: