background image

Norstar, Meridian and Companion are trademarks of 
Nortel Networks
© Nortel Networks 2001

Companion

Modular ICS 5.0

Installer Guide

1-800-4 NORTEL

www.nortelnetworks.com/

norstar

P0941568 01

Printed in Canada

(to be used with MICS-XC 5.0 software)

Summary of Contents for Modular ICS 5.0 Companion

Page 1: ...d Companion are trademarks of Nortel Networks Nortel Networks 2001 Companion Modular ICS 5 0 Installer Guide 1 800 4 NORTEL www nortelnetworks com norstar P0941568 01 Printed in Canada to be used with MICS XC 5 0 software ...

Page 2: ......

Page 3: ...On a maxi system 9 On a mega system 10 ICS numbering 13 Installation 15 Installation checklist 15 Connecting expansion modules 16 Installing Remote Power Interconnect RPI units 16 Mounting the RPI unit 18 Wiring the RPI 20 RPI Connector Overview 21 Installing base stations 28 Positioning a base station 28 Mounting a base station 29 Installing portable telephones 32 Installing external antennas and...

Page 4: ...ing programming 53 Entering programming for system coordinators 54 Entering programming using other passwords 55 Norstar features 55 Portable features 55 Registration password 55 Changing the Registration password 56 Companion programming 57 Registration 57 Radio data 59 System logical identifier LID 63 Software keys U S only 64 Registering individual portables 70 Registering the C3060 70 C3060 Ic...

Page 5: ...uring directed RSSI 87 Measuring directed RSSI using your portable 88 After registering the portables 89 Testing 90 Testing the Companion portable telephones 90 Testing the base stations 90 Testing the system coverage 91 Troubleshooting 92 Problems with a portable telephone 92 Problems with a base station 92 Replacing a base station 94 Verifying Radio Credits U S only 95 Problems with an RPI 96 Pr...

Page 6: ...6 Modular ICS 5 0 Companion Installer Guide P0941568 01 Adding Companion to a mini midi maxi or mega system 114 Upgrading an RPI 8 to an RPI 16 114 Glossary 116 Index 125 Backup programming overlays 132 ...

Page 7: ...5 subpart D DOC RSS 130 documents in Canada Do not install the Base Station in ducts plenums or hollow spaces used to transport environmental air Note In Canada Base Stations may be installed where the duct plenum or hollow space is created by a suspended ceiling having lay in panels or tiles in accordance with CE Handbook Rule 60 402 Activation U S only Wireless communication on a Companion syste...

Page 8: ...star administration set and base stations must not be used as off premises equipment Installers must check the lightning surge arrestors at the cable entry point to the building with special attention to the grounding Report any problems to your telephone company in writing Do not install Norstar administration sets and base stations outside of the building because they are not lightning protected...

Page 9: ...r conferencing and voice mail Companion on Norstar consists of four main components ICS and Norstar XC software Norstar MICS XC software manages the telephone traffic between Companion base stations and portable telephones Base stations are connected to the ICS in the same way as Norstar sets Companion portable telephones are registered on the system and do not take up any ports on the system Up t...

Page 10: ...ble Telephone User Guide that is supplied with it Before the portables can be used in the United States portable credits must be obtained Please refer to Software keys U S only on page 64 Administration and Maintenance Tools Programming the Companion system is easily and quickly done through a T7316 Business Series Terminal or an M7310 or M7324 Norstar set You can assign portable telephones to the...

Page 11: ...w to access Norstar Voice Mail using your Norstar Companion portable refer to the Portable Telephone Feature Card that is supplied with it What s new with Norstar This release reflects new features in the Modular ICS XC 5 0 software For a list of these changes refer to the Modular ICS 5 0 Installer Guide For a complete list of features supported on Companion portables refer to the Modular ICS 5 0 ...

Page 12: ...Power Supplies Companion ID Labels See Step 1 Obtain the Companion ID on page 65 Configuring Station Modules When installing wireless capabilities use only the last two or highest numbered ports for connecting the Companion base stations Each Station Module allows you to connect up to 16 additional Norstar telephones to the system Maximum number of Norstar telephones on a system Each Station Modul...

Page 13: ...ey Service Unit KSU has been renamed the Integrated Communication System ICS The last two ports are reserved for Companion use only Note For each type of expanded system above Norstar Companion capability is supported Ensure you have the correct Modular ICS software to support wireless capability mini midi maxi mega ICS SM3 SM4 SM7 SM8 SM13 SM14 16 16 32 16 32 16 32 Installed in ICS Additional mod...

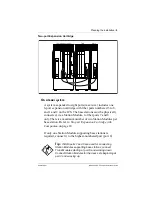
Page 14: ...e ICS via a wiring distribution panel On a midi system On midi and maxi systems the highest numbered ports can be used for both base stations and Norstar sets Therefore sets and base stations can share the two highest numbered fiber ports A system expanded to four ports midi size includes one 2 port expansion cartridge with fiber ports numbered 3 and 4 and 1 and 2 on the ICS The base stations must...

Page 15: ...Module to fiber ports 7 and 8 only There is a maximum number of two Station Modules per base station Refer to Six port Expansion Cartridge with Companion on page 10 If only one Station Module supporting base stations is required connect it to the highest numbered port port 8 Tip If Both ports 7 and 8 are used for connecting Station Modules supporting base stations connect Trunk Modules starting at...

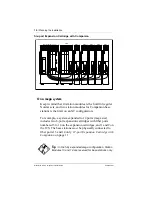
Page 16: ...t on an XC configuration For example a system expanded to 14 ports mega size includes two 6 port expansion cartridges with fiber ports numbered 3 to 14 on the expansion cartridges and 1 and 2 on the ICS The base stations must be physically connected to fiber ports 13 and 14 only 12 port Expansion Cartridge with Companion on page 11 Tip In the fully expanded mega configuration Station Modules 13 an...

Page 17: ... SM4 SM3 SM14 SM13 SM12 SM11 SM10 SM9 To Ac outlet To Ac outlet Fiber Cable Guide max 7 modules per power bar max 7 modules per power bar Note 1 Station modules 13 and 14 are used for Companion capability only See your Norstar Companion Installer Guide for more detail Note 2 Using a 2 or 3 row layout is acceptable The layout depends on the available wall space ...

Page 18: ...ning the installation Modular ICS 5 0 Companion Installer Guide P0941568 01 Routing fiber cables 6 port Expansion Cartridge Fiber cable guide Upward routed fiber cable Downward routed fiber cable loose cables ...

Page 19: ...N ports Base station ports Portable DN 4 049 072 401 412 269 284 333 348 401 416 401 416 637 696 3 073 096 301 312 253 268 317 332 301 316 301 316 637 696 ICS 2 001 048 201 248 ICS 1 221 252 285 316 101 132 Expansion module Lines Line ports B1 DN B2 DN DN ports Base station ports Portable DN 8 049 072 801 812 333 348 461 476 801 816 801 816 637 696 7 073 096 701 712 317 332 445 460 701 716 701 716...

Page 20: ... 364 541 556 901 916 8 049 072 801 812 333 348 525 540 801 816 7 073 096 701 712 317 332 509 524 701 716 6 097 108 601 612 301 316 493 508 601 616 5 109 120 501 512 285 300 447 492 501 516 4 121 132 401 412 269 284 461 476 401 416 3 133 144 301 312 253 268 455 460 301 316 ICS 2 001 048 201 248 ICS 1 221 252 413 444 101 132 Tip Port 3 is the bottom fiber cable port on the two port and the six port ...

Page 21: ...munication System ICS and expansion modules as required install the NVRAM Cartridge if required install the ROM Software Cartridge install the Expansion Cartridge and Trunk Cartridges as required connect the expansion modules install the emergency telephone s install the Norstar telephones install the single line telephones install the optional equipment power up the system program the system and ...

Page 22: ... base stations please see Configuring expansion modules on page 7 for more information on the installation rules involved The RPI unit should have the DC backup power supplied by a UL listed UPS The UPS should have an output voltage rating of 44 to 50 V DC with a maximum fault current limit of 6 A to protect the RPI output wiring Otherwise it may be necessary to use class 1 wiring The RPI units mu...

Page 23: ...ximum input power consumption of an RPI is 240 W If a UPS 48 V DC backup source is used the maximum input power requirement of the RPI is 140 W You can upgrade an RPI 8 BIX UL to an RPI 16 BIX UL by installing a second PSU to the RPI 8 BIX UL Refer to Upgrading an RPI 8 to an RPI 16 on page 114 If RPIs are distributed throughout the site the number and type of RPIs depend on the placement and powe...

Page 24: ...nd to prevent overheating leave a clearance of at least 125 mm 5 in around the RPI If you are mounting two RPIs one above the other leave a clearance of at least 3 0 0mm 12in between them to provide adequate ventilation and to prevent overheating Base stations RPI 16 and RPI 8 required PSUs required 1 8 1 RPI 8 1 PSU 9 16 1 RPI 16 2 PSUs 17 24 1 RPI 16 and 1 RPI 8 3 PSUs 25 32 2 RPI 16 4 PSUs 325 ...

Page 25: ...e right side You can remove the cover by lifting it off its hinges Opening the RPI cover 5 Hang the RPI on the two keyhole screws and tighten them 6 Install the remaining two screws 7 Feed the power cord through the bottom of the RPI and route it through the clip and around the strain relief support as shown in the following figure 8 Route the power cord to the input power socket just to the left ...

Page 26: ...wire size of the power pairs and the distance between the base station and the RPI Unplug the RPI power cord Do not apply power to the RPI until its installation and wiring are complete Do not run unprotected power cables outdoors PSU 1 PSU 2 if equipped Up to 16 outputs TCM power Up to 16 inputs TCM Connection board Jumper lead to PSU 2 Power cord Grounding strap Power supply cabling Strain relie...

Page 27: ...d output connectors are located on the RPI connector board RPI connector board Wire size Single pair Double pair 0 6 mm 22 AWG 800 m 2 500 ft 1200 m 4 000 ft 0 5 mm 24 AWG 500 m 1 500 ft 1000 m 3 000 ft When using two power pairs ensure they are connected with the same polarity OBIX1 OBIX2 OBIX3 OBIX4 OBIX9 OBIX10 OBIX11 OBIX12 OBIX5 OBIX6 OBIX7 OBIX8 OBIX13 OBIX14 OBIX15 OBIX16 IBIX1 IBIX3 IBIX2 ...

Page 28: ...er a base station connect one pair to PWR 1 and PWR 1 and the second pair to PWR 2 and PWR 2 Output connector pinout Input connections Feed the TCM input pairs from the ICS distribution frame through the top of the RPI and route the pairs to the input connectors IBIX1 to IBIX4 as shown in the following illustration There may be fewer than 16 input pairs in any given RPI installation Ensure both pa...

Page 29: ...BIX1 1 2 TCM 1 OBIX1 3 4 TCM 2 OBIX2 5 6 TCM 3 OBIX3 7 8 TCM 4 OBIX4 IBIX2 1 2 TCM 5 OBIX5 3 4 TCM 6 OBIX6 5 6 TCM 7 OBIX7 7 8 TCM 8 OBIX8 IBIX3 1 2 TCM 9 OBIX9 3 4 TCM 10 OBIX10 5 6 TCM 11 OBIX11 7 8 TCM 12 OBIX12 IBIX4 1 2 TCM 13 OBIX13 3 4 TCM 14 OBIX14 5 6 TCM 15 OBIX15 7 8 TCM 16 OBIX16 IBIXn Pin 3 Pin 1 Pin 2 Pin 4 Pin 6 Pin 8 Pin 5 Pin 7 ...

Page 30: ...Green White 29 OBIX2 BS2 PWR White Brown 4 Brown White 30 TCM White Slate 5 Slate White 31 PWR Red Blue 6 Blue Red 32 OBIX3 BS3 PWR Red Orange 7 Orange Red 33 TCM Red Green 8 Green Red 34 PWR Red Brown 9 Brown Red 35 OBIX4 BS4 PWR Red Slate 10 Slate Red 36 TCM Black Blue 11 Blue Black 37 PWR Black Orange 12 Orange Black 38 OBIX5 BS5 PWR Black Green 13 Green Black 39 TCM Black Brown 14 Brown Black ...

Page 31: ...nge 17 Orange Yellow 43 PWR Yellow Green 18 Green Yellow 44 OBIX7 BS7 PWR Yellow Brown 19 Brown Yellow 45 TCM Yellow Slate 20 Slate Yellow 46 PWR Violet Blue 21 Blue Violet 47 OBIX8 BS8 PWR Violet Orange 22 Orange Violet 48 TCM Violet Green 23 Green Violet 49 PWR Violet Brown 24 Brown Violet Pin RPI Connector Board Label Wire color ...

Page 32: ...n White 29 OBIX10 BS10 PWR White Brown 4 Brown White 30 TCM White Slate 5 Slate White 31 PWR Red Blue 6 Blue Red 32 OBIX11 BS11 PWR Red Orange 7 Orange Red 33 TCM Red Green 8 Green Red 34 PWR Red Brown 9 Brown Red 35 OBIX12 BS12 PWR Red Slate 10 Slate Red 36 TCM Black Blue 11 Blue Black 37 PWR Black Orange 12 Orange Black 38 OBIX13 BS13 PWR Black Green 13 Green Black 39 TCM Black Brown 14 Brown Bl...

Page 33: ...17 Orange Yellow 43 PWR Yellow Green 18 Green Yellow 44 OBIX15 BS15 PWR Yellow Brown 19 Brown Yellow 45 TCM Yellow Slate 20 Slate Yellow 46 PWR Violet Blue 21 Blue Violet 47 OBIX16 BS16 PWR Violet Orange 22 Orange Violet 48 TCM Violet Green 23 Green Violet 49 PWR Violet Brown 24 Brown Violet 50 25 Pin RPI Connector Board Label Wire color ...

Page 34: ...e columns This affects radio coverage If possible place the base station at least 1m 40 in from such columns Do not mount a base station where metalwork is near the antenna housings Be careful not to damage existing wiring or panels Do not position base stations in ducts plenums or hollow spaces used to transport environmental air except where the duct plenum or hollow space is created by a suspen...

Page 35: ... on a ceiling When mounting on a wall install them with their covers at the bottom as shown in the following illustrations Allow for clearances around the base station as indicated in the following illustration Clearance for the base stations Number of base stations in the cell Minimum distance between office areas and base stations 1 1 m 40 in 2 1 4 m 56 in 3 1 8 m 72 in 4 2 m 80 in Clearance con...

Page 36: ...e strain relief 4 Connect the wires to the BIX connector on the bracket termination board as shown in the following illustration The polarity of the TCM connections is not important If two power pairs are brought in they must be connected with the same polarity to the base station bracket termination board Bracket termination board Ensure that the RPI is off before connecting power pairs to the ba...

Page 37: ... class 2 plug top power source only 8 Record the associated ICS port number in the space provided on the printed label affixed on the lower right corner of the mounting bracket Include the labeling information for each Companion base station on the completed installation floor plans 9 Slide the cover onto the bracket using the guide to position it properly Snap it into place Inserting the power su...

Page 38: ...stem on line Installing base stations on page 28 Companion Portable Telephones are installed differently than traditional desk sets There are no direct connections between the portables and the Norstar system Do the following Install the batteries and battery charging units for each portable using the instructions that come with the portable Register each Companion portable for use with the Norsta...

Page 39: ...hould always be mounted vertically Refer to the figure Installed antenna and lightning surge arrestor USA on page 35 Use 8 12 mm to 50 mm 1 2 in to 2 in screws to mount the antenna bracket and lightning surge arrestor bracket to the wall Always ensure that the antenna is clear of any adjacent obstruction particularly metal If more than one external antenna is used at a cell center space them at le...

Page 40: ...ly necessary You must install a lightning surge arrestor for each outdoor external antenna FCC requirements In the United States the FCC requires that only certified antennas be connected to Companion base stations Do not install the external antenna or the lightning surge arrestor during an electrical storm Always turn off the base station power before connecting the coaxial cable of an outdoor e...

Page 41: ... are used the external antenna connectors on the base station are special proprietary BNC connectors antennas are supplied with cables already attached and terminated with special proprietary BNC plugs to join with the connector on the base station cables are not supplied with exterior antennas Wall Back to back proprietary BNC connectors Lightning surge arrestor with mounting bracket to Base Stat...

Page 42: ...install a lightning surge arrestor between an outdoor antenna and a base station Installing an outdoor external antenna USA To install an outdoor external antenna follow these steps 1 Drill a hole for the coaxial cable 2 Install conduit for the antenna cable according to local building and wiring codes 3 Screw the antenna bracket to the wall so that the antenna is positioned vertically on the exte...

Page 43: ...g surge arrestor USA Install the lightning surge arrestor to protect the Companion components from electrical surges To install a lightning surge arrestor follow these steps 1 Mount the lightning surge arrestor on the interior wall as close as possible to the entry point of the coaxial cable from the outdoor external antenna ...

Page 44: ...nded wire gauge is 6 AWG Connect the ground lead to the building ground Do not connect to a ground rod or series of ground rods If you cannot connect the ground lead to the building ground connect it to the steel frame of the building The connection should be no more than 6 to 10 ft You can also connect the ground lead to the 120 V ac conduit which is connected to the building ground but this is n...

Page 45: ... protector for each outdoor external antenna installed The following are requirements for installing external antennas If you are installing an external antenna on a metal surface greater than 18 cm in diameter position the antenna perpendicular to the surface When running the co axial cable inside or outside do not to kink stretch or crush the cable This will seriously affect its performance The ...

Page 46: ...ntenna Canada The indoor directional external antenna comes with its own back plate for mounting The recommended mounting height on a wall is halfway between the floor and the ceiling For some applications you can mount the antenna on the ceiling for example in a stairwell Indoor directional external antenna Canada Only passive antennas are allowed to be connected to the Companion base stations Th...

Page 47: ... not exceed 10 m Installing an indoor omni directional external antenna Canada When installing an indoor omni directional external antenna Use the bracket supplied to mount the antenna on a wall or ceiling Note Use of a bracket other than the one supplied may not provide the necessary clearance between the floor or wall and the antenna Install the bracket so that the external antenna is vertical T...

Page 48: ...3 To prevent undue cable stress on the co axial cable secure it to the mounting surface with a clamp 4 Connect the external antenna to the appropriate base station radio Note The length of the co axial cable must not exceed 10 m 30 mm Ceiling mount installation Wall mount installation 30 mm Cable clamp Cable clamp Co axial cable Co axial cable 30 mm C0 axial cable Ceiling mount installation Cable ...

Page 49: ...e connector on the outdoor omni directional antenna is a TNC female connector so you need an adapter to connect it to the standard BNC co axial cables needed for the surge protector and the base station You can also use a co axial cable with a TNC male connector on one end and BNC male connector on the other end Fit lightning protection to the antenna if appropriate Refer to Installing a lightning...

Page 50: ...external antenna Canada 2 Feed one end of the co axial cable up through the bottom of the antenna shroud and attach the BNC connector to the base of the mast 3 Slide the mast down into the shroud until it fits Plastic plug Connector at the base of the mast Shroud Mast Co axial cable to surge protector on interior wall Set screw Cable ties Exterior wall mounting plate Lag bolts or other appropriate...

Page 51: ...out 7 Feed the co axial cable through the wall to the surge protector on the interior wall Installing a lightning surge protector Canada Install the lightning surge protector for the outdoor omni directional antenna to protect it from electrical surges The recommended lightning surge protector is part number A0382082 Refer to the installation instructions that come with the antenna for more detail...

Page 52: ...e 120 V ac conduit connected to the building ground but this is not a preferred solution 3 Route and connect the co axial cable from the outdoor external antenna to the surge protector 4 Route and connect the co axial cable from the surge protector to the appropriate base station BNC connector Note The total length of the co axial cables from the outdoor external antenna to the base station must n...

Page 53: ...e Administration Terminal shows BS 1 Dload Done Press CLEAR to clear the message Some Base Stations may not be powered up at the same time and this message repeats at the beginning of each download In the United States the display shows one of the following messages after powering up If display shows See UTAM code reqÕd System logical identifier LID on page 63 UTAM test failed Alarm codes on page ...

Page 54: ...ou attempt to program the Companion sets familiarize yourself with the Programming section of the Modular ICS 5 0 Installer Guide The section explains the four types of passwords and the menus each password can access Not that that the Companion prompts are only visible through the MICS XC 5 0 software For information about Companion set programming using the System Coordinator and Basic passwords...

Page 55: ...te overlay and then refer to the table below for corresponding button faces Programming overlays are included with the Programming Record The Norstar Programming Record The Programming Record provides a convenient way to record what you have programmed There is a special section for Companion specific records that includes charts for recording the handset information and the base station informati...

Page 56: ...es have not been updated Items disappear from the list as they are updated and UPDATE disappears once all changes are complete Template defaults This section describes only the defaults that apply to Companion programming For all other default settings refer to Programming Record Note U S only Before registering Companion portable telephones you must first obtain and enter a certain number of port...

Page 57: ...tration Portable DNs N Availble Radio data Re evaluation Status Schedule Radio credits U S only Required Not scheduled No defaults assigned Radios Cell Assignment Antenna Type Unassigned Internal Cells Cell radios Cell nghbrs Cell rad nghbrs Unassigned Unassigned Unassigned Note DID Companion defaults are the same as PBX defaults Setting Default ...

Page 58: ...ust be entered no later than 15 minutes after the Norstar system has been powered up If 15 minutes have elapsed since you powered up the system turn system power off and on to prepare for the Startup process 2 Enter the Installer password The default is Ç؈ÏÈÌ which is the same as flfl Startup erases programming Startup erases any existing programmed data and resets the system to factory defaults Ti...

Page 59: ...Startup use programming to change default settings as required Headings and subheadings in programming help you to keep track of where you are Companion programming falls under System prgrming and has the following subheadings For other programming operations refer to Modular ICS 5 0 Installer Guide Changing template resets programming If you change your system template your programming will be re...

Page 60: ...ists who work with large Norstar systems or other telephone systems like PBX or Centrex By using a special password a system coordinator can see and change many but not all of the programming settings used by an installer In this guide programming that can be changed only by an installer is marked in the heading If you are programming using the System Coordinator Plus password you do not see these...

Page 61: ...portables Portable features For information about the features of your handsets refer to the Portable Telephone User Guide that is supplied with your portable External paging system customer supplied Registration password Before anyone can begin making portable telephone calls the portable telephones must be registered for use with the Norstar system The recommended steps are as follows 1 Change t...

Page 62: ... program the Registration password Record the password in the Programming Record Change password to avoid incorrect registration To ensure accurate registration change the Registration password before registering any portables If there is another wireless system in radio range and both systems have the same Registration password and registration enabled you may accidentally register on the other s...

Page 63: ...ation Press CREDITS U S only to view the credits available Software Keys are required to activate wireless capabilities U S only To take advantage of the wireless capabilities available to your Norstar system you must first enable a certain number of portable credits using Software Keys purchased through Nortel Networks Keys are obtained and entered into the system by the installer For more detail...

Page 64: ...n number or de register the current portable telephone You must perform deregistration at the portable and in either an Installer or System Coordinator programming session Press to view registered and available DNs Note The DN range 637 to 696 can be used by either portable telephones or ISDN S loops You can assign all 60 of the DNs to S loops and none to portable telephones You can assign up to 3...

Page 65: ...lease refer to Software keys U S only on page 64 of this document before setting up your wireless system Re evaluation Re evaluation automatically assigns the base station radios to cells and determines which cells are neighbors When adding or removing base stations Re evaluation needs to be applied to the system Tip This procedure does not clear the registration data in the portable You must also...

Page 66: ...y problems Re evaluation Status Press to see the Re evaluation status If the display reads required you can carry out the re evaluation by pressing CONTINUE and following the prompts Re evaluation Schedule This setting allows you to select whether to proceed or to schedule the next Re evaluation The default setting is Not scheduled If you want to schedule a re evaluation press CHANGE You can begin...

Page 67: ...le on a call with your portable the call is handed off from one cell to another A call on a portable can be handed off from one cell to another only if those cells are programmed as neighbors The Norstar system automatically assigns cell neighbors and re evaluates the cell to cell configuration when base stations are added or removed This setting allows you to determine if a base station radio is ...

Page 68: ...gned to this cell For example if radio 07012 is in the cell the display shows 07012 asgned Press and enter the five digit radio number to view the setting Assigned or Unassigned Select LIST to see all in sequence Select SCAN to go to the list or next radio with a setting Assigned Cell nghbrs This sub heading allows you to view the two digit number of any cells that border a particular cell in a sy...

Page 69: ...neighbor see the example under Cell nghbr so it must be a neighbor of cell 03 or 04 System logical identifier LID This setting allows you to change the code by which the system identifies itself to portables and which the portables use to request service from the system The default setting is randomly generated by the system at start up When the system logical identifier LID is changed all portabl...

Page 70: ...only The United States FCC has appointed UTAM Inc as the body responsible for coordinating and verifying the installation or relocation of unlicensed personal wireless communication devices To comply with UTAM Inc Norstar uses keys and credits to control user capacity and to ensure system location verification These software keys and credits are required to activate Norstar Companion services on a...

Page 71: ...D label your Companion ID number the zip code the number of radio credits already purchased if applicable Call Nortel Networks Customer Response Center at 1 800 321 2649 to verify that you have approval from UTAM Inc when initially installing wireless equipment or relocating wireless equipment Failure to receive approval prevents you from enabling wireless communication on the Companion system You...

Page 72: ...ds Terminals Sets 4 Press Ô until the display reads Software keys 5 Press The display reads SysID followed by the unique System Identification Number 6 Press Ô to continue in Software keys or to exit Record the Companion ID and the SysID in the Modular ICS Programming Record Step 3 Call the Nortel Customer Response Center 1 To obtain your two sets of keys call the Nortel Networks Customer Response...

Page 73: ...adio credits U S only on page 61 for information on viewing the available number of radio credits Portable Credit Key This key predefines the maximum number of portables that can be registered to the system Systems can only register as many portables as there are available Portable Credits A maximum of 60 Companion portable telephones may be registered Step 4 Enter the keys You may enter the keys ...

Page 74: ...lete System online as the reevaluation runs its course Note If the UTAM Activation Code entry is unsuccessful the display shows Invalid code If this happens reenter the code or call Nortel Customer Response Center at 1 800 321 2649 for assistance Step 5 Configure base stations and portables Once you have entered the required keys to activate the base stations and to obtain enough portable credits ...

Page 75: ...rdinator Guide for more information on registering Companion portables Tip If your system has been powered down for an extended period of time your System ID may have changed Contact the Nortel Networks Customer Response Center to obtain a UTAM Regression Key If your Norstar Companion system seems disabled all keys were input but base stations and portables are not operational contact the Northern...

Page 76: ...ones To register each portable with the Norstar system you must do two things Register the portables by entering the Registration password on each one Verify that the portable functions correctly C3060 Icons The following table identifies the C3060 portable telephone icons C3060 Icon function m Mute button k Hang up button i Answer button m Feature button l Telephone directory button j Service dir...

Page 77: ... display briefly shows Adding SYSTEM next system number If ADD not available start over at step 1 again The display shows Pswd for an established radio link The display shows No connection for a radio link not established 5 Enter the registration password The default password is 72346 RADIO The display shows DN The display shows Invld Pswd for a wrong password 6 Enter the three digit Directory Num...

Page 78: ...is on the same button 8 Press SAVE The display shows the registered name For example NORTEL 1 registered 9 Turn off registration for your system To confirm that the C3060 is registered 1 Select the system you just registered a Press k to power off the portable and press k again to power on the portable If the display shows the system name that you just registered proceed to step 2 If the display s...

Page 79: ... registered portable The portable must ring to confirm the registration If you do not hear dial tone or if the portable does not ring refer to Troubleshooting If you continue to experience difficulty registering the portable contact your distributor Deregistering the C3060 You can deregister the C3060 two ways from the portable from the Administration Terminal If you are in radio range of the syst...

Page 80: ... The display shows Deregistering and then Item erased Measuring RSSI for a C3060 The Receive Signal Strength Indicator RSSI is a measurement of the signal strength the base station receives from the portable The strongest RSSI value the display shows is 44 dBm The weakest RSSI value the display shows is approximately 94 to 100 dBm Measuring undirected RSSI You can measure the signal strength betwe...

Page 81: ...while you find a cell edge To measure the RSSI of a specific radio you must be in range of two base stations the one you want to measure and another base station Note You cannot measure the directed RSSI of both radios in the base station at the same time Before you measure directed RSSI use the Programming Record to find and note the following the five digit ID of the base station radio you want ...

Page 82: ... end the undirected RSSI connection press k 2 Press m The display shows MENU 3 Press or until the display shows Feature request 4 Press SELCT The display shows Feature 5 Press 8 9 9 6 Enter the five digit ID code for the base station radio you want to measure This mode displays the radio ID of the base station to which the portable is linked followed by the signal strength and power mode For examp...

Page 83: ...3050 Icons Some C3050 portable telephone icons for Canada and the United States are different but have the same functions The following table identifies these icons To register the C3050 1 Turn on registration for your system 2 Open the portable flap The portable displays the current system name or No system selected for two seconds 3 Press ê The portable displays WIRELESS SYSTEMS Your portable ca...

Page 84: ...d 696 The portable displays Enter name If the DN is incorrect the portable displays Invld DN If the registration fails the portable displays Reg failed If you try to register the C3050 to the same system twice the portable displays the registered name for example Registered as NORTEL 1 7 Enter up to 16 characters for the system name for example NORTEL 1 If you are registering to only one system us...

Page 85: ...ady selected 5 Press ñ or L You hear a dial tone and the portable displays 6 If you do not hear a dial tone check that you have selected the correct system and try to register the portable again 7 Close the flap on the portable and set the Ringer Control Switch to C 8 If the portable is twinned with a desk telephone make sure the desk telephone is idle and Call Forward is not active 9 On another w...

Page 86: ...the Norstar administration set You could use this method if the portable was lost or stolen or if you wanted to assign it to another system This procedure does not clear registration data from the portable If the portable is registered on other systems it is still available on those systems You deregister from one system at a time To deregister the C3050 1 Open the flap on the portable 2 Press ê T...

Page 87: ...ngest RSSI value the portable displays is 45 dBm in the US and 44 dBm in Canada The weakest RSSI value the portable displays is approximately 94 to 100 dBm To measure undirected RSSI You can measure the signal strength between a portable and a system selected base station radio using undirected RSSI 1 Open the portable flap 2 Press ñ or L 3 Press The portable displays the radio ID of the base stat...

Page 88: ...ovisioning Record to find the following the five digit ID of the base station radio you want to measure by mapping the base station location to the time compression multiplex TCM port The first four digits indicate the TCM port to which the base station is connected The last digit indicates the number of the radio on the base station For example the number 03142 on the base station is connected to...

Page 89: ...red by the base station is 54 dBm 6 To end the connection press e or close the flap Registering the C3020 Canada only The following section describes the procedures involved in registering Companion C3020 portable telephones To register each portable with the Norstar system you must do two things Register the portables by entering the Registration password on each one Verify that the portable func...

Page 90: ...ait for the display to clear When it shows DN enter the internal number 637 666 you want to assign to the portable When the display clears it shows Reg n complete 8 On the administration set turn off registration in general programming Companion subheading Registration To confirm that the C3020 is registered 1 To check that the portable has a dial tone press L If you hear a dial tone go to step 2 ...

Page 91: ...formation about using the Norstar administration set see the Modular ICS System Coordinator Guide For example you may want to deregister the portable before you assign it another number on the same system You can also deregister a portable using the administration set You could use this method if the portable was lost or stolen or if you wanted to assign it to another system This procedure does no...

Page 92: ...trength the base station receives from the portable The base station controls the power transmitting mode of the portable When the base station receives a weak signal it instructs the portable to transmit in high power When the base station receives a strong signal it instructs the portable to transmit in low power The strongest RSSI value the portable displays is 44 dBm The weakest RSSI value the...

Page 93: ...urs normally 4 To end the connection press ror close the flap Measuring directed RSSI You may want to measure the Receive Signal Strength Indicator between a portable and a specific base station radio For example you may suspect that a radio in a base station is not working properly You can also use directed Receive Signal Strength Indicator to prevent hand off while you find a cell edge To measur...

Page 94: ...cation Measuring directed RSSI using your portable 1 Perform an undirected Receive Signal Strength Indicator by following steps 1 to 3 in To measure undirected RSSI on page 81 To direct the Receive Signal Strength Indicator to the other radio of the base station move out of range until hand off occurs before moving on to step 2 2 Press L Wait for dial tone 3 Press 8 9 9 4 Enter the five digit ID c...

Page 95: ...anion Portable Telephone User Guide that is supplied with the portable When you distribute the portables tell the users that the portables are registered and give them the corresponding extension numbers Tip You can register a portable to more than one system You cannot register a portable to more than one extension number per system You cannot register more than one portable to one extension numb...

Page 96: ...e portable telephone again 3 Verify that the portable telephone is using the correct registration slot 4 Verify that the portable telephone can make a call 5 Verify that the portable telephone has been assigned the correct extension number by calling a wired telephone and viewing the line number displayed Testing the base stations 1 Verify that the ICS is ON 2 Verify that re evaluation is complete...

Page 97: ...ived Signal Strength Indication feature on a portable telephone verify that the base stations are handing off calls and serving the coverage area as intended To check valid handoff move from one cell to another As you do this the radio number shown on the portable telephone display changes To test system coverage at critical points follow these steps 1 Make a call Move over the entire coverage are...

Page 98: ...fy that the dialtone is available from the ICS b The portable may not be registered Try to register the portable refer to the Modular ICS 5 0 Companion System Coordinator Guide 4 Check that the portable is using the correct registration slot 5 Verify that the portable has been assigned the correct internal number by calling it from another telephone Problems with a base station 1 Verify that the g...

Page 99: ...ds 75 ohms Measure the loop resistance with an ohmmeter If the resistance exceeds 75 ohms install a second power pair or power the base station with a plug top power supply The base station is faulty 4 Verify that the power cord of the RPI is properly connected to a working AC outlet If the base station is powered locally verify that the power supply is properly connected to a working AC outlet an...

Page 100: ...acket 3 If an external antenna is installed unplug its coaxial cable from the base station 4 Unplug the teledapt cable from the base station 5 While holding the base station to prevent it from falling apply upward pressure to the base station 6 Lift the base station away from the bracket 7 Carefully install the new base station onto the bracket 8 Gently press down to snap it into position 9 Reconn...

Page 101: ...ion 6 Press The display shows Registration 7 Press Ô until the display shows Radio credits 8 Press once The display shows nnn Available Press and the display shows nnn Total Verify that the total number of Radio Credits is enough to support the system you have just installed Note The number of Radio Credits must be double the number of base stations you have installed Each base station has two rad...

Page 102: ...tes that both radios on the base station are busy that the ICS is downloading data into the base stations or that one or both radios have not been assigned to a cell Verify that the red light is not flashing The red light flashes for about 15 seconds when a base station is powered up This is normal 4 If none of the base stations connected to the RPI or to one of its power supply units is functioni...

Page 103: ... follow the procedures for the UTAM Activation Key explained in Software keys U S only on page 64 Obtaining a Regression Key U S only You may need a Regression Key if one of the following conditions occurs a defective ICS is replaced an ICS has lost its System Identification Number SysID due to a power outage for more than 72 hours U S only If you are relocating a base station call the Nortel Netw...

Page 104: ...Key 4 Provide them with the original and new SysID Companion ID customer address and zip code See Software keys U S only on page 64 5 Make a note of the new Regression Key A Regression Key cannot be reused Please do not record this Key in the Programming Record 6 Enter the Regression Key Follow the same procedure for entering software keys on page 66 Once the keys have been entered the previous Sy...

Page 105: ...f wireless base stations in system Alarm 53 A single radio has been removed from service due to an error An accompanying event message indicates an explicit reason for the radio failure Alarm 54 A software download to the base stations has started Alarm 55 The base station download is complete Alarm 68 An upgrade has been performed A trunk or station module has been added to a system to which base...

Page 106: ... is finished Alarm 209 Demo system Re Eval required System Re evaluation required This message occurs when a new base station is added to the system or is moved to a different port Run System Reevaluation immediately or schedule a System Reevaluation See Re evaluation on page 59 Re Eval recommended System Re evaluation recommended base station may have lost power for longer than 3 minutes or was r...

Page 107: ...nly on page 97 UTAM test failed System is disabled This alarm appears only after a restart Ensure there is power to the base stations and RPI or plug top power supply Ensure that the location and number of base stations is correct Ensure that there are at least four terminals and base stations Ensure that there are sufficient Radio Credits to support the number of base stations you have connected ...

Page 108: ...edits See Verifying Radio Credits U S only on page 95 2 Remove the excess base stations and restart the system To determine the number of connected base stations to remove subtract the total number of radio credits from the total number of connected base stations Remember that each base station has two radios See Problems with an RPI on page 96 If you have increased the number of base stations you...

Page 109: ...g alarm code 53 occurs The base station on port 0103 in this case cannot be written to during data transfer Both radios belonging to the base station are disabled The base station flash EEPROM is faulty Two events are raised one for the B1 channel radio as in this case and another for the B2 channel radio A corresponding alarm code 53 occurs The base station on port 0103 in this case cannot be syn...

Page 110: ...l radio in this case and another for the B2 channel radio A corresponding alarm code 53 occurs A recoverable RIM fault has occurred The RIM is reset If a link is active when this error occurs the link is dropped The radio 0109 1 in this case is returned to service An unrecoverable RIM fault has occurred The radio 0109 1 in this case is disabled and taken out of service If a link is active when thi...

Page 111: ...led Evaluation override is finished Disablement test is active Disablement test is finished System initialization is beginning System initialization is finished Demo system Software error dealing with base station System problem with locating portable telephones Event message display Cause Evt 664 S8 Evt 665 S4 Evt 666 S5 Evt 667 S5 Evt 668 S5 Evt 669 S5 Evt 670 S5 Evt 671 S5 Evt 672 S5 Evt 673 S5...

Page 112: ...n incompatible wireless device Wireless system software error in dealing with a portable telephone Wireless system software error Portable does not support specific display character Internal radio driver error A cell manager has been unable to register with the router Synchronization error Synchronization error Base station software error Event message display Cause Evt 833 S5 Evt 834 S5 Evt 835 ...

Page 113: ...tered to portable telephones No directory number is available to handle the registration Link setup request A base station has received a corrupted stimulus message The base station does not understand the received stimulus message This occurs when you are trying to use a type of portable that the system does not support Wireless subsystem language loading error Firmware downloading to base statio...

Page 114: ... configured cell failed to come on line Alarm 23 displays cell that failed The Wireless auto admin Re Eval subsystem has detected an error Sequencer functionality has detected an error The Wireless auto admin Re Eval Initial Intelligence component has detected an error The Wireless auto admin Re Eval radio Sniffing component has detected an error The Wireless auto admin Re Eval Radio Manager has d...

Page 115: ...anti surge fuses Each output has short circuit protection The length of the cord from the outside surface of the unit to the plug should be a minimum of 1 4 m 4 5 ft and a maximum of 4 2 m 15 ft Part no RPI 8 NTE023AA A0667940 RPI 16 NTE024AA A0667941 Color Dolphin Gray Height 35 6 cm 14 in Width 30 5 cm 12 in Depth 7 6 cm 3 in Input voltage 80 to 270 V AC Input frequency 40 to 70 Hz Output voltag...

Page 116: ...on the base station Base station If a plug top power supply is required use only the power supply recommended for use with the base station Other usage invalidates any approval given to this apparatus Part no NTAE20AA A0401506 in the US NT0P30DA 93 A0403378 in Canada Color Dolphin Gray Height 20 cm 8 in Width 32 cm 12 in Depth 5 cm 2 in Weight less than 1 kg less than 2 lbs Input voltage 12 to 50 ...

Page 117: ... 120 F Relative humidity 5 to 85 condensation may occur Height 10 cm 4 in Width 10 cm 4 in Depth 6 cm 2 in Part no antenna NTAE50AA A0637293 Frequency range 1 92 to 1 93 GHz Peak power rating 13 5 dBm Peak antenna gain between 1 2 and 1 5 dBi Polarization nominally vertical Input impedance 50 Ω nominal Voltage standing wave ratio better than 1 5 1 Extension cable loss below 4 5 dB Lightning surge ...

Page 118: ... gain 4 dBi maximum Polarization vertical Input impedance 50 Ω nominal Temperature 50 C to 55 C Humidity 0 to 100 Length 49 0 cm maximum Width 3 5 cm maximum Weight 1 0 kg maximum Part no A0383447 Frequency range 944 to 952 MHz Peak power rating 10 mW minimum Peak antenna gain 2 5 dBi maximum Polarization vertical Input impedance 50 Ω nominal Temperature 18 C to 55 C Humidity 5 to 95 Length 21 0 c...

Page 119: ... power rating 10 mW minimum Peak antenna gain 5 dBi maximum Polarization vertical Input impedance 50 Ω nominal Temperature 18 C to 55 C Humidity 5 to 95 Length 21 0 cm maximum Width 8 0 cm maximum Depth 13 0 cm maximum Weight 0 5 kg maximum Part no A0382082 Surge capability 50 000 A repeatable Turn on threshold 600 V dc Turn on time 2 5 ns Impedance 50 ohms Operating frequency range 125 MHz to 1 G...

Page 120: ...ar sets or base stations base stations cannot be connected to any other module On a maxi system 6 port expansion ensure that the Station Modules 7 or 8 or both are available to connect Norstar sets or base stations Base stations cannot be connected to any other module Upgrading an RPI 8 to an RPI 16 Only distributors and authorized service personnel are permitted to upgrade an RPI 8 Do not power u...

Page 121: ...he connector board 5 Connect the jumper lead from PSU 1 to the lead from PSU 2 as shown in RPI connections 6 Power up the RPI RPI connections PSU 1 PSU 2 if equipped Up to 16 outputs TCM power Up to 16 inputs TCM Connection board Jumper lead to PSU 2 Power cord Grounding strap Power supply cabling Strain relief support Clip Grounding plates Ferrite rings Jumper lead to PSU2 PSU1 PSU2 if equipped G...

Page 122: ...cally assigned to a telephone when that telephone is assigned an Answer DN Answer DN The internal or directory number DN of a telephone that is monitored by an Answer button You can assign up to four Answer DNs to a telephone under Line Access in Terminals and Sets programming antenna A built in antenna inside each base station External antennas can also be used to extend radio coverage to hard to...

Page 123: ... its components and the Norstar system Companion Wireless provides mobility in the workplace Calls that used to ring just at your Norstar set can also appear and ring at your portable Companion ID An eight character alphanumeric number assigned by Northern Telecom to identify each Companion wireless system This Companion ID is sent to each customer once radio or portable credits have been purchase...

Page 124: ...ion They record a variety of events and activities in the Norstar system Expansion Cartridge A cartridge that allows you to connect Trunk Modules and Station Modules to the ICS to expand the system s capacity for trunks and telephones There are two Expansion Cartridges a two port Expansion Cartridge and a six port Expansion Cartridge See also Combo Cartridge External paging A feature you can use t...

Page 125: ...button that provides access to internal lines used for calls within a Norstar system and access to external lines through a line pool or external code A telephone may be assigned zero to eight Intercom buttons This is done during an Installer programming session Intercom keys See Intercom button K Key Service Unit KSU Please see Integrated Communication System ICS L Line Pool ßÝ A group of lines u...

Page 126: ...le telephone Prime line The line on your telephone that is automatically selected when you lift the receiver press the Handsfree Mute button or use an external dialing feature A Prime Line is assigned to a telephone during Installer programming Private line See Private to Private to A line can be assigned during Installer programming to one telephone as a private line The line cannot appear on any...

Page 127: ...n password a password that prevents unauthorized users from registering portables on the Norstar Companion system Regression Key U S only Restores the previous system security number so that previously applied UTAM Activation Keys and Portable Credit Keys can be reentered to restore full system operation Also required in cases of system recovery This key cannot be reused Remote access The ability ...

Page 128: ... to your Norstar system System Coordinator password A one to six digit password that prevents unauthorized access to system programming The system coordinator password can be assigned and changed in programming System Logical Identifier LID a 4 digit number by which the system identifies itself to portable telephones and which the portable telephones use to request service from the system Only the...

Page 129: ...th Indicator A measurement of the signal strength between a portable and the base station radio that the portable is currently linked to See also Receive Signal Strength Indicator UTAM Activation Key U S only Activates the wireless capability on a new system and in system upgrades involving a change to the number of base stations supported UTAM Inc U S only The Federal Communications Commission FC...

Page 130: ...124 Glossary Modular ICS 5 0 Companion Installer Guide P0941568 01 ...

Page 131: ...na 40 indoor omni directional external antenna 41 installation 33 39 installation restrictions 39 lightning surge protector 39 outdoor omni directional external antenna 43 type selecting 61 B backup power 16 Base Station signal strength see Receive Signal Strength Indicator base station configuring 8 10 68 connecting to ICS 6 connecting to Station Module 6 DC loop resistance 93 disabling 94 displa...

Page 132: ...us 60 registration 57 60 system logical identifier 63 wireless on a maxi system 8 9 on a mega system 10 on a midi system 8 on a mini system 8 conducted emissions 1 connecting expansion modules 9 10 12 D default password 51 Startup 50 template changing 53 deregistration C3050 portables 80 diagnostics running on remote system 4 disabled system activating 65 E equipment and supplies installation chec...

Page 133: ...8 Evt 879 S5 108 Evt 881 S5 108 Evt 884 S5 108 Evt 885 S5 108 Evt 886 S5 108 Evt 887 S5 108 Evt 888 S5 108 Expansion Cartridge installation planning 7 six port 10 twelve port 10 two port 9 expansion equipment installation checklist 7 expansion modules connecting 9 12 16 installation 10 routing fibers for 12 external antenna installing 33 39 external paging portable telephones 55 F features Norstar...

Page 134: ... surge protector Installing 45 46 M maxi system configuring base station 8 mega system configuring base station 10 midi system configuring base station 8 mini system configuring base station 8 module numbering six port Expansion Cartridge 13 twelve port Expansion Cartridge 14 two port Expansion Cartridge 13 mounting RPI 18 N non expanded system ICS alone numbering 13 Norstar features 55 Norstar Pr...

Page 135: ...er 63 tools 49 using Norstar Remote Utilities NRU 4 viewing updates 50 programming record 49 provisioning record 28 using 6 R radiated emissions 1 radio credits 61 Receive Signal Strength Indicator C3020 directed 88 C3020 undirected 87 C3050 directed 82 C3050 undirected 81 measuring undirected directed for C3050 model 75 re evaluation see Companion re evaluation registration C3050 portables 77 79 ...

Page 136: ...oordinators entering programming 54 System Coordinators entering programming 54 system logical identifier 63 T TCM connections Base Stations 30 polarity of 30 technical specifications Base Station 110 base station 109 110 plug top power supply 110 RPI 109 template changing default 53 testing base station 90 portable telephone 90 system coverage 91 troubleshooting base station 92 93 portable teleph...

Page 137: ...taller Guide V viewing programming 50 Voice Mail system requirements 5 W wireless capabilities see Companion wireless communication activation approval 1 65 98 regression key 97 98 wireless equipment 28 wireless antenna installation 33 wiring RPI 16 28 ...

Page 138: ...Backup programming overlays Business Series Terminals Programming Overlay P0914001 01 Heading Back Show Next Heading Back Next Show Norstar Programming Overlay PO698666 Issue 02 Printed in Canada ...

Page 139: ...slots provided on the back cover Après avoir terminé la programmation rangez la grille Norstar dans les fentes prévues à cet effet à la fin de ce guide Cuando haya terminado de programar inserte en estas ranuras su Plantilla de programación Norstar que se encuentra en la contra tapa ...

Reviews: