NIMO ECO Dryer 2.0 HP, Installation And User Manual
The NIMO ECO Dryer 2.0 HP is a powerful and efficient drying solution. To get the most out of your dryer, download the free Service Manual from our website. This comprehensive manual provides step-by-step instructions and troubleshooting tips, ensuring optimal performance. Simply visit manualshive.com and start benefiting from this invaluable resource.
Share
Download


Reviews:
No comments
Related manuals for ECO Dryer 2.0 HP

900386
Brand: Taurus Pages: 36

SE1200 Easy Breeze
Brand: Hoefer Pages: 27

EC 3296
Brand: Laden Pages: 2

COMBO 12-in-1
Brand: PowerXL Pages: 44

900377
Brand: Taurus Pages: 56

Lavadora y Secadora EWY8614W
Brand: EAS Electric Pages: 62

CKSTAF40D-013
Brand: Oster Pages: 20

ExxcelWVD24520GB
Brand: Bosch Pages: 64

WDU28561TR
Brand: Bosch Pages: 60

GHF91G
Brand: Vulcan-Hart Pages: 2

JT-MC206GS-W-E
Brand: Mitsubishi Electric Pages: 15

Jet Towel JT-SB216JSH-H-E
Brand: Mitsubishi Electric Pages: 13
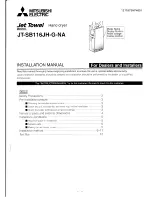
Jet Towel JT-SB116JH-G-NA
Brand: Mitsubishi Electric Pages: 12

JT-SB216ESH-W-CE
Brand: Mitsubishi Electric Pages: 8

JT-MC206GS-W-E
Brand: Mitsubishi Electric Pages: 28

Jet Towel JT-SB216JSH2
Brand: Mitsubishi Electric Pages: 13

JT-SB216ESH-DG-CE
Brand: Mitsubishi Electric Pages: 59

Jet Towel JT-SB216JSH-H-E
Brand: Mitsubishi Electric Pages: 59


