Netopia 3381-ENT, Getting Started Manual
The Netopia 3381-ENT is an advanced networking device that offers seamless connectivity and enhanced security features. Get started quickly and effortlessly with the comprehensive "Getting Started Manual." To access this manual for free, simply download it from manualshive.com, and unlock the full potential of your Netopia 3381-ENT.
Share
Download


Reviews:
No comments
Related manuals for 3381-ENT

MSR 20-20
Brand: H3C Pages: 6

OfficeConnect 3CP4144
Brand: 3Com Pages: 4

OfficeConnect 3CP4144
Brand: 3Com Pages: 2

MSR 20-20
Brand: H3C Pages: 60

MSR 20 Series
Brand: H3C Pages: 149
3C13636
Brand: 3Com Pages: 27

OfficeConnect 3C19500
Brand: 3Com Pages: 52

P1GCCAS
Brand: Garland Pages: 4

Storagelibrary T24
Brand: Tandberg Data Pages: 28

Dimension ES-3124
Brand: ZyXEL Communications Pages: 228

RC-402
Brand: Rosewill Pages: 3

ZT-2024
Brand: ICP DAS USA Pages: 8

RP614 - Web Safe Router
Brand: NETGEAR Pages: 16

NVR41-4KS2 Series
Brand: Dahua Pages: 452

TRACER 5045
Brand: ADTRAN Pages: 9

GW7001
Brand: Doro Pages: 50
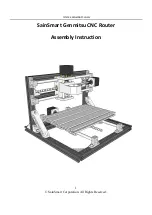
Genmitsu CNC
Brand: SainSmart Pages: 12

RT1610
Brand: Xantech Pages: 6


