

Start Here
Follow these quick steps to install your WG602.
Important:
The WG602 v3 firmware is not backward compatible with
earlier versions of the WG602.
1
1
Set Up the WG602 Access Point
Tip:
Before mounting the WG602 in a high location, first set up and
test the WG602 to verify wireless network connectivity.
a.
Prepare a PC with an Ethernet adapter. If this PC is already part
of your network, record its TCP/IP configuration settings.
b. Configure the computer with a static IP address of
192.168.0.210 and 255.255.255.0 for the Subnet Mask.
c.
Connect an Ethernet cable from the WG602 to the PC (A).
d. Turn on your computer, connect the power adapter to the
WG602 and verify the following:
The power power light goes on.
The LAN light of the wireless access point is lit when
connected to a powered on PC.
2
2
Configure LAN and Wireless Access
a.
Configure the WG602 Ethernet port for LAN access.
•
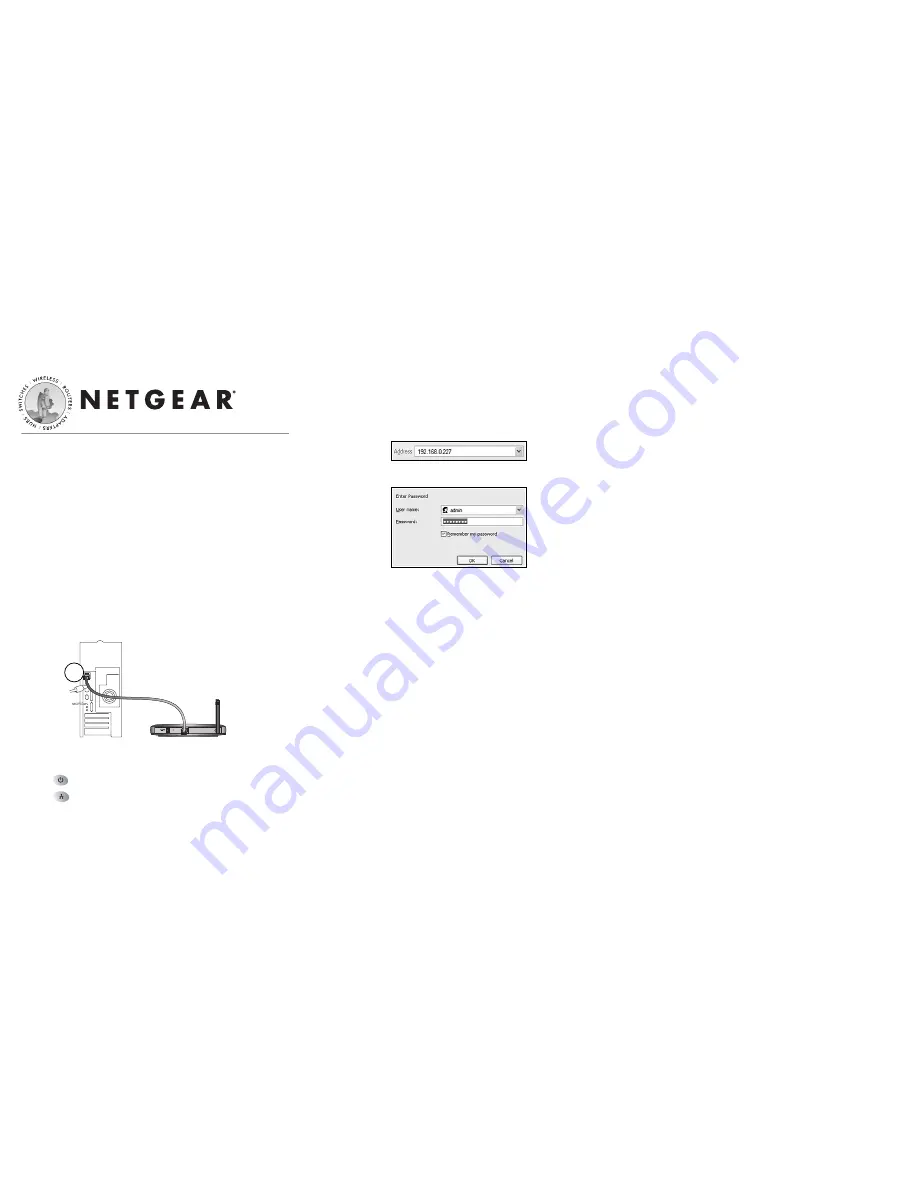
Connect to the WG602 by opening your browser and
entering
http://192.168.0.227
in the address field.
•
When prompted, enter
admin
for the user name and
password
for the password, both in lower case letters.
•
Click the IP Settings link and configure the IP Settings
according to your network setup.
b. Configure the wireless interface for wireless access. See the
online help or the
Understanding Basic Wireless Settings
topic of the
Reference Manual
on the
54 Mbps Wireless Access Point Resource CD
for full instructions.
Note:
You must set the Regulatory Domain. It may not be legal
to operate the wireless access point in a region other than one of
those identified in this field.
Now that you have finished the setup steps, you are ready to deploy
the WG602 in your network. If needed, you can now reconfigure the
PC you used in step 1 back to its original TCP/IP settings.
3
3
Deploy the WG602 Access Point
a.
Disconnect the WG602 and position it where you will deploy it.
The best location is elevated at the center of your wireless
coverage area.
b. Lift the antenna so that it is vertical.
c.
Connect an Ethernet cable from your WG602 Access Point to a
LAN port on your router, switch, or hub.
Note:
By default, the WG602 is a DHCP client. If there is no
DHCP server in the network, the WG602 uses 192.168.0.227 as
its IP address. If your network used different addressing, you
will need to configure the WG602 accordingly.
d. Connect the power adapter to the wireless access point and plug
the power adapter in to a power outlet. The power, LAN, and
wireless lights should light up.
4
4
Verify Wireless Connectivity
Using a computer with an 802.11b or 802.11g wireless adapter with
the correct wireless settings needed to connect to the WG602 (SSID,
MAC ACL, WEP, WPA, etc.), verify connectivity by using a browser
such as Netscape
®
or Internet Explorer to browse the Internet, or
check for file and printer access on your network.
Note:
If you cannot connect, see the Troubleshooting Tips on the
next page or the
Reference Manual
on the
54 Mbps Wireless Access Point
Resource CD
.
54 Mbps Wireless Access Point WG602 v2
WG602 54 Mbps Wireless Access Point
12 VDC 1.2A
+
A
54 Mbps Wireless Access Point WG602 v3


