

Connect the Network Cables
Using the appropriate cable, connect the port on a network hub or switch to the RJ-45 port on the USB
device. The port on the USB device performs autonegotiation and supports full-duplex operation.
Select the Windows operating system that your computer uses- Windows XP, Windows 2000, Windows ME,
or Windows 98 - and follow the instructions for installing that driver.
Install the Windows XP Network Driver
Note:
You need to first physically install the card before installing the network driver.
Although the screens on your system may look different than those shown in these instructions, you
should be prompted for the same information. If you are not prompted for the same information, refer
to your Microsoft documentation.
Note:
If the “Insert Disk” window opens and a message prompts you to insert your Windows
CD-ROM at any time during the installation process, insert the Windows CD-ROM in Drive D (the
CD-ROM drive) and click on “OK”. Then follow the next step in the instructions.
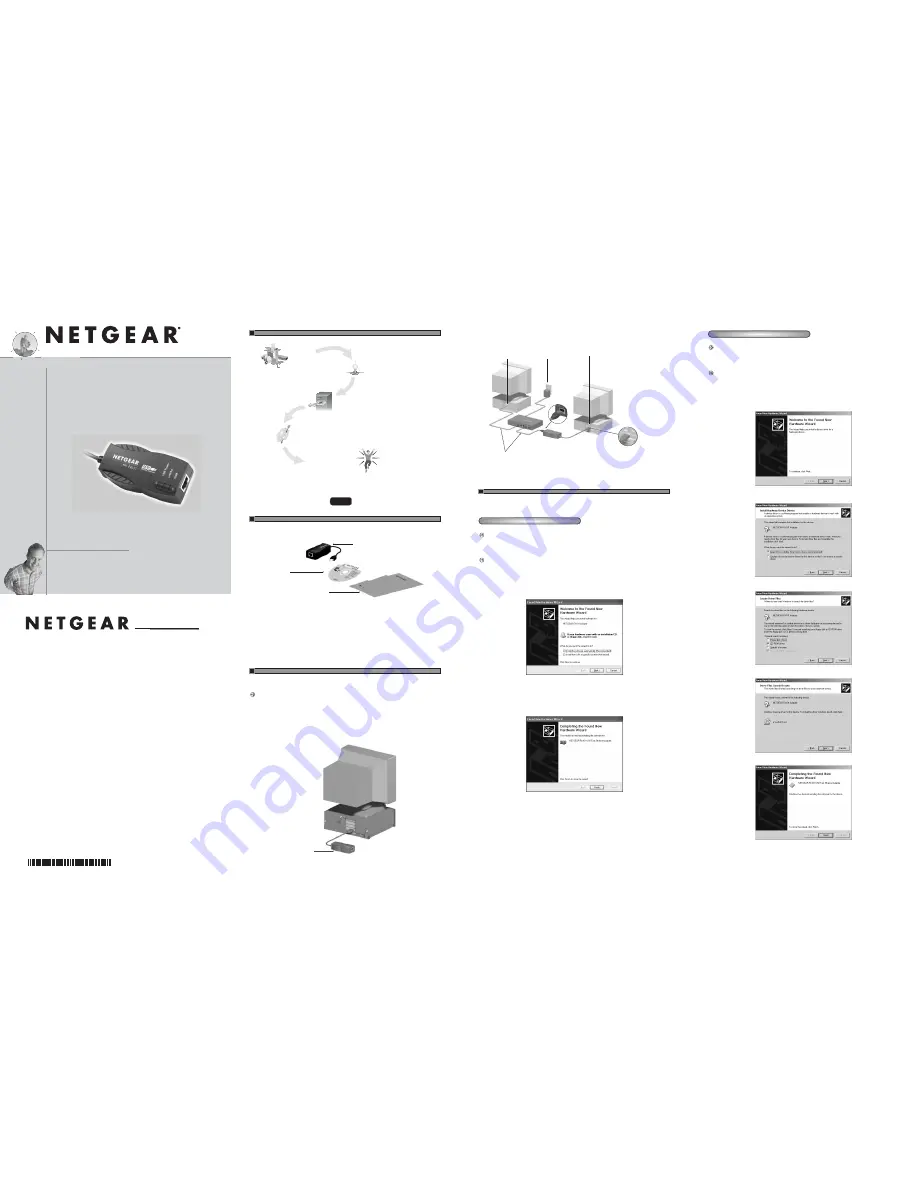
1. After installing the FA101 USB Adapter, a Found New Hardware Wizard dialog box is displayed.
Insert the GearBox for Adapters CD into your CD-ROM drive.
2. Select “Install the software automatically (Recommended)” and then click “Next” .
3. Windows Logo Testing Not Found dialog box may appear. Click “Continue anyway”.
4. The driver is copied onto your system.
5. The Completing the Found New Hardware Wizard dialog box appears with the following adapter.
Click "Finish".
6. Remove the GearBox for Adapters CD from the CD-ROM drive.
The Model FA101 Adapter driver installation for Windows XP is now complete.
As a last step, be sure to register your Adapter at
http://www.NETGEAR.com.
Plan Your Time
Estimated setup time for this product is only minutes.
Unpack the contents of the package and make sure that you have everything.
• FA101 USB Fast Ethernet Adapter
• GearBox for Adapters CD
• FA101 Installation Guide
• Warranty Card
• Support Installation Card
The Model FA101 USB Fast Ethernet Adapter is hot swappable, which means it can be inserted into a PC
that is either turned off or powered on.
Note:
For Windows XP or Windows 2000, you must log into the system with administrative rights
before installing the hardware.
1. Insert the Model FA101 USB Fast Ethernet Adapter into the USB (Universal Serial Bus) slot as
shown in the illustration below.
Some PCs have two USB ports. The Model FA101 USB Fast Ethernet Adapter can be inserted into
either port.
2. Turn on power to the PC, if you have chosen to install the adapter with the power turned off.
Model FA101 USB
Fast Ethernet Adapter
Installation Guide,
Warranty Card, and
Support Information Card
GearBox for Adapters CD
9309FA
®
NETGEAR, Inc.
Support Information
Phone: 1-888-NETGEAR
E-mail: [email protected]
www.NETGEAR.com
See Support Information Card for for additional phone numbers.
Internet / World Wide Web
Go to http://www.NETGEAR.com for the NETGEAR Web page.
Defective or damaged merchandise can be returned to your point-of-sale representative.
IMPORTANT!
Please register online. YOU MUST REGISTER TO OBTAIN TECHNICAL SUPPORT. PLEASE
RETAIN PROOF OF PURCHASE and this warranty information. To register your product, get product
support, or to obtain product information and NETGEAR product documentation, direct your Web
browser to the
http://www.NETGEAR.com
Web page.
July 2002
START HERE
1 VERIFY PACKAGE CONTENTS
2 CONNECT NETGEAR TO YOUR ENVIRONMENT
0:10
1. Open the box
and verify its
contents
2. Connect NETGEAR to
your environment
3. Install Network Driver
4. Test Your Network Connection
5. Enjoy being connected!
Model FA101
USB Fast Ethernet
Adapter
9308FA
Power adapter
PC with USB port
Category 5 10/100 Mbps UTP cables*
*Use a Category 3 or 5 UTP cable.
Maximum length = 100 meters (300 feet)
PC with USB port
USB
connector
Model FA101 USB
Fast Ethernet Adapter
Switch
9310FA
Installation Guide
Everybody ’s connecting.
™
10/100 Mbps
FA101
USB
Fast Ethernet Adapter
S
R
E
T
U
O
R
S
S
E
L
E
R
I
W
S
E
H
C
TI
W
S
S B
U
H
S
R
E
T
P
A
D
A
M
1
-
F
A
1
0
1
N
A
-
1
Install the Windows 2000 Network Driver
Note:
You need to first physically install the card before installing the network driver.
Although the screens on your system may look different than those shown in these instructions, you
should be prompted for the same information. If you are not prompted for the same information, refer
to your Microsoft documentation.
Note:
If the “Insert Disk” window opens and a message prompts you to insert your Windows CD-ROM
at any time during the installation process, insert the Windows CD-ROM in Drive D (the CD-ROM
drive) and click on “OK”. Then follow the next step in the instructions.
1. A Found New Hardware Wizard dialog box will appear, indicating that Windows 2000 has found the
adapter. Insert the GearBox for Adapters CD into your CD-ROM drive.
2. Click “Next”.
3. The install hardware device drivers dialog box will appear. Select “Search for a suitable driver for
your device (Recommended)”. Click “Next”.
4. The Locate Driver Files dialog box will appear. Select “CD-ROM drives”. Click “Next”.
5. The Driver File Search Results dialog box will appear. Click “Next”.
6. Digital Signature Not Found dialog box may appear. Click “Yes”.
7. Remove the GearBox for Adapters CD from the CD-ROM drive.
The Model FA101 Adapter driver installation for Windows 2000 is now complete.
3 INSTALL NETWORK DRIVER


