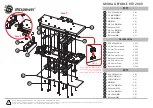
background image

Instruction Manual

NCE2DBT

Bluetooth

Summary of Contents for NCE2DBT

Page 1: ...60Wx4 HIGH POWER PLAYER RECEIVER BLUETOOTH 6 2 TOUCH SCREEN DVD MULTIMEDIA Instruction Manual NCE2DBT Bluetooth...

Page 2: ...s product Please read through these operating instructions so you will know how to operate your model properly After you ve finished reading the instructions keep this manual in a safe place for futur...

Page 3: ...r becomes normal before operating the unit 5 Using the car heater in low temperature environment may result in moisture inside the unit DO NOT use the unit in this situation Eject the disc and wipe of...

Page 4: ...sert SD Card 12 Remove SD Card 12 Play Pause 12 Previous Next 13 Search for a Folder 13 Repeat 13 Repeat A B 14 14 Select Audio Mode 14 Select Subtitle Language 14 Change View Angle 14 Video Setup 15...

Page 5: ...e e r c s f o s s e n t h g i r b e h t t s u j d A 7 MENU Button t i n u e h t o t d e i l p p a s e c r u o s o e d i v o i d u a e l b a l i a v a e h t n e e w t e b h c t i w s o t s s e r P 8 SD...

Page 6: ...t source 16 Power on off 17 Access to Bluetooth source 18 Access to navigation source 19 Pause playback Start playback 20 Search an available radio station by increasing tuning frequency Select the ne...

Page 7: ...ote control won t work please change the battery 5 Use button shaped lithium battery CR2025 3V only 6 DO NOT recharge disassemble heat or expose the battery in fire 7 Insert the battery in proper dire...

Page 8: ...e knob on the to the on The on the the in the LCD Playing Source Selection ress the MENU b tton on the ront panel to display the playin 1 or T ch to view the or next o 2 3 Clock 4 Volume Adjustment To...

Page 9: ...You can adjust front back left right balance of the speaker and the subwoofer volume to get balanced listening effect according to the surroundings and your interest 1 Enter the EQ setup mode Touch t...

Page 10: ...the date information on the screen A submenu is displayed 3 Touch or to set year month and day Set Clock Mode 1 Touch Clock mode 2 Touch 12Hr or 24Hr to switch clock mode Set Time 1 Touch Time 2 Touc...

Page 11: ...Method 2 1 Touch the numeric keypad icon Numeric keyboard is displayed touch numbers to input fre uency 2 Touch to delete the input numbers step by step 3 Touch OK to enter Radio Mode 1 2 3 4 5 6 7 8...

Page 12: ...tomatically Manual Store 1 Tune to a station 2 Touch 3 Touch one of the channels P1 to P6 to save the select band Tune to a Preset Station 1 Touch Radio 2 Select a band if needed 3 Touch one of the pr...

Page 13: ...Time display Controlling Playback To access the on screen controls touch the screen except upper left corner and touch again to cancel display Touch to view all function icons Connect USB Device 1 Op...

Page 14: ...display all available picture folders 2 Touch a folder then touch the desired file 3 Touch the file again to start play For Folder Control 1 Touch to display all available folders 2 Touch a folder th...

Page 15: ...u if necessary 2 Touch to display the 2nd menu if necessary 3 Touch on the screen repeatedly to turn random play on or off Select Audio Mode When you play VCDs you can select an audio mode R Stereo 1...

Page 16: ...08 indicates that this VCD has 8 tracks and the track playing back now is the first title Elapsed Time 1 Elapsed time of the current track 2 Total time of the current track Direct Track Entry To sele...

Page 17: ...ze yourself with the Bluetooth capabilities of the device Compatibility with all Bluetooth device is not guaranteed Any obstacle between this unit and a Bluetooth device can reduce the operational ran...

Page 18: ...l minutes to load on initial setup Tip You can also adjust Bluetooth settings in the Settings menu Music Mode A2DP A2DP is short for Advanced Audio Distribution Profile The mobile phones supporting th...

Page 19: ...beep sound Calibration Start Calibrate the touch screen Calibration When the touch operation is not sensitive or valid you should calibrate the touch screen using the calibration setting function Adj...

Page 20: ...ch blank area of the screen to exit Language settings Description OSD Select on screen display language DVD audio Select DVD audio language Options available depend on DVD disc DVD subtitle Select DVD...

Page 21: ...wing for children under 17 R Restricted re parental guidance is advised for children under the age of 17 NC 17 Unsuitable for children under age 17 Adult Acceptable for adults only DRC On Off Dynamic...

Page 22: ...power the fuse may be damaged and need to be replaced 1 Remove the unit from the dashboard 2 Check all electrical connections 3 Buy a fuse that matches the amperage of the damaged fuse 4 Replace the...

Page 23: ...nal Noise Ratio 80dB Dynamic Range 80dB Distortion line out 0 1 Frequency Response 3dB 20Hz 20KHz Maximum Output Power 4 60W Load Impedance 4 AUX IN Distortion 0 5 Frequency Response 3dB 20Hz 20KHz Au...

Page 24: ...back only when its region code is compatible with that of the player in use Region 1 Region 2 Japan West Europe North Europe Egypt South Africa Middle East Region 3 Taiwan of China Hong Kong of China...

Page 25: ...terference appears on screen The color system of DVD disc does not match the monitor Adjust the color system of the DVD disc playing back or the monitor in use Pirated disc is in use Use original disc...

Page 26: ...a small gap between the radio and dash is piece after installation is complete In this case use the appropriate trim ring to conceal any gaps that may be present Note For proper operation of the CD DV...

Page 27: ...26 Wire Connections Yellow Reverse Camera Input Fuse 15A...

Page 28: ...www nce com au CLASS 1 LASER PRODUCT Made In PRC Rev 1 0...

Reviews: