background image

Front Cover


LIVEWIRE OS 
DIGITAL SET-TOP BOX USER MANUAL 


Back Cover 

CONTACT  INFO 

• <Mailing Address > 

• <Phone Number> 

• <Customer Service  Phone Number and Address (If Different)> 

• <Parent Company Affiliations (If Necessary)>


 Important safety instructions  

& FCC information 

Safety


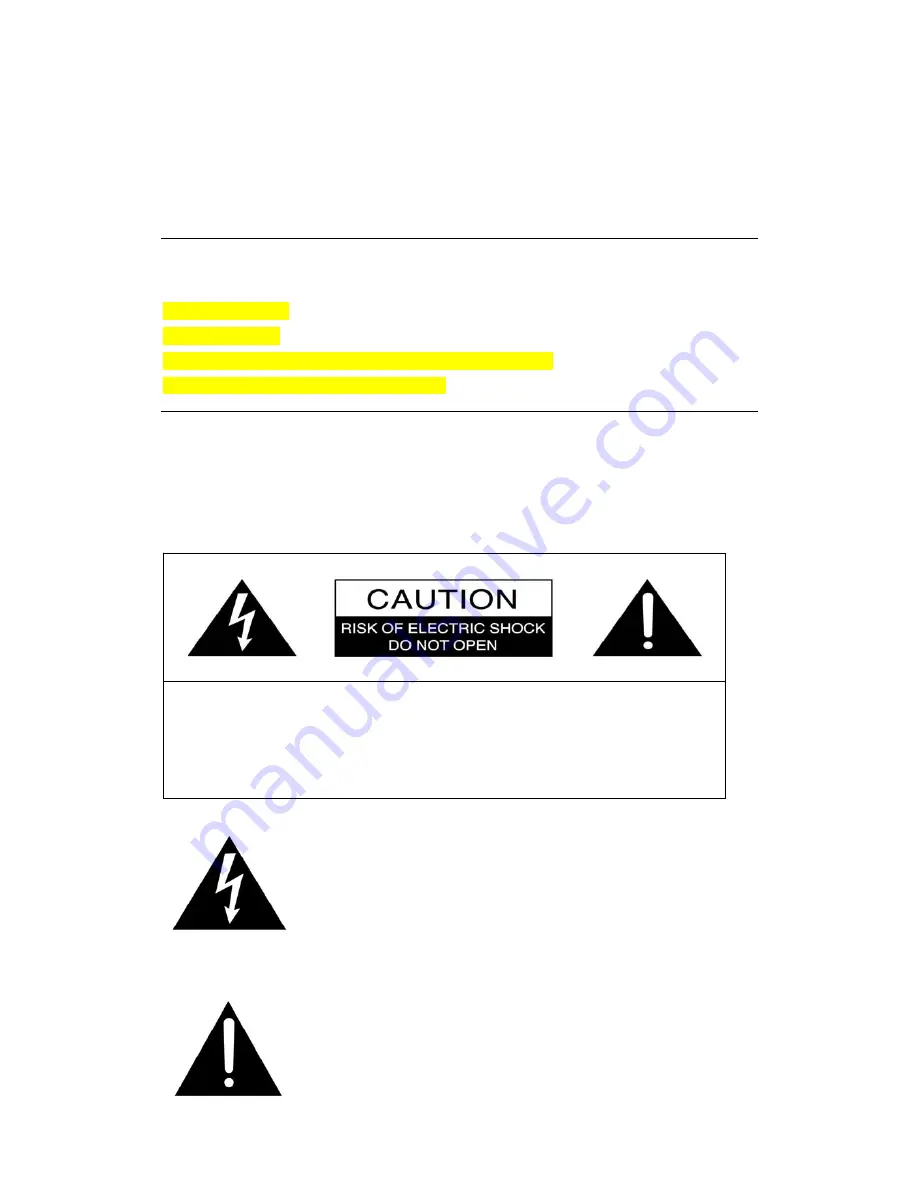
The exclamation point within an equilateral triangle is 
intended to alert the user to the presence of important 
operating and maintenance (servicing) instructions in the 
literature accompanying the appliance.

The lighting flash with arrowhead symbol, 
Within an equilateral triangle, is intended to alert the user 
to the presence of un-insulated 
“dangerous voltage” within the product’s enclosure that 
may be of sufficient magnitude to constitute a risk of 
electric shock to persons.

CAUTION 

:TO REDUCE THE RISK OF ELECTRIC SHOK 
DO NOT REMOVE COVER(OR BACK) 
NO USER-SERVICEABLE PARTS INSIDE. 
REFER SERVICING TO QUALIFIED SERVICE 
PERSONNEL. 

Summary of Contents for DMT 1761

Page 1: ...to the presence of important operating and maintenance servicing instructions in the literature accompanying the appliance The lighting flash with arrowhead symbol Within an equilateral triangle is intended to alert the user to the presence of un insulated dangerous voltage within the product s enclosure that may be of sufficient magnitude to constitute a risk of electric shock to persons CAUTION ...

Page 2: ...ll not be exposed to dripping or splashing and no objects filled with liquids such as vases shall be placed on the apparatus Outdoor Use Marking Warning To prevent fire or electric shock do not expose this appliance to rain or moisture Cable System Installation Marking Note to CATV System Installer This reminder is provided to call CATV system installer s attention to Article 820 40 of the NEC tha...

Page 3: ... into your outlet consult an electrician for replacement of the obsolete outlet 10 Protect the power cord from being walked on or pinched particularly at plugs convenience receptacles and the point where they exit from the apparatus 11 Only use attachments accessories specified by the manufacturer 12 Use only with the cart stand tripod bracket or table specified by the manufacturer or sold with th...

Page 4: ... accordance with the instructions may cause harmful interference to radio communications However there is no guarantee that interference will not occur in a particular installation If this equipment does cause harmful interference to radio or television reception which can be determined by turning the equipment off and on the user is encouraged to try to correct the interference by one or more of ...

Page 5: ... reduce the risk of fire use only No 26 AWG or larger telecommunication line cord Note 1 Both side shell peeled 6 7mm 2 To take up positions when insert the RJ11 6P2C 3 cable wording E216131 AWM 20251 26AWG VW 160 150V ETERNAL WELL ...

Page 6: ...ation 10 11 2 2 Program Navigation 11 12 2 3 Program Guide 12 16 2 4 Options 17 2 5 Ordering Pay Per View 18 3 MENU FEATURES 3 1 PPV Status 19 3 2 Favorites Themes 20 21 3 3 Parental Controls 22 23 3 4 Timers 24 3 5 System Menu 25 28 4 TROUBLE SHOOTING 4 1 Onscreen Help 29 4 2 Message Screens 30 31 4 3 Problem Solving 32 33 4 4 Care and Maintenance 33 34 5 APPENDIX Universal Remote Codes 35 37 ...

Page 7: ...all to the back of your Digital Set Top Box CABLE IN 2 Connect a COAX Cable CABLE OUT TO TV VCR or RCA Cables VIDEO OUT and AUDIO OUT R L between the Digital Set Top Box and your television 3 Plug the AC Power Cord into the back of the Digital Set Top Box and then into a convenient AC power outlet A surge protected power supply is recommended 4 For optimum performance it is recommended that you se...

Page 8: ...h TV If you do not see the Livewire Start Up Screen Fig 1 or live video check your connections from your TV and your cable source again If you still do not see the Livewire Start Up Screen Fig 1 or live video please refer to the Problem Solving section 4 3 for the most common problems 1 2 Front Panel Smart Card Panel Hidden Panel is behind Atlantic Digital Cable logo on the left front of your Digi...

Page 9: ... receiver or amplifier VIDEO OUT Video Output Yellow RCA Connector connects into a TV or VCR AUDIO OUT R L Stereo Audio Outputs Red and White RCA Connectors Right Red and Left White connect into a TV VCR or Hi Fi S VIDEO OUT Composite S Video Output S Video Connector S Video out to S Video into a TV or VCR CABLE OUT TO TV VCR RF Output Coax Cable This can be used to connect to a TV or VCR using a ...

Page 10: ...nnect a TV antenna using a Coax Cable to the Digital Set Top Box When the Digital Set Top Box is in Stand By Mode the original signal can be displayed through the Digital Set Top Box and into your TV or VCR directly bypass using the ANT OUT connector ...

Page 11: ...1 3 Universal Remote Control ...

Page 12: ... INFO MODE arrows will browse through the channel lineup and the next available program Right While inside a text window the Up and Down arrows will scroll through the characters A Z and numbers 0 9 Use the Left and Right arrows to navigate through the text window OK Confirms a selection In SURF MODE displays the OPTION MENU FAV Red Rotates Favorite Lists between All Channels currently selected Th...

Page 13: ...structs a VCR DVD or CD player to Fast Forward 2 View Programs 2 1 Program Information INFO MODE You can view information about the current program by pressing the Info button on the remote control Each time you press the button more information about the program will be displayed onscreen To exit INFO MODE continue to press the Info button until the information screens disappear or press EXIT at ...

Page 14: ...annel Number Current Date and Time Program Start Time Program End Time Program Theme If Available Program Rating If Available Program Name Program Time Remaining INFO 3 MODE Displays all of INFO 2 plus Program Description Transparent Window 2 2 Program Navigation NAVIGATING INFO MODE ...

Page 15: ...Left arrow button to return to the current time slot While viewing program information press OK to select and tune to a program If you select OK for a program in the next time slot your Digital Set Top Box will tune immediately to that channel NOTE You can use the Program Guide Section 2 3 to set timers for future programs in advance With a timer set your Digital Set Top Box will automatically tun...

Page 16: ...l Name Program Name Short Program Description Current Favorite List Name The top right corner of your screen displays a VIDEO MONITOR of the tuned program along with the following information Current Channel Number Current Short Channel Name Current Time The LEFT COLUMN lets you scroll through the channels available in your current channel lineup and displays all programs currently playing The lef...

Page 17: ...re programs available on the channel that you have highlighted in the LEFT COLUMN Use the Right arrow on your remote control to browse inside the RIGHT COLUMN Use the Up and Down arrows to scroll through future programs You can return to the LEFT COLUMN by pressing the Left arrow at any time To scroll more quickly through the Channel Lineup use the Page Up or Page Down button on your remote contro...

Page 18: ...te At any time while using the DAY SHIFTER use the Down arrow to browse through the programs available that day NOTE To return to the DAY SHIFTER feature once you have started browsing in the future program list you can select the Last button on your remote control You can also start over by returning to the LEFT COLUMN by pressing the Left arrow and return to the current day s programming TUNING ...

Page 19: ...n by pressing OK on your remote control 2 4 Options USING THE OPTIONS SCREEN While viewing any program you can access the OPTIONS screen directly by pressing OK on your remote control Available program options include Additional Audio Additional Video and Subtitles TIP You can use the blue Done button on your remote control to automatically select DONE onscreen without having to navigate to it Als...

Page 20: ... now Once you confirm your purchase your account will be charged immediately and the program will be available at its scheduled start time Also you are able to purchase in advance the next available pay per view event at any time before and up to 20 minutes after the start time Press the Right Arrow on the remote to scroll to the next event and you will be instructed on screen to purchase the next...

Page 21: ...you have made to the current screen Please note that using the Last button will only return you to the previous menu and NOT SAVE any changes you have made on the current screen 3 1 PPV Status With the PPV Status feature you can keep track of the PPV events that have been purchased on your account The menu will list the event name date of the event starting time and the purchase price This feature...

Page 22: ...t highlight the custom favorite channel list you would like to edit CHANNEL THEMES You can choose from a variety of different pre set themes for browsing such as Movies Kids or Sports Select DONE onscreen to confirm your selection EDIT FAVORITE To change the name of a favorite list select Edit Name onscreen A cursor will then appear inside the TEXT WINDOW Use the Up and Down arrow buttons on your ...

Page 23: ...ENTAL CONTROLS screen enter your System PIN Code using numbers 0 9 on your remote control then select ENTER onscreen NOTE The first time you set the System PIN Code the numbers will appear in the TEXT WINDOW The next time the System PIN Code will appear as asterisks TIP You can use the blue Done button on your remote control to auto matically select CANCEL onscreen without having to navigate to it...

Page 24: ...NTAL CONTROLS main screen BLOCK RATINGS You can specify that all programs of any selected rating will be blocked from view Select the ratings of the programs that you would like blocked Select DONE onscreen to confirm blocked ratings and return to the PARENTAL CONTROLS main screen 3 3 Timers REVIEW SET TIMERS AND CREATE MANUAL ON OFF TIMERS With this screen you can review the number of timers that...

Page 25: ...tem Menu features menu screens that allow you to customize your Digital Set Top Box Change your System PIN Code and view information about your System Software Access the System Menu at any time by pressing the MENU button on the remote control Scroll down the menu list and select SYSTEM MENU by pressing the OK button on the remote control SYSTEM MENU FEATURES General Settings System PIN Code Inst...

Page 26: ... default DEFAULT LANGUAGE Use the Arrow buttons on your remote control to select the text language that you would like to appear on the interactive TV screens NOTE Use the Page Up Down buttons onscreen or on your remote control to access GENERAL SETTINGS 2 or select DONE onscreen to confirm your preferences GENERAL SETTINGS 2 PREFERED AUDIO LANGUAGE Use the Arrow buttons on your remote control to ...

Page 27: ...o enter your new PIN Code twice to confirm your change Use the numbers 0 9 on your remote control then select ENTER onscreen each time After the second time your PIN Code will be changed Select CANCEL onscreen to return to the SYSTEM MENU and not change you PIN Code NOTE You may not use 4 equal digits for example 0000 Please keep you PIN Code in a safe place If you have forgotten or lost your PIN ...

Page 28: ...INGS 2 and 3 or select DONE onscreen to return to the INSTALLATION sub menu SMART CARD This menu provides details about the smart card currently inserted in your Digital Set Top Box It is recommended that you never remove your Smart Card unless asked to do so by a customer service representative Removal of your Smart Card will result in loss of service Your Digital Set Top Box is paired to the spe...

Page 29: ...his will erase all customization including PIN Code Favorites Parental Controls Default Languages and other General Settings Press CANCEL onscreen to return to the DIAGNOSTICS screen without resetting the system TIP You can use the blue Done button on your remote control to automatically select CANCEL onscreen without having to navigate to it 4 Trouble Shooting 4 1 Onscreen Help ACCESS HELP AND IN...

Page 30: ...ng changes 4 2 Message Screens RECEIVE CHANNEL BLOCK AND TROUBLE SHOOTING MESSAGES ONSCREEN Your Digital Set Top Box can diagnose most problems that may occur with the video and audio signal as well as the status of the Smart Card that controls your access to programming Each MESSAGE SCREEN will provide a tip on what to do in case of trouble Also channels or programs that are BLOCKED display a not...

Page 31: ...r on the front panel display of your Digital Set Top Box Your box is not plugged in properly Make sure the power cord is plugged in correctly and the power outlet is working properly The Digital Set Top Box does not respond to your Remote Control 1 The Digital Set Top Box is in standby mode 2 Something such as furniture is blocking the path between the Remote Control and the Digital Set Top Box 3 ...

Page 32: ... Set Top Box is not hooked up properly to your television set If your system is connected by Coax Cables switch your TV to the channel you have selected as its channel for the Digital Set Top Box NOTE If you have not yet manually tuned your TV or turned your TV on you need to do this first ...

Reviews: