Mitsubishi Electric WD-52525, Owner'S Manual
The Mitsubishi Electric WD-52525 Owner's Manual is available for free download on our website. This comprehensive manual provides users with detailed instructions and helpful information on operating and maintaining the WD-52525 projector. Get your free manual today at manualshive.com and unleash the full potential of your Mitsubishi Electric WD-52525.
Share
Download


Reviews:
No comments
Related manuals for WD-52525

TouchPanel TP 612C
Brand: YASKAWA Pages: 53

LPC-15P5
Brand: Avalue Technology Pages: 12

CS-100/P2000 Series
Brand: Cincoze Pages: 116

VTPC100PSS
Brand: VarTech Systems Pages: 12

PERIPAD-504
Brand: perixx Pages: 20
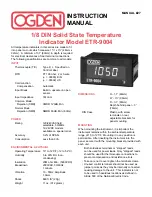
ETR-9004
Brand: Ogden Pages: 2

Power Panel C Series
Brand: B&R Pages: 93

VALESA
Brand: EAE Pages: 16

4.3inch HDMI LCD
Brand: Waveshare Pages: 8

HX8257-A
Brand: Waveshare Pages: 7

AFL2-12A-HM65/PC-R15
Brand: IEI Technology Pages: 141

POLARIS B7-72V1 Series
Brand: Bartec Pages: 73

MPC-122-K
Brand: Moxa Technologies Pages: 2

S243HL - Bmii Widescreen Slim WLED Display
Brand: Acer Pages: 27

AL2671W
Brand: Acer Pages: 25

AL2671W
Brand: Acer Pages: 57

LCD-S243HL
Brand: Acer Pages: 76

AT1935
Brand: Acer Pages: 24


