background image

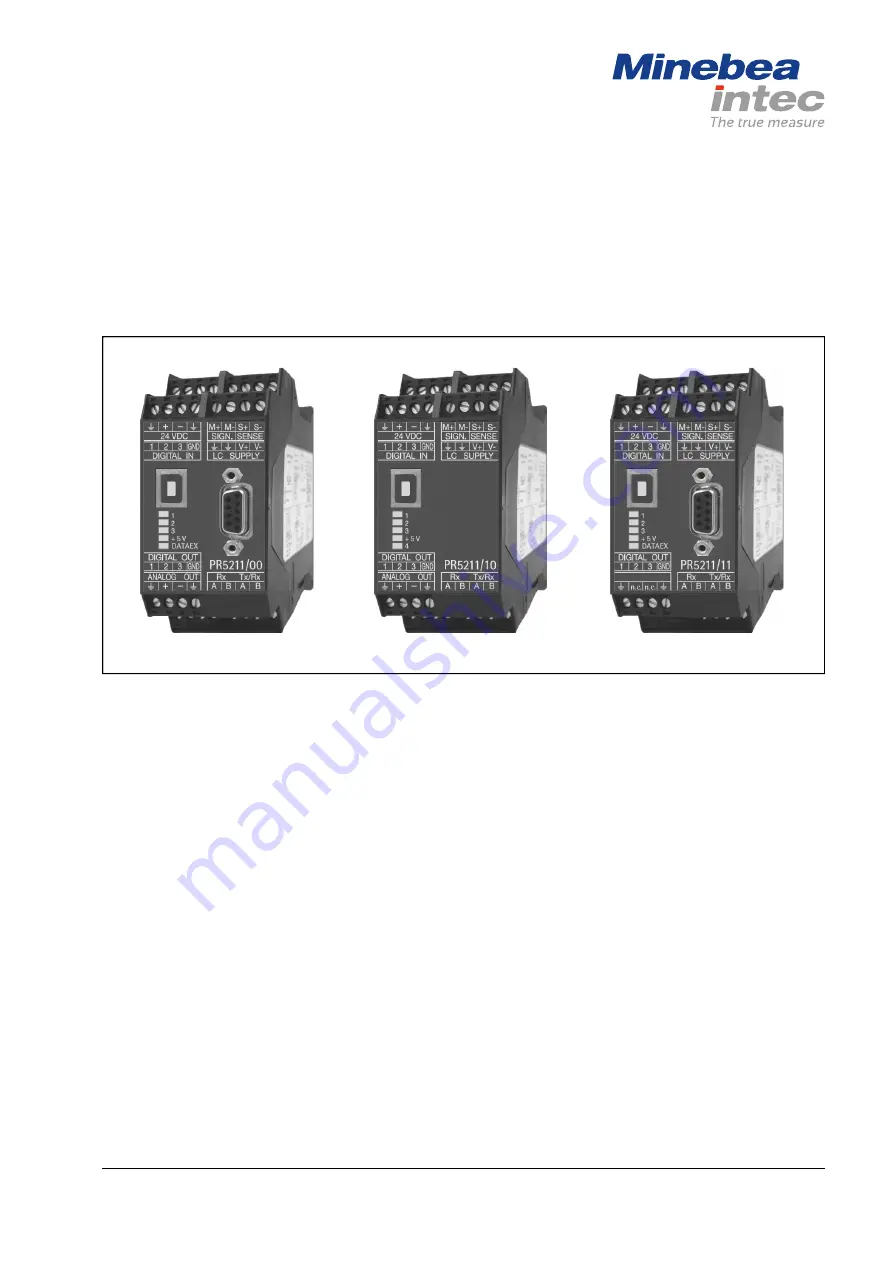
Transmitter Series PR 5211

Instrument manual

Translation of the original instrument manual

9499 050 52100

Edition 2.1.0

07/06/2018

Release 6.00

Minebea Intec GmbH, Meiendorfer Str. 205 A, 22145 Hamburg, Germany
Phone: +49.40.67960.303 Fax: +49.40.67960.383

Summary of Contents for PR 5211 Series

Page 1: ...211 Instrument manual Translation of the original instrument manual 9499 050 52100 Edition 2 1 0 07 06 2018 Release 6 00 Minebea Intec GmbH Meiendorfer Str 205 A 22145 Hamburg Germany Phone 49 40 67960 303 Fax 49 40 67960 383 ...

Page 2: ...ified personnel In correspondence concerning this product the type name and release number serial number as well as all license numbers relating to the product have to be cited Note This document is partially protected by copyright It may not be changed or copied and it may not be used without purchasing or written permission from the copyright owner Minebea Intec The use of this product constitut...

Page 3: ...ce suppression 9 2 6 Failure and excessive stress 9 2 7 Important note 9 2 8 Repairs and maintenance 9 2 8 1 General information 9 2 8 2 Electrostatically sensitive parts 9 2 8 3 Replacing fuses 9 3 Device description 10 3 1 Transmitter versions 10 3 1 1 General information 10 3 1 2 PR 5211 00 10 3 1 3 PR 5211 10 without ProfiBus DP 10 3 1 4 PR 5211 11 without analog output 10 3 2 Overview of the ...

Page 4: ... 3 Overwrite protection 39 5 2 Switching on the device 40 5 3 Switching off the device 41 5 4 Warm up time 41 5 5 Installing driver for USB chip 41 5 6 Installing ConfigureIt 41 5 7 Load and save the settings and configuration 42 5 7 1 Data in PR 5211 42 5 7 2 Archive data in the PC 43 5 8 Print dataset 44 5 9 Select language 44 5 10 Status Line 45 5 11 ADU 46 5 12 Parameter 50 5 13 Calibration 54...

Page 5: ...ad 80 7 5 7 Parameter P27 CalcTest Write 81 7 5 8 Parameter P40 Digital filter 81 7 5 9 Parameter P41 Filter frequency 81 7 5 10 Parameter P42 Measurement time 81 7 5 11 Parameter P43 Test operating mode 82 7 5 12 Parameter P44 Standstill time 82 7 5 13 Parameter P45 Standstill range 82 7 5 14 Parameter P46 Standstill timeout 82 7 5 15 Parameter P47 Zero range 83 7 5 16 Parameter P48 Zerotrack ran...

Page 6: ...agnetic Compatibility EMC 89 11 5 3 Interference suppression 89 11 6 Weighing electronics 89 11 6 1 Load cells 89 11 6 2 Principle 90 11 6 3 Accuracy and stability 90 11 6 4 Sensitivity 90 11 7 ProfiBus DP 90 11 8 Mechanics 91 11 8 1 Type 91 11 8 2 Dimensions 91 11 8 3 Weights 91 11 9 Documentation on the CD included 91 12 Appendix 92 12 1 Replacement parts 92 12 2 Certificates 92 Transmitter Seri...

Page 7: ...lved when measures for preventing hazards are not followed DANGER Warning of personal injury DANGER indicates death or severe irreversible personal injury which will occur if the corresponding safety measures are not observed Take the corresponding safety precautions WARNING Warning of hazardous area and or personal injury WARNING indicates that death or severe irreversible injury may occur if app...

Page 8: ...or the environment may occur if appropriate safety measures are not observed Take the corresponding safety precautions Note User tips useful information and notes 1 6 Hotline Phone 49 40 67960 444 Fax 49 40 67960 474 eMail help minebea intec com Transmitter Series PR 5211 1 Introduction Minebea Intec EN 6 ...

Page 9: ...warranty is given that the product is free of faults especially not in conjunction with third party software and hardware components required for operation The manufacturer does not accept any liability for damage caused by third party system components or due to incorrect use of the product The use of this product signifies recognition of the stipulations listed above 2 3 Initial inspection Check...

Page 10: ...ce is at least 20 mm The device has to be installed in an EMC compliant manner see Chapter 4 3 2 4 2 Supply voltage connection The supply voltage is 24 V DC 10 15 The maximum power consumption is 8 2 W For a connection to 230 115 V alternating current an external power supply is required 2 4 3 Protective ground connection The protective ground connection is made via the support rails Transmitter S...

Page 11: ...ty damage caused by a device repaired incorrectly by an operator or installer 2 8 Repairs and maintenance 2 8 1 General information Repairs are subject to inspection and must be carried out at Minebea Intec In case of defect or malfunction please contact your local Minebea Intec dealer or service center for repair When returning the device for repair please include a precise and complete descripti...

Page 12: ...fibus connection as well 3 1 3 PR 5211 10 without ProfiBus DP This version has digital inputs and outputs as well as an analog output and a USB B port for configuring the device The serial output can be used to connect e g a remote display This version does not have a Profibus connection The respective menus in the operating tools have been adapted to this version 3 1 4 PR 5211 11 without analog o...

Page 13: ...ounting rail 5 status indicator LEDs for power supply communication error detection The menu guided calibration and configuration of the device are carried out on a notebook PC Calibration using weights according to the mV V method or using load cell data smart calibration Analogue output 0 4 to 20 mA configurable for gross net weight Analog value via ProfiBus PR 5211 00 only 3 digital inputs elec...

Page 14: ...3 3 Housing 3 3 1 Sticker The connection diagram is located on the side of the housing 3 3 2 Dimensions All dimensions in mm Transmitter Series PR 5211 3 Device description Minebea Intec EN 12 ...

Page 15: ... bus connection LED Power on Bus Bus connection not provided 1 2 3 5V lit DATAEX lit flashing 1 Hz The LED for bus activity PR 5211 00 and PR 5211 11 lights up as soon as there is a connection Note The LED remains lit even if there is no communication or the physical connection is interrupted Weight status LED Standstill Null Null or FSD 1 lit 2 lit 3 lit 5V DATAEX FSD Skalenendwert 3 Device descr...

Page 16: ...reIt The configuration and calibration of the transmitter is done via the ConfigureIt program Installation see Chapter 5 6 Operation see Chapter 5 7 to Chapter 5 15 3 5 Overview of connections Transmitter Series PR 5211 3 Device description Minebea Intec EN 14 ...

Page 17: ...g power cable fuse protection load cells junction box data cables console cabinet etc Follow all device installation instructions related to application safety ventilation sealing and environmental influences Connect the cable from the junction box or platform load cell Connect additional data cables network cables etc as needed Connect the power supply Check the installation 4 2 Mechanical prepar...

Page 18: ...ng Establish equipotential bonding between devices system components this is essential for Ex applications Use a standardized reference potential Connect the mounting rail to protective ground Keep measurement and data cables away from power cables No Description 1 Screen clamp e g Phoenix SK8 D 2 Screen clamping rail e g Phoenix NLS CU 3 10 3 Rail connector e g Phoenix AB SK 65D 4 Mounting rail 3...

Page 19: ...e rear terminals 2 bottom row to the rear terminals 3 top row to the front terminals 4 4 4 2 RS 485 interface The device is equipped with an integrated RS 485 interface The interface can be configured by software The RS 485 interface serves for the connection of the remote display and PC for data transfer using the SMA protocol 4 Device installation Transmitter Series PR 5211 EN 17 Minebea Intec ...

Page 20: ...rity Remote display even SMA protocol None Signals TxA RxA R TxB RxB R Potential isolation yes Cable type Twisted pair screened e g LifYCY 2 2 0 20 Cable gauge 1 5 mm2 Cable length max 1000 m preset values factory settings The RS 485 receiver Rx has an internal terminating resistor of 120 Ω and 1 6 Ω for internal bus power supply on RxA on RxB Transmitter Series PR 5211 4 Device installation Mineb...

Page 21: ...play Example 9 pin D Sub male connector 5 pin plug in screw terminal Configuration PR 5211 PR 5110 configuration Parameters Communication Remote display oP 10 LInE rS485 oP 12 tokEn oFF oP 13 SEndModE SEnd oP 14 WEIght FolloW oP 15 WPkEy SElEct The following operations are possible from the connected remote display Display current weight mode Set tare Reset tare Set zero 4 Device installation Tran...

Page 22: ...nication SMA protocol 4 4 3 USB interface Configuration and calibration is performed using the ConfigureIt software version 6 00 or higher via the USB interface see Chapter 5 6 and 5 7 Technical data Description Data Connection USB B port Connection cable USB 2 0 A B Transmitter Series PR 5211 4 Device installation Minebea Intec EN 20 ...

Page 23: ...inal 4 pin Output Number 1 current output Output voltage via an external resistor Output Function Gross net weight Output Range 0 4 to 20 mA configurable Output Resolution e g 0 20 mA in max 40 000 counts Output Linearity error 0 to 20 mA 0 05 4 to 20 mA 0 025 Output Temperature error 100 ppm K Output Load Max 0 to 500 Ω Output Protected against short circuit yes 4 Device installation Transmitter ...

Page 24: ...ge output Current is supplied directly via the terminal contacts The voltage level corresponds to the voltage drop at the external 500 Ω resistor 4 4 5 Digital inputs 3 passive opto decoupled inputs are permanently built into the device The interface can be configured by software All inputs have a common GND Transmitter Series PR 5211 4 Device installation Minebea Intec EN 22 ...

Page 25: ...for all inputs Potential isolation Yes via optocoupler Cable length Max 50 m screened Example Contact input If the voltage at terminals in this example 1 GND is 10 V DC input 1 is active true 4 4 6 Digital outputs 3 passive opto decoupled outputs are permanently built into the device The interface can be configured by software All outputs have a common GND 4 Device installation Transmitter Series ...

Page 26: ... Number of outputs 3 Supply voltage Max 24 V 10 external Switching current Max 30 mA Signals GND common for all outputs Potential isolation Yes via optocoupler Cable length Max 50 m screened Transmitter Series PR 5211 4 Device installation Minebea Intec EN 24 ...

Page 27: ...ue the output voltage drops from 24 12 V DC to 3 V DC The load resistance must be 2 2 1 kΩ 4 4 7 Connection of analog load cells and weighing platforms 4 4 7 1 General information Load cells can be connected to the device doing the following One load cell directly see Chapter 4 4 7 2 and 4 4 7 3 several load cells in the junction box via connecting cable see Chapter 4 4 7 4 and 3 3 1 4 Device inst...

Page 28: ...ional information on the connection of load cells and cable junction boxes refer to the corresponding installation manuals 4 4 7 2 Connecting a load cell with a 4 wire cable The following links between the terminal contacts are provided from SIGN SENSE S to LC SUPPLY V from SIGN SENSE S to LC SUPPLY V Transmitter Series PR 5211 4 Device installation Minebea Intec EN 26 ...

Page 29: ...V Supply bu Supply voltage LC SUPPLY Grounding Screen ground 4 4 7 3 Connecting a load cell with a 6 wire cable Terminal Connection color code Description SIGN M Meas gn Signal LC output SIGN M Meas gy Signal LC output SENSE S Sense wh Sense SENSE S Sense bk Sense LC SUPPLY V Supply rd Supply excitation LC SUPPLY V Supply bu Supply excitation LC SUPPLY Grounding Screen ground 4 Device installation...

Page 30: ...l supply circuit Load resistance of load cell circuit 75 Ω e g 8 load cells of 650 Ω each The supply voltage is fixed at 12 V DC and protected against short circuits For further technical data see Chapter 11 6 1 4 4 7 5 Connecting load cells of type series PR 6221 See installation manuals of PR 6221 and PR 6021 08 68 Transmitter Series PR 5211 4 Device installation Minebea Intec EN 28 ...

Page 31: ...al load cell supply voltage or use of an isolating unit the internal load cell supply is not relevant Supply voltage 12 V 0 8 V symmetrical to housing ground Sense voltage 12 V 0 8 V symmetrical to housing ground Measuring voltage 0 12 mV LC with 1 0 mV V 0 24 mV LC with 2 0 mV V 4 Device installation Transmitter Series PR 5211 EN 29 Minebea Intec ...

Page 32: ...this case the internal supply is replaced by a potential free external supply The center of the external supply voltage 0 ext supply should be connected to ground to ensure that the voltage reacts symmetrically to 0 External supply specifications 6 V DC 5 30 ripple max 50 mVpp asymmetry max 3 The internal supply is not connected Transmitter Series PR 5211 4 Device installation Minebea Intec EN 30 ...

Page 33: ... must be open on the A D converter Print remove 0 Ω impedance Note In the factory setting the solder jumper is closed by a 0 Ω impedance By opening J300 the sense voltage monitoring will be switched off NOTICE Installation in the Ex zone The screen of the load cell cable and the screen of the connecting cable must not be connected inside the junction box if connection of both ends is not permissib...

Page 34: ... Equipotential bonding conductor Mounting rail Screen Transmitter Series PR 5211 4 Device installation Minebea Intec EN 32 ...

Page 35: ...e assignments of cable colors are listed in the relevant weighing platform operating instructions Connection designations Combics 1 to 3 devices PR 5211 BR_POS V LC SUPPLY SENSE_POS S SENSE OUT_POS M SIGN OUT_NEG M SIGN SENSE_NEG S SENSE BR_NEG V LC SUPPLY The cable screens must be connected to the grounding terminal of the device If the measuring lines M M are screened individually these screens ...

Page 36: ...ith 4 wire connection The following links between the terminal contacts are provided from SIGN SENSE S to LC SUPPLY V from SIGN SENSE S to LC SUPPLY V Transmitter Series PR 5211 4 Device installation Minebea Intec EN 34 ...

Page 37: ...R 5211 00 and PR PR 5211 11 Communication protocols and syntax comply with the ProfiBus DP standard to IEC 61158 with transfer rates up to 12 Mbit s Connection to the ProfiBus is established using the 9 pin D Sub female connector on the front of the device 4 Device installation Transmitter Series PR 5211 EN 35 Minebea Intec ...

Page 38: ...l isolation Yes optocoupler in lines A and B RS 485 Bus termination The bus termination in the last device is implemented via the integrated terminating resistor in the ProfiBus plug Cable type ProfiBus special color violet screened twisted pair cable Cable impedance 150 Ω Cable length The max distance of 200 m can be extended at 1 5 Mbit s by means of an additional repeater Certificates Profibus ...

Page 39: ...en on connector housing e g D Sub bus plug SIMATIC NET PROFIBUS FAST CONNECT Allocation of the 9 pin D sub female connector Pin assignment Signal Color Description Housing S Screen 1 Not connected 2 Not connected 3 RxD TxD P positive ac cording to RS 485 specifi cation Red Send receive data Data core B D P 4 if required RTS Request To Send only when using a repeater 5 DGND Insulated GND to RS 485 ...

Page 40: ...D N negative ac cording to RS 485 specifi cation Green Send receive data Data core A D N 9 Not connected Note Only plug connections with integrated terminating resistors may be used Transmitter Series PR 5211 4 Device installation Minebea Intec EN 38 ...

Page 41: ...tch protects the calibration data and parameters against unauthorized access The CAL switch is located under a cover that can be opened by means of a knife see Chapter 5 1 3 2 When the CAL switch is in opened position the calibration data and parameters can be changed using the PC program or via the ProfiBus connection With the CAL switch in the closed position the calibration data e g dead load S...

Page 42: ...rack step width 0 25 d Frequency 1 56 Hz Zerotrack time interval 0 M In the original condition as delivered from the factory the calibration data and parameters are set to default values Factory setting If a new calibration is started the calibration data will be set to default the parameters remain unchanged 5 2 Switching on the device The device can be set up as follows Via a notebook PC with th...

Page 43: ...CD ROM and it can be run on Windows 7 or Windows 10 1 Open the internet browser 2 Type the URL www ftdichip com Drivers VCP htm and confirm The web page is displayed 3 Click on the link of the appropriate operating system in the table e g 2 08 28 A ZIP folder is downloaded 4 In the menu of the opened ZIP folder select Commands Unzip to specific directory choose the target directory and click OK 5 ...

Page 44: ...d in Chapter 5 5 3 Check Are all the necessary Administrator rights to install executable programs given Run the ConfigureIt 6 00 Setup exe file 4 Follow the instructions 5 Select the destination directory for the installation e g C Programs Minebea Intec PR5211 On successful installation this message will appear Installation completed 6 Start the program on the desktop of the notebook PC 7 Select...

Page 45: ...aded in ConfigureIt can be stored as a file on the PC and loaded again This way the configuration data can be archived on the PC Load dataset Save dataset 1 Select File Load Dataset from File Note The default dataset cannot be overwritten To store a new configuration the name must be changed The default values factory settings will be loaded in the DEFAULT DAT file for ConfigureIt 2 Save the modif...

Page 46: ...r assigned as the default printer 5 9 Select language If the program was set to German D If the program was set to English GB automatically set at the first start of the program 1 Select File Select Language A selection window opens Transmitter Series PR 5211 5 Getting started Minebea Intec EN 44 ...

Page 47: ... is the status line No Description of the example 1 The program has established a communication connection using the PC inter face COM4 with a PR 5211 of version release 06 00 2 A dataset for the device type PR 5211 00 is loaded 3 The device has the board number 4294967295 4 The current weight is 2426 kg 2 Select the desired language 5 Getting started Transmitter Series PR 5211 EN 45 Minebea Intec...

Page 48: ... The value must be divisible by the scale interval Stepwidth and can have max 5 digits after decimal point The default value is 3000 kg Stepwidth Scale interval The scale interval is adjustable and applies to the entire range 1 2 5 10 20 or 50 default 1 Increased resolution 10 fold During calibration the display resolution can be increased by factor 10 Span During calibration it has to be decided ...

Page 49: ...bration Calculate dead load The input voltage in mV V equivalent to the dead load can be calculated by using the dead load rather than the maximum capacity in the formula specified above Normally calculation of the dead load scale without load or empty vessel is not necessary Subsequent dead load correction can be used for later re determination of the dead load when the scale or vessel is empty L...

Page 50: ...the weight value is measured Input 10 1920 msec default 320 msec Up to 160 ms the measurement time equals the conversion time for the analog digital converter Over 160 ms the conversion time of the analog digital converter remains at 160 ms but the average weight is presented in the entered time Standstill time The standstill detection requires two parameters to determine the mechanical standstill...

Page 51: ...if the repeat interval of Zerotrack is not set to 0 see Zerotrack repeat Zerotrack works only as long as the weight signal is within the set zero signal Permitted range 0 00 500 00 d default 0 25 d Zerotrack step Permitted range 0 00 10 00 d default 0 25 d The scale interval of the automatic Zerotrack must be smaller than the standstill range This function is only valid if the repeat interval of Z...

Page 52: ...not used Transparent Analog output is controlled via PLC e g to set the mixer speed Gross Gross weight value is linked to the analog output Net Net weight value is linked to the analog output if not tared gross weight Analog range The following can be set 0 120 mA Analog output range 4 120 mA Analog output range Transmitter Series PR 5211 5 Getting started Minebea Intec EN 50 ...

Page 53: ...ove FSD the analog output continues only possible if the output value for FSD is less than 20 mA 0 mA In case of weight value above FSD the analog output goes to 0 mA 4 mA In case of weight value above FSD the analog output goes to 4 mA 20 mA In case of weight value above FSD the analog output goes to 20 mA Analog value The analog output can be set to a fixed analog value The analog mode has to be...

Page 54: ...f comparison of limit 2 values with actual weight see Lim its Limit 3 Result of comparison of limit 3 values with actual weight see Lim its Tare active The output is set if the transmitter is in net mode Inputs The following settings are possible for each of the three digital inputs none Input is not used for transmitter control Set zero The transmitter will be set to zero see Chapter 5 11 Zero ra...

Page 55: ... of 10 kg In the event of a power failure both outputs turn to off OFF thus indicating underfill and overfill simultaneously Example 2 If the Limits 1 and 2 are the same for On and Off on off switches output 1 Limit 1 out ON if the weight Wgt exceeds the value switches output 2 Limit 2 out OFF if the weight falls below the value The default values for the limits Limit 1 Limit 3 are 0 kg 5 Getting ...

Page 56: ...m the calibration of the weighing point is performed With Start Calibration a new calibration will be done With Modify Calibration an existing calibration can be changed Transmitter Series PR 5211 5 Getting started Minebea Intec EN 54 ...

Page 57: ...value for the full SPAN zero to FSD will be entered By selecting by load cell data the data of the load cells will be used for the calibration see Chapter 5 13 1 Using the Previous button you can go to the previous step in the calibration 5 13 1 Smart calibration If the scale to be calibrated is not used in legal metrology calibration can be performed with the data of the load cell s Before starti...

Page 58: ...bration Certificate of the load cells In sensivity enter the data of the Rated output LC 1 10 resistance For this data refer to the Calibration Certificate of the load cells In resistance enter the data of the output impedance Hysteresis correction Only if with has been selected the values for Correction A B must be entered For this data refer to the load cell certificate 1 Select Load Cell Data 2...

Page 59: ...The sequence has to be performed as described in Chapter 5 13 only in Step 4 by load cell data has to be selected 4 Select Calibration 5 Getting started Transmitter Series PR 5211 EN 57 Minebea Intec ...

Page 60: ...nu the current status of the weight and the digital inputs and outputs is displayed The scale can be tared set to zero and switched to the test mode 1 Press Start Adaption The analog output is set to 4 mA 2 Measure this current at the receiver side and enter the value of the measured current e g 4 002 mA 3 Press Next The analog output is set to 20 mA 4 Measure this current at the receiver side and...

Page 61: ...ero offset from the calibrated zero point dead load By pressing the Set zero key the new zero point will differ from the calibrated zero point Use to switch on and switch off the test mode Use to tare the scale and reset tare Use to set the scale to zero 5 Getting started Transmitter Series PR 5211 EN 59 Minebea Intec ...

Page 62: ...ngs are 8 bits no parity and 1 stop bit The commands to the transmitter are printable ASCII characters starting with LF 0A hex and ending with CR 0D hex The transmitter sends a reply on each received command after approx 100 µs With commands that wait for standstill of the weight value the reply can be delayed by the timeout The following commands are supported W Z D A B ESC H P Q R S T M C I N Tr...

Page 63: ...bytes are read even if there are no changes to the data content The Profibus protocol ensures the data transport between Profibus master and the 2 x 8 byte data windows The interface protocol runs under the Profibus and manages the access to the most varying data via the 8 byte read and write windows Note All fieldbus data is only valid if Read_Value_Selected has been reflected 7 2 1 Data exchange...

Page 64: ...ct 1 byte Function for selecting the read request Write_Value_Select 1 byte Function for selecting the write request ResPower 1 bit PowerFail is reset ResTest 1 bit The test operating mode is finished SetTest 1 bit The test operating mode is started Now the test value can be read out by reading the gross weight ResTare 1 bit Tare is reset SetTare 1 bit The weighing point is tared SetZero 1 bit The...

Page 65: ...ecuting a function e g waiting for a standstill for taring CmdError 1 bit The device has interrupted the execution of a com mand e g standstill could not be reached within the defined standstill time The error number can be read from LASTERROR see Chapter 7 2 5 5 Tare_Active 1 bit The scale has been tared Cal_Changed 1 bit The device has been calibrated When this bit is 1 the weighing point parame...

Page 66: ..._Data bytes 0 3 7 2 2 2 Writing data Procedure 1 Write the function number as Read_Value_Select in byte 4 of the write window e g 9 net weight 2 Wait until Read_Value_Selected in byte 4 of the read window is equal to Read_Value_Select of the write window The requested value is available in bytes 0 3 1 Wait until Write_Active 0 in the read window slave is ready to receive new data 2 Write value in ...

Page 67: ...ue_Select is set and the corresponding function carried out Set the Write_Active bit Wait until Write_Active has been set Write 0 in Write_Value_Select Reset the Write_Active bit 7 2 2 4 Reading bits Reading individual bits which are not contained directly in the read window is only possible with a corresponding function number and the data in Read_Data Byte 0 3 of the read window In those bytes t...

Page 68: ...bit Wait until CmdBusy 0 Check the CmdError bit If CmdError is set Evaluate the LastError for function number 4 see Chapter 7 2 5 5 Set the ResetError bit for function number 121 see Chapter 7 2 5 14 The ResetError bit is reset The CmdError bit is reset 7 2 5 Function numbers Function numbers are written to MOSI by the master SPS and reflected in MISO by the PR 5211 Funktionsnummer 0 I O status bi...

Page 69: ...ve Cal Chan ged Test Active Note Byte 0 corresponds to byte 7 in the output area Weight error in byte 1 see table in Chapter 10 1 Field Function ADUError AD conversion error OR function of bits E1 E3 E7 AboveMax The weight value has exceeded the Max FSD but is still within Max permissible overload gross FSD overload Overload The weight value has exceeded the measuring range No valid weight data is...

Page 70: ...evice executes the ADC test The read weight value is not the gross value but the test value Cal_Changed The device has been calibrated When this bit is 1 the weighing parameters EXPO UNIT STEP must be read again Set after Power on and reset after reading the FSD Full scale de flection Tare_Active The scale has been tared 7 2 5 3 Function number 2 For internal use only 7 2 5 4 Function number 3 For...

Page 71: ...de 42 calibration active transmitter is in calibration mode 46 tare active can occur at start calibration 47 no zero setting weight not within zero setting range 50 invalid scale interval step width 51 not enough counts d 53 calibration weight FSD Full scale deflection 55 arithmetic overflow 57 entered unit does not comply with FSD weight unit 58 SPAN above maximum 59 fullscale cannot be divided b...

Page 72: ...x point The real data value is derived from DINT and EXPO as follows ValueReal readingDINT 10 EXPO Function number 8 Current gross value Function number 9 Current net value if tared otherwise gross Function number 10 Current tare value if tared otherwise 0 Function number 11 Reserved for internal use Function number 12 Reserved for internal use Function number 13 Reserved for internal use Function...

Page 73: ...ith the specified number see Chapter 7 2 2 3 The bit is reset at the specified number 128 Function number 80 SetZero Set the gross weight to zero Function number 81 SetTare The weighing point is tared Function number 82 ResetTare Reset tare Function number 83 SetTest Start the ADC test Function number 84 ResetTest Finish the ADC test Function number 85 ResetPwf Reset the PowerFail bit function num...

Page 74: ...ransition controlled for one write operation The bit is set as Write_Value_Select with the specified number see Chapter 7 2 2 3 Function number 112 SetZero Function number 113 SetTare Function number 114 ResetTare Function number 115 SetTest Function number 116 ResetTest Function number 117 ResetPwf Function number 118 SetFixTare function number 86 see Chapter 7 2 5 13 Function number 119 GetFixTa...

Page 75: ...DU Error In direct access status bits are independent of the write or read request Bit 7 Bit 6 Bit 5 Bit 4 Bit 3 Bit 2 Bit 1 Bit 0 The gross value hex 000004D2 1234 can be read from bytes 0 3 Negative values are output in the second complement 7 3 ProfiBus parameter numbers All configuration and calibration data can be written in the transmitter or can be read from it with the following parameters...

Page 76: ...1 2 3 1 ADU below zero Linear 0 mA 4 mA 20 mA 0 1 2 3 0 ADU above SKE Linear 0 mA 4 mA 20 mA 0 1 2 3 3 Output value 1 means that the value in function number 30 is written to the analog output The ADU error state is only valid if output value is set to gross 8 or net 9 The linear selection can be used to get a proportional output signal outside the range 0 FSD 7 3 1 2 Parameter 2 Scaling weight va...

Page 77: ... 7 Bit 6 Bit 5 Bit 4 Bit 3 Bit 2 Bit 1 Bit 0 Byte 0 Byte 1 Byte 2 Byte 3 COM 21 COM 20 The transmission to a remote display e g PR 5110 or the SMA protocol can be switched on or off COM 0 off COM 1 remote display e g PR 5110 switched on COM 2 SMA protocol switched on default 1 7 3 1 5 Parameter 5 Digital outputs Bit 7 Bit 6 Bit 5 Bit 4 Bit 3 Bit 2 Bit 1 Bit 0 Byte 0 Byte 1 Output 1 default 0 Byte ...

Page 78: ... parity 7 3 1 7 Parameter 7 Digital inputs Bit 7 Bit 6 Bit 5 Bit 4 Bit 3 Bit 2 Bit 1 Bit 0 Byte 0 Byte 1 Input 1 default 0 Byte 2 Input 2 default 0 Byte 3 Input 3 default 0 Description Value None 0 Set zero 1 Set tare 2 Reset tare 3 The PLC can read the status of the inputs at any time 7 4 Calibration 7 4 1 Procedure To modify calibration data and parameters parameter 21 53 first of all P20 must b...

Page 79: ...tion After each step always check for errors 2 Example of a new calibration with weights Parameter 20 1 Write all parameters P40 P53 Parameter 20 5 Set SPAN 1 000000 mV V Dead load 0 000000 mV V FSD Full scale deflection 3000 kg Step 1 Parameter 21 0x000FA013 400 0 kg Parameter 22 2 2 scale interval Empty the scale Parameter 23 1 the current weight will be transferred as the dead load Load the sca...

Page 80: ...rite parameters 40 53 in any order Parameter 20 3 SaveAndExit Parameter 20 4 UndoAndQuit 8 End Function 1 StartCal Test the CAL switch set CalActiv 2 Factory settings The calibration data and parameters are reset to the original condition as deli vered from the factory see Chapter 5 1 3 3 Transmitter Series PR 5211 7 ProfiBus interface Minebea Intec EN 78 ...

Page 81: ...PAN 1 000000 mV V Dead load 0 000000 mV V 7 5 ADU Parameters 7 5 1 Parameter P21 SetFullScale Write Bit 7 Bit 6 Bit 5 Bit 4 Bit 3 Bit 2 Bit 1 Bit 0 Byte 0 FSD MSB Byte 1 FSD MSB Byte 2 FSD LSB Byte 3 EXPONENT UNIT FSD 3 bytes for the full scale EXPONENT 4 bit Number of decimal places UNIT 4 bit Weight unit as in function number 4 7 5 2 Parameter P22 Scale interval Step width Write Bit 7 Bit 6 Bit ...

Page 82: ...ts Weight 3 bytes for the weight value Exponent Number of decimal places Unit Weight unit as in function number 4 7 5 5 Parameter P25 Set GetDeadloadMvpv Write Read Bit 7 Bit 6 Bit 5 Bit 4 Bit 3 Bit 2 Bit 1 Bit 0 Byte 0 Dead load MSB Byte 1 Dead load MSB Byte 2 Dead load MSB Byte 3 Dead load LSB DEAD LOAD in mV V value in mV V x 106 7 5 6 Parameter P26 Set GetSpanMvpv Write Read Bit 7 Bit 6 Bit 5 ...

Page 83: ... be entered in Frequency x 100 Example for 1 56 Hz enter 156 The frequency range depends on the measurement time see Table in Chapter 5 11 Frequency Applicable only if the digital filter has not been set to off If the digital filter is switched on the measurement time is max 160 ms 7 5 10 Parameter P42 Measurement time Bit 7 Bit 6 Bit 5 Bit 4 Bit 3 Bit 2 Bit 1 Bit 0 Byte 0 Byte 1 Byte 2 TIME MSB B...

Page 84: ...TIME 1 9 times the measurement time default 1 7 5 13 Parameter P45 Standstill range Bit 7 Bit 6 Bit 5 Bit 4 Bit 3 Bit 2 Bit 1 Bit 0 Byte 0 Byte 1 Byte 2 SRANGE MSB Byte 3 SRANGE LSB Limit to define the weight to be in standstill SRANGE 0 10 00 d default 1 d Value d x 100 7 5 14 Parameter P46 Standstill timeout Bit 7 Bit 6 Bit 5 Bit 4 Bit 3 Bit 2 Bit 1 Bit 0 Byte 0 Byte 1 Byte 2 Byte 3 TIME Number ...

Page 85: ...5 16 Parameter P48 Zerotrack range Bit 7 Bit 6 Bit 5 Bit 4 Bit 3 Bit 2 Bit 1 Bit 0 Byte 0 Byte 1 Byte 2 RANGE MSB Byte 3 RANGE LSB RANGE 0 500 00 d default 0 25 d Value d x 100 7 5 17 Parameter P49 Zerotrack step Bit 7 Bit 6 Bit 5 Bit 4 Bit 3 Bit 2 Bit 1 Bit 0 Byte 0 Byte 1 Byte 2 STEP MSB Byte 3 STEP LSB STEP 0 10 00 d default 0 25 d Value d x 100 7 5 18 Parameter P50 Zerotrack repeat Repeat inte...

Page 86: ...5 Hz 40 ms 3 50 Hz 20 ms 4 100 Hz 10 ms 7 5 21 Parameter P99 Access code Write Bit 7 Bit 6 Bit 5 Bit 4 Bit 3 Bit 2 Bit 1 Bit 0 Byte 0 CODE MSB Byte 1 CODE MSB Byte 2 CODE MSB Byte 3 CODE LSB CODE If an access code has been set in the configuration tool parameters and function numbers for limits can be written only if the access code is also present in parameter P99 The parameter P99 can always be ...

Page 87: ... exception is the solder switch see Chapters 4 4 7 7 and 4 4 7 8 8 4 Cleaning NOTICE Property damage caused by unsuitable cleaning utensils agents Damage to the device Prevent moisture from penetrating the interior Do not use aggressive cleaning agents solvents or similar agents For use in the food industry use a cleaning agent suitable for that particular working environment Use soft sponges brus...

Page 88: ...er unsorted municipal waste so that it can then be recycled Before disposing of or scrapping the product any batteries should be removed and taken to a suitable collection point Please see our T Cs for further information Service addresses for repairs are listed in the product information supplied with the product and on our website www minebea intec com We reserve the right not to accept products...

Page 89: ...3 36 mV Error 6 Sense control Flash 1Hz Flash 1Hz Altern flash 1Hz Flash 1Hz Flash 1Hz Altern flash 1Hz Flash 1Hz Flash 1Hz Flash 1Hz Flash 1Hz Altern flash 1Hz Note In all other messages the top status LED will flash FSD Full scale deflection 10 Error messages Transmitter Series PR 5211 EN 87 Minebea Intec ...

Page 90: ...und on the CD ROM included 11 3 Decoding the serial number 30 252 00015 30 252 00015 Location no 30 Hamburg Code for the year month 252 April 2010 Current number Is increment according to the year group table of Minebea Intec 11 4 General data The following characteristics are valid after a warm up time of at least 30 minutes reference temperature 23 C Values specified without tolerances are avera...

Page 91: ...ltages surge 1 2 50 µs EN 61000 4 5 1 2 kV Conducted disturbances by high fre quency coupling 0 15 80 MHz EN 61000 4 6 10 V Voltage fluctuations NAMUR NE21 100 0 100 2 s 1 s 2 s 100 40 100 2 s 1 s 2 s Mains inputs Voltage interruptions NAMUR NE21 0 20 ms 11 5 3 Interference suppression Electromagnetic emissi on EN 55011 Group 1 Limit class A for industrial areas 11 6 Weighing electronics The weigh...

Page 92: ...upply 0 5 µV V Linearity error 0 002 Zero point stability error TK0 0 02 µV K RTI SPAN stability error TKspan 2 ppm K 11 6 4 Sensitivity Sensitivity 0 5 µV d 0 2 µV d Resolution internal Approx 4 8 million internal steps at 36 mV Input voltage measuring signal dead load 0 max 36 mV Dead load range 36 mV max measuring signal entry calibration via software 11 7 ProfiBus DP Standards EN 50 179 volume...

Page 93: ...0050 IP 20 11 8 2 Dimensions Housing Dimensions Width 45 mm Height 99 mm Depth 116 mm 11 8 3 Weights Net weight 0 30 kg Shipping weight 0 45 kg 11 9 Documentation on the CD included The documents and manuals listed in the appendix see Chapter 12 2 can be found on the PR 5211 CD 11 Technical data Transmitter Series PR 5211 EN 91 Minebea Intec ...

Page 94: ...A B 1 8 m 5312 447 98005 Dummy cap 12 2 Certificates Ser no Description Document no 1 EU Declaration of Conformity MEU17026 2 Declaration of Conformity MDC17004 3 Certificate of Conformity TR CU 020 RU Д DE A303 B 06727 The documents listed in the table can be found on the PR 5211 CD Transmitter Series PR 5211 12 Appendix Minebea Intec EN 92 ...

Page 95: ......

Page 96: ...Published by Minebea Intec GmbH Meiendorfer Strasse 205 A 22145 Hamburg Germany Phone 49 40 67960 303 Email info minebea intec com www minebea intec com ...

Reviews: