background image

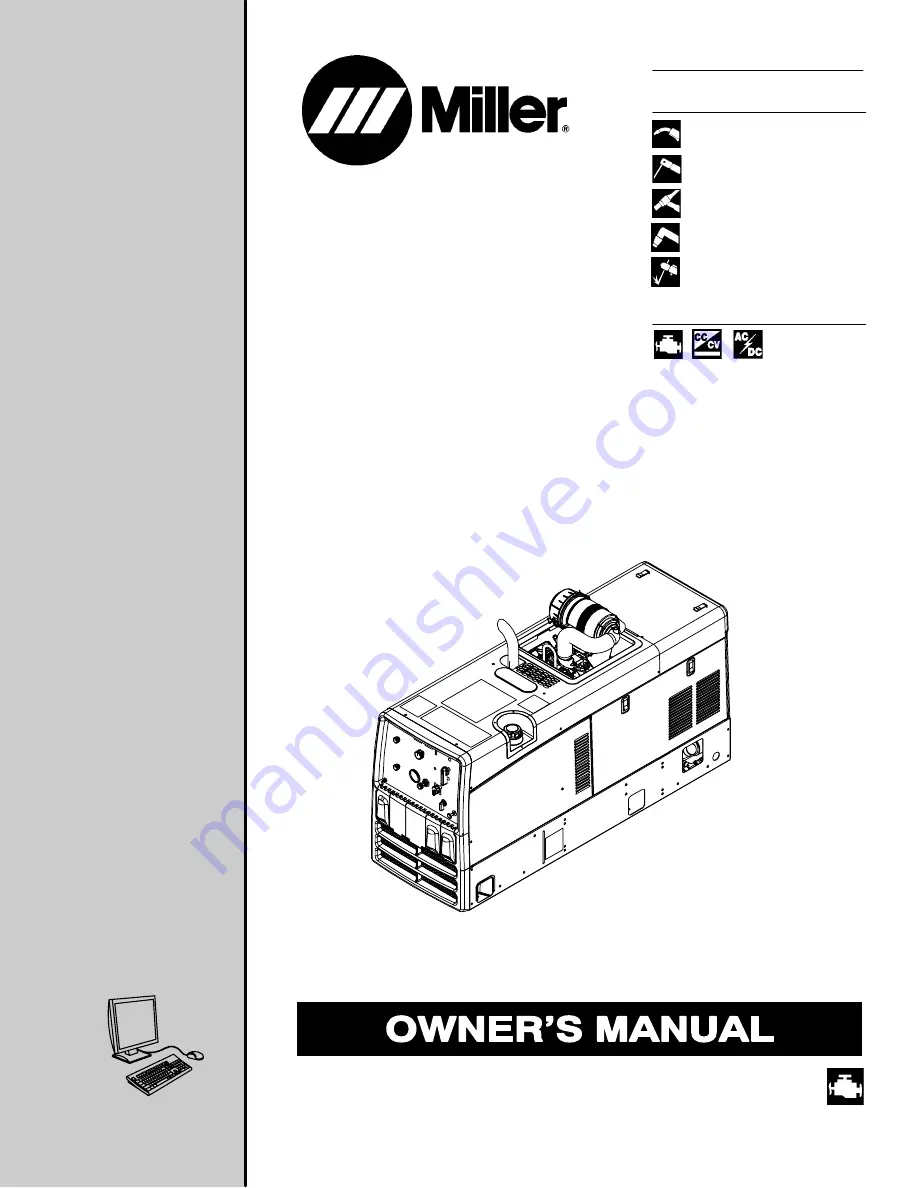
Trailblazer 302 Air Pak

Processes

Description

TIG (GTAW) Welding

Stick (SMAW) Welding

MIG (GMAW) Welding

Flux Cored (FCAW)

OM-229 930A

2009

01

Air Plasma Cutting and Gouging

with Spectrum

 Unit

Air Carbon Arc (CAC-A) Cutting

and Gouging

Visit our website at

www.MillerWelds.com

File: Engine Drive

Engine Driven Welding Generator And 

Air Compressor

Summary of Contents for TRAILBLAZER 302 AIR PAK

Page 1: ...k SMAW Welding MIG GMAW Welding Flux Cored FCAW OM 229 930A 2009 01 Air Plasma Cutting and Gouging with Spectrum Unit Air Carbon Arc CAC A Cutting and Gouging Visit our website at www MillerWelds com File Engine Drive Engine Driven Welding Generator And Air Compressor ...

Page 2: ...ntinue the tradition They re just as committed to providing equipment and service that meets the high standards of quality and value established in 1929 This Owner s Manual is designed to help you get the most out of your Miller products Please take time to read the Safety precautions They will help you protect yourself against potential hazards on the worksite We ve made installation and operatio...

Page 3: ...eld Power And Engine Specifications 16 4 2 Air Compressor Specifications 16 4 3 Sound Level Table 4 Meter 13 1 Ft Reading Per SAE J2101 16 4 4 Dimensions Weights and Operating Angles 17 4 5 Fuel Consumption Curves 18 4 6 Generator Power Curve 19 4 7 Duty Cycle 19 4 8 Stick And MIG Mode Volt Ampere Curves 20 4 9 TIG Mode Volt Ampere Curves 21 SECTION 5 INSTALLATION 22 5 1 Serial Number And Rating L...

Page 4: ...ntenance 42 9 3 Servicing Air Cleaner 43 9 4 Changing Engine Oil Oil Filter And Fuel Filter 44 9 5 Overload Protection 45 9 6 Servicing Optional Spark Arrestor 46 SECTION 10 AIR COMPRESSOR MAINTENANCE 47 10 1 Maintenance 47 10 2 Compressor Maintenance Label 48 10 3 Servicing Compressor Air Cleaner And Air Oil Separator 49 10 4 Changing Air Compressor Oil And Filter 50 SECTION 11 TROUBLESHOOTING 51...

Page 5: ...igh risk of unavoid able or accidental contact with the workpiece or ground For these conditions use the following equipment in order presented 1 a semiautomaticDC constant voltage wire welder 2 a DC manual stick welder or 3 an AC welder with reduced open circuit volt age In most situations use of a DC constant voltage wire welder is recommended And do not work alone Disconnect input power or stop...

Page 6: ...lding can easily go through small cracks and openings to adjacent areas Watch for fire and keep a fire extinguisher nearby Be aware that welding on a ceiling floor bulkhead or partition can cause fire on the hidden side Do not weld on closed containers such as tanks drums or pipes unless they are properly prepared according to AWS F4 1 see Safety Standards Do not weld where the atmosphere may cont...

Page 7: ... engine is cold to avoid scalding Always check coolant level at overflow tank if present on unit instead of radiator unless told otherwise in maintenance section or engine manual If the engine is warm checking is needed and there is no over flow tank follow the next two statements Wear safety glasses and gloves and put a rag over radiator cap Turn cap slightly and let pressure escape slowly before...

Page 8: ... 1 5 Compressed Air Hazards COMPRESSED AIR EQUIPMENT can injure or kill Incorrect installation or operation of this unit could result in equipment failure and personal injury Only qualified persons should install op erate and service this unit according to its Owner s Manual industry standards and na tional state and local codes Do not exceed the rated output or capacity of the compressor or any e...

Page 9: ...ALLING UNIT can cause injury Use lifting eye to lift unit and properly installed accessories only NOT gas cylinders Do not exceed maximum lift eye weight rating see Specifications Lift and support unit only with proper equipment and correct procedures If using lift forks to move unit be sure forks are long enough to extend beyond opposite side of unit OVERHEATING can damage motors Turn off or unpl...

Page 10: ...sparky org Safe Handling of Compressed Gases in Cylinders CGA Pamphlet P 1 from Compressed Gas Association 4221 Walney Road 5th Floor Chantilly VA 20151 phone 703 788 2700 website www cganet com Code for Safety in Welding and Cutting CSA Standard W117 2 from CanadianStandards Association Standards Sales 5060 Mississauga Ontario Canada L4W 5NS phone 800 463 6727 or in Toronto 416 747 4044 website w...

Page 11: ... est équipé Des précautions de sécurité supplémentaires sont requises dans des environnements à risque comme les endroits humides ou lorsque l on porte des vêtements mouillés sur des structures mé talliques au sol grillages et échafaudages dans des positions assises à genoux et allongées ou quand il y a un risque important de contact accidentel avec la pièce ou le sol Dans ces cas utiliser les app...

Page 12: ...rter des lunettes de sécurité avec écrans latéraux même sous votre casque Avoir recours à des écrans protecteurs ou à des rideaux pour protéger les autres contre les rayonnements les éblouissements et les étincelles prévenir toute personne sur les lieux de ne pas regarder l arc Porter des vêtements confectionnés avec des matières résistan tes et ignifuges cuir coton lourd ou laine et des bottes de...

Page 13: ...LE CARBURANT MOTEUR peut pro voquer un incendie ou une explosion Arrêter le moteur avant de vérifier le niveau de carburant ou de faire le plein Ne pas faire le plein en fumant ou proche d une source d étincel les ou d une flamme nue Ne pas faire le plein de carburant à ras bord prévoir de l espace pour son expansion Faire attention de ne pas renverser de carburant Nettoyer tout carburant renversé...

Page 14: ...er des blessures ou même la mort Avant d intervenir sur le circuit hydraulique couper l alimentation électrique verrouiller et étiqueter l appareil détendre la pression et s assurer que le circuit hydraulique ne peut être remis sous pression par inadvertance Détendre la pression avant de débrancher ou de brancher des canalisations hydrauliques Avant d utiliser l appareil contrôler les composants d...

Page 15: ...ir Avant d utiliser l appareil contrôler les composants du circuit d air comprimé les branchements et les flexibles en recherchant tout signe de détérioration de fuite et d usure Ne pas diriger un jet d air vers soi même ou vers autrui Pour intervenir sur un circuit d air comprimé porter un équipement de protection tel que des lunettes de sécurité des gants de cuir une chemise et un pantalon en ti...

Page 16: ...ence trop faibles Ne pas brancher de moteur de 50 ou de 60 Hz à la prise de 100 Hz s il y a lieu LES ÉTINCELLES VOLANTES ris quent de provoquer des blessures Porter un écran facial pour protéger le visage et les yeux Affûter l électrode au tungstène uniquement à la meuleuse dotée de protecteurs Cette ma nœuvre est à exécuter dans un endroit sûr lors que l on porte l équipement homologué de pro tec...

Page 17: ...mations congénitales ou autres problèmes de procréation Se laver les mains après manipu lation Pour les moteurs à essence Les gaz d échappement des moteurs contiennent des pro duits chimiques dont l État de Californie reconnaît qu ils provoquent des cancers et des malformations congénitales ou autres problèmes de procréation Pour les moteurs diesel Les gaz d échappement des moteurs diesel et certa...

Page 18: ...s En attendant que les conclusions finales de la recherche soient établies il vous serait souhaitable de réduire votre exposition aux champs électromagnéti ques pendant le soudage ou le coupage Pour réduire les champs magnétiques sur le poste de travail appliquer les procédures suivantes 1 Garder les câbles ensemble les torsader les scotcher ou les recouvrir d une housse 2 Disposer les câbles d un...

Page 19: ...ngine Engine Read Operator s Manual A Amperes V Volts MIG GMAW Wire Stick SMAW TIG GTAW Lift Arc TIG Positive Negative Alternating Current AC Direct Current DC Time h Hours s Seconds Protective Earth Ground Do not switch while welding Remote Receptacle Work Connection CC Constant Current Wire Feed Electrode Positive Electrode Negative CV Constant Voltage Circuit Protector F Full E Empty Output Air...

Page 20: ...50 A 32 V 60 Duty Cycle 35 13 35 V CC AC 200 A 25 V 60 Duty Cycle 60 10 225 A 4 2 Air Compressor Specifications Compressor Type Air Output At 100 psi 100 Duty Cycle Pressure Safety Relief Valve Setting Air Compressor Oil Capacity Rotary Screw 26 scfm 3600 RPM 21 scfm 3000 RPM 17 scfm 2400 RPM 100 psi 689 kPa Range 80 150 psi 552 1034 kPa Auto Shutoff 165 psi 1138 kPa Pressure Relief 200 psi 1379 k...

Page 21: ...ate suspended from lifting eye 804 951 A Height 34 1 4in 870 mm To Top Of Air Cleaner Width 20 in 508 mm Depth 59 5 8 in 1514 mm A 20 in 508 mm B 16 1 2 in 419 mm C 1 3 4 in 44 mm D 6 1 16 in 154 mm E 32 3 4 in 832 mm F 59 5 8 in 1514 mm G 13 32 in 10 mm Dia Weight Without Fuel 805 lb 365 kg With Fuel 880 lb 399 kg Lifting Eye Weight Rating 1000 lb 453 kg Notes Work like a Pro Pros weld and cut sa...

Page 22: ...00 150 200 250 300 350 400 US GAL HR IDLE A Welding B Auxiliary Power DC WELD AMPERES AT 100 DUTY CYCLE 0 000 0 200 0 400 0 600 0 800 1 000 1 200 2400 3000 3600 US GAL HR ENGINE SPEED RPM 0 00 0 25 0 50 0 75 1 00 1 25 1 50 1 75 2 00 2 25 0 2 4 6 8 10 12 US GAL HR AUXILIARY POWER IN KILOWATTS IDLE C Air Compressor ...

Page 23: ... 0 20 40 60 80 100 120 140 0 50 100 150 200 250 300 AC VOLTS 13 000 WATTS Duty cycle is the percentage of 10 minutes that unit can weld at rated load without overheating NOTICE Exceeding duty cycle can damage unit and void warranty 100 Duty Cycle at 280 Amperes DC Continuous Welding 4 7 Duty Cycle 242 683 0 50 100 150 200 250 300 350 400 0 10 20 30 40 50 60 70 80 90 100 WELDING AMPERES DUTY CYCLE ...

Page 24: ...en the curves shown A CC DC Stick Mode C CV DC MIG Mode 4 8 Stick And MIG Mode Volt Ampere Curves B CC AC STICK Mode 0 50 100 150 200 250 300 MIN MIN DIG MAX DIG MAX 0 10 20 30 40 50 60 70 80 AC AMPERES 0 50 100 150 200 250 300 350 400 450 500 0 10 20 30 40 50 60 70 80 90 100 MIN MAX MIN DIG MAX DIG DC VOLTS DC AMPERES 40 35 30 15 20 10 0 5 0 100 200 300 400 500 600 700 25 DC AMPERES DC VOLTS AC V...

Page 25: ...apabilities of the welding generator Curves of other settings fall between the curves shown A CC AC TIG Mode B CC DC TIG Mode 4 9 TIG Mode Volt Ampere Curves DC AMPERES DC VOLTS AC AMPERES AC VOLTS 0 50 100 150 200 250 300 350 0 10 20 30 40 50 60 70 80 90 100 MIN MAX 0 50 100 150 200 250 0 10 20 30 40 50 60 70 80 MIN MAX ...

Page 26: ...ely fasten welding generator onto transport vehicle or trailer and comply with all DOT and other applicable codes NOTICE Do not install unit where air flow is restricted or engine may over heat See Section4 4 for lifting eye rating Mounting Do not mount unit by supporting the base only at the four mount ing holes Do not use flexible mounts Use cross supports to adequatelysupport unit and pre vent ...

Page 27: ...und wire from the generator equip ment grounding terminal to bare metal on the vehicle frame as shown If unit does not have GFCI re ceptacles use GFCI pro tected extension cord 1 Equipment Grounding Terminal On Front Panel 2 Grounding Cable Not Supplied 3 Metal Vehicle Frame Connect cable from equipment ground terminal to metal vehicle frame Use 10 AWG or larger insulated copper wire Electrically ...

Page 28: ...r neck empty to allow room for expan sion Check fuel level on a cold en gine before use each day To check fuel level turn Engine Con trol switch to Auto Speed position LED s indicate fuel level in tank Engine Oil Do not exceed the Full mark on the oil level dipstick The fuel pump may operate erratically if crankcase is overfilled After fueling check oil with unit on level surface If oil is not up ...

Page 29: ...ick in completely to accu rately check oil level Check oil with unit on level surface Check oil level at primary or optional oil fill check location as shown If oil is not up to full mark on dipstick add oil see compressor main tenance label in Section 10 2 Use front panel meters to determine hours until next recommended compressor oil change see Section 7 1 Inspect compressor air cleaner element ...

Page 30: ...29 219 Stop engine and let cool Engine backfire can cause se vere burns or other injuries Do not point exhaust pipe to ward control panel Keep away from exhaust outlet Do not point exhaust pipe to ward air cleaner or LP fuel tank if equipped Do not point exhaust pipe towards shield ing gas tank if equipped Point exhaust pipe in desired di rection but always away from front panel and direction of t...

Page 31: ... 219 803 778 B 1 2 3 Tools Needed 3 4 in 5 9 Connecting To Weld Output Terminals 803 778 B Stop engine Failure to properly connect weld cables may cause ex cessive heat and start a fire or damage your machine Do not place anything between weld cable terminal and copper bar Make sure that the sur faces of the weld cable terminal and copper bar are clean 1 Correct Weld Cable Connection 2 Incorrect W...

Page 32: ...es overheat use next size larger cable Weld cable size AWG is based on either a 4 volts or less drop or a current density of at least 300 circular mils per ampere mm2 for metric use S 0007 F For distances longer than those shown in this guide call a factory applications representative at 920 735 4505 5 11 Remote Receptacle Information 804 857 A A J B K I C L N H D M G E F Socket Socket Information...

Page 33: ...uting Options Use holes in the base and rear panel to route the air compressor hose customer supplied from the compressor outlet to the equipment Compressor outlet is shown with a quick connectfitting not supplied Protect hose from rubbing on sheet metal base Obtain optional 50 ft 15 m air hose with 1 2 in NPT swivel fitting Miller Part No 300 571 1 804 953 A WM Design 2 ...

Page 34: ...ion For Frequently Loaded Unit Carburetor Icing Carburetor icing causes the unit to drop be low the normal idle speed and then stall This condition occurs when the tempera ture is near freezing and the relative humid ity is high Ice forms on the throttle plate and inner bore of the carburetor The engine typically restarts without problems but soon stalls again Treat gasoline with a fuel de icer pr...

Page 35: ...and for five seconds after welding has stopped See Section 11 1 for additional display code information 3 Voltage Amperage Control Use control to select weld voltage or amperage Control may be ad justed while welding With Process Contactor switch in any Stick or TIG setting use control to adjust amperage With Process Contactor switch in any Wire posi tion use control to adjust voltage When a remot...

Page 36: ...nal current is needed to compensate for tight joint fit up without the need to increase overall welding current This setting is recommended for those who prefer a very stiff arc with 6010 electrodes Engine runs at 3600 RPM when weld ing with the Process Contactor switch in the Stiff Arc 6010 position Stick Remote On Off When switch is in a Stick Remote On Off mode select one of three settings to p...

Page 37: ... Arc w Auto Stop TIG GTAW Lift Arc w Auto Stop GTAW DC Only Electrode Hot TIG Remote On Off GTAW With HF Unit Pulsing Device Or Remote Control AC or DC At Remote Receptacle Stick Remote On Off Stick SMAW With Remote On Off At Remote Receptacle Wire Wire Feeder CV Using Remote MIG GMAW At Remote Receptacle 6 5 Stick Scratch Start With Stick selected start arc as follows 1 Electrode 2 Workpiece 3 Ar...

Page 38: ...lowly lift electrode Arc is started when electrode is lifted Maintain shielding gas coverage and eliminate tungsten and work piece contamination by using Auto Crater or Auto Stop to end the arc Arc End With Auto Crater Remote control is not needed when using Auto Crater 1 While welding 2 Lift torch slightly to start Auto Crater end current is reduced 3 Lower torch Weld current ramps down 4 Shieldi...

Page 39: ...ode weld output is con trolled through remote control only If no remote voltage amperage control is connected to the Remote receptacle the front panel Voltage Amperage control adjusts voltage and amperage 2 Remote Hand Control Optional 3 Remote Foot Control Optional Engine runs at weld power speed in Wire mode whenever a device connected to the re mote receptacle makes clo sure between pins A and ...

Page 40: ...ced when the air com pressor is on With the compressor on weld or generator loads will cause the en gine to run at 3600 RPM To reduce moisture in the com pressor air install optional air cool er with separator Part No 300 420 or desiccant dryer Part No 195 117 When the temperature inside the unit drops below 45 7 C in ternal heaters activate to prevent air system freeze up Air Compressor Maintenan...

Page 41: ... pressure exceeds 150 psi the compressor clutch will dis engage and shut down the compres sor Do not set pressure below 80 psi 552 kPa Compressor will supply 80 psi re gardless of setting below 80 psi See Section 7 3 for air compressor over load information 7 3 Air Compressor Overload Protection See Section9 5 for engine generator overload protection Over Pressure Protection Do not set air pressur...

Page 42: ... performing other compressor maintenance To control the release of air mixed in the compressor oil while running the compressor goes through a blow down cycle when the com pressor is turned off or the engine is stopped The blow down valve slowly discharges the pressure in the compressor 1 236 200 Notes Work like a Pro Pros weld and cut safely Read the safety rules at the beginning of this manual ...

Page 43: ...ens RC3 does not work and the 115 volt AC output to RC4 stops Press button to re set If supplementary protector continues to open contact Factory Authorized Ser vice Agent Combined output of all receptacles limited to 10 kVA kW rating of the generator EXAMPLE If 20 A is drawn from each 120 V duplex receptacle only 20 A is available at the 240 V receptacle 2 x 120 V x 20 A 240 V x 25 A 9 6 kVA kW 1...

Page 44: ...for a 240 V 2 wire load or a 120 240V 3 wire load See circuit diagram 1 Plug Wired for 120 240 V 3 Wire Load When wired for 120 V loads each duplex receptacle shares a load with one half of 240 V receptacle 2 Plug Wired for 240 V 2 Wire Load 3 Neutral Silver Terminal 4 Load 1 Brass Terminal 5 Load 2 Brass Terminal 6 Ground Green Terminal 7 Amperes Available using 120 240 V Plug 1 2 3 4 5 6 3 4 5 6...

Page 45: ...OM 229 930 Page 41 SECTION 9 GENERATOR ENGINE MAINTENANCE 9 1 Maintenance Label ...

Page 46: ...bel for important start up service and storage information Service engine more often if used in severe conditions Recycle engine fluids Check Change Clean Replace To be done by Factory Authorized Service Agent Reference Every 8 Hours Sections 5 4 6 3 Fuel Level Oil Level Meters for next oil change interval Oil Fuel Spills Every 25 Hours Sections 9 3 9 6 Spark Arrestor Screen If Equipped Every 50 H...

Page 47: ... engine protection Never clean a safety element Re place the safety element after servic ing the primary element three times Clean or replace primary element if dirty see note above before cleaning Re place primary element if damaged Re place primary element yearly or after six cleanings 1 Housing 2 Safety Element Optional 3 Primary Element 4 Dust Cap 5 Dust Ejector To clean air filter Wipe off ca...

Page 48: ...efore adding oil and run ning engine Fill crankcase with new oil to full mark on dipstick see Section 5 4 3 Fuel Filter 4 Fuel Line Replace line if cracked or worn Install new filter Wipe up any spilled fuel Start engine and check for fuel leaks Stop engine tighten connec tions as necessary and wipe up fuel Reset oil maintenance countdown by flipping Engine Control switch from Run Idle to Run thre...

Page 49: ...ines may freeze in cold weather and cause a no air pres sure or high air pressure condition Supplementary protectors CB1 and CB3 protect the stator winding supplying 115 volt AC output to Remote Receptacle RC4 see Section 8 1 Press button to reset 3 Fuse F6 See Parts List 4 Fuse F7 See Parts List F6 and F7 protect the engine wiring system from overload If F6 or F7 opens the engine will not crank R...

Page 50: ...f 803 572 A Stop engine and let cool 1 Spark Arrestor Screen Clean and inspect screen Replace spark arrestor if screen wires are broken or missing 1 4 in 1 Tools Needed Notes Work like a Pro Pros weld and cut safely Read the safety rules at the beginning of this manual ...

Page 51: ...the first 50 hours of operation Check Change Clean Replace To be done by Factory Authorized Service Agent Reference Every 8 Hours To Check Oil Level Do not open dipstick until unit has been off for 10 min utes Do not open while running Screw dipstick fully in be fore checking oil level Sections 5 4 7 1 Oil Level Meters for next oil change interval Fluid Spills Every 500 Hours Or Yearly Section 10 ...

Page 52: ...OM 229 930 Page 48 10 2 Compressor Maintenance Label ...

Page 53: ...y 1 Compressor Air Cleaner 2 Cover 3 Air Cleaner Element Wipe off cover Remove cover and ele ment Wipe dust from cover and housing with damp cloth Inspect element and Install new element if necessary Rein stall cover NOTICE Do not clean element with compressed air 4 Air Oil Separator To replace air oil separator Turn filter counterclockwise Remove fil ter Apply thin coat of oil to gasket on new fi...

Page 54: ...sor is still warm Route compressor oil drain hose through ac cess panel on rear panel Remove compres sor oil dipstick fill cap Remove plug from oil drain hose and drain oil into a suitable con tainer Reinstall oil drain hose plug Remove filter by turning filter counterclock wise Apply thin coat of oil to gasket on new filter Install new filter and turn clockwise until tight Add recommended oil unt...

Page 55: ...ion and Engine Control switch is toggled between Run and Auto Speed positions three or four times AIR OFF Air Compressor Off Before start up code is displayed when Engine Control switch is in Run or Auto Speed position and Compressor switch is in Off position Code is also displayed for three seconds when Compressor switch is moved to Off posi tion while engine is running Display then returns to ap...

Page 56: ...s to remote control Be sure connection to work piece is clean and tight Remove excessive coils from weld cables Use dry properly stored electrodes Have Factory Authorized Service Agent check engine speed brushes slip rings and circuit boards PC1 and PC2 Check shielding gas ensure proper shielding gas coverage while welding No remote voltage amperage control Check and tighten connections to Remote ...

Page 57: ...ield current control board PC2 Check receptacle wiring and connections 11 4 Engine Troubleshooting Trouble Remedy Engine will not crank Check fuses F6 and F7 and replace if open see Section 9 5 Check battery voltage Check battery connections and tighten if necessary Check plug PLG5 and plug PLG8 connections Have Factory Authorized Service Agent check Engine Control switch S2 Engine does not start ...

Page 58: ...ear freezing tem peratures engine starts and goes to idle but stalls after a few minutes Treat fuel with isopropyl alcohol de icer product Place Engine Control switch in the Run position until unit has been in operation and loaded for a peri od of time During operation in severe cold weath er engine starts and goes to idle but stalls after a few minutes Install engine manufacturer s kit for cold w...

Page 59: ...r and replace if plugged see Section 10 3 Check engine speed and adjust if necessary Check compressor belt and tension Be sure correct belt is used and is properly installed Replace belt if damaged or stretched Have Factory Authorized Service Agent check compressor air inlet valve safety valve air pressure switch and internal heating system Oil in air from compressor Check compressor oil level see...

Page 60: ...use Mintr Gl Slo Blo 15 Amp 32 Volt 1 238743 Tune up Filter Kit Kohler Includes 1 238744 Air Filter Element 1 238745 Air Filter Kohler Safety Element 1 066698 Oil Filter 1 215985 Filter Fuel w Clamps 1 4 in Fuel Line 1 238746 Spark Plug 2 232207 Filter Oil Air Compressor 1 232208 Filter Inlet Air Air Compressor 1 232209 Separator Oil Air Rotary Screw Compressor 1 229913 Belt Drive 1 ...

Page 61: ...OM 229 930 Page 57 Notes Work like a Pro Pros weld and cut safely Read the safety rules at the beginning of this manual ...

Page 62: ...OM 229 930 Page 58 SECTION 13 ELECTRICAL DIAGRAMS Figure 13 1 Circuit Diagram For Welding Generator ...

Page 63: ...OM 229 930 Page 59 228 867 F ...

Page 64: ...hock and static electricity hazards Also see AWS Safety Health Fact Sheet No 29 Grounding of Portable And Vehicle Mounted Welding Generators 1 EquipmentGrounding Terminal On Front Panel 2 Grounding Cable Not Supplied 3 Metal Vehicle Frame Connect cable from equipment ground terminal to metal vehicle frame Use 10 AWG or larger insulated copper wire Electrically bond generator frame to vehicle frame...

Page 65: ...ive load and requires a constant amount of power 2 Non Resistive Load Equipment with a motor is a non re sistive load and requires approxi mately six times more power while starting the motor than when running see Section 14 8 3 Rating Data Rating shows volts and amperes or watts required to run equipment Amperes x Volts Watts Example 1 If a drill uses 4 5 am peres at 115 volts calculate its run n...

Page 66: ...m Home Equipment Rating Starting Watts Running Watts Stock Tank De Icer 1000 1000 Grain Cleaner 1 4 HP 1650 650 Portable Conveyor 1 2 HP 3400 1000 Grain Elevator 3 4 HP 4400 1400 Milk Cooler 2900 1100 Milker Vacuum Pump 2 HP 10500 2800 FARM DUTY MOTORS 1 3 HP 1720 720 Std e g Conveyors 1 2 HP 2575 975 Feed Augers Air 3 4 HP 4500 1400 Compressors 1 HP 6100 1600 1 1 2 HP 8200 2200 2 HP 10550 2850 3 ...

Page 67: ...1 HP 6000 1500 1 1 2 HP 8200 2200 2 HP 10500 2800 Electric Chain Saw 1 1 2 HP 12 in 1100 1100 2 HP 14 in 1100 1100 Electric Trimmer Standard 9 in 350 350 Heavy Duty 12 in 500 500 Electric Cultivator 1 3 HP 2100 700 Elec Hedge Trimmer 18 in 400 400 Flood Lights HID 125 100 Metal Halide 313 250 Mercury 1000 Sodium 1400 Vapor 1250 1000 Submersible Pump 400 gph 600 200 Centrifugal Pump 900 gph 900 500...

Page 68: ...t must be at least twice the motor s running amperage kVA HP x HP x 1000 Volts Starting Amperage Example Calculate starting amper age required for a 230 V 1 4 HP mo tor with a motor start code of M Volts 230 HP 1 4 kVA HP 11 2 11 2 x 1 4 x 1000 230 12 2A Starting the motor requires 12 2 amperes VOLTS AMPS HP 230 2 5 1 4 Hz PHASE CODE 60 1 M AC MOTOR 1 2 3 4 14 9 How Much Power Can Generator Supply...

Page 69: ...ck to electric utility when service is re stored Install correct switch customer supplied Switch rating must be same as or greater than the branch overcurrent protection 3 Fused Disconnect Switch Install correct switch customer supplied if required by electrical code 4 Welding Generator Output Generator output voltage and wir ing must be consistent with regular utility system voltage and wiring Co...

Page 70: ...50 15 40 4800 112 34 62 19 37 11 45 5400 100 30 62 19 50 6000 87 26 50 15 Conductor size is based on maximum 2 voltage drop Cord Lengths for 240 Volt Loads If unit does not have GFCI receptacles use GFCI protected extension cord Maximum Allowable Cord Length in ft m for Conductor Size AWG Current Amperes Load Watts 4 6 8 10 12 14 5 1200 700 213 450 137 225 84 200 61 7 1680 800 244 500 152 300 91 2...

Page 71: ...ts MIG Guns and Subarc SAW Guns Induction Heating Coils and Blankets Cables and Non Electronic Controls APT SAF Model Plasma Cutting Torches Remote Controls Accessory Kits Replacement Parts No labor Spoolmate Spoolguns Canvas Covers Miller s True Blue Limited Warranty shall not apply to 1 Consumable components such as contact tips cutting nozzles contactors brushes slip rings relays or parts that ...

Page 72: ...h your personal records Always provide Model Name and Serial Style Number Contact a DISTRIBUTOR or SERVICE AGENCY near you Welding Supplies and Consumables Options and Accessories Personal Safety Equipment Service and Repair Replacement Parts Training Schools Videos Books Technical Manuals Servicing Information and Parts Circuit Diagrams Welding Process Handbooks Contact the Delivering Carrier to ...

Reviews: