background image

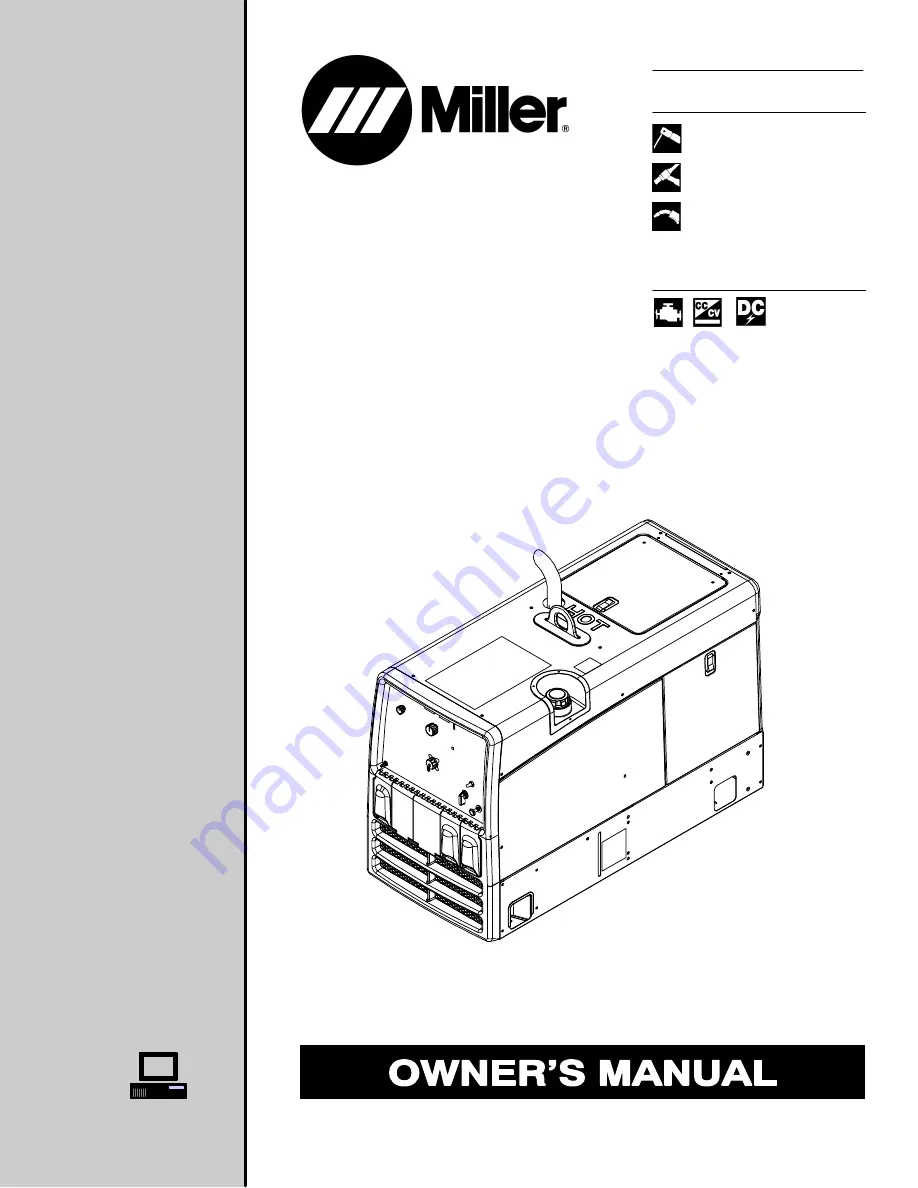
Miller Legend 302

Processes

Description

TIG (GTAW) Welding

Stick (SMAW) Welding

MIG (GMAW) Welding &

Flux Cored (FCAW) Welding

With Voltage Sensing Feeder

Engine Driven Welding Generator

OM-4430

217 243B

November 2004

Visit our website at

www.MillerWelds.com

Summary of Contents for Legend 302

Page 1: ...sses Description TIG GTAW Welding Stick SMAW Welding MIG GMAW Welding Flux Cored FCAW Welding With Voltage Sensing Feeder Engine Driven Welding Generator OM 4430 217 243B November 2004 Visit our website at www MillerWelds com ...

Page 2: ...nue the tradition They re just as committed to providing equipment and service that meets the high standards of quality and value established in 1929 This Owner s Manual is designed to help you get the most out of your Miller products Please take time to read the Safety precautions They will help you protect yourself against potential hazards on the worksite We ve made installation and operation q...

Page 3: ...ng Angles 10 4 4 Fuel Consumption While Welding And Using Generator Power 11 4 5 Generator Power Curve 11 4 6 Duty Cycle 12 4 7 TIG Mode Volt Ampere Curves 12 4 8 Stick And MIG Mode Volt Ampere Curves 13 SECTION 5 INSTALLATION 14 5 1 Installing Welding Generator 14 5 2 Engine Prestart Checks 15 5 3 Connecting Or Replacing The Battery 16 5 4 Installing Exhaust Pipe 17 5 5 Connecting To Weld Output ...

Page 4: ... 30 8 3 Servicing Optional Spark Arrestor 31 8 4 Servicing Air Cleaner 31 8 5 Changing Engine Oil Oil Filter And Fuel Filter 32 8 6 Overload Protection 33 8 7 Troubleshooting 34 SECTION 9 ELECTRICAL DIAGRAMS 38 SECTION 10 GENERATOR POWER GUIDELINES 41 SECTION 11 PARTS LIST 48 OPTIONS AND ACCESSORIES WARRANTY ...

Page 5: ...rd plug is connected to a properly grounded receptacle outlet When making input connections attach proper grounding conductor first double check connections Frequently inspect input power cord for damage or bare wiring replace cord immediately if damaged bare wiring can kill Turn off all equipment when not in use Do not use worn damaged undersized or poorly spliced cables Do not drape cables over ...

Page 6: ... cylinders contain gas under high pressure If damaged a cylinder can explode Since gas cylinders are normally part of the welding process be sure to treat them carefully CYLINDERS can explode if damaged Protect compressed gas cylinders from excessive heat mechanical shocks slag open flames sparks and arcs Install cylinders in an upright position by securing to a stationary support or cylinder rack...

Page 7: ...ting and gouging can cause fire or explosion Do not cut or gouge near flammables Watch for fire keep extinguisher nearby HOT PARTS can cause burns and injury Do not touch hot compressor or air system parts Let system cool down before touching or servicing READ INSTRUCTIONS Read Owner s Manual before using or servicing unit Stop engine and release air pressure before servicing 1 5 Additional Symbol...

Page 8: ...ing Society Standard AWS F4 1 from American Welding Society 550 N W LeJeune Rd Mi ami FL 33126 phone 305 443 9353 website www aws org National Electrical Code NFPA Standard 70 from National Fire Protec tion Association P O Box 9101 1 Battery March Park Quincy MA 02269 9101 phone 617 770 3000 website www nfpa org and www sparky org Safe Handling of Compressed Gases in Cylinders CGA Pamphlet P 1 fro...

Page 9: ...on à la réparation ou à l entretien de l appareil Déverrouiller l alimentation selon la norme OSHA 29 CFR 1910 147 voir normes de sécurité Installer et mettre à la terre correctement cet appareil conformément à son manuel d utilisation et aux codes nationaux provinciaux et municipaux Toujours vérifier la terre du cordon d alimentation Vérifier et s assurer que le fil de terre du cordon d alimentat...

Page 10: ...ns sans revers des chaussures hautes et un couvre chef Avant de souder retirer toute substance combustible de vos poches telles qu un allumeur au butane ou des allumettes Suivre les recommandations dans OSHA 1910 252 a 2 iv et NFPA 51B pour les travaux à chaud et avoir de la surveillance et un extincteur à proxi mité DES PARTICULES VOLANTES peuvent blesser les yeux Le soudage l écaillement le pass...

Page 11: ...le radiateur sauf si précisé autrement dans la section maintenance du manuel du moteur Si le moteur est chaud et que le liquide doit être vérifié opérer comme sui vant Mettre des lunettes de sécurité et des gants placer un torchon sur le bou chon du radiateur Dévisser le bouchon légèrement et laisser la vapeur s échapper avant d enlever le bouchon LA CHALEUR DU MOTEUR peut pro voquer un incendie N...

Page 12: ...plémentaires telles que le déplacement du poste l utilisation de câbles blindés l utilisation de fil tres de ligne ou la pose de protecteurs dans la zone de travail 2 6 Principales normes de sécurité Safety in Welding Cutting and Allied Processes norme ANSI Z49 1 de l American Welding Society 550 N W LeJeune Rd Miami FL 33126 télé phone 305 443 9353 site Web www aws org Recommended Safe Practices ...

Page 13: ...ad Operator s Manual A Amperes V Volts MIG GMAW Wire Stick SMAW TIG GTAW Circuit Breaker Positive Negative Alternating Current AC Output Time h Hours s Seconds Protective Earth Ground Do not switch while welding Remote Receptacle Work Connection CC Constant Current Wire Feed Electrode Positive Electrode Negative CV Constant Voltage Notes Work like a Pro Pros weld and cut safely Read the safety rul...

Page 14: ... Peak 5 kVA kW Continuous 42 21 A 120 240 V AC 60 Hz Single Phase at 1800 rpm 12 gal 45 L Kohler CH 20 Air Cooled Two Cylinder Four Cycle CV DC 300 A 25 V 100 Duty Cycle 35 13 35 V 1800 rpm And 2 4 kVA kW 20 A 120 V AC 60 120 Hz Single Phase At All Speeds 45 L Tank Four Cycle 20 HP Gasoline LP Engine w Electronic Governor 4 3 Dimensions Weights and Operating Angles Dimensions Height 34 in 864 mm A...

Page 15: ...DUTY CYCLE U S GAL HR 1 98 0 95 2 84 3 78 5 67 4 73 6 62 7 57 LITERS HR 0 00 3600 RPM Weld Generator at 5 kW Generator at 4 kW Generator at 2 kW Generator at 1 kW Generator at 3 kW Idle At 1800 RPM 222 553 The ac generator power curve shows the generator power avail able in amperes at the receptacles 4 5 Generator Power Curve AC AMPERES AC VOLTS 0 5 10 15 20 25 30 0 50 100 150 200 250 300 ...

Page 16: ... Cycle Ref 207 925 0 10 20 30 40 50 60 100 70 80 90 150 175 200 225 250 275 300 DUTY CYCLE WELD AMPERES 325 MIG FCAW STICK 222 558 The volt ampere curves show the minimum and maximum voltage and amperage output capabilities of the welding generator Curves of other settings fall between the curves shown 4 7 TIG Mode Volt Ampere Curves DC AMPERES DC VOLTS 0 100 200 300 400 0 5 10 15 20 25 30 35 40 4...

Page 17: ...of the welding generator Curves of other settings fall between the curves shown A CC DC Stick Mode B CV DC MIG Mode 4 8 Stick And MIG Mode Volt Ampere Curves DC AMPERES DC VOLTS 0 200 400 600 0 5 10 15 20 25 30 35 40 Min 20V Preset 3000RPM Max 3600RPM Max DC AMPERES DC VOLTS 0 200 400 600 0 20 40 60 80 100 Min 3000RPM Max 3600RPM Max ...

Page 18: ...ounting 1 Cross Supports Mount unit on flat surface or use cross supports to support base Grounding 2 Equipment Grounding Terminal On Front Panel 3 Grounding Cable Not Supplied 4 Metal Vehicle Frame Connect cable from equipment ground terminal to metal vehicle frame Use 10 AWG or larger insu lated copper wire Electrically bond generator frame to vehicle frame by metal to metal contact GND PE 2 3 4...

Page 19: ...r specifications Always leave filler neck empty to allow room for expan sion Check fuel level on a cold engine before use each day To check fuel level turn Engine Control switch to either Run Idle position LED s indicate fuel level in tank Oil Do not exceed the Full mark on the oil level dipstick The fuel pump may operate erratically if crankcase is overfilled Check oil with unit on level surface ...

Page 20: ...ecting Or Replacing The Battery Connect negative cable last 803 847 803 849 Ref S 0756 D Ref 216 172 B Ref 803 983 A 3 8 1 2 in Tools Needed Replacing The Battery Connect negative cable last Remove end panel to replace battery ...

Page 21: ...n 5 5 Connecting To Weld Output Terminals Stop engine Do not connect to CC and CV terminals at the same time 1 Negative Weld Output Terminal 2 Stick TIG CC Weld Output Terminal 3 Wire CV Weld Output Terminal For MIG welding connect work cable to Negative terminal and wire feeder cable to Wire CV terminal For Stick welding connect work cable to Negative terminal and electrode holder cable to Stick ...

Page 22: ... general guideline and may not suit all applications If cable overheats use next size larger cable Weld cable size AWG is based on either a 4 volts or less drop or a current density of at least 300 circular mils per ampere mm2 for metric use S 0007 F For distances longer than those shown in this guide call a factory applications representative at 920 735 4505 5 7 Remote Receptacle Information Engi...

Page 23: ... puddle for mild steel Tab 1 provides wettest weld puddle for stainless steel Lead 28 is connected between the Wire CV weld output terminal and Tab 3 at the factory For wetter weld puddle for mild steel Remove insulated sleeving from Tab 2 Dis connect Lead 28 from Tab 3 Connect lead 28 to Tab 2 reusing hardware Insulate Tab 3 with sleeving removed from Tab 2 Secure sleeving with cable ties For wet...

Page 24: ...OM 4430 Page 20 SECTION 6 OPERATING WELDING GENERATOR 6 1 Front Panel Controls 2 1 4 3 Ref 216 172 B 7 5 6 8 9 ...

Page 25: ...osition LED s indi cate fuel left in tank 6 Voltage Amperage Control Use control to select weld voltage or amperage Control may be adjusted while welding For maximum weld output above 220 Amps run unit at 3600 rpm For weld output below 220 Amps operate unit at 3000 or 3600 rpm With Process switch in any Stick or TIG set ting use control to adjust amperage With Process switch in Wire position use c...

Page 26: ... 3600 rpm Weld Speed Either Run Idle position Engine Controls Engine Speed Generator Power Output Weld Output 5 kW kVA Total From All AC Receptacles 2 4 kW kVA at 60 120 Hz From AC Receptacle RC3 Only No Load 1800 rpm Idle Speed Load 3000 rpm Weld Speed Welding Not Recommended 3600 rpm 20 300 A 3000 rpm 20 220 A 5 kW kVA Total From All AC Receptacles At 1800 rpm At 3000 rpm Output Available Only A...

Page 27: ...otential for electrode sticking at shorter arc lengths Medium Stiff Arc Position 3 This setting provides medium dig arc force for open root vertical up joints or joints that do not require additionalcurrent for fit up inconsistencies Stiff Arc E6010 Position 4 This setting provides a high dig arc force for open root vertical down joints where additional current is needed to compensate for tight jo...

Page 28: ...s Lift Arc TIG 1 TIG Electrode 2 Workpiece Turn gas on Touch tungsten electrode to workpiece at weld start point Hold electrode to workpiece for 1 second and slowly lift electrode Arc is started when electrode is lifted Normal open circuit voltage is not present before tungsten electrode touches workpiece only a low sensing voltage is present between electrode and workpiece The solid state output ...

Page 29: ...only 2 Remote Hand Control Optional 3 Remote Foot Control Optional Engine runs at weld power speed in Wire and TIG mode whenever a device connected to the remote receptacle makes closure between pins A and B This unit does not have remote contactor control Output is al ways on 803 984 A 216 172 B S 0769 S 0774 Process Stick Using Remote On Off In Example 2 Max 160 A CC DC Min 20 A CC DC Max 160 A ...

Page 30: ...olts ac 3 Circuit Breaker CB1 CB1 protects receptacles RC1 and RC2 from overload If CB1 opens the receptacles do not work Place switch in On position to reset breaker 4 Circuit Breaker CB2 CB2 protects RC2 from overload If CB2 opens the receptacle does not work Press button to reset breaker If circuit breaker continues to open contact Factory Authorized Service Agent Combined output of all recepta...

Page 31: ...z of generator power output changes with engine speed Total output avail able is 2 4 kVA kW 2 Circuit Breaker CB3 CB3 protects receptacle RC3 and 115 volt ac output to Remote Recep tacle RC4 from overload If CB3 opens the receptacle does not work and 115 volt ac output at RC4 stops Press button to reset circuit breaker If breaker continues to open contact a Factory Autho rized Service Agent 1 2 No...

Page 32: ...each duplex receptacle shares a load with one half of 240 V receptacle 2 Plug Wired for 240 V 2 Wire Load 3 Neutral Silver Terminal 4 Load 1 Brass Terminal 5 Load 2 Brass Terminal 6 Ground Green Terminal 7 Amperes Available using 120 240 V Plug 1 2 3 4 5 6 3 4 5 6 240V 240V 120V 120V Tools Needed 240 V AC 120 V AC 120 V AC 7 One 240 V load or two 120 V loads Current Available in Amperes 240 V Rece...

Page 33: ...oam element See Section 8 4 Every 50 h Clean and tighten weld terminals Every 100 h Change oil See Section 8 5 and maintenance label Clean cooling system See engine manual Service air filter element See Section 8 4 Clean and tighten battery connections Every 200 h Replace fuel filter See Section 8 5 Change oil filter See Section 8 5 and maintenance label Replace unreadable labels Check spark plugs...

Page 34: ...OM 4430 Page 30 8 2 Maintenance Label Follow the storage procedure in the engine owner s manual if the unit will not be used for an extended period NOTE ...

Page 35: ... Ref 216 172 B Tools Needed 1 8 4 Servicing Air Cleaner aircleaner3 9 00 802 772 Ref 185 095 A S 0759 Stop engine Do not run engine without air cleaner or with dirty element 1 Wrapper Foam Element Wash wrapper with soap and water solution Allow wrapper to air dry completely Spread 1 tablespoon SAE 30 oil evenly into wrapper Squeeze out excess oil 2 Element Replace element if damaged dirty or oily ...

Page 36: ...cord ing to engine manual Close valve and valve cap before adding oil and run ning engine Fill crankcase with new oil to full mark on dipstick see Section 8 2 3 Fuel Filter 4 Fuel Line Replace line if cracked or worn Install new filter Wipe up any spilled fuel Start engine and check for fuel leaks Stop engine tighten connec tions as necessary and wipe up fuel 2 3 4 Full Tools Needed 1 ...

Page 37: ...g 24 volt ac output to Re mote receptacle RC4 If CB4 opens 24 volt ac output to RC4 stops Circuit breaker CB3 protect the stator winding supplying 115 volt ac output to Remote Re ceptacle RC4 see Section 7 1 Press button to reset breaker 2 Fuse F6 See Parts List F6 protects the engine wiring sys tem from overload If F6 opens engine will not crank Replace fuse if open Close left side door 803 773 A...

Page 38: ...ds PC1 and PC2 See engine manual High weld output Check control settings Check for obstructed movement of solenoid linkage Have Factory Authorized Service Agent check circuit boards PC1 and PC2 Weld output cannot be adjusted Have Factory Authorized Service Agent check field current control board PC2 Erratic weld output Check control settings Clean and tighten connections both inside and outside un...

Page 39: ...run engine at 1800 rpm 60 Hz receptacles RC1 and RC2 work only at 1800 rpm Check receptacle wiring and connections Have Factory Authorized Service Agent check brushes slip rings and circuit boards PC1 and PC2 Low power output at 60 Hz ac recep tacles RC1 or RC2 Check and clean air cleaner as necessary Check engine electronic governor system See engine manual High power output at 60 Hz ac recep tac...

Page 40: ...itch in Off position when unit is not running Clean top of battery with baking soda and water solution rinse with clear water Periodically recharge battery approximately every 3 months Replace battery Check voltage regulator according to engine manual Engine stopped during normal operation Check fuel level see Section 5 2 Check oil level see Section 5 2 Low oil pressure shutdown stops engine if oi...

Page 41: ...otes 16 Gauge 063 in 22 Gauge 031 in 24 Gauge 025 in 20 Gauge 037 in 18 Gauge 050 in 14 Gauge 078 in 1 8 in 125 in 3 16 in 188 in 1 4 in 25 in 5 16 in 313 in 3 8 in 375 in 1 2 in 5 in MATERIAL THICKNESS REFERENCE CHART ...

Page 42: ...OM 4430 Page 38 SECTION 9 ELECTRICAL DIAGRAMS Figure 10 1 Circuit Diagram For Welding Generator Models ...

Page 43: ...OM 4430 Page 39 218 723 B ...

Page 44: ...otes 16 Gauge 063 in 22 Gauge 031 in 24 Gauge 025 in 20 Gauge 037 in 18 Gauge 050 in 14 Gauge 078 in 1 8 in 125 in 3 16 in 188 in 1 4 in 25 in 5 16 in 313 in 3 8 in 375 in 1 2 in 5 in MATERIAL THICKNESS REFERENCE CHART ...

Page 45: ...Generator To Truck Or Trailer Frame S 0854 Always ground generator frame to vehicle frame to pre vent electric shock and static electricity hazards 1 Equipment Grounding Terminal On Front Panel 2 Grounding Cable Not Supplied 3 Metal Vehicle Frame Connect cable from equipment ground terminal to metal vehicle frame Use 10 AWG or larger insulated copper wire If unit does not have GFCI re ceptacles us...

Page 46: ...sistive Load Equipment with a motor is a non re sistive load and requires approxi mately six times more power while starting the motor than when running see Section 10 8 3 Rating Data Rating shows volts and amperes or watts required to run equipment VOLTS 115 4 5 60 AMPS Hz 1 2 3 3 EXAMPLE 1 If a drill uses 4 5 amperes at 115 volts calculate its running power requirementin watts 4 5 A x 115 V 520 ...

Page 47: ... Home Equipment Rating Starting Watts Running Watts Stock Tank De Icer 1000 1000 Grain Cleaner 1 4 HP 1650 650 Portable Conveyor 1 2 HP 3400 1000 Grain Elevator 3 4 HP 4400 1400 Milk Cooler 2900 1100 Milker Vacuum Pump 2 HP 10500 2800 FARM DUTY MOTORS 1 3 HP 1720 720 Std e g Conveyors 1 2 HP 2575 975 Feed Augers Air 3 4 HP 4500 1400 Compressors 1 HP 6100 1600 1 1 2 HP 8200 2200 2 HP 10550 2850 3 H...

Page 48: ...HP 6000 1500 1 1 2 HP 8200 2200 2 HP 10500 2800 Electric Chain Saw 1 1 2 HP 12 in 1100 1100 2 HP 14 in 1100 1100 Electric Trimmer Standard 9 in 350 350 Heavy Duty 12 in 500 500 Electric Cultivator 1 3 HP 2100 700 Elec Hedge Trimmer 18 in 400 400 Flood Lights HID 125 100 Metal Halide 313 250 Mercury 1000 Sodium 1400 Vapor 1250 1000 Submersible Pump 400 gph 600 200 Centrifugal Pump 900 gph 900 500 F...

Page 49: ...or Starting Requirements Motor Start Code G H J K L M N P KVA HP 6 3 7 1 8 0 9 0 10 0 11 2 12 5 14 0 EXAMPLE Calculate the starting amperage required for a 230 V 1 4 HP motor with a motor start code of M Starting the motor requires 12 2 amperes 11 2 x 1 4 x 1000 230 12 2 A kVA HP x HP x 1000 VOLTS STARTING AMPERAGE Volts 230 HP 1 4 Using Table Code M results in kVA HP 11 2 10 9 How Much Power Can ...

Page 50: ...if required by electrical code 4 Welding Generator Output Generator output voltage and wiring must be consistent with regular utility system volt age and wiring Connect generator with temporary or perma nent wiring suitable for the installation Turn off or unplug all equipment connected to generator before starting or stopping engine When starting or stopping the engine has low speed which causes ...

Page 51: ...0 15 40 4800 112 34 62 19 37 11 45 5400 100 30 62 19 50 6000 87 26 50 15 Conductor size is based on maximum 2 voltage drop Cord Lengths for 240 Volt Loads If unit does not have GFCI receptacles use GFCI protected extension cord Maximum Allowable Cord Length in ft m for Conductor Size AWG Current Amperes Load Watts 4 6 8 10 12 14 5 1200 700 213 450 137 225 84 200 61 7 1680 800 244 500 152 300 91 20...

Page 52: ...mmon and not available unless listed 1 2 3 4 5 6 7 8 9 10 11 12 13 18 17 19 21 22 23 24 26 Fig 11 2 27 28 29 30 31 32 33 34 35 36 37 40 38 41 42 43 44 45 46 47 48 49 50 51 Fig 11 3 53 54 55 31 56 57 58 59 60 61 62 14 15 16 25 39 56 52 20 Figure 11 1 Main Assembly ...

Page 53: ...n Nyl 1 000 Id X 1 375 Mtg Hole Cent 1 26 Figure 11 2 Generator Assembly 1 27 211402 Muffler Exhaust Engine 1 28 209057 Clamp Muffler 1 625 Dia U Pld 1 29 189477 Muffler Gasket 2 30 217223 Engine Gas Elec Start Kohler includes 1 F6 021718 Fuse Mintr Gl 30 Amp 32 Volt 1 VOLT REG 190249 Regulator Voltage 1 180096 Tune up Filter Kit includes 1 067272 Air Filter Element 1 066698 Oil Filter 1 215985 Fi...

Page 54: ...358 Bracket Mtg Generator 1 56 010954 Washer Flat 406idx1 250odx 125t Stl Pld 3 57 214556 Mount Vibration 3 58 127595 Screw 375 16x2 50 Hex Hd pln Gr5 Pld 2 59 211210 Bracket Mtg Engine 1 60 215798 Bracket Capacitor Support 1 61 C41 217632 Capacitor Elctlt 1200 Uf 300 Vdc Can 2 00 Dia 1 62 215873 Shroud Air Bypass 1 Recommended Spare Parts When ordering a component originally displaying a precauti...

Page 55: ...909 Nut 375 16 56hex 46h Stl Pld Elastic Stop Nut 4 13 136343 Screw K50x 20 Pan Hd phl Stl Pld Pt Thread Forming 4 14 218049 Endbell includes 1 15 183419 O ring 1 16 214017 Bracket Terminal Strip 1 17 1T 172661 Block Stud Connection 6 Position 1 18 173734 Link Jumper 803 887 Hardware is common and not available unless listed 14 12 11 10 9 7 6 1 2 16 17 18 8 13 15 5 3 4 Figure 11 2 Generator When o...

Page 56: ...OM 4430 Page 52 803 989 A Hardware is common and not available unless listed 1 2 3 4 5 6 7 9 8 11 12 13 14 15 16 17 18 19 20 21 22 23 24 25 26 27 28 29 10 Figure 11 3 Panel Front w Components ...

Page 57: ...pdt 15a 125vac On none on Spd Term Chr 1 14 021385 Boot Toggle Switch Lever 1 15 221516 Control Push Pull Snap in 36 000 W 1 750 Extension 1 16 207073 Lever Ignition Switch 1 17 212977 Panel Front 1 18 RC1 182954 Rcpt Str 3p4w 50a 125 250v Flush Mtg 14 50 1 19 211416 Bezel 1 20 216775 Cover Output Stud Wire 1 21 213914 Cover Output Stud Stick Tig 1 22 216773 Cover Receptacle Duplex 120v 1 23 21677...

Page 58: ... Cable Lkg 2 PLG 25 114063 Conn Rect Univ 084 4p S 1row Plug Cable Lkg 1 PLG 31 114063 Conn Rect Univ 084 4p S 1row Plug Cable Lkg 1 PLG 26 066104 Conn Rect Univ 084 6p S 3row Plug Cable Lkg 1 PLG 17 117037 Conn Rect Mini 045 2skt 2row Plug Cable Lkg 1 PLG 23 117037 Conn Rect Mini 045 2skt 2row Plug Cable Lkg 1 PLG 21 113752 Conn Rect Mini 045 10skt 2row Plug Cable Lkg 1 PLG 16 116513 Conn Rect Mi...

Page 59: ...and Blankets APT SAF Model Plasma Cutting Torches Remote Controls Accessory Kits Replacement Parts No labor Spoolmate Spoolguns Canvas Covers Miller s True Blue Limited Warranty shall not apply to 1 Consumable components such as contact tips cutting nozzles contactors brushes slip rings relays or parts that fail due to normal wear Exception brushes slip rings and relays are covered on Bobcat Trail...

Page 60: ... retain with your personal records Always provide Model Name and Serial Style Number Contact a DISTRIBUTOR or SERVICE AGENCY near you Welding Supplies and Consumables Options and Accessories Personal Safety Equipment Service and Repair Replacement Parts Training Schools Videos Books Technical Manuals Servicing Information and Parts Circuit Diagrams Welding Process Handbooks Contact the Delivering ...

Reviews: