background image

Microtek Scanner
Installation Guide

for the ScanMaker

®

 V6

USL

QI V6USL-SCSI rev1 January 1999
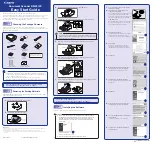
1. Unpack scanner

Open your scanner package and check the components as stated in your packing list. 

Do not

 install any of

the software until the hardware has been installed. Before proceeding any further, check that you have the
items listed on the packing list. If any item is missing, call Customer Service at 800-654-4160.

Your Microtek ScanMaker V6

USL

 comes with two built-in interfaces: SCSI and USB. See the graphic below

to locate the different ports on the back of the scanner, as well as the SCSI ID dial and the scanner
accessory port.

Copyright © 1999 Microtek Lab, Inc.

Internet: http://www.microtekusa.com

This document provides information on how to install the ScanMaker V6

USL

 on a PC or Mac using the scanner's

SCSI interface. For PC SCSI installation, see pages 1 to 5. For Mac SCSI installation, see pages 6 to 8.

SCSI Installation on the PC

12

345

678

90

SCSI 

Port 1

SCSI

Port 2

Accessory

Port

USB

Port

SCSI

ID Dial

Power

 Adapter

Note: Make sure the SCSI ID
number for your scanner, which is
preset to 6, does not conflict with
the SCSI IDs of the other devices
on your SCSI chain. If you need to
change the SCSI ID on your
scanner, turn the dial and choose a
SCSI ID number from 0 to 6
(do not use 7, 8, or 9).

for PC (Windows

®

 95/98/NT4.0)

& Mac (OS 7.6x or later)

Version

Summary of Contents for ScanMaker V6USL

Page 1: ...SCSI ID dial and the scanner accessory port Copyright 1999 Microtek Lab Inc Internet http www microtekusa com This document provides information on how to install the ScanMaker V6USL on a PC or Mac us...

Page 2: ...e able to provide help on installing your interface card 2 Connect the SCSI cable from one of the scanner s SCSI ports to the SCSI interface card on the back of your computer Then place the terminator...

Page 3: ...P C For each software follow the on screen instructions during installation Default values are specified at every point during installation simply accept these values to continue installation until yo...

Page 4: ...o no nt h eP C 5 After all the software has been installed click Exit at the bottom left of the Microtek Software Installer screen 6 Install Adobe Photoshop LE Insert the Adobe Photoshop LE CD ROM in...

Page 5: ...LE exit ScanWizard by clicking the X on the top right corner of the Preview window Scan button Resize dotted line for size of final scan S C S II n s t a l l a t i o no nt h eP C Preview button 5 Scan...

Page 6: ...t in interfaces SCSI and USB See the graphic below to locate the different ports on the back of the scanner as well as the SCSI ID dial and the scanner accessory port SCSI Installation on the Macintos...

Page 7: ...oftware on your Microtek CD ROM including the following Microtek ScanWizard SCSI version This is your scanner controller program for capturing images from your scanner and delivering it to your image...

Page 8: ...ned on your scanner then click the yellow Preview button 3 ScanWizard now performs a quick preview of the image on your scanner When the preview image appears you can resize the floating dotted line a...

Reviews: