MERLYN MB2, Installation Manual
The Aquabrass MB2 is an exceptional product designed to elevate your bathroom experience. With its sleek design and superior functionality, it adds a touch of elegance to any space. Ensure a hassle-free installation with our detailed Installation Manual, available for free download on manualshive.com.
Share
Download


Reviews:
No comments
Related manuals for MB2
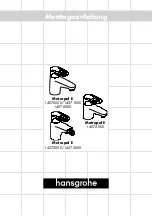
Metropol E 14070 Series
Brand: Hans Grohe Pages: 16

ShowerSelect 15738400
Brand: Hans Grohe Pages: 72

Verso Fox Set 27088000
Brand: Hans Grohe Pages: 44

Talis M51 200 2jet 72813 Series
Brand: Hans Grohe Pages: 44
Talis C
Brand: Hans Grohe Pages: 20

Vivenis 75420 Series
Brand: Hans Grohe Pages: 48

56968
Brand: WENKO Pages: 5

Pure Wall Bath Hostess
Brand: Milli Pages: 2

SLU 54GB
Brand: Sanela Pages: 6

AW3321A1Q
Brand: Wayfair Pages: 7

BOLD 022
Brand: IB RUBINETTERIE Pages: 8

Marengo
Brand: Rainware Pages: 2

ABP-1WCA
Brand: Bradley Pages: 4

SerenityNow
Brand: EZ Able Pages: 9

M2-2201
Brand: Lefroy Brooks Pages: 11

AQC02
Brand: CEA Pages: 12

28567 Series
Brand: Hans Grohe Pages: 8

DREAM CUBE
Brand: Bossini Pages: 20


