MERIT INDUSTRIES MAXX Upright, Technical Service Reference Manual
The MERIT INDUSTRIES MAXX Upright is a top-of-the-line commercial upright vacuum cleaner designed for maximum cleaning efficiency. For technical support and troubleshooting, download the free Technical Service Reference Manual from manualshive.com. This comprehensive manual is essential for maintaining and optimizing the performance of your MAXX Upright.
Share
Download


Reviews:
No comments
Related manuals for MAXX Upright

Teenage Mutant Ninja Turtles
Brand: Raw Thrills Pages: 42

F-43N
Brand: Uchida Yoko Pages: 25

KORI NTO FB
Brand: N&W Global Vending Pages: 38
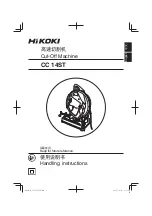
CC 14ST
Brand: HIKOKI Pages: 28

DF-1200
Brand: Duplo Pages: 98

PAC 400
Brand: Galaxy Pages: 2

HOME ECHO
Brand: JVL Pages: 37

Heroof Steel
Brand: Ace Amusement Pages: 32

Quick & Crash
Brand: NAMCO Pages: 3

SPEED HUNTER
Brand: jakar Pages: 8

KICKBOXER
Brand: jakar Pages: 11

WATER TRUCK
Brand: WIK Pages: 21

TDV
Brand: Royal Vendors Pages: 2

PASHOM17-02
Brand: Pop-A-Shot Pages: 16

TOP SKATER
Brand: Sega Pages: 107

U48DFF
Brand: Envipco Pages: 100

CMP-15-ANZ
Brand: Chandler And Me Pages: 12


