MediaFORM 24X CD-2000-4 thermal, Руководство оператора
"MediaFORM 24X CD-2000-4 термальный - идеальное решение для печати на CD / DVD-дисках. Бесплатно загрузите операторское руководство с нашего сайта для подробной информации о функциях и настройках. Не упустите возможность загрузить мануал с manualshive.com прямо сейчас!"
Поделиться
Скачать


Отзывы:
Нет отзывов
Похожие инструкции для 24X CD-2000-4 thermal
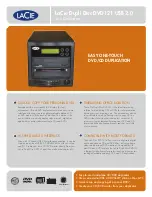
107756 - Dupli Disc DVD121
Бренд: LaCie Страницы: 2

HDC11FH
Бренд: ACT Страницы: 24

Mini SAS Series
Бренд: ureach Страницы: 20

TechDisc Pro
Бренд: Recordex Страницы: 38

ROBOTIC AUTOLOADER 3.6.0
Бренд: Vinpower Страницы: 64

TITAN lite
Бренд: Vinpower Страницы: 2

THE CUBE SERIES
Бренд: Vinpower Страницы: 2

Daisy Chain
Бренд: Vinpower Страницы: 47

GM4 Pro
Бренд: Mediaimager Страницы: 63

OmniWIPE
Бренд: Logicube Страницы: 30

EchoPlus-NG
Бренд: Logicube Страницы: 77

ZXi-10G
Бренд: Logicube Страницы: 110


