Marquant 805-042, User Instructions
Looking for User Instructions for Marquant 805-042? Look no further! You can download the manual for free from manualshive.com. Get all the information you need to operate your Marquant 805-042 device efficiently. Don't miss out on this essential resource for your product.
Share
Download


Reviews:
No comments
Related manuals for 805-042
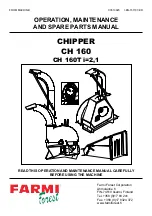
CH 160
Brand: Farmi Forest Pages: 44

VHDH 06
Brand: Vega Pages: 2

SC56B
Brand: Jata Beauty Pages: 20

FURBI
Brand: MO-EL Pages: 24

MR219
Brand: Maestro Pages: 48

LU-2513
Brand: Lumme Pages: 27

WC-8H
Brand: Victory Pages: 64

Type 1250
Brand: Moser Pages: 132

C45
Brand: Hansa Pages: 36

AA
Brand: DAN DRYER Pages: 2

THX1401E
Brand: THX Pages: 44

3035U
Brand: BaByliss Pages: 12

Absolut
Brand: VALERA Pages: 2

CURL & WAVE TRIO
Brand: BaByliss Pages: 12

9363
Brand: CALOR Pages: 4

ER-FGP72
Brand: Panasonic Pages: 14

GS9500
Brand: Nakayama Pages: 18

Volume Pro AR 5063
Brand: Arzum Pages: 36


