Makita XCU08, Instruction Manual
The Makita XCU08 is a high-performance chainsaw designed for professional and DIY tree-cutting tasks. With its powerful motor and ergonomic design, this chainsaw is reliable and easy to use. To get started, simply visit manualshive.com to download your free Instruction Manual and have all the necessary guidance at your fingertips.
Share
Download


Reviews:
No comments
Related manuals for XCU08

SWJ701E Saw Joe
Brand: sunjoe Pages: 24
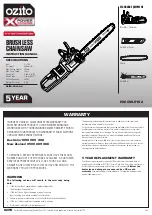
Power X Change PXCCSS-0182
Brand: Ozito Pages: 12

2004202AZ
Brand: GreenWorks Pro Pages: 48

KS 400 BW
Brand: Gude Pages: 108

PS-3410 TH TLC
Brand: Dolmar Pages: 80

CHAIN SAWS SP 355
Brand: Stiga Pages: 2

PCS-4500
Brand: ParkerBrand Pages: 23

CS48L4410
Brand: GreenWorks Tools Pages: 52

530403514
Brand: Poulan Pro Pages: 16

G3200
Brand: Zenoah Pages: 40

RDP-SPS20 Set
Brand: Raider Pages: 138

Patriot ES 240 PS
Brand: Mountfield Pages: 72

TCS 33EB
Brand: Tanaka Pages: 96

GM45CS3
Brand: GardenMaster Pages: 32

PCH25
Brand: Gardenline Pages: 28

600
Brand: Pioneer Pages: 32

315
Brand: Electrolux Pages: 24

CS1825ST1
Brand: Black+Decker Pages: 136


