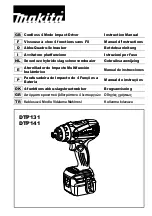
background image


INSTRUCTION MANUAL


MANUEL D'INSTRUCTION


MANUAL DE INSTRUCCIONES


IMPORTANT: 

Read Before Using. 

IMPORTANT: 

Lire avant usage. 

IMPORTANTE: 

Leer antes de usar. 

Cordless Impact Driver

Tournevis à Chocs sans Fil 

Atornillador de Impacto Inalámbrico

DTD145 

014067 

Summary of Contents for DTD145

Page 1: ...UEL D INSTRUCTION MANUAL DE INSTRUCCIONES IMPORTANT Read Before Using IMPORTANT Lire avant usage IMPORTANTE Leer antes de usar Cordless Impact Driver Tournevis à Chocs sans Fil Atornillador de Impacto Inalámbrico DTD145 014067 ...

Page 2: ...tools create sparks which may ignite the dust or fumes 3 Keep children and bystanders away while operating a power tool Distractions can cause you to lose control Electrical safety 4 Power tool plugs must match the outlet Never modify the plug in any way Do not use any adapter plugs with earthed grounded power tools Unmodified plugs and matching outlets will reduce risk of electric shock 5 Avoid b...

Page 3: ... that may affect the power tool s operation If damaged have the power tool repaired before use Many accidents are caused by poorly maintained power tools 22 Keep cutting tools sharp and clean Properly maintained cutting tools with sharp cutting edges are less likely to bind and are easier to control 23 Use the power tool accessories and tool bits etc in accordance with these instructions taking in...

Page 4: ...o not expose battery cartridge to water or rain A battery short can cause a large current flow overheating possible burns and even a breakdown 6 Do not store the tool and battery cartridge in locations where the temperature may reach or exceed 50 ゚ C 122 ゚ F 7 Do not incinerate the battery cartridge even if it is severely damaged or is completely worn out The battery cartridge can explode in a fir...

Page 5: ...o not install the battery cartridge forcibly If the cartridge does not slide in easily it is not being inserted correctly Switch action 1 009208 CAUTION Before inserting the battery cartridge into the tool always check to see that the switch trigger actuates properly and returns to the OFF position when released To start the tool simply pull the switch trigger Tool speed is increased by increasing...

Page 6: ...damage the tool When not operating the tool always set the reversing switch lever to the neutral position Changing the hammering force S H S H S H S H 1 2 3 4 5 011217 Hammering force grade displayed on panel Maximum blows Application Work Hard Medium Soft Tightening when force and speed are desired Tightening when a good finishing is needed Tightening when excessive tightening need to be avoided ...

Page 7: ... by pulling the switch trigger to the extent that the tool does not operate All of the lamps on the switch panel go out approximately one minute after releasing the switch trigger When the tool temperature is high the LED indicator may flicker or light up If the LED indicator lights up and the tool stops even with a recharged battery cartridge cool down the tool temperature fully When the status i...

Page 8: ...it Hook 1 2 3 014068 The hook is convenient for temporarily hanging the tool This can be installed on either side of the tool To install the hook insert it into a groove in the tool housing on either side and then secure it with a screw To remove loosen the screw and then take it out OPERATION 014066 The proper fastening torque may differ depending upon the kind or size of the screw bolt the mater...

Page 9: ...ischarged almost completely voltage will drop and the fastening torque will be reduced 2 Driver bit or socket bit Failure to use the correct size driver bit or socket bit will cause a reduction in the fastening torque 3 Bolt Even though the torque coefficient and the class of bolt are the same the proper fastening torque will differ according to the diameter of bolt Even though the diameters of bo...

Page 10: ...en the tool has stopped due to the motor locking withdraw the battery cartridge one time and then insert it again or release the switch trigger for more than 60 seconds to restart the tool Use the tool with the motor not locked Release the switch trigger Stop using and have the tool repaired by a Makita local service center 011187 To maintain product SAFETY and RELIABILITY repairs any other mainte...

Page 11: ...GES FROM THE SALE OR USE OF THE PRODUCT THIS DISCLAIMER APPLIES BOTH DURING AND AFTER THE TERM OF THIS WARRANTY MAKITA DISCLAIMS LIABILITY FOR ANY IMPLIED WARRANTIES INCLUDING IMPLIED WARRANTIES OF MERCHANTABILITY AND FITNESS FOR A SPECIFIC PURPOSE AFTER THE ONE YEAR TERM OF THIS WARRANTY This Warranty gives you specific legal rights and you may also have other rights which vary from state to stat...

Page 12: ...e travail encombrées ou sombres ouvrent grande la porte aux accidents 2 N utilisez pas les outils électriques dans les atmosphères explosives par exemple en présence de liquides gaz ou poussières inflammables Les outils électriques produisent des étincelles au contact desquelles la poussière ou les vapeurs peuvent s enflammer 3 Assurez vous qu aucun enfant ou curieux ne s approche pendant que vous...

Page 13: ...utils électriques 17 Ne forcez pas l outil électrique Utilisez l outil électrique adéquat suivant le type de travail à effectuer Si vous utilisez l outil électrique adéquat et respectez le régime pour lequel il a été conçu il effectuera un travail de meilleure qualité et de façon plus sécuritaire 18 N utilisez pas l outil électrique s il n est pas possible de mettre sa gâchette en position de marc...

Page 14: ...rmement 4 Portez une protection d oreilles CONSERVEZ CE MODE D EMPLOI AVERTISSEMENT NE VOUS LAISSEZ PAS tromper au fil d une utilisation répétée par un sentiment d aisance ou de familiarité avec le produit en négligeant les consignes de sécurité qui accompagnent le produit UNE UTILISATION INCORRECTE ou le non respect des règles de sécurité énoncées dans le présent manuel d instructions peut provoq...

Page 15: ... DU FONCTIONNEMENT ATTENTION Assurez vous toujours que l outil est hors tension et que sa batterie est retirée avant de l ajuster ou de vérifier son fonctionnement Installation ou retrait de la batterie 1 2 3 014065 ATTENTION Mettez toujours l appareil hors tension avant d installer ou de retirer la batterie Tenez fermement l outil et la batterie lors de l installation ou du retrait de cette derni...

Page 16: ... état de la lumière appuyez sur la gâchette Lorsque la lumière s allume quand vous appuyez sur la gâchette le bouton d éclairage est à ON marche Lorsque la lampe ne s allume pas le bouton d éclairage est à OFF arrêt Pour vérifier l état de la lumière appuyez sur la gâchette Lorsque la lumière s allume quand vous appuyez sur la gâchette le bouton d éclairage est à ON marche Lorsque la lampe ne s al...

Page 17: ... niveau de la force de martelage en appuyant sur la gâchette jusqu au point de fonctionnement de l outil Il est impossible de changer le niveau de la force de martelage lors de l utilisation de la gâchette Signal de batterie morte pour la puissance restante de la batterie Varie selon le pays S H 1 014071 Si vous appuyez sur la gâchette lorsque la capacité résiduelle de la batterie est très faible ...

Page 18: ...t travail dessus Installation ou retrait de l embout ou l embout à douille 12 mm 15 32 9 mm 3 8 001266 Utilisez exclusivement l embout ou l embout à douille du modèle indiqué sur la figure 1 2 009205 Pour installer le foret insérez le foret à fond dans le manchon Pour retirer l embout tirez le manchon dans le sens de la flèche et dégagez l embout NOTE Si l embout n est pas inséré assez profondémen...

Page 19: ...is ou la pointe de l embout pourrait être foirée endommagé soumise à une pression excessive etc Avant de commencer votre tâche effectuez toujours une vérification pour déterminer la durée de serrage appropriée pour votre vis Le couple de serrage dépend d un certain nombre de facteurs comme suit Une fois le serrage terminé vérifiez toujours le couple avec une clé dynamométrique 1 Lorsque la batteri...

Page 20: ...dans un centre de service après vente local Makita Si l outil s est arrêté à cause du verrouillage du moteur retirez la batterie puis insérez la à nouveau ou relâchez la gâchette pendant plus de 60 secondes pour redémarrer l outil Utilisez l outil lorsque le moteur n est pas verrouillé Relâchez la gâchette Cessez d utiliser l outil et faites le réparer par un centre de service après vente local Ma...

Page 21: ...IT CET AVIS DE NON RESPONSABILITÉ S APPLIQUE À LA FOIS PENDANT ET APRÈS LA PÉRIODE COUVERTE PAR CETTE GARANTIE MAKITA DÉCLINE TOUTE RESPONSABILITÉ QUANT À TOUTE GARANTIE TACITE INCLUANT LES GARANTIES TACITES DE QUALITÉ MARCHANDE ET ADÉQUATION À UN USAGE PARTICULIER APRÈS LA PÉRIODE D UN AN COUVERTE PAR CETTE GARANTIE Cette garantie vous donne des droits spécifiques reconnus par la loi et possiblem...

Page 22: ...n cableado eléctrico o herramienta eléctrica de funcionamiento a batería inalámbrica Seguridad en el área de trabajo 1 Mantenga el área de trabajo limpia y bien iluminada Las áreas oscuras o desordenadas son propensas a accidentes 2 No utilice las herramientas eléctricas en atmósferas explosivas tal como en la presencia de líquidos gases o polvo inflamables Las herramientas eléctricas crean chispa...

Page 23: ...izarlos debidamente La utilización de estos dispositivos reduce los riesgos relacionados con el polvo Mantenimiento y uso de la herramienta eléctrica 17 No fuerce la herramienta eléctrica Utilice la herramienta eléctrica correcta para su aplicación La herramienta eléctrica adecuada hará un trabajo mejor a la velocidad para la que ha sido fabricada 18 No utilice la herramienta eléctrica si el inter...

Page 24: ...ducto a base de utilizarlo repetidamente sustituya la estricta observancia de las normas de seguridad para dicho producto El MAL USO o el no seguir las normas de seguridad establecidas en este manual de instrucciones puede ocasionar graves lesiones personales USD302 1 Símbolos A continuación se muestran los símbolos utilizados para la herramienta volts o voltios corriente directa o continua veloci...

Page 25: ...ído antes de realizar cualquier ajuste o comprobación en la herramienta Instalación o desmontaje del cartucho de batería 1 2 3 014065 PRECAUCIÓN Apague siempre la herramienta antes de colocar o quitar el cartucho de batería Sujete la herramienta y el cartucho de la batería con firmeza al colocar o quitar el cartucho Si no se sujeta con firmeza la herramienta y el cartucho de la batería puede ocasi...

Page 26: ...luz se apagará 10 segundos después aproximadamente Con el botón de la luz en el estado de apagado incluso si se jala el gatillo la luz no se encenderá NOTA Para asegurarse del estado de la luz jale el gatillo Cuando la luz se encienda al jalar el gatillo el interruptor de la luz está en el estado de encendido Si la luz no se enciende el interruptor de la luz está en el estado de apagado Durante la...

Page 27: ...ermite un apriete adecuado para la labor Cada vez que el botón de la fuerza de impacto sea presionado el número de golpes cambia en tres pasos En aproximadamente un minuto tras soltar el gatillo interruptor la fuerza de impacto puede cambiarse NOTA Cuando todas las luces indicadoras en el panel del interruptor se apaguen la herramienta se apaga para ahorro de energía en la batería El grado de la f...

Page 28: ...gue sin cambiar deje de usar la herramienta y llévela a que se le dé servicio por un centro de servicio Makita en su región Indicación de la capacidad restante de la batería Solo para cartuchos de batería con una B al final del número de modelo 1 2 015676 Presione el botón de comprobación en el cartucho de la batería para indicar la capacidad restante de la batería La luz indicadora se enciende po...

Page 29: ...re el par torsional y el tiempo de apriete se muestra en las figuras Tornillo estándar N m Par de fuerza de apriete Tiempo de apriete Torsión de fijación apropiada ft lbs 14 29 43 58 72 87 120 N m 100 N m 80 N m 60 N m 40 N m 20 N m 0 1S 2S 3S M14 M12 M10 M8 M14 M12 M10 M8 S 9 16 14 2mm 9 16 14 2mm 1 2 12 7mm 1 2 12 7mm 3 8 9 5mm 3 8 9 5mm 5 16 7 9mm 5 16 7 9mm 009220 87 72 58 43 29 14 0 N m Par d...

Page 30: ...cuerpo de la herramienta usando un paño húmedo y agua enjabonada PRECAUCIÓN Nunca use gasolina bencina diluyente tíner alcohol o sustancias similares Puede que esto ocasione grietas o descoloramiento RESOLUCIÓN DE PROBLEMAS Problema Estado de la luz estado de la luz indicadora estado de la herramienta Pasos que deben tomarse La herramienta se detiene durante la operación La luz indicadora para señ...

Page 31: ...rante este periodo de un año se desarrollase algún problema retorne la herramienta COMPLETA porte pagado con antelación a una de las fábricas o centros de servicio autorizados Makita Si la inspección muestra que el problema ha sido causado por mano de obra o material defectuoso Makita la reparará o a nuestra opción reemplazará sin cobrar Esta garantía no será aplicable cuando EN NINGÚN CASO MAKITA...

Page 32: ...polvos creados por el lijado aserrado esmerilado taladrado y otras actividades de la construcción contienen sustancias químicas reconocidas por el Estado de California como causantes de cáncer defectos de nacimiento y otros peligros de reproducción Algunos ejemplos de estos productos químicos son plomo de pinturas a base de plomo sílice cristalino de ladrillos y cemento y otros productos de albañi...

Reviews: