Mac Afric ML393D, Service Manual
The Mac Afric ML393D Service Manual is a must-have companion for equipment owners seeking to maximize the lifespan and performance of their machine. Download this comprehensive manual for free from manualshive.com to access detailed instructions and expert tips, ensuring smooth operation and hassle-free maintenance.
Share
Download


Reviews:
No comments
Related manuals for ML393D

RCD 930AX
Brand: Rotel Pages: 6

BTP1800-254
Brand: Build Worker Pages: 16

DX-C300
Brand: Onkyo Pages: 15

SHOP FOX W1742S insert
Brand: Shop fox Pages: 60

X-CD1000EVO
Brand: Advance Paris Pages: 20

317249 1904
Brand: Parkside Pages: 87

351.217890
Brand: Craftsman Pages: 24

351.233780
Brand: Craftsman Pages: 28

172.267290
Brand: Craftsman Pages: 11

315.277160
Brand: Craftsman Pages: 16

351.217020
Brand: Craftsman Pages: 24

351.233831
Brand: Craftsman Pages: 32

351.217430
Brand: Craftsman Pages: 32

351.217330
Brand: Craftsman Pages: 40

149.236321
Brand: Craftsman Pages: 16
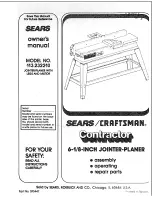
113.232210
Brand: Craftsman Pages: 46

113.20680
Brand: Craftsman Pages: 32

113.232240
Brand: Craftsman Pages: 40


