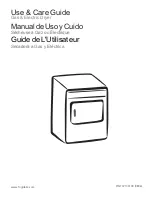
background image


1

 | 

Manual de Servicio 

Ingenieria de Servicio 


Julio 2020 


July 2020


Pub. MSL-0120 


Ingeniería de Servicio


Modelos | Models


ICL2040…, CLME70204…, 

CLMG70204…, 

CLGG70214…, 

MCL2040…, MCLC2040…, 

MKTG15…


Centro de Lavado Centauro | Centauro Laundry Center


Centauro Estandarización


Manual de Servicio 

Service Manual 

Summary of Contents for Centauro CLGG70214 Series

Page 1: ...o Julio 2020 July 2020 Pub MSL 0120 Ingeniería de Servicio Modelos Models ICL2040 CLME70204 CLMG70204 CLGG70214 MCL2040 MCLC2040 MKTG15 Centro de Lavado Centauro Centauro Laundry Center Centauro Estandarización Manual de Servicio Service Manual ...

Page 2: ...ón a tierra pijas cintas ganchos tuercas o rondanas usados para completar una ruta hacia la tierra son removidos para dar servicio deben ser regresados a su posición original y deben asegurarse apropiadamente Equipo de seguridad obligatorio Pantalón Camisa Lentes de seguridad transparente antiempañante Guantes Anticorte Mangas de seguridad anticorte Guantes de seguridad dieléctricos Zapato de segu...

Page 3: ...CA 09 DATOS TÉCNICOS GENERALES 12 CONTROLES Y FUNCIONES 14 LOGICA DE LAVADO 21 CARTAS DE TIEMPOS CICLO 23 DESENSAMBLE Y REFACCIONAMIENTO 24 HERRAMIENTAS PARA DESENSAMBLE 38 TARJETA ELECTRÓNICA 41 DIAGRAMA ELÉCTRICO 43 SOLUCIÓN DE PROBLEMAS 46 CODIGO BINARIO DE PROTECCIONES 51 CODIGOS DE FALLA O PROTECCIONES 52 BORRADO DE FALLAS 57 MODO DE SERVICIO 58 SECADORA 61 SISTEMA IMPULSOR 67 GARANTÍA 71 ...

Page 4: ... Kraken 24 o Kraken 27 Digital y algunas partes de Centros de Lavado DOE esta última familia se comercializa en USA y Canadá El mercado para esta nueva Plataforma de Centros de Lavado será el mismo que para la producción actual es decir México Centro América Andina y algunos países de Mabe Internacional Estos nuevos modelos de Centros de Lavado también tomarán de Kraken la etiqueta con código QR p...

Page 5: ...roducto CL Centro de Lavado Despachador 0 Sin Despachador 8 Despachador Triple Combustible E Eléctrico G Gas Natural P Propano Idioma S Español E Inglés Color Acentos BB Blanco DG Diamond Gray 4 D M 0 Número de Perillas Capacidad 20 20 Kg 0 Generación Digito de Ingeniería NOMENCLATURA 1 ...

Page 6: ...be Combustible E Eléctrico G Gas Natural P Propano Tipo de Control 0 Digital 1 Hibrido 2 3 4 5 Perillas Color B Blanco G Gris D Diamond Gray 0 B C B Gabinete 7 27 4 24 Capacidad Invertida 02 20 Kg 0 Generación Digito de Ingeniería 0 V Hz A 120 60 B 220 60 C 220 50 D 110 50 E 110 60 Clavija B B K K T Terminal Block P Sin Plug NOMENCLATURA 2 ...

Page 7: ...delo y número de serie así como un código QR que direcciona al cliente a la página de videos explicativos de mabe en you tube Dichas etiquetas se encuentran al abrir la puerta de la secadora en el marco superior Número de serie Ejemplo 2011C00821 Los 2 primeros números corresponden al año de fabricación 20 2020 Los siguientes 2 números corresponden al mes de fabricación 11 Noviembre La letra C cor...

Page 8: ...MBUSTIBLE PARA LA SECADORA Se dividen en ELÉCTRICOS GAS PROPANO GAS NATURAL VOLTAJE PARA LA LAVADORA V HZ Se tienen modelos de 127 60 220 60 y 220 50 MECANISMO DE LAVADO Infusor o Agitador COLORES DISPONIBLES Blanco Diamond Gray CARACTERISTICAS COMUNES ENTRE MODELOS DE CENTROS DE LAVADO ANCHO DE GABINETE 27 CONTROLES Todos los modelos son de 4 Perillas CANASTA LAVADORA Acero Inoxidable CAPACIDAD D...

Page 9: ...a que este producto emplea agua caliente para algunos ciclos de lavado Drenaje El agua podrá ser drenada al tubo de subida o el tubo configurado La altura de descarga no deberá ser inferior a 30in 76 cm o no más de 6ft 1 8m sobre la base de la lavadora El tubo de subida debe ser un mínimo de 1 1 2 de pulgadas dentro del diámetro y debe estar abierto a la atmosfera CENTRO DE LAVADO A GAS Requisito ...

Page 10: ...tado a otro y finalmente de adelante hacia tras asegurando que se encuentre nivelado en los diferentes lados c Para ajustar las patas del frente debe ser de arriba hacia abajo el desplazamiento para asegurar que el producto se apoya con solidez sobre sus cuatro patas gire las tuercas de bloqueo en cada pata hacia la base de la unidad y ajuste con una llave Mantenga la extensión de la pata al mínim...

Page 11: ...un circuito de cuatro o tres cables de fase simple de 120 240v o 120 208v 60 Hz 30 amperios Si el suministro eléctrico no cumple con los requisitos anteriores llame a un electricista calificado Pasos para conectar su centro de lavado ELÉCTRICO 1E Verifique que su instalación corresponda a lo establecido en su etiqueta de producto voltaje Realice los siguientes pasos de la Sección de Centros de Lav...

Page 12: ...iente A Potencia W RPM 1 4 220 240V 50 60Hz 2 7 2 3 410 a 430 1425 1725 1 4 115V 60Hz 4 8 160 1725 MOTOR SECADORA Tipo de Motor HP Voltaje Frec Corriente A Potencia W RPM 1 4 110 127V 50 60Hz 3 3 a 3 5 350 a 390 670 1 4 220 240V 60Hz 2 0 390 a 440 670 1 4 220 240V 50Hz 2 0 380 670 MOTOR LAVADORA ...

Page 13: ...ico entre las terminales 4 5 debe estar cerrado Debe abrirse después de 120 segundos mínimo de haber dejado de suministrar dicho voltaje SEGURO TAPA Tipo Válvula Voltaje V Frecuencia Hz Resistencia Ohms a 25 C Agua Caliente 110 120 50 60 1150 5 Agua Fría 110 120 50 60 1150 5 Agua Caliente 220 240 50 60 3550 10 Agua Fría 220 240 50 60 3550 10 VÁLVULAS DE AGUA Tensión V 110 220 Frecuencia Hz 60 50 6...

Page 14: ...l que necesite o permita al sensor automático hacerlo por usted Nivel de Agua Existen 4 niveles de agua y un sensor automático Seleccione el que necesite o permita al sensor automático hacerlo por usted Selección de funciones toque personal Presione repetidamente el botón de selección para elegir las funciones independientes del ciclo de lavado o la combinación de etapas que necesite para sólo lav...

Page 15: ...edad ligera Máxima Centrifugado lana no se recomienda delicadas Lavado extendido este es un programa de eficiencia energética adecuado para limpiar prendas de algodón blancas de color claro con un lavado suave que combina periodos de remojo con agitaciones Este programa se relaciona con la información en la etiqueta energética en términos de consumo de agua de energía y eficiencia de extracción de...

Page 16: ...ama seleccionará la temperatura apropiada Si usted lo prefiere seleccione la temperatura de acuerdo a sus necesidades Para un mejor resultado en el lavado y cuidado de la ropa le sugerimos que use la posición automática o la que recomiende la etiqueta de su ropa Selección Nivel de Carga algunos modelos automático Esta selección de carga permite que el sistema automáticamente calcule la cantidad qu...

Page 17: ... ciclo AL SELECCIONAR ESTA ETAPA SE ACTIVA LA FUNCION DE AHORRO DE AGUA Solo Lava Esta función realizará el llenado y posteriormente la agitación de lavado Al terminar esta etapa del lavado se encenderá el indicador de centrifuga sin efectuar el drenado del agua Solo Enjuaga Realizará el drenado y centrifugado del agua mientras el indicador de centrifuga permanecerá encendido posteriormente se lle...

Page 18: ...OLES Y FUNCIONES Solo Lava y Centrifuga Realizará el llenado y posteriormente la agitación del lavado Al terminar hará el drenado del agua y el centrifugado de la ropa terminando así esta función Permaneciendo encendido el indicador de centrifuga Solo Enjuaga y Centrifuga Realizará el drenado del agua se encenderá el indicador de centrifugar llenará la tina con agua limpia y realizará la agitación...

Page 19: ...etas o listones Menos seca Para prendas con algodones telas combinadas con algodón y la mayoría de prendas blancas Tipo de Ropa algunos modelos Normal Para prendas libres de arrugas planchado permanente y artículos que necesiten cuidado especial al secar Pesada Sanitizado No utilizar ropa delicada como licra deportiva o con alto porcentaje de sintético No meter o ingresar más de 6 prendas que teng...

Page 20: ...ucto de la secadora se encuentre en buen estado y libre de obstrucciones Filtro atrapapelusas Limpie el filtro antes de cada uso Deslice la rejilla que cubre el filtro hacia afuera Pase los dedos por el filtro Es posible que se forme una acumulación de cera en el filtro atrapapelusas debido al uso de suavizantes de tela agregados a la secadora Para eliminar dicha acumulación lave la rejilla para a...

Page 21: ... agitación tiempos arco gpm depende de cada ciclo plataforma o voltaje ver Cartas de Tiempo CICLO SANITIZADO TEMPERATURA DE AGUA Automático 140 F 60 C Caliente 140 F 60 C Tibio 140 F 60 C Fresca 140 F 60 C Ambiente 140 F 60 C Fría 140 F 60 C Llenado a nivel mínimo sensado Drenado Spin intermedio Rampas Largas Enjuague profundo Enjuague hipo alergénico Rampas Largas Spin final Llenado a nivel asign...

Page 22: ...vo sudsing prendas atoradas entre tina y canasta Para cada rampa activación de motor se le da un tiempo máximo para alcanzar la velocidad si no se alcanza esa velocidad suspende el centrifugado realizando lo siguiente Durante el centrifugado de enjuague Suspende y pasa a la siguiente etapa llenar y agitación de enjuague Durante el centrifugado final Suspende y realiza un segundo enjuague si no pue...

Page 23: ...osos 31 min Para prendas voluminosas tales como las frazadas y las sábanas ropa de cama nivel de agua máximo 15 min de agitación incluido 5 min de centrifugado Ciclo con intensidad de lavado y centrifugado normal pero con un nivel de agua máximo Delicados 28 min La ropa delicada frágil que puede engancharse estirarse o perder su forma fácilmente durante el lavado como son Prendas de lana medias le...

Page 24: ...dado de quitar los 2 tornillos que sujetan la cubierta al Gabinete uno en cada extremo Queda liberada la Cubierta del Gabinete Lid Lock Con un desarmador Philips quitar los 2 tornillos que sujetan el Lid Lock a la Cubierta Se puede desconectar el Lid Lock del Arnés Lid Lock por debajo de la Cubierta Al aplicar voltaje sobre las terminales 3 4 por espacio de 1 5 a 8 segundos se cerrará el circuito ...

Page 25: ...de la Cubierta El otro cincho se puede retirar por la parte superior de la Cubierta Para retirar el Magneto o Interruptor Magnético utilizar un desarmador plano delgado Cubierta Tina Manualmente libere los snaps que sujetan la Cubierta Tina a la Tina Arnés Principal y Manguera Presostato Tina Con unas pinzas de punta retirar los cinchos que sujetan el Arnés Principal y la Manguera Presostato a la ...

Page 26: ...resostato del pivote de la Tina teniendo cuidado de no dañarla SUBLAVADORA Con unas pinzas retirar la Abrazadera de la Manguera Bomba Dren que va hacia la Tina Varillas Suspensión Manualmente retirar las Varillas de la Suspensión Ensamble Tina Manualmente retirar el Ensamble Tina por el frente del Gabinete por debajo del Refuerzo Frontal ...

Page 27: ...sor cada vez que se remueva para Servicio y debe colocarse a un torque o par de 100 5 lbs pulgada Infusor Si el Infusor está pegado o atorado se recomienda usar agua caliente y un cinto por debajo del Infusor o se recomienda el uso de un extractor como se describe a continuación se recomienda colocar un poco de afloja todo WD 40 por 5 minutos antes de usarlo Extractor para Infusor Colocar el Torni...

Page 28: ...l extractor en sentido de las manecillas del reloj para sacar el Infusor Tuerca Izquierda Utilizando una llave o dado de 1 5 16 y un mazo de goma o martillo hacer girar la Tuerca Izquierda en sentido de las manecillas del reloj para retirarla Se recomienda utilizar una nueva Tuerca Izquierda cada vez que se desensamble ensamble la Canasta La Tuerca se debe ajustar a un torque o par de 100 10 lb pi...

Page 29: ...os del Fondo Plástico Aro Balance Utilizar una punta torx 20 para retirar los 10 tornillos del Fondo Plástico Arnés Termoactuador Con pinzas desconectar el Arnés del Termoactuador Arnés Motor y Sensor Para desensamblar el conector del Sensor de Velocidad se debe presionar el seguro que se encuentra en la parte superior y jalar hacia afuera Para desensamblar el conector del Motor se debe presionar ...

Page 30: ...r y retirar la Tuerca Polea Motor Cada vez que se reinstale la Polea se recomienda colocar una Tuerca de Seguridad nueva colocarla con un torque o par de 155 5 lb pulgada Polea y Ventilador Motor Desensamblar la Polea Motor aluminio y el Ventilador Magneto del Motor Sensor de Velocidad Desensamblar el Sensor de Velocidad con un desarmador perillero Soporte Motor Con un dado de retirar los dos torn...

Page 31: ... Transmisión Cambiador y Termoactuador Con dado de 3 8 retirar los 2 tornillos que sujetan al Cambiador y Termoactuador Clutch Manualmente retirar el Clutch Resorte Clutch Manualmente retirar el Resorte Clutch Ensamble Transmisión El Ensamble Transmisión está asegurado a la Tina por medio de 16 tornillos de 3 8 que se encuentran circulados en la foto El Sello Tina se ensambla a presión en el Ensam...

Page 32: ...a Esto debe hacerse apretando cada tornillo aproximadamente de vuelta El torque o par de estos Tornillos debe ser de 75 10 in lbf Bomba Dren Con unas pinzas desensamblar los conectores del Arnés Bomba Usando un dado de retirar los 2 tornillos que sujetan la Bomba al Gabinete 1 2 3 4 5 6 7 8 Con unas pinzas retirar la Abrazadera de la Manguera Bomba Manguera Dren Con unas pinzas de punta presionar ...

Page 33: ...nel de Acceso uno en cada extremo superior Capacitor Con un desarmador plano hacer palanca en el seguro del Capacitor para desensamblarlo Arnés Capacitor Manualmente desconectar el Arnés Gabinete Tarjeta Control Manualmente desensamblar los 7 conectores de la Tarjeta Control Con los dedos índice y pulgar sujetar la Manguera Presostato girarla y jalarla hacia el frente para desensamblarla del Senso...

Page 34: ...samble al Gabinete Válvula de Agua Con un desarmador o dado de quitar el tornillo que sujeta la Válvula por la parte superior del ensamble Manualmente desconectar el Arnés Válvula Con unas pinzas de punta quitar la Abrazadera y los 2 cinchos de la Manguera Válvula Con un desarmador o dado de quitar los 2 tornillos de la Regadera Válvula Con pinzas de punta retirar la Abrazadera Manguera Regadera R...

Page 35: ...ran Panel de Control Con un desarmador Philips retirar 2 Tornillos superiores y 4 laterales 2 de cada lado Selectores Manualmente desconectar el Arnés Selectores Sujetar y girar cada Selector para desensamblarlos del Panel Con pinzas de punta retirar los 2 cinchos que sujetan el Arnés Selectores Tarjeta T o Tarjeta de LEDS Manualmente desensamblar esta Tarjeta ...

Page 36: ...tencia Panel Frontal Secadora Con un desarmador de retirar 2 Tornillos inferiores y 3 superiores El Panel se retira incluyendo la Puerta sujetar con las 2 manos al retirar este ensamble Banda Tambor Manualmente retirar la Banda Tambor Tambor Manualmente retirar el Tambor Bracket Motor Con un desarmador o dado de retirar 3 tornillos que sujetan el Bracket Motor ...

Page 37: ... retirar el Seguro del Bracket Motor Brazo Polea Tensora Manualmente desensamblar el Brazo Polea Termostatos Con un desarmador o dado de 1 4 quitar el tornillo con el que está sujeto cada Termostato Resistencia Con un desarmador o dado de 1 4 retirar los 8 tornillos de la Resistencia De forma manual retirar las 3 Zapatas ...

Page 38: ...na Manual Retirar Tina por el frente Tapa Infusor Desarmador plano delgado Retirar tapa Tornillo Infusor Dado 7 16 1 tornillo Infusor Extractor Si se dificulta la extracción se recomienda usar agua caliente y o un cinto por debajo del Infusor Tuerca Izquierda Llave o Dado 1 5 16 Rondana Canasta Manual Canasta Manual Rondana Tina Manual Fondo Canasta aluminio Punta torx 25 8 tornillos Fondo Plástic...

Page 39: ...rmador plano Hacer palanca en el seguro Arnes Capacitor Manual Conectores Tarjeta Manual 7 conectores Manguera Presostato Tarjeta Manual Tener cuidado de no dañar el Sensor Presostato Soporte Tarjeta Tarjeta Desarmador 1 4 2 tornillos 1 Tornillo Tierra deslizar Soporte hacia la izquierda Válvula Desarmador 1 4 1 tornillo Conector Arnés Válvula Manual Pinzas Punta Abrazadera Manguera Válvula Pinzas...

Page 40: ... Secadora Desarmador 1 4 2 Tornillos inferiores 3 superiores el Panel se retira incluyendo la Puerta sujetar con las 2 manos al retirar este ensamble Banda Tambor Manual Tambor Manual Bracket Motor Desarmador 1 4 3 Tornillos Seguro Bracket Motor Pinzas de Punta Brazo Polea Tensora Manual Termostatos Desarmador 1 4 1 Tornillo cada Termostato Resistencia Desarmador 1 4 Manual 8 Tornillos y 3 zapatas...

Page 41: ...R J2 Motor bomba 127 o 220 Volts CONECTOR J4 Perillas 5 VDC CONECTOR J5 Lid lock 127 o 220 Volts CONECTOR J6 Comunicación NA CONECTOR J7 Sensor Hall 12 VDC CONECTOR J8 Lid switch 12 VDC CONECTOR J9 Programación NA CONECTOR J10 Válvulas Fría Caliente y Suavizante 127 o 220 Volts CONECTOR J12 Tarjeta T 5 VDC TARJETA ELECTRÓNICA ...

Page 42: ...ones Valim 5 VDC Selector de temperaturas Sensor Hall Valim 12 VDC Sensado de velocidad Lid Switch Valim 12 VDC Magnético Lid Lock Valim 127 VAC 60 Hz Valim 220 VAC 60 Hz Valim 220 VAC 50 Hz Térmico Válvula doble Valim 127 VAC 60 Hz Valim 220 VAC 60 Hz Valim 220 VAC 50 Hz Válvula Agua fría Agua caliente Bomba de drenado Valim 127 VAC 60 Hz Valim 220 VAC 60 Hz Valim 220 VAC 50 Hz Motor síncrono de ...

Page 43: ...43 Manual de Servicio Ingenieria de Servicio Modelos a Gas Propano y Natural DIAGRAMA ELÉCTRICO ...

Page 44: ...44 Manual de Servicio Ingenieria de Servicio Modelos Eléctricos 127V DIAGRAMA ELÉCTRICO ...

Page 45: ...45 Manual de Servicio Ingenieria de Servicio Modelos Eléctricos 220V DIAGRAMA ELÉCTRICO ...

Page 46: ...la válvula de agua están obstruidos Cierre la llave de agua y quite las mangueras de conexión de agua de la parte superior trasera de la lavadora Use un cepillo para limpiar las válvulas de la lavadora Vuelva a conectar las mangueras y abra la entrada de agua nuevamente El calefactor de agua del hogar no está correctamente configurado Asegúrese de que el calefactor de agua de la casa provea el agu...

Page 47: ...correcto Asegúrese de que el ciclo de centrifugado seleccionado concuerde con la cantidad que está lavando Algunas telas se sentirán más mojadas cuando se enjuaguen con agua fría Manchas de colores Uso incorrecto de suavizante de tela Consulte las instrucciones del paquete de suavizante de tela y siga las instrucciones sobre el uso del dispensador Trate las manchas previamente y vuelva a lavar Tra...

Page 48: ...usas Intente usar un suavizante de tela Sobrecarga o nivel incorrecto de agua Cargue la lavadora de modo que la ropa tenga suficiente espacio para moverse libremente y que el agua cubra todas las prendas Ciclos de lavado y secado incorrectos Haga coincidir la selección del ciclo con el tipo de tela que está lavando especialmente para cargas fáciles de limpiar Lavado repetido en agua demasiado cali...

Page 49: ...arga bien ordenada en la secadora Grandes cargas de telas pesadas como toallas de playa Las telas grandes y pesadas contienen más humedad y tardan más tiempo en secarse Separe las telas grandes y pesadas en cargas más pequeñas a fin de acelerar el tiempo de secado Configuración inadecuada de los controles Haga coincidir la configuración de los controles con la carga que está secando El filtro de p...

Page 50: ...as con seguridad pero pueden encogerse en la secadora Para evitar que la ropa encoja siga las instrucciones de las etiquetas de cuidado de las prendas en forma precisa Algunas prendas se podrán presionar para que regresen a su tamaño original luego del secado Si le preocupa que una prenda específica se pueda encoger no la lave ni seque ...

Page 51: ...leds del Selector El Modo de Servicio inicia con el led Centrifuga como prueba 1 CODIGO BINARIO DE PROTECCIONES 0 1 E1 t1 2 E2 t2 3 E3 t3 4 E4 t4 5 E5 t5 6 E6 t6 7 E7 t7 8 E8 t8 9 E9 t9 10 EA tA 11 EB tB 12 EC tC 13 ED tD 14 EE tE 15 EF 16 EG 17 EH 18 EJ 19 EL 20 En 21 EP 22 Er 23 Et 24 Eu Tabla de Equivalencias entre Número de Falla Prueba en Display y Código Binario LEDs Número de Falla Prueba C...

Page 52: ...isión dañada A 13122 Tarjeta sensor Abierta En Corto 13395 Tarjeta sensor Zafada 13123 Tarjeta sensor desconectada B 13077 Motor abierto En corto 13078 Motor Se Protege 13075 Motor abierto En corto C 13154 Capacitor desconectado D NA 13016 Agitador propela prendas atoradas E 13000 Ens Transmisión forzada 4 E4 X El lid lock no se bloquea o desbloquea después de 40 segundos Resetear falla volátil Ve...

Page 53: ... el nivel de agua es menor a 3 in H2O A Sobrepasar de agua el nivel máximo permitido Se llena con manguera Se llena de agua a un nivel alto y luego se coloca la ropa B Válvulas de agua no cortan flujo C Manguera presostato obstruida o colapsada en el ruteo Manguera de presostato con agua ensamble de manguera presostato ensamblada con agua en la tina A FALLA FEOS 969 Baja presión de agua B 13169 Vá...

Page 54: ... a la Tina Verificar que no esté perforada la manguera presostato Verificar que la Manguera Presostato no tenga agua en el interior Correr rutina en modo de servicio prueba 8 y verificar que no salga la falla E9 No Vo lát il Bl oq ue ad a Drena por 6 minutos y se resetea si la manguera sigue desconect ada al reiniciar el ciclo mostrara la protección E9 A Mal ruteo de manguera presostato zafada B P...

Page 55: ...ido en la línea eléctrica o cercana al producto como soldadura por arco taladros etc 13126 Tarjeta electrónica no funciona en lavado Sólo si reincide la protección EE 15 EF X Código de falla corrupto Resetear falla Volátil preguntar si el producto esta cercano o en la misma línea que las fuentes de ruido Verificar la conexión del Tomacorriente al contacto de alimentación de la casa En caso de que ...

Page 56: ... en lavado Sólo si reincide la protección EL al correr ciclo 2 ciclos 20 En X Relevador de operación abierto Resetear falla Volátil Iniciar un ciclo si se presenta la falla volver a resetearla e iniciar otro ciclo si se vuelve a presentar la misma falla cambiar tarjeta Vo lát il De sb lo qu ea da Cuando se detecta la retroalime ntación 1 Relevador dañado 13126 Tarjeta control No funciona en lavado...

Page 57: ... CICLOS en posición DELICADO Perilla de posición de NIVEL CARGA en AUTO Mientras el control se encuentre en estado de falla se deberá presionar simultáneamente SELECCIÓN ETAPA INICIO PAUSA durante 5 segundos Centauro Facelift Perilla en posición APAGAR Presionar botón INICIO PAUSA Mientras el control se encuentre en estado de falla se deberá presionar simultáneamente NIVEL CARGA AQUA SAVER durante...

Page 58: ...liza a través de la perilla de ciclo Mediante el botón INICIO PAUSA se permite ejecutar o detener la prueba seleccionada El modo de servicio se deshabilita después de 5 minutos de inactividad Centauro Facelift Perilla en posición APAGADO Durante los primeros 10 segundos después de energizar la unidad presionar simultáneamente INICIO PAUSA AQUA SAVER durante 2 segundos Emitirá un pitido y aparecerá...

Page 59: ...nte led enjuaga X Enciende válvula durante la prueba Auto Apagado en 60s 3 t3 Válvula suavizante Aplica para modelos con Despachador led centrifuga enjuaga X Enciende válvula durante la prueba Auto Apagado en 60s 4 t4 Válvula de cloro NA Enciende válvula durante la prueba Auto Apagado en 60s 5 t5 Bomba drenado Termoactuador Lid Lock led centrifuga lava X Enciende bomba de drenado cambia a modo Spi...

Page 60: ...ura de pulsos de sensor hall y funcionamiento de triacs 10 tA Switch tapa led remoja enjuaga X La tarjeta muestra en el display y con Leds el status de la tapa Tapa abierta LO en display K24 y CL LED Enjuagar encendido K27 LEDs Soak30 Soak60 Tapa cerrada LC en display K24 y CL LED Centrifugar encendido K27 Leds Pausa Spin 11 tB Bomba de recirculado NA Activa bomba de recirculado durante la prueba ...

Page 61: ...istema por el exhaust La Secadora Eléctrica cuenta con 2 niveles de potencia FUNCIONAMIENTO BASICO SECADORA A GAS El flujo de aire pasa del exterior del gabinete y entra al producto El Rear Panel cuenta con unas aperturas y rejillas para la entra del aire Dentro se calienta el aire por medio de la combustión de gas en la cámara de combustión Se hace una mezcla de aire fresco y caliente dentro ante...

Page 62: ...62 Manual de Servicio Ingenieria de Servicio FLUJO DE AIRE El flujo tiene un impacto considerable en el correcto funcionamiento de la secadora SECADORA ...

Page 63: ...20V 60Hz 220V 50Hz Estos modelos cuentan con 2 ciclos 1 automático y 1 minutado El tiempo del ciclo Automático dependerá de la humedad y cantidad de la carga además de la restricción de la unidad El ciclo Minutado dura el tiempo que dice en la serigrafía SECADORA Control Secadora ...

Page 64: ...CA 220V 60Hz Estos modelos cuentan con 4 ciclos 3 automático y 1 minutado El tiempo del ciclo Automático dependerá de la humedad y cantidad de la carga además de la restricción de la unidad El ciclo Minutado dura el tiempo que dice en la serigrafía SECADORA Control Secadora ...

Page 65: ...vicio NIVELES DE TEMPERATURA Los termostatos controlan el calor que la resistencia o la válvula suministran al sistema para secar FUNCIONAMIENTO DEL CONTROL Según la combinación de diferentes factores será el desempeño de la unidad SECADORA ...

Page 66: ...66 Manual de Servicio Ingenieria de Servicio POSIBLES CAUSAS DE UN MAL DESEMPEÑO La relación Flujo tamaño y tipo de carga afecta el desempeño de la unidad SECADORA ...

Page 67: ...E SISTEMA IMPULSOR EXPLOSIONADO Motores o 127 60 o 220 60 o 220 50 Sistema de cambio Termo actuador para todos los voltajes Sensor de velocidad Un modelo para todos los voltajes Torque Tornillos sistema impulsor a tina 16 x 75 10 in lbf SISTEMA IMPULSOR ...

Page 68: ...RTES CAMBIOS PRINCIPALES VS PLATAFORMA CENTAURO LA Soporte principal KRAKEN 24 espesor 053 Transmisión KRAKEN 24 4 1 grasa Sello tina KRAKEN interferencia vs soporte principal Baleros C5 KRAKEN Absorben mayor desalineamiento menor torque libre SISTEMA IMPULSOR ...

Page 69: ...MISIÓN 4 1 grasa Funciones Reducir velocidad en lavado Transmitir torque y velocidad en spin Guía para el cambiador CTQ Torque libre Que cuidar en fabricación torque libre ruido por rebaba y alineación Fallas Ruido transmisión forzada SISTEMA IMPULSOR ...

Page 70: ...ces o Diámetro externo sello vs tina o Diámetro interno sello vs tubo transmisión Soportar condiciones de operación desbalanceo aditivos en agua etc CTQ Diámetro de sello diámetro tubo transmisión tina Que cuidar en fabricación materiales de interfaces acabados proceso ensamble Fallas Fuga de agua daño rodamientos ruido SISTEMA IMPULSOR ...

Page 71: ...71 Manual de Servicio Ingenieria de Servicio GARANTIA ...

Page 72: ...72 Manual de Servicio Ingenieria de Servicio ...

Page 73: ...o Julio 2020 July 2020 Pub MSL 0120 Ingeniería de Servicio Modelos Models ICL2040 CLME70204 CLMG70204 CLGG70214 MCL2040 MCLC2040 MKTG15 Centro de Lavado Centauro Centauro Laundry Center Centauro Estandarización Manual de Servicio Service Manual ...

Page 74: ... wires clamps straps hooks nuts or washers used to complete a path to ground are removed for service they must be returned to their original position and properly secured Mandatory safety equipment Trousers Shirt Transparent anti fog safety glasses Anti cut Gloves Anti cut safety sleeves Dielectric Safety Gloves Dielectric safety shoe with polycarbonate cap Don t work with tennis Keep clothing fre...

Page 75: ...8 INSTALLATION OR MECHANICAL GUIDE 09 GENERAL TECHNICAL DATA 12 CONTROLS AND FUNCTIONS 14 WASH LOGIC 21 CYCLE TIME CHARTS 23 DISASSEMBLY AND REFACTION 24 DISASSEMBLY TOOLS 38 CONTROL BOARD 41 ELECTRIC DIAGRAM 43 PROBLEM SOLVING 44 BINARY CODE OF PROTECTIONS 48 FAULT CODES OR PROTECTIONS 49 CLEARING FAULTS 53 SERVICE MODE 54 DRYER 57 DRIVE SYSTEM 63 ...

Page 76: ... 24 or Kraken 27 Digital Washer Platform and some parts of DOE Washing Centers the latter family is marketed in the USA and Canada The market for this new Platform for Washing Centers will be the same as for the current production that is Mexico Central America Andina and some Mabe International countries These new models of Washing Centers will also take the label with QR code from Kraken to dire...

Page 77: ...IO Mabe Product CL Laundry Center Dispatcher 0 Without Dispenser 8 Triple Dispenser Fuel E Electric G Natural gas P Propane Language S Spanish E English Color Accents BB White DG Diamond Gray 4 D M 0 Number of Knobs Capacity 20 20 Kg 0 Generation Engineering Digit NOMENCLATURE 1 ...

Page 78: ...and M Mabe Fuel E Electric G Natural Gas P Propane Control type 0 Digital 1 Hybrid 2 3 4 5 Knobs Color B White G Gray D Diamond Gray 0 B C B Cabinet 7 27 4 24 Capacity Inverted 02 20 Kg 0 Generation Engineering Digit 0 V Hz A 120 60 B 220 60 C 220 50 D 110 50 E 110 60 Plug B B K K T Terminal Block P Without Plug NOMENCLATURE 2 ...

Page 79: ... and serial number as well as a QR code that directs the customer to the mabe explanatory videos page on you tube These labels are found when you open the dryer door on the upper frame Serial number Example 2011C00821 The first 2 numbers correspond to the year of manufacture 20 2020 The next 2 numbers correspond to the month of manufacture 11 November The letter C corresponds to Laundry Centers of...

Page 80: ...ristics TYPE OF FUEL FOR THE DRYER They are divided into ELECTRICAL PROPANE GAS NATURAL GAS VOLTAGE FOR THE WASHER V HZ There are 127 60 220 60 and 220 50 models WASHING MECHANISM Impeller or Agitator AVAILABLE COLORS White Diamond Gray COMMON CHARACTERISTICS BETWEEN WASHING CENTER MODELS CABINET WIDTH 27 CONTROLS All models are 4 Knob WASHING BASKET Stainless steel WASHER CAPACITY 20 Kg ...

Page 81: ...ter is between 120 and 150 F 50 and 66 C Because this product uses hot water for some wash cycles Drainage piping The water can be drained into the riser tube or configured tube The discharge height shall not be less than 30in 76cm or no more than 6ft 1 8m above the base of the washer The riser must be a minimum of 1 1 2 inches in diameter and must be open to the atmosphere GAS LAUNDRY CENTER Elec...

Page 82: ... To check the leveling use a level on the back of the washer lid then from one side to the other and finally from front to back ensuring that it is level on the different sides c To adjust the front legs the offset must be from top to bottom to ensure the product rests solidly on all four legs turn the locking nuts on each leg toward the base of the unit and tighten with a wrench Keep leg extensio...

Page 83: ...y fuses or circuit breakers A 120 240v or 120 208v 60 Hz 30 amp single phase four or three wire circuit is required If the electrical supply does not meet the above requirements call a qualified electrician Steps to connect your laundry center ELECTRIC 1E Verify that your installation corresponds to what is established on your product label voltage Perform the following steps from the Gas Laundry ...

Page 84: ...Watts RPM 1 4 110 127V 50 60Hz 3 3 a 3 5 350 a 390 670 1 4 220 240V 60Hz 2 0 390 a 440 670 1 4 220 240V 50Hz 2 0 380 670 WASHER MOTOR Motor Type HP Voltage Freq Ampers Watts RPM 1 4 220 240V 50 60Hz 2 7 2 3 410 a 430 1425 1725 1 4 115V 60Hz 4 8 160 1725 DRYER MOTOR TECHNICAL DATA ...

Page 85: ...OCK SWITCH Valve Voltage V Frequency Hz Resistance Ohms a 25 C Hot Water 110 120 50 60 1150 5 Cold Water 110 120 50 60 1150 5 Hot Water 220 240 50 60 3550 10 Cold Water 220 240 50 60 3550 10 WATER VALVES Voltage V 110 220 Frequency Hz 60 50 60 Power Steady State W 5 8 1 5 5 1 Power Peak W 44 165 Current Peak A 0 5 1 5 0 5 1 5 Current Steady State mA 30 50 30 50 Resistance Ohm 1 779 4 2 520 8 7 446...

Page 86: ...ne you need or let the automatic sensor do it for you Water level There are 4 water levels and one automatic sensor Select the one you need or let the automatic sensor do it for you Selecting functions Press the select button repeatedly to choose the independent functions of the wash cycle or the combination of stages you need to wash only rinse only wash and spin etc The lights will turn on indic...

Page 87: ...f slightly soiled clothes maximum spin Avoid woolen clothes not recommended for delicate clothes extended wash This is an energy efficient program suitable to clean while light color cotton item with a gentle wash that combines soaking periods with agitation This program relates to the information in the energy label in terms of energy Water consumption and water extraction efficiency based on the...

Page 88: ...he program If you prefer select the temperature according to your needs For best results in washing and caring for your clothes we suggest you use automatic or follow the instructions on the fabric label Load Size some models Automatic This load selection allows the system to automatically calculate the amount being washed Maximum This load selection is when you are washing the largest amount allo...

Page 89: ... activates water consumption to decrease the amount of water in the cycle SELECT THIS STAGE THE WATER SAVING FUNCTION IS ACTIVATED Wash only This function will the washer and then provide agitation At the end of the wash stage the spin light will turn on without draining the water Rinse only Drains and spins the wash while the spin light is on after that it will fill the tub with clean water and p...

Page 90: ... pieces ABOUT THE CONTROLS AND FUNCTIONS Only wash and spin This function will fill the washer and then provide wash agitation At the end it will drain the water and spin the clothes to complete the cycle The spin light will stay on Only rinse and spin This function Will drain the water The spin light turn on and the tub will be filled with clean water and provide rinse agitation and then drain th...

Page 91: ... synthetics and special care knits Items labeled tumble dry low Automatic cycles automatically determine fabric dryness Select less dry if you want your clothes slightly damped at the end of the drying cycle Select more dry if you want them to be more dry Timed cycles run for a selected time Load size some models Easy Care For wrinkle free garments permanent ironing and items that need special car...

Page 92: ...d condition and free of obstructions Lint Filter Clean the filter before each use Slide the grid that covers the filter out Move your fingers through the filter It may form wax buildup on the lint filter due to the use of fabric softeners added to the dryer To remove residue wash the lint filter with soap and warm water Dry completely and perform the replacement Do not operate the dryer without th...

Page 93: ...ING LOGIC PERFORMANCE Standard Cycle Sequence WHITE COLOR FAST etc Agitation parameters times arc gpm depend on each cycle platform or voltage SANITIZED CYCLE WATER TEMPERATURE Automatic 140 F Hot 140 F Warm 140 F Cool 140 F Cold 140 F Tap Cold 140 F ...

Page 94: ...or each ramp motor activation a maximum time is given to reach the speed if that speed is not reached during the spin suspension doing the following During the rinse spin Suspends and goes to the next stage fill and rinse agitation During the final spin Suspends and perform a second rinse if it cannot in the second rinse finish the spin Laundry Center Centauro Spin Spin pattern Ramp UP Down Protec...

Page 95: ...uch as blankets and sheets bedding maximum water level 15 min shaking including 5 min spin Cycle with normal wash and spin intensity but with a maximum water level Delicate 28 min Delicate fragile clothing that can easily catch stretch or lose its shape during washing such as wool garments stockings lingerie and corsetry 12 min shaking including 5 min spin Cycle with intensity of washing and light...

Page 96: ...move the 2 screws holding the Cover to the Cabinet one at each end The Cabinet Cover is released Lid Lock Switch Using a Phillips screwdriver remove the 2 screws that hold the Lid Lock Switch to the Cover The Lid Lock Switch can be disconnected from the Lid Lock Harness below the Cover Applying voltage to terminals 3 4 for 1 5 to 8 seconds will close the circuit between terminals 4 5 after which t...

Page 97: ...nder the Cover The other plastic tie can be removed from the top of the Cover To remove the Magnet or Magnetic Switch use a thin flathead screwdriver Tub Cover Manually release the snaps holding the Tub Cover to the Tub Main Harness and Pressure Switch Hose Tub With tip pliers remove the ties that hold the Main Harness and the Pressure Switch Hose to the Tub press them and remove them without cutt...

Page 98: ...essure Switch Hose from the tub pivot taking care not to damage it SUBWASHER With a pliers remove the Clamp from the Drain Pump Hose that goes to the Tub Suspension Rods Manually remove the Suspension Rods Assemble Tub Manually remove the Tub Assembly from the front of the Cabinet below the Front Brace ...

Page 99: ...r Screw be replaced each time it is removed for Service and should be torqued to 100 5 lbs In Impeller If the Impeller is stuck it is recommended to use hot water and a belt underneath the Impeller or it is recommended to use an extractor as described below it is recommended to place a little bit of WD 40 5 minutes before use it Impeller extractor Install the Extractor Screw Place the hooks or rod...

Page 100: ...ith a ratchet turn the screw of the extractor clockwise to remove the Impeller Left Nut Using a 1 5 16 socket or wrench and a rubber mallet or hammer turn the Left Nut clockwise to remove it It is recommended to use a new Left Nut each time the Basket is disassembled assembled The Nut should be tightened to a torque of 100 10 ft Lbs Basket Washer Remove the Basket Washer Basket Remove the Basket f...

Page 101: ...to remove the 10 screws from the Plastic Bottom Balance Ring Use a 20 torx bit to remove the 10 screws from the Balance Ring Thermoactuator Harness With pliers disconnect the Harness from the Thermoactuator Motor and Sensor Harness To disassemble the Speed Sensor connector press the latch at the top and pull out To disassemble the Motor connector press the latch on the bottom of the connector and ...

Page 102: ...n and remove the Motor Pulley Nut Each time the Pulley is reinstalled it is recommended to place a new Lock Nut place it with a torque of 155 5 lb inch Pulley and Fan Motor Disassemble the Motor Pulley aluminum and the Fan Magneto from the Motor Speed Sensor Disassemble the Speed Sensor with a Knob Screwdriver Motor Support With a socket remove the two screws from the Bracket or Motor Support When...

Page 103: ...emble the Drive Pulley Shifter and Thermoactuator With a 3 8 socket remove the 2 screws that hold the Shifter and Thermoactuator Clutch Manually remove the clutch Clutch spring Manually remove the Clutch Spring Transmission Assembly The Transmission Assembly is secured to the Tub by 16 3 8 screws that are circled in the photo The Tina Seal snaps into the Transmission Assembly If there is a leak in...

Page 104: ...securely This should be done by tightening each screw approximately turn The torque for these Screws should be 75 10 in lbf Drain pump Using pliers disassemble the Pump Harness connectors Using a socket remove the 2 screws holding the Pump to the Cabinet 1 2 3 4 5 6 7 8 With pliers remove the Clamp from the Pump Hose Drain Hose With Pliers press and remove without cutting the 2 ties that hold the ...

Page 105: ...ess Panel one at each top end Capacitor With a flat screwdriver pry the capacitor s lock to disassemble it Capacitor Harness Manually disconnect the Cabinet Harness Control Board Manually disassemble the 7 connectors of the Control Board Using your thumb and index finger grasp the Pressure Switch Hose twist it and pull it forward to disassemble it from the Pressure Sensor Do not use too much force...

Page 106: ...his assembly is attached to the Cabinet Water Valve With a screwdriver or socket remove the screw that holds the Valve at the top of the assembly Manually disconnect the Valve Harness With Pliers remove the Clamp and the 2 straps from the Valve Hose With a screwdriver or socket remove the 2 screws from the Shower Valve With Pliers remove the Shower Hose Clamp Access Panel Back With a screwdriver o...

Page 107: ...re required Control Panel With a Phillips screwdriver remove 2 top and 4 side Screws 2 on each side Selectors Manually disconnect the Harness Selectors Grasp and twist each Selector to disassemble them from the Panel With Snips remove the 2 plastic ties that hold the Selector Harness T Board Manually disassemble this Board ...

Page 108: ... Start Power Front Panel Dryer With a screwdriver remove 2 lower and 3 upper Screws The Panel is removed including the Door hold with 2 hands when removing this assembly Drum Belt Manually remove the Drum Belt Drum Manually remove the Drum Motor Bracket With a screwdriver or socket remove 3 screws that hold the Motor Bracket ...

Page 109: ...th Pliers remove the Motor Bracket Lock Idler Arm Manually disassemble the Idler Arm Thermostats With a screwdriver or 1 4 socket remove the Thermostats MICA HEATER With a screwdriver or 1 4 socket remove the 8 screws from the Mica Heater Manually remove the 3 electric connectors ...

Page 110: ...p Thin Flathead Screwdriver Remove lid Impeller Screw 7 16 Socket Wrench 1 screw Impeller Extractor Tool If extraction is difficult it is recommended to use hot water and or a belt under the Impeller Left Nut 1 5 16 Socket or Wrench Basket Washer Manually Washer Manually Tub Washer Manually Basket bottom aluminum Torx tip 25 8 screws Plastic Bottom Torx tip 25 10 screws Balance Ring Torx tip 20 10...

Page 111: ...llips Screwdriver 2 screws Capacitor Flathead Screwdriver Pry the lock Capacitor Harness Manually Control Board Connectors Manually 7 connectors Pressure Switch Hose Control Board Manually Take care not to damage the Pressure Sensor Control Board Support Control Board 1 4 Socket Wrench 2 screws 1 ground screw slide Bracket to the left Water Valve 1 4 Socket Wrench 1 screw Harness Valve Connector M...

Page 112: ...Power Dryer Front Panel 1 4 Socket Wrench 2 low screws 3 top screws Panel is removed including Door hold with 2 hands when removing this assembly Drum Belt Manually Drum Manually Bracket Motor 1 4 Socket Wrench 3 screws Bracket Motor Lock Pliers Idle Arm Manually Thermostats 1 4 Socket Wrench 1 screw each Thermostat Mica Heather 1 4 Socket Wrench Manually 8 screws y 3 electric connectors DISASSEMB...

Page 113: ...41 Manual de Servicio Ingenieria de Servicio CONTROL BOARD ...

Page 114: ...5 LEDs 6 position selector V 5 VDC Temperature selector Sensor Hall V 12 VDC Speed sensing Lid Switch V 12 VDC Magnetic Lid Lock V 127 VAC 60 Hz V 220 VAC 60 Hz V 220 VAC 50 Hz Thermal Double Valve V 127 VAC 60 Hz V 220 VAC 60 Hz V 220 VAC 50 Hz Valve Cold Water Hot Water Drain Pump V 127 VAC 60 Hz V 220 VAC 60 Hz V 220 VAC 50 Hz 2 pole synchronous motor Thermoactuator V 127 VAC 60 Hz V 220 VAC 60...

Page 115: ...43 Manual de Servicio Ingenieria de Servicio Electric Models 220V ELECTRIC DIAGRAM ...

Page 116: ...h to clean the washer valves The home water heater is not configured correctly Make sure your home water heater supplies water between 48 C 60 C 120 F 140 F Water pumping stopped before cycle The lid was lifted or the cycle was paused Restart cycle Water does not drain Drain hose is tangled or improperly connected Straighten the drain hose and make sure the washer is not on it The top of the drain...

Page 117: ... a water conditioner such as Calgon brand or install a water softener The water is not hot enough Make sure the water heater supplies water at a temperature of 48 C to 60 C 120 F to 140 F The washing machine is overloaded Select the load size to match the load of the clothes Detergent is not dissolving Add detergent as the wash basket fills with water before loading laundry Color transfer Sort the...

Page 118: ...sed Make sure the main and dryer faucets are fully open The dryer shakes or makes noise Some level of shake noise is normal The dryer may be resting on an uneven floor Move the Wash Center to a level space or adjust the leveling feet as necessary until it is leveled Grease stains on clothing Incorrect use of fabric softener Follow the directions on the fabric softener package Drying dirty clothes ...

Page 119: ...ince most dryers use 2 fuses breakers make sure both are working Overload combination of loads Do not put more than one load of laundry in the dryer at a time Insufficient charge If you will only dry one or two items add a few more to ensure proper drying The clothes are wrinkled Excessive drying Select shorter drying time Remove items while they have a small amount of moisture Select LESS DRY or ...

Page 120: ...om right to left and in Laundry Centers it is read from bottom to top See the image below the Table it is an example of how it would be represented in the Control Panel of the Laundry Center for illustrative purposes the image of the Selector LEDs was rotated The Service Mode starts with the Spin led as test 1 DISPLAY TEST AND FAULT CHART ...

Page 121: ...mal protection opened C Capacitor o motor unplugged D Clothes stuck in Basket or Agitator E Transmission damaged 4 E4 X The lid lock does not lock or unlock after 40 seconds Reset Non Volatile fault Verify that the lid is completely closed and that the lid actuator is not broken Run routine in service mode test 5 and if it fails check a Verify connections to Lid Lock and control board Run routine ...

Page 122: ...cted Check that the water supply valves are open Check that valves filters are clean Running service mode routine test 1 4 verifying that each valve is activated and water ingress if water does not entry Check harness connections Measure resistance at the valve terminals disconnected measuring a value of 1000 for 127VAC Ohm and 3670 Ohm for 220VAC outside this range change valve In case if water e...

Page 123: ...ess damaged E Pressure sensor hose bent F Control board does not detect level change 13 ED X Disturbance on the power line Very high line frequency greater than 60 Hz Reset Volatile fault ask if the product is close to or on the same line as the noise sources Verify the connection of the Power Outlet to the power contact of the house In the event that there are no noise sources and the fault is pe...

Page 124: ...n A Lid lock mechanically locked B Card short operation relay 19 EL X Safety relay open Reset Volatile fault Start a cycle if the fault occurs reset it and start another cycle if the same fault occurs again change the card vo lat ile Unlo cked When feedback is detected 1 Damaged relay 20 En X Operate relay open Reset Volatile fault Start a cycle if the fault occurs reset it and start another cycle...

Page 125: ...atile Faults Non volatile faults Laundry Centers Centaur Standardization Knob in OFF position Press START PAUSE button CYCLES knob in DELICATE position LOAD LEVEL knob in AUTO While the control is in a fault state SELECTION START PAUSE must be pressed simultaneously for 5 seconds CLEARING FAULTS OR PROTECTIONS ...

Page 126: ...seconds The SPIN led lights up SPIN is test 1 The test change is done through the cycle knob Using the START PAUSE button it is possible to run or stop the selected test Service mode is disabled after 5 minutes of inactivity Description of Service Mode Tests Test Number Test code shown on display Service Mode Test Laundry Center Test Description 1 t1 Cold water valve led Spin X Turn on valve durin...

Page 127: ...the lid 8 t8 Pressure sensor led eco X If the control board detects correct sensor operation it activates the valves and fills until it reaches 2 inches of water The test ends successfully when this level is reached The display shows the water column value example 1 5in H2O shows 15 On models with Knobs 1 LED will light for every 0 5 9 t9 Speed Sensor TRIACS eco spin led X A shaking pattern is per...

Page 128: ...1 tB Recirculation pump NA Activates recirculation pump during test 12 tC Control software review led eco wash X Shows the software review by a Led or Display code 13 tD Parameter table review led eco wash spin X Shows the parameter table review by a Led or Display code 14 tE End of test X The control board exits service mode by pressing the Start Pause button ...

Page 129: ...ly exit the system through the exhaust The Electric Dryer has 2 power levels FUNCIONAMIENTO BASICO SECADORA A GAS Airflow passes from outside the cabinet and enters the Dryer The Rear Panel has openings and grilles for air intake Inside the air is heated by means of gas combustion in the combustion chamber A mixture of cool and hot air is made inside before passing through the gas diffuser The hot...

Page 130: ...58 Manual de Servicio Ingenieria de Servicio AIR FLOW Flow has a considerable impact on the correct operation of the dryer DRYER ...

Page 131: ...V 60Hz 220V 50Hz These models have 2 cycles 1 automatic and 1 minute The time of the Automatic cycle will depend on the humidity and quantity of the load in addition to the restriction of the unit The Minute cycle lasts the time it says in the silkscreen DRYER Dryer Control ...

Page 132: ... 220V 60Hz These models have 4 cycles 3 automatic and 1 minute The time of the Automatic cycle will depend on the humidity and quantity of the load in addition to the restriction of the unit The Minute cycle lasts the time it says in the silkscreen DRYER Dryer Control ...

Page 133: ...e Servicio TEMPERATURE LEVELS The thermostats control the heat that the resistance or the valve supplies to the system to dry CONTROL OPERATION Depending on the combination of different factors the performance of the unit will be DRYER ...

Page 134: ...62 Manual de Servicio Ingenieria de Servicio POSSIBLE CAUSES OF POOR PERFORMANCE The relationship Flow size and type of load affects the performance of the unit DRYER ...

Page 135: ...ria de Servicio DRIVE SYSTEM ASSEMBLY EXPLOSED Motors o 127 60 o 220 60 o 220 50 Shift system Thermo actuator for all voltages Speed Sensor One model for all voltajes Torque Screws drive system to tub 16 x 75 10 in lbf DRIVE SYSTEM ...

Page 136: ...PPORTS ASSEMBLY MAIN CHANGES VS CENTAURO LA PLATFORM Main support KRAKEN 24 thickness 053 Transmission KRAKEN 24 4 1 grease Tub seal KRAKEN interference vs main support Bearings C5 KRAKEN Absorb increased misalignment lower free torque DRIVE SYSTEM ...

Page 137: ...NSMISSION 4 1 grease Features Reduce speed when washing Transmit torque and speed in spin Guide for shift system CTQ Free torque What to watch out for in manufacturing free torque burr noise and alignment Faults Noise forced transmission DRIVE SYSTEM ...

Page 138: ...terface o External diameter seal vs tub o Internal diameter seal vs transmission tube Withstand operating conditions unbalance additives in water etc CTQ Seal diameter transmission tube diameter tub What to take care of in manufacturing interface materials finishes assembly process Failures Water leakage bearing damage noise DRIVE SYSTEM ...

Reviews: