Lytx DC-ACE-01, Quick Start Manual
Introducing the Lytx DC-ACE-01, a cutting-edge device revolutionizing your driving experience. Ensure a seamless setup and effortless operation with our Quick Start Manual, available for free download on our website. Discover the endless possibilities of this incredible product and elevate your driving to new heights with Lytx.
Share
Download


Reviews:
No comments
Related manuals for DC-ACE-01

MC Series
Brand: Lanoptik Pages: 12

Camedia D-575ZOOM
Brand: Olympus Pages: 180

Camedia D-575ZOOM
Brand: Olympus Pages: 2

EOS Rebel T3 18-55mm IS II Kit
Brand: Canon Pages: 2

SK6288GKOC-L
Brand: Schäfter+Kirchhoff Pages: 32

E60BX Series
Brand: FLIR Pages: 112

QSTC211
Brand: Q-See Pages: 70

DS491LT6
Brand: Dynascan Pages: 31

DC-1041
Brand: LENCO Pages: 3

IS-CV200SIG40
Brand: Eagleye Pages: 2

Pearleye P-007 LWIR
Brand: Allied Vision Technologies Pages: 85

QV-770
Brand: Casio Pages: 46

Zoom 6000
Brand: Navitar Pages: 4
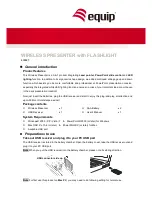
610027
Brand: Equip Pages: 8

B2W
Brand: Blueskysea Pages: 24

IDCMR-IP-POE-PTZ-20X
Brand: Larson Electronics Pages: 30

IP52LR
Brand: PNI Pages: 104

EF-16
Brand: Canon Pages: 11


