1
Install LiveWire
Attach the included feet and screw one end of
the power supply cable to the DC jack on the
back of LiveWire
™
, and plug the other end of the
cable into a reliable power source.
Warning:
Do not place anything on top of or on
either side of LiveWire as this may cause the unit
to overheat.
2
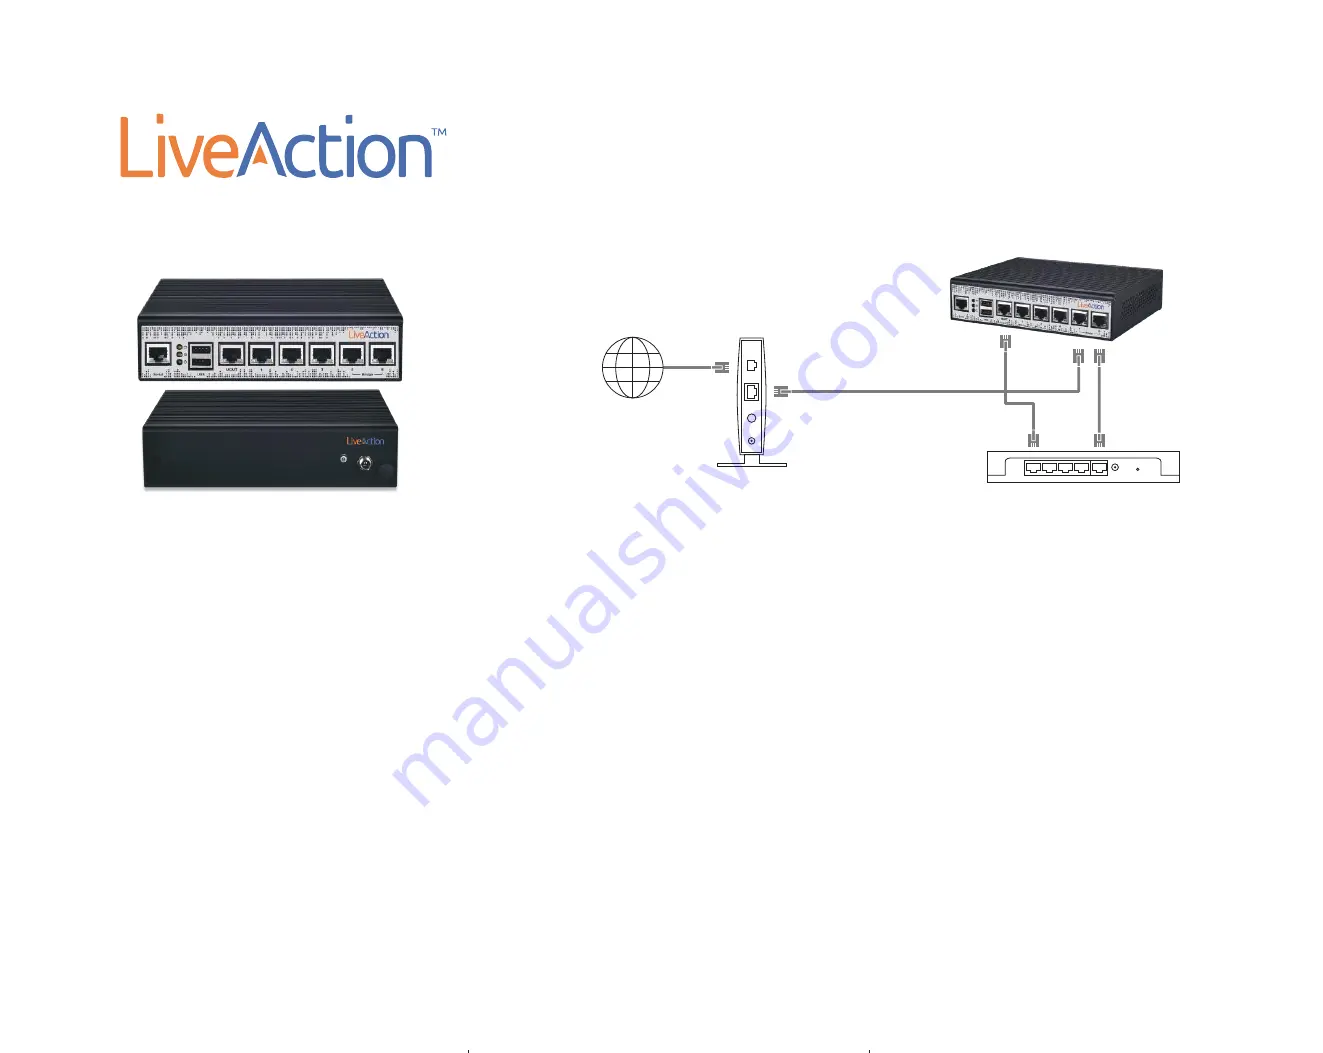
Connect LiveWire to the Network
LiveAction suggests connecting LiveWire inline
between your Internet source or modem and
your network router or switch. LiveWire’s Bridge
ports will pass traffic back and forth without
interruption while monitoring the connection
whether or not the device is powered on.
To do so: disconnect the Ethernet cable between
the router and the modem and plug it into either
of the Bridge ports. Connect a second Ethernet
cable, included in the box, to the other Bridge port
to complete the connection.
Note: If you are using LiveWire to export IPFIX
flow data to a LiveNX server, you must connect
port 4 on LiveWire to the WAN side and port 5
to the LAN side.
3
Connect ‘MGMT’ Port to Network
Connect the 'MGMT' port on LiveWire to your
network router or switch with an Ethernet cable.
4
Turn on LiveWire
Press the On/Off button next to the power cord.
The lights next to the USB ports will illuminate
and LiveWire will boot up.
Note: This may take several minutes.
5
Identify LiveWire IP Address
LiveWire comes pre-configured to obtain
its IP address via DHCP. The IP address is required
to configure and use LiveWire, as described in
Steps 6 and 7. If you are not familiar with how to
look up the IP address assigned to LiveWire,
please obtain the IP address from your network
administrator. The MAC address on the bottom of
LiveWire is useful in determining the corresponding
IP address.
Note: If an IP address is not assigned to LiveWire
by the DHCP server within two minutes of being
connected to the network, LiveWire defaults to
a static address of 192.168.1.21.
Internet
Modem
Router
6
Configure LiveWire
LiveWire is ready to use straight out of the box;
however, to change settings with the confi-
guration utility, use a web browser to connect
to the IP address identified in Step 5.
Settings that can be changed include the device
name, MGMT IP address, time zone, NTP server,
and reporting options: None, Local, Remote
ELK Server, and Export Data to LiveNX.
Username:
admin
Password:
savvius
7
Start Using LiveWire
To view a graphical representation of your
network, use a web browser to go to
https://YOUR_IP:8443
; or to get more
in-depth data about your network, connect
to LiveWire from Omnipeek Connect (via the
Capture Engine window).
LiveWire
™
Front and Back Panels