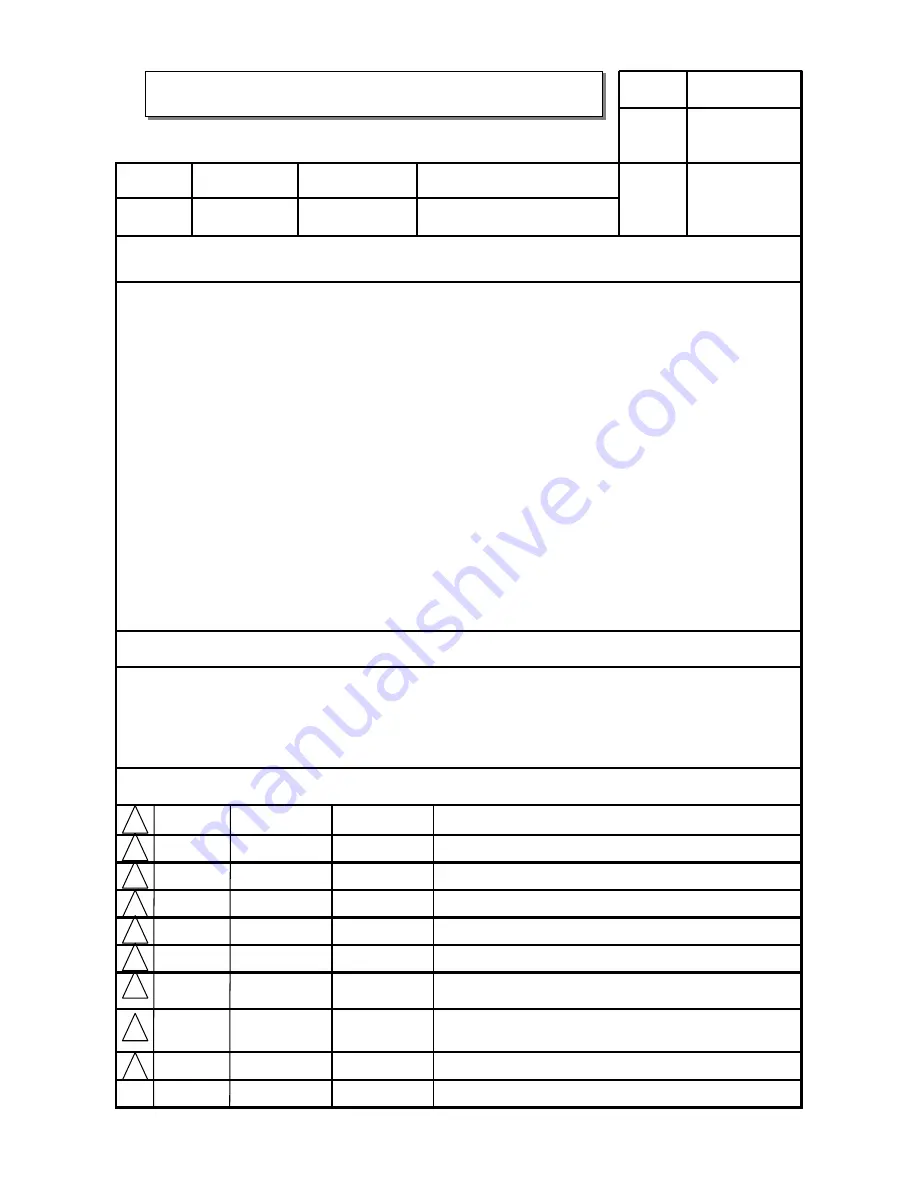
background image

담 당

관 리 자

Model Description

MODEL

BRAND

Printing Specification

1. Trim Size (Format) : 

210mm x 280 mm

2. Printing Colors

Cover : 

2 COLORS (BLACK, PMS207C)

Inside : 

2 COLORS (BLACK, PMS207U)

3. Stock (Paper)

Cover : 

Coated paper , Snow White 150 g/

Inside : 

Uncoated paper , 

백상지

80 g/

4. Printing Method : 

Off set

5. Bindery  : 

Perfect bind

6. Language : 

English/French (2)

7. Number of pages : 

132

/

뒷페이지는 단면 유광 코팅

Part No.

1.

2

.

User’s Guide Specification

User’s Guide Specification

Changes 

4.

REV.

NO.

MM/DD/YY

SIGNATURE

CHANGE NO.

CHANGE    CONTENTS

1

2

3

4

5

7

6

SUFFIX

42PC1DA-UB

LG

38289U0512D
(0602-REV00)

KIM JONG OK

06.02.14

(1) Origin Notification

* LGEDI : Printed in Indonesia 

* LGEWA : Printed in U.K.

* LGESP : Printed in Brazil        

* LGEMX : Printed in Mexico

* LGENT : Printed in China        

* LGEIL : Printed in India

8

9

Special Instructions

3

.

Product Name

USA/CANADA

Park SY

06.02.14

42PC1DA

Summary of Contents for 42PC1DA Series

Page 1: ...nguage English French 2 7 Number of pages 132 앞 뒷페이지는 단면 유광 코팅 Part No 1 2 User s Guide Specification User s Guide Specification Changes 4 REV NO MM DD YY SIGNATURE CHANGE NO CHANGE CONTENTS 1 2 3 4 5 7 6 SUFFIX 42PC1DA UB LG 38289U0512D 0602 REV00 KIM JONG OK 06 02 14 1 Origin Notification LGEDI Printed in Indonesia LGEWA Printed in U K LGESP Printed in Brazil LGEMX Printed in Mexico LGENT Printe...

Page 2: ...Pagination sheet Pagination sheet P NO 38289U0512D Total pages 132 pages Blank page 1 Front cover 127 LG EN LG P NO Rear cover Blank page Blank page ...

Page 3: ...42PC1DA P NO 38289U0512D 0602 REV00 As an ENERGY STAR Partner LGE U S A Inc has determined that this product meets the ENERGY STAR guidelines for energy efficiency ...

Page 4: ......

Page 5: ...ct the equipment to an outlet on a circuit different from that to which the receiver is con nected Consult the dealer or an experienced radio TV technician for help Any changes or modifications not expressly approved by the party responsible for compliance could void the user s authority to operate the equipment CAUTION Do not attempt to modify this product in any way without written authorization...

Page 6: ...on or pinched particularly at plugs convenience receptacles and the point where they exit from the apparatus Only use attachments accessories specified by the manufacturer Important safety instructions shall be provided with each apparatus This information shall be given in a separate booklet or sheet or be located before any operating instructions in an instruction for installation for use and su...

Page 7: ...pecification page of this owner s manual to be certain Do not overload wall outlets Overloaded wall outlets loose or damaged wall outlets extension cords frayed power cords or damaged or cracked wire insulation are dangerous Any of these conditions could result in electric shock or fire Periodically examine the cord of your appliance and if its appearance indicates damage or deterioration unplug i...

Page 8: ...etup 29 30 PC Setup 31 34 BASIC OPERATION Turning the TV On 35 On Screen Menus Language Selection 36 Initial Channel Search EZ Scan 37 Channel Selection 38 Volume Adjustment 38 TV GUIDE ON SCREENTM SYSTEM TV Guide On Screen Setup 39 41 Ready to Setup Using TV Guide TV Guide On ScreenTM Feature 42 57 Overview Screen Components Panel Menu Main Services Listings Search Schedule Setup Remind Features ...

Page 9: ...al Clock Setup 88 On Off Timer Setup 89 Sleep Timer 90 Auto Off 91 Optional Features Aspect Ratio Control 92 93 Caption Text 94 95 Analog Broadcasting System Captions 94 Digital Broadcasting System Captions 95 Caption Option 96 ISM Image Sticking Minimization Method 97 Low Power 98 Brief Info 99 Lock Adjustment Setting Up Your Password 100 Lock System 101 Set Password 101 Block Channel 102 Movie R...

Page 10: ...eptionally broad viewing angle of over 160 degrees This means that the display is clear and visible to viewers any where in the room Wide Screen The wide screen offers a theater like experience in your own home Multimedia Connect your plasma display to a PC and use it for conferencing games and Internet browsing The Picture in Picture feature allows you to view your PC and video images simultaneou...

Page 11: ...actured under license from Dolby Laboratories Dolby and the double D symbol are trademarks of Dolby Laboratories High definition television High resolution digital television broadcast and playback system composed of roughly a million or more pixels 16 9 aspect ratio screens and AC3 digital audio A subset of digital television HDTV formats include 1080i and 720p resolutions HDMITM the HDMI logo an...

Page 12: ...ar TV Guide International Inc License Notice The TV Guide On ScreenTM system is manufactured under license from Gemstar TV Guide International Inc and or one of its affiliates Patent Notice The TV Guide On ScreenTM system is protected by one or more of the following issued United States patents 6 498 895 6 418 556 6 331 877 6 239 794 6 154 203 5 940 073 4 908 713 4 751 578 4 706 121 Use of the Cab...

Page 13: ...V Owner s Manual Batteries APM CC AUTO DEMO M C EJECT 1 2 3 4 5 6 7 8 0 9 FLASHBK VOL CH MUTE FAV PAGE PAGE MENU INFO i TV GUIDE ENTER EXIT SAP CC RATIO POWER DAY DAY VCR TV DVD AUDIO CABLE STB MODE TV INPUT INPUT Remote Control Power Cord D sub 15 pin Cable 75ohm Round Cable Polishing Cloth Polish the screen with the cloth 2 Bolts Refer to p 15 2 eye bolts 2 Wall brackets 512D 1 06 2 18 8 49 AM P...

Page 14: ...TV GUIDE Remote Control Sensor POWER Button TV GUIDE Button INPUT Button MENU Button VOLUME F F G G Buttons CHANNEL E E D D Buttons Power Standby Indicator Illuminates red in standby mode When the TV is turned on the indicator blinks white and then illuminates white before the picture is displayed 512D 1 06 2 18 8 49 AM Page 10 ...

Page 15: ...t Connects the video signal from a video device CableCARD Used for CableCARD Cable Service Provider AV OUT Connect a second TV or monitor AV Audio Video IN 1 Connect audio video output from an external device to these jacks S VIDEO Connect S Video out from an S VIDEO device COMPONENT IN Connect a component video audio device to these jacks HDMI IN Connect a HDMI signal to 1 DVI or 2 Or DVI VIDEO s...

Page 16: ...s a Panel Menu in the TV Guide On Screen system Display information at the top of the screen G G p p 9 99 9 Displays the TV Guide On Screen system Navigate the on screen menus and adjust the system set tings to your preference Clear all on screen displays and return to TV viewing from any menu Analog mode Selects MTS sound Mono Stereo and a SAP DTV mode Change the audio language Select a closed ca...

Page 17: ...MER APM ADJUST Select the amount of time before your TV turns off automatically G G p p 9 90 0 Compare the Daylight Normal Night Time and User1 or2 on the screen G G p p 7 70 0 Adjust the screen position size and phase in PC mode G G p p 3 34 4 PIP PIP CH PIP CH PIP INPUT SWAP EZ PIC EZ SOUND Switches the sub picture PIP POP Twin picture or off mode G G p p 5 58 8 6 61 1 Changes the PIP channel G ...

Page 18: ...as the bolts in the eye bolts position before inserting the eye bolts loosen the bolts Secure the wall brackets with the bolts not provided as parts of the product must purchase separately on the wall Match the height of the bracket that is mounted on the wall to the holes in the product Ensure the eye bolts or brackets are tightened securely Use a sturdy rope not provided as parts of the product ...

Page 19: ...m of the stand 1 2 When connecting cables to the set Do not disengage the lock C This may cause the set to fall causing serious bodily injury and serious damage to the set 3 A B G G W Wh he en n c cl lo os si in ng g t th he e s st ta an nd d f fo or r s st to or ra ag ge e First remove the screws in the holes B on the bottom of the stand And then pull two Hooks D of the stand bottom and fold the ...

Page 20: ...ATION Arrange the cable as shown 2 Connect the cables as necessary After connecting the cables neatly arrange the cables to the Cable Holder To connect an additional equipment see the Connections Setup section 1 512D 1 06 2 18 8 49 AM Page 16 ...

Page 21: ...ON Power Supply Short circuit Breaker Here shown may be somewhat different from your TV GROUNDING Ensure that you connect the earth ground wire to prevent possible electric shock If grounding methods are not possible have a qualified electrician install a separate circuit breaker Do not try to ground the unit by connecting it to telephone wires lightening rods or gas pipes 4 inches 4 inches 512D 1...

Page 22: ...he E EN NT TE ER R button to change the main input to the active external equipment Use the D D or E E button to select the main input source EZ Scan Manual Scan Channel Edit DTV Signal Main Input G Sub Input Input Label Set ID Antenna Cable AV 1 AV 2 Component1 Component2 RGB PC HDMI1 DVI HDMI2 Antenna Cable AV 1 AV 2 Component1 Auto Link AV 2 A An nt te en nn na a C Ca ab bl le e When every exte...

Page 23: ...onnect to wall antenna socket Single family Dwellings Houses Connect to wall jack for outdoor antenna Outdoor Antenna VHF UHF Wall Antenna Socket RF Coaxial Wire 75 ohm Bronze Wire Be careful not to bend the bronze wire when connecting the antenna Cable TV Wall Jack Cable TV Wall Jack Antenna RF Coaxial Wire 75 ohm RF Coaxial Wire 75 ohm RF Coaxial Wire 75 ohm HDMI IN DIGITAL AUDIO OUT OPTICAL 2 1...

Page 24: ...alled properly contact your dealer for assistance Antenna UHF Signal Amplifier VHF CABLECARDTM SETUP 1 How to use Insert the CableCARDTM from your cable service provider into the CableCARDTM slot on the back of your TV If pairing information about this TV and the CableCARD is displayed on the screen contact your cable ser vice provider G G This TV supports CableCARDTM technology from Motorola Scie...

Page 25: ...igital set top box to the C CO OM MP PO ON NE EN NT T I IN N V VI ID DE EO O 1 1 jacks on the set Match the jack colors Y green PB blue and PR red Connect the audio output of the digital set top box to the C CO OM MP PO ON NE EN NT T I IN N A AU UD DI IO O 1 1 jacks on the set 2 1 2 How to use Turn on the digital set top box Refer to the owner s manual for the digital set top box Select C CO OM MP...

Page 26: ...1 How to connect 2 How to use Turn on the digital set top box Refer to the owner s manual for the digital set top box Select H HD DM MI I1 1 D DV VI I or H HD DM MI I2 2 input source with using the I IN NP PU UT T button on the remote control 2 1 2 1 ANTENNA IN CABLE IN L R RGB OUTPUT REMOTE CONTROLIN RGB IN AUDIO RGB DVI AUDIO RGB DVI RGB PC DTV 1 2 ANTENNA IN CABLE IN VIDEO AUDIO COMPONENT IN DI...

Page 27: ...the digital set top box to the H HD DM MI I I IN N 1 1 D DV VI I jack on the set Connect the audio output of the digital set top box to the A AU UD DI IO O R RG GB B D DV VI I jack on the set 1 How to connect Turn on the digital set top box Refer to the owner s manual for the digital set top box Select H HD DM MI I1 1 D DV VI I input source with using the I IN NP PU UT T button on the remote contr...

Page 28: ...factures warranty does not cover the product bearing this phenomenon L R S VIDEO VIDEO OUTPUT SWITCH ANT IN ANT OUT VIDEO AUDIO VIDEO AUDIO COMPONENT IN S VIDEO AV IN 1 RGB PC DTV RGB IN AUDIO RGB DVI REMOTE CONTROLIN ANTENNA ANTENNA IN IN CABLE CABLE IN IN Wall Jack Antenna 1 2 Connect the RF antenna out socket of the VCR to the A An nt te en nn na a socket on the set Connect the antenna cable to...

Page 29: ...w Audio Left white and Audio Right red 1 How to connect 2 How to use Insert a video tape into the VCR and press PLAY on the VCR Refer to the VCR owner s manual Select A AV V1 1 input source with using the I IN NP PU UT T button on the remote control If connected to A AV V I IN N2 2 select A AV V2 2 input source When connecting with an S Video cable Connect the S VIDEO output of the VCR to the S S ...

Page 30: ... CABLE IN AV OUT Connect the second TV or monitor to the TV s A AV V O OU UT T jacks See the Operating Manual of the second TV or monitor for further details regarding that device s input settings 1 How to connect G G Component1 2 RGB PC RGB DTV HDMI1 DVI HDMI2 DTV input sources cannot be used for AV out G G We recommend to use the AV OUT jacks for VCR recording NOTE 2 1 1 512D 1 06 2 18 8 49 AM P...

Page 31: ... speakers off G G p p 8 84 4 NOTE G G Do not look into the optical output port Looking at the laser beam may damage your vision CAUTION Connect one end of an optical cable to the TV Digital Audio Optical Output port Connect the other end of the optical cable to the digital audio optical input on the audio equipment Set the TV Speaker option Off in the AUDIO menu G G p p 8 84 4 See the external aud...

Page 32: ...and external equipment Match the jack colors Video yellow Audio Left white and Audio Right red 1 How to connect 2 How to use Select A AV V1 1 input source with using the I IN NP PU UT T button on the remote control If connected to A AV V I IN N2 2 input select A AV V2 2 input source Operate the corresponding external equipment 1 1 512D 1 06 2 18 8 49 AM Page 28 ...

Page 33: ...C CO OM MP PO ON NE EN NT T I IN N V VI ID DE EO O1 1 jacks on the set Match the jack colors Y green PB blue and PR red Connect the audio outputs of the DVD to the C CO OM MP PO ON NE EN NT T I IN N A AU UD DI IO O1 1 jacks on the set 1 How to connect 2 How to use Turn on the DVD player insert a DVD Select C CO OM MP PO ON NE EN NT T 1 1 input source with using the I IN NP PU UT T button on the re...

Page 34: ...t A AV V2 2 input source Refer to the DVD player s manual for operating instructions When connecting HDMI cable Connect the HDMI output of the DVD to the H HD DM MI I I IN N 1 1 D DV VI I or 2 2 jack on the set No separated audio connection is necessary 1 How to connect 2 How to use Select H HD DM MI I1 1 D DV VI I or H HD DM MI I2 2 input source with using the I IN NP PU UT T button on the remote...

Page 35: ...rast on the VIDEO menu until the picture is clear If the refresh rate of the PC graphic card can not be changed change the PC graphic card or consult the manufacturer of the PC graphic card NOTE ANTENNA IN BLE CABLE N IN REMOTE CONTROLIN RGB OUTPUT AUDIO RGB PC DTV AUDIO RGB DVI AUDIO RGB DVI RGB IN Connect the RGB output of the PC to the R RG GB B P PC C D DT TV V jack on the set Connect the PC a...

Page 36: ...tput resolution to 1024x768 60Hz NOTE DIGITAL AUDIO OUT OPTICAL RS 232C IN CONTROL SERVICE ANTENNA IN CABLE IN HDMI IN 2 1 DVI REMOTE CONTROLIN DVI PC OUTPUT AUDIO RGB IN AUDIO RGB DVI AUDIO RGB DVI RGB PC DTV Connect the DVI output of the PC to the H HD DM MI I I IN N 1 1 D DV VI I jack on the set Connect the PC audio output to the A AU UD DI IO O R RG GB B D DV VI I jack on the set 1 How to conn...

Page 37: ...layed in the HDMI DVI Input In this case that Video Resolution is not supported If Invalid Format is displayed refer to the Source Device manual or contact your service center G G Avoid keeping a fixed image on the screen for a long period of time The fixed image may become permanently imprinted on the screen G G The synchronization input form for Horizontal and Vertical frequencies is separate NO...

Page 38: ...ust Close Initializing Reset to original factory values Press the A AD DJ JU US ST T button and then use D D or E E button to select R Re es se et t Press the E EN NT TE ER R button and then use F F or G G button to select Y Ye es s Press the E EN NT TE ER R button Position Size Phase Reset G G To initialize the adjusted values APM TIMER ADJUST ADJUST SWAP PIP CH PIP CH PIP PIP INPUT 1 2 3 4 5 6 7...

Page 39: ... IN NP PU UT T T TV V I IN NP PU UT T C CH H D D or E E N Nu um mb be er r 0 0 9 9 button on the remote control Select the viewing source by using the I IN NP PU UT T button on the remote control This TV is programmed to remember which mode it was last set to even if you turn the TV off When finished using the TV press the P PO OW WE ER R button on the remote control The TV reverts to standby mode...

Page 40: ...uage Press the E EX XI IT T button to return to TV viewing or press M ME EN NU U to return to the previous menu ON SCREEN MENUS LANGUAGE SELECTION INFO i TV GUIDE ENTER ENTER SAP CC RATIO POWER DAY DAY VCR TV DVD AUDIO CABLE STB MODE TV INPUT INPUT MENU MENU EXIT The menus can be shown on the screen in the selected language First select your language Aspect Ratio Caption Text Caption Option Langua...

Page 41: ...the antenna or cable input and stores them in memory on the channel list Run EZ Scan again after any Antenna Cable connection changes Note A password is required to gain access to EZ Scan menu if the Lock System is turned on 1 2 3 EZ Scan Manual Scan Channel Edit DTV Signal Main Input Sub Input Input Label Set ID Selection G or leads you to the EZ scan screen EZ Scan Manual Scan Channel Edit DTV S...

Page 42: ...nnel number 1 VOLUME ADJUSTMENT Press the V VO OL L D D or E E button to adjust the volume If you want to switch the sound off press the M MU UT TE E button You can cancel the Mute function by pressing the M MU UT TE E or V VO OL L D D or E E button VOL CH MUTE FAV PAGE PAGE MENU INFO i TV GUIDE ENTER EXIT SAP CC RATIO POWER DAY DAY VCR TV DVD AUDIO CABLE STB MODE TV INPUT INPUT Adjust the volume ...

Page 43: ... button to highlight an option and press the E EN NT TE ER R button Set up TV Guide On Screen now displays the Welcome Screen Press the E EN NT TE ER R button to begin Setup Remind me to set up later returns you to watching TV Don t remind me again returns you to watching TV and stops the reminder screen from appearing upon power On 1 2 The TV Guide On Screen system uses Setup information to provi...

Page 44: ...n the remote or using the D D or E E button to display a num ber and then the F F or G G button to move to another field Press the E EN NT TE ER R button to display Screen 3 O Op pt ti io on n 2 2 If you selected Canada in Screen 1 you see the Postal Code screen You input characters by using the D D or E E button and then the F F or G G button to move to another field Press the E EN NT TE ER R but...

Page 45: ... to receive a channel lineup and listings NOTE G G The TV Guide On Screen system receives program listings data through your cable or over the air video signal In order to receive regular program listings please remember to do the following 1 Turn OFF your TV when it is not in use Do not unplug the power cord 2 If you have more than one Cable system in your area you may be prompted to select which...

Page 46: ...the following features Eight days of show listings today plus seven days Icons that indicate show rating stereo HDTV new episode etc Intuitive up down left right navigation using your remote control Schedule show Reminders Search shows by category e g Movies Sports Children etc Search for shows based on keywords or alphabetically by title Direct tuning to a channel Streamlined System Setup and def...

Page 47: ...s show title Highlight Indicates an active tile INFO Box Provides information for a highlighted item INFO Button Indicates you can cycle through the various Info Box sizes Channel Logo Identifies network Remind Icons Indicates a show is set as a Reminder Panel Ad Location where show or product spe cific information appears and also where Panel Menu appears Video Window Current Service Label Highli...

Page 48: ...here these arrows change the odometer choice Pressing the E EN NT TE ER R button from an odometer or number entry box moves the highlight to the default command button of that Panel Menu for example Schedule Reminder Pressing the E EN NT TE ER R button from a highlighted command button executes the action and closes the Panel Menu e g Schedule Reminder Cancel Select Cancel to cancel any changes an...

Page 49: ... Listings by pressing the TV GUIDE button on your remote or on the front panel of your TV Listings is always the first Service displayed in the Guide With Listings highlighted press the INFO button to display a Help screen Press the INFO button again to close the screen NOTE G G There may be times when the TV Guide On Screen system could display partial or no program listings The reasons for this ...

Page 50: ...s Search lets you find shows alphabetically by category Movies Sports Children Educational News Variety Series HDTV or by Keyword With Search highlighted press the INFO button to display a Help screen Press the INFO button again to close the screen Category Search Example Movies 1 1 1 1 512D 1 06 2 18 8 49 AM Page 46 ...

Page 51: ...Service Bar Closes the menu changes no infor mation and returns to the Search Service Bar G G Tune to Channel Exits the Guide and tunes to the channel of the highlighted show show airs in the future G G Set Recording This TV doesn t support recording fea ture G G Set Reminder Displays the Remind Options menu from which you can set frequency when automatically power On and auto tune the TV G G Canc...

Page 52: ...category to search e g All HDTV Children Sports etc When finished use the E E button to highlight Enter Keyword Highlight Enter Keyword and press the E EN NT TE ER R button The keyboard is displayed Use the D D E E F F G G button to highlight a character and press the E EN NT TE ER R button to display it When complete highlight Done and press the E EN NT TE ER R button Keyword search lets you ente...

Page 53: ... shows for that keyword is displayed You can highlight a show and press the E EN NT TE ER R button to display all airings You can then highlight a specific listing and press the E EN NT TE ER R button to watch if On now or the M ME EN NU U button to display the Episode Options menu From the Episode Options menu choose to set a reminder or tune to the channel as previously described The TV Guide On...

Page 54: ...the same time Weekly Sets a show reminder each time the show airs on the same day of the week on the same channel and starts at the same time Off Keeps the show in the list but will not remind the show until the frequency is changed G G Go to Service Bar Closes the menu changes no information and returns to the Schedule Service Bar G G Tune to channel Exits the TV Guide On Screen system and tunes ...

Page 55: ...n appears after you have completed the initial Guide Setup process Press the E EN NT TE ER R button to display the Confirming Your Settings screen You can see your current settings Choose one of the options press the E EN NT TE ER R button and follow the on screen instructions After you initially complete Guide Setup you can make changes to Guide settings in the following areas Change System Setti...

Page 56: ...E EN NU U button A Grid Options menu is displayed Highlight Go Back to Setup to close the menu change no information and return to the Setup Service Bar Or make changes and when finished press the E EN NT TE ER R button to highlight Done Press the E EN NT TE ER R button again to close the menu and accept the changes Highlight Cancel to close the menu change no information and return to the highlig...

Page 57: ...utton is pressed while in the TV Guide On Screen system Choices are No only Small only Large only No Small No Large Small Large All Default All Automatic entry into the TV Guide On Screen system Auto Guide when the TV is powered On Choices are On and Off Default Off Highlight General Defaults and press the M ME EN NU U button to display the General Defaults menu Highlight Go to Service Bar to clos...

Page 58: ... No Default No When to display the reminder screen choices are 30 seconds to 15 minutes early to 30 seconds to 15 minutes late to On time Default 1 min early Highlight Remind Defaults and press the M ME EN NU U button to display the Remind Defaults menu Highlight Go to Service Bar to close the menu change no information and return to the Setup Service Bar When finished press the E EN NT TE ER R bu...

Page 59: ...in early When finished press the E EN NT TE ER R button to highlight Schedule Reminder Press the E EN NT TE ER R button again to close the menu You can see a Remind icon for the selected fre quency next to the show title Highlight Cancel to close the menu change no information and return to the highlighted show You can set a show Reminder in Listings Search and Schedule or change Reminder settings...

Page 60: ... and No Default No Automatically tune the TV to the channel TV must be On when a Reminder is scheduled Choices are Yes and No Default No When finished press the E EN NT TE ER R button to highlight Schedule Reminder Press the E EN NT TE ER R button again to close the menu You can see a Remind icon for the selected fre quency next to the input and channel number Highlight Cancel to close the menu ch...

Page 61: ...eminders are set for the same time arrows appear on the Reminder screen Use the D D or E E button to view the shows NOTE Remind Alerts Based on your option settings a notification screen will appear if your TV is On at the reminder time Then you can choose to hide the reminder or highlight the show and press the E EN NT TE ER R button to tune to the show If there is no activity for 3 minutes the n...

Page 62: ...hown below PIP Mode POP Mode Twin Picture Mode PIP lets you view 2 different inputs sources on your TV screen at the same time One source will be large and the other source will show a smaller inset image Twin Picture mode splits the screen into two images allowing two picture sources to be shown on the TV screen at the same time Each source is given half the screen PIP Off TV 2 0 TV 4 0 TV 6 0 SP...

Page 63: ...AV1 and AV2 TV CATV AV1 AV2 Component1 Component2 RGB PC RGB DTV DTV CADTV Analog TV CATV AV1 and AV2 HDMI1 DVI HDMI2 TV Program Selection for PIP Moving the PIP Sub Picture Press the P PI IP P button Select the A An nt te en nn na a or C Ca ab bl le e option on the Sub input menu or with the P PI IP P I IN NP PU UT T button Use the P PI IP P C CH H P PI IP P C CH H button to select a channel for ...

Page 64: ...input sources for the main picture can t be used to swap the main and sub pictures Main Picture Sub Picture Adjusting Main and Sub Picture Sizes for Twin Picture Use the D D E E F F G G button to change main and sub picture sizes in Twin Picture mode If screen is adjusted to the maximum size the large screen is filled with entire screen vertically as shown Main Picture Sub Picture SWAP SWAP PIP Tw...

Page 65: ...P mode When watching TV CATV TV DTV or CATV CADTV Sub pictures are scanned However when watching DTV CADTV only TV CATV Sub pictures are scanned Press the E EX XI IT T button to cancel POP mode Use POP to search the programs of all the memorized channels one by one on the 3 PIP screen display while the main picture source remains the current channel The pictures of all the programmed channels are ...

Page 66: ...n Channel Edit DTV Signal Main Input Sub Input Input Label Set ID EZ Picture Color Temperature XD Advanced Video Reset Auto Clock Manual Clock Off Timer On Timer Sleep Timer Auto Off Aspect Ratio Caption Text Caption Option Language ISM Method Low Power AUDIO Audio Language EZ SoundRite EZ Sound Balance TV Speaker BBE Lock System Set Password Block Channel Movie Rating TV Rating Children TV Rating...

Page 67: ... stores them in memory on the channel list Run EZ Scan again after any Antenna Cable connection changes A password is required to gain access to EZ Scan menu if the Lock System is turned on EZ Scan Manual Scan Channel Edit DTV Signal Main Input Sub Input Input Label Set ID Selection G or leads you to the EZ scan screen EZ Scan Manual Scan Channel Edit DTV Signal Main Input Sub Input Input Label Se...

Page 68: ...E ER R button to add or delete the channel Press the E EX XI IT T button to return to TV viewing or press M ME EN NU U button to return to the previous menu INFO i TV GUIDE ENTER ENTER SAP CC RATIO POWER DAY DAY VCR TV DVD AUDIO CABLE STB MODE TV INPUT INPUT MENU MENU EXIT NOTE G G This digital channel number is a physical channel number which is different from the normal channel number shown in C...

Page 69: ... button to select the S SE ET TU UP P menu Press the G G button and then use D D or E E button to select C Ch ha an nn ne el l E Ed di it t Press the G G button You will now see a screen filled with channel numbers and a preview picture Use D D E E F F G G button to select a channel and then use the E EN NT TE ER R button to add or delete it Press F FA AV V button to add the channel to the Favorit...

Page 70: ... ET TU UP P menu Press the G G button and then use D D or E E button to select D DT TV V S Si ig gn na al l View the on screen signal strength monitor to see the quality of the signal being received Press E EX XI IT T button to return to TV viewing or press M ME EN NU U button to return to the previous menu INFO i TV GUIDE ENTER ENTER SAP CC RATIO POWER DAY DAY VCR TV DVD AUDIO CABLE STB MODE TV I...

Page 71: ...I I or H HD DM MI I2 2 To toggle RGB DTV and RGB PC select RGB PC or RGB DTV and press the G G button Press E EX XI IT T button to return to TV viewing or press M ME EN NU U button to return to the previous menu Select sources for the S Su ub b I In np pu ut t in the S SE ET TU UP P menu See Page 59 for selecting the input source for the sub picture by pressing the P PI IP P I IN NP PU UT T button...

Page 72: ...mp po on ne en nt t2 2 R RG GB B H HD DM MI I1 1 D DV VI I or H HD DM MI I2 2 Press the F F or G G button to select the label Press E EX XI IT T button to return to TV viewing or press M ME EN NU U button to return to the previous menu INFO i TV GUIDE ENTER ENTER SAP CC RATIO POWER DAY DAY VCR TV DVD AUDIO CABLE STB MODE TV INPUT INPUT MENU MENU EXIT EZ Scan Manual Scan Channel Edit DTV Signal Mai...

Page 73: ...UT 1 2 3 4 5 6 7 8 0 9 FLASHBK EZ SOUND EZ PIC EZ PIC EZ Picture adjusts the TV for the best picture appearance Select the preset value in the EZ Picture menu based on the program category D Da ay yl li ig gh ht t N No or rm ma al l N Ni ig gh ht t T Ti im me e Settings are preset for optimum picture quality at the factory and are not adjustable In the U Us se er r1 1 and U Us se er r2 2 modes onl...

Page 74: ...ows you to select your preferred picture mode after comparing the four different picture Daylight Normal Night Time User1 or User2 settings APM APM TIMER ADJUST SWAP PIP CH PIP CH PIP PIP INPUT 1 2 3 4 5 6 7 8 0 9 FLASHBK EZ SOUND EZ PIC D Da ay yl li ig gh ht t Normal User1 Night Time EXIT Navigate Select Exit D Da ay yl li ig gh ht t Normal User1 Night Time EXIT Navigate Select Exit NOTE G G Whi...

Page 75: ... in nt t Press the G G button and then use F F or G G button to make appropriate adjustments Press E EX XI IT T button to return to TV viewing or press M ME EN NU U button to return to the previous menu INFO i TV GUIDE ENTER ENTER SAP CC RATIO POWER DAY DAY VCR TV DVD AUDIO CABLE STB MODE TV INPUT INPUT MENU MENU EXIT Adjust the picture appearance to suit your preference and viewing situations EZ ...

Page 76: ...E E button to select C Co ol lo or r T Te em mp pe er ra at tu ur re e Press the G G button and then use D D or E E button to select either C Co oo ol l M Me ed di iu um m W Wa ar rm m or U Us se er r Press E EX XI IT T button to return to TV viewing or press M ME EN NU U button to return to the previous menu INFO i TV GUIDE ENTER ENTER SAP CC RATIO POWER DAY DAY VCR TV DVD AUDIO CABLE STB MODE TV...

Page 77: ...e ee en n or B Bl lu ue e Press the G G button and then use F F or G G button to make appropriate adjustments The adjustment range of R RG GB B G Gr re ee en n or B Bl lu ue e is 20 20 Press E EX XI IT T button to return to TV viewing or press M ME EN NU U button to return to the previous menu INFO i TV GUIDE ENTER ENTER SAP CC RATIO POWER DAY DAY VCR TV DVD AUDIO CABLE STB MODE TV INPUT INPUT MEN...

Page 78: ...o Auto When selecting EZ Picture options User 1 and User 2 you can choose the Auto Manual When selecting the Manual you can adjust the XD Contrast XD color and XD Noise EZ Picture Color Temperature XD G Advanced Video Reset Manual XD Contrast On XD Color On XD Noise On EZ Picture Color Temperature XD Advanced Video Reset 2 3 4 1 S Se el le ec ct ti in ng g t th he e M Ma an nu ua al l 1 Press the ...

Page 79: ... TV viewing or press M ME EN NU U button to return to the previous menu INFO i TV GUIDE ENTER ENTER SAP CC RATIO POWER DAY DAY VCR TV DVD AUDIO CABLE STB MODE TV INPUT INPUT MENU MENU EXIT Set up the TV for the best picture appearance for viewing movies When you operate Cinema 3 2 Mode 3 2 Pull Down Mode or Cinema Correction Mode the TV will adjust 24 fps video from movies to 30 fps video for disp...

Page 80: ...the screen and set it to High or Low automatically L Lo ow w The screen gets darker H Hi ig gh h The screen gets brighter Press E EX XI IT T button to return to TV viewing or press M ME EN NU U button to return to the previous menu INFO i TV GUIDE ENTER ENTER SAP CC RATIO POWER DAY DAY VCR TV DVD AUDIO CABLE STB MODE TV INPUT INPUT MENU MENU EXIT Adjusting the contrast and the brightness of the sc...

Page 81: ...eset the Video menu options to original values INFO i TV GUIDE ENTER ENTER SAP CC RATIO POWER DAY DAY VCR TV DVD AUDIO CABLE STB MODE TV INPUT INPUT MENU MENU EXIT Use to quickly reset all the Video menu options to their original factory preset values EZ Picture Color Temperature XD Advanced Video Reset G Selection G or resets to the factory settings default EZ Picture Color Temperature XD Advance...

Page 82: ... La an ng gu ua ag ge e Press the G G button and then use D D or E E button to select E En ng gl li is sh h S Sp pa an ni is sh h or F Fr re en nc ch h Press E EX XI IT T button to return to TV viewing or press M ME EN NU U button to return to the previous menu INFO i TV GUIDE ENTER ENTER SAP CC RATIO POWER DAY DAY VCR TV DVD AUDIO CABLE STB MODE TV INPUT INPUT MENU MENU EXIT Audio Language G EZ S...

Page 83: ... or press M ME EN NU U button to return to the previous menu Scans for changes in sound levels during commercials then adjusts the sound to match the specified audio level SoundRite makes sure that the volume level remains con sistent whether you are watching a commercial or a regular TV program INFO i TV GUIDE ENTER ENTER SAP CC RATIO POWER DAY DAY VCR TV DVD AUDIO CABLE STB MODE TV INPUT INPUT M...

Page 84: ...to select the appropriate sound setup as below N No or rm ma al l S St ta ad di iu um m N Ne ew ws s M Mu us si ic c T Th he ea at te er r and U Us se er r your own settings Press E EX XI IT T button to return to TV viewing APM TIMER ADJUST SWAP PIP CH PIP CH PIP PIP INPUT 1 2 3 4 5 6 7 8 0 9 FLASHBK EZ SOUND EZ SOUND EZ PIC You can also adjust E EZ Z S So ou un nd d in the A AU UD DI IO O menu Au...

Page 85: ...button to select the desired sound option T Tr re eb bl le e B Ba as ss s or F Fr ro on nt t S Su ur rr ro ou un nd d INFO i TV GUIDE ENTER ENTER SAP CC RATIO POWER DAY DAY VCR TV DVD AUDIO CABLE STB MODE TV INPUT INPUT MENU MENU EXIT Adjust the sound to suit your taste and room situations Audio Language EZ SoundRite EZ Sound Balance TV Speaker BBE Selection G or leads you to the detailed setting ...

Page 86: ... EX XI IT T button to return to TV viewing or press M ME EN NU U button to return to the previous menu Front Surround 3D EchoSound System S SR RS S T Tr ru uS Su ur rr ro ou un nd d X XT T Takes advantage of any multi channel format without needing to add extra speakers or equipment Dialog clari ty bass enrichment and the addition of stereo audio enhancement produces an immersive sound experience ...

Page 87: ...ments Press E EX XI IT T button to return to TV viewing or press M ME EN NU U button to return to the previous menu INFO i TV GUIDE ENTER ENTER SAP CC RATIO POWER DAY DAY VCR TV DVD AUDIO CABLE STB MODE TV INPUT INPUT MENU MENU EXIT Adjust the left right sound of speaker to suit your taste and room situations L R Balance 0 2 3 4 1 Audio Language EZ SoundRite EZ Sound Balance TV Speaker BBE Audio L...

Page 88: ... O On n or O Of ff f Press E EX XI IT T button to return to TV viewing or press M ME EN NU U button to return to the previous menu INFO i TV GUIDE ENTER ENTER SAP CC RATIO POWER DAY DAY VCR TV DVD AUDIO CABLE STB MODE TV INPUT INPUT MENU MENU EXIT Turn the TV speakers off if using external audio equipment Feature turns the TV Speakers option On or Off Audio Language EZ SoundRite EZ Sound Balance T...

Page 89: ... EX XI IT T button to return to TV viewing or press M ME EN NU U button to return to the previous menu BBE High Definition Sound restores clarity for better speech intelligibility and musical realism INFO i TV GUIDE ENTER ENTER SAP CC RATIO POWER DAY DAY VCR TV DVD AUDIO CABLE STB MODE TV INPUT INPUT MENU MENU EXIT Audio Language EZ SoundRite EZ Sound Balance TV Speaker BBE G Off On 2 3 4 1 Audio ...

Page 90: ...te control Mono sound is automatically received if the broadcast is only in Mono even though Stereo or SAP has been selected Select Mono if you want to listen to the mono sound in remote areas during stereo SAP broadcasting Stereo or SAP can be received in Analog channel Use the S SA AP P button to select your desired MTS mode in analog signal Each time you press the S SA AP P button M Mo on no o ...

Page 91: ... E Ea as st te er rn n C Ce en nt tr ra al l M Mo ou un nt ta ai in n P Pa ac ci if fi ic c A Al la as sk ka a or H Ha aw wa ai ii i Canada E Ea as st te er rn n C Ce en nt tr ra al l M Mo ou un nt ta ai in n P Pa ac ci if fi ic c N Ne ew w F F l la an nd d or A At tl la an nt ti ic c Press the G G button and then use D D or E E button to select A Au ut to o O Of ff f O On n depending on whether o...

Page 92: ...the year date and time options Press E EX XI IT T button to return to TV viewing or press M ME EN NU U button to return to the previous menu INFO i TV GUIDE ENTER ENTER SAP CC RATIO POWER DAY DAY VCR TV DVD AUDIO CABLE STB MODE TV INPUT INPUT MENU MENU EXIT If the current time setting is wrong reset the clock manually When you set up the TV Guide On Screen system the Manual Clock menu is not avail...

Page 93: ...and then use D D or E E to set the sound level at turn on Press E EX XI IT T button to return to TV viewing or press M ME EN NU U button to return to the previous menu INFO i TV GUIDE ENTER ENTER SAP CC RATIO POWER DAY DAY VCR TV DVD AUDIO CABLE STB MODE TV INPUT INPUT MENU MENU EXIT Auto Clock Manual Clock Off Timer On Timer G Sleep Timer Auto Off Auto Clock Manual Clock Off Timer On Timer Sleep ...

Page 94: ... the TV turns off press the T TI IM ME ER R button once To cancel the Sleep Timer press the T TI IM ME ER R button repeatedly to select O Of ff f APM TIMER TIMER ADJUST SWAP PIP CH PIP CH PIP PIP INPUT 1 2 3 4 5 6 7 8 0 9 FLASHBK EZ SOUND EZ PIC The Sleep Timer turns the TV off at the preset time Note that this setting is cleared when the TV is turned off You can also set up the S Sl le ee ep p T ...

Page 95: ...use D D or E E button to select O On n or O Of ff f Press E EX XI IT T button to return to TV viewing or press M ME EN NU U button to return to the previous menu INFO i TV GUIDE ENTER ENTER SAP CC RATIO POWER DAY DAY VCR TV DVD AUDIO CABLE STB MODE TV INPUT INPUT MENU MENU EXIT Auto Clock Manual Clock Off Timer On Timer Sleep Timer Auto Off G Off On TV will be automatically turned off in case of N...

Page 96: ... original 4 3 aspect ratio NOTE G G If a fixed image is displayed on the screen for a long time the image may become imprinted on the screen and remain visible This phenomenon is common to all manufactures and in consequence the manufactures warranty does not cover the product bearing this phenomenon OPTIONAL FEATURES MENU INFO i TV GUIDE ENTER EXIT POWER DAY DAY VCR TV DVD AUDIO CABLE STB MODE TV...

Page 97: ...l be cropped Zoom 2 Choose Zoom 2 when you want the picture to be altered both vertically extended and cropped The picture taking a halfway trade off between alteration and screen coverage Cinema Zoom Choose Cinema Zoom when you want to enlarge the picture in correct proportion Note When enlarging or reducing the picture the image may become distorted You can adjust the enlarge proportion of Cinem...

Page 98: ...IO CABLE STB MODE TV INPUT INPUT CC CC SAP Aspect Ratio Caption Text G Caption Option Language ISM Method Low Power Off CC 1 CC 2 CC 3 CC 4 Text 1 Text 2 Text 3 Text 4 Aspect Ratio Caption Text Caption Option Language ISM Method Low Power Use the C CC C button repeatedly to select Caption O Of ff f C CC C1 1 C CC C2 2 C CC C3 3 C CC C4 4 T Te ex xt t1 1 T Te ex xt t2 2 T Te ex xt t3 3 or T Te ex x...

Page 99: ...on to return to TV viewing or press M ME EN NU U button to return to the previous menu INFO i TV GUIDE ENTER ENTER SAP CC RATIO POWER DAY DAY VCR TV DVD AUDIO CABLE STB MODE TV INPUT INPUT MENU MENU EXIT Digital Broadcasting System Captions Choose the language you want the DTV CADTV Captions to appear in Languages can be chosen for digital sources only if they are included on the program Aspect Ra...

Page 100: ...RATIO POWER DAY DAY VCR TV DVD AUDIO CABLE STB MODE TV INPUT INPUT MENU MENU EXIT G G S Si iz ze e Set the word size G G F Fo on nt t Select a typeface for the text G G T Te ex xt t C Co ol lo or r Choose a color for the text G G T Te ex xt t O Op pa ac ci it ty y Specify the opacity for the text color G G B Bg g B Ba ac ck kg gr ro ou un nd d C Co ol lo or r Select a background color G G B Bg g B...

Page 101: ...the image will move once per 2 minutes Left Right Upside Downside Right Left Downside Upside I In nv ve er rs si io on n Inversion will automatically invert the plasma display panel color every 30 minutes Press E EX XI IT T button to return to TV viewing or press M ME EN NU U button to return to the previous menu INFO i TV GUIDE ENTER ENTER SAP CC RATIO POWER DAY DAY VCR TV DVD AUDIO CABLE STB MOD...

Page 102: ...n and then use D D or E E button to select O On n or O Of ff f When you select O On n the screen darkens Press E EX XI IT T button to return to TV viewing or press M ME EN NU U button to return to the previous menu INFO i TV GUIDE ENTER ENTER SAP CC RATIO POWER DAY DAY VCR TV DVD AUDIO CABLE STB MODE TV INPUT INPUT MENU MENU EXIT Aspect Ratio Caption Text Caption Option Language ISM Method Low Pow...

Page 103: ...of Input Signal 16 9 Resolution of Input Signal 720x480i Resolution of Input Signal 720x480p Resolution of Input Signal 1280x720p Resolution of Input Signal 1920x1080i Input Signal have rating information Refer to the Lock Menu D Dialogue L Language S Sex V Violence FV Fantasy Violence 480i 480p 720p 1080i 4 3 16 9 Program title Day Month Year Program start time Program progress bar Program finish...

Page 104: ... be blocked by TV Rating and or Individual Categories Movies that have been shown at the theaters or direct to video movies use the Movie Rating System MPAA only Ratings for Television programs including made for TV movies TV G General audience TV PG Parental guidance suggested TV 14 Parents strongly cautioned TV MA Mature audience only TV Y All children TV Y7 Children 7 years older SETTING UP YOU...

Page 105: ...hen use the D D or E E button to select O On n or O Of ff f When you select O On n the Lock System is enable Press E EX XI IT T button to return to TV viewing or press M ME EN NU U button to return to the previous menu Enables or disables the blocking scheme you set up previously Lock System G Set Password Block Channel Movie Rating TV Rating Children TV Rating General Input Block Off On Lock Syst...

Page 106: ...nd a preview picture Use D D E E F F G G button to select a channel and then use the E EN NT TE ER R button to block or unblock it Press E EX XI IT T button to return to TV viewing or press M ME EN NU U button to return to the previous menu Lock System Set Password Block Channel G Movie Rating TV Rating Children TV Rating General Input Block Selection G or leads you to the block channel screen Loc...

Page 107: ... G G P PG G P PG G 1 13 3 R R N NC C 1 17 7 or X X G General audience PG Parental guidance suggested PG 13 Parents strongly cautioned R Restricted NC 17 No one 17 and under admitted X Adult only Blocking Off Permits all programs Press E EX XI IT T button to return to TV viewing or press M ME EN NU U button to return to the previous menu G G If you set PG 13 G and PG movies will be available PG 13 ...

Page 108: ...ra al l Press the G G button and then use the D D or E E button to select A Ag ge e D Di ia al lo og gu ue e L La an ng gu ua ag ge e S Se ex x or V Vi io ol le en nc ce e Press the G G button and then use the D D or E E button to select block options Age applies to TV G TV PG TV 14 TV MA Dialogue sexual dialogue applies to TV PG TV 14 Language adult language applies to TV PG TV 1 4 TV MA Sex sexu...

Page 109: ...button to select E E G G 8 8a an ns s 1 13 3a an ns s 1 16 6a an ns s 1 18 8a an ns s or B Bl lo oc ck ki in ng g o of ff f E Exempt G General 8ans General Not convenient for little children 13ans Not convenient for children of 13 years and younger 16ans Not convenient for children of 16 years and younger 18ans This programs is only for adults Blocking off Permits all programs Press E EX XI IT T b...

Page 110: ...s the G G button and then use the D D or E E button to select O On n or O Of ff f on the each source Press E EX XI IT T button to return to TV viewing or press M ME EN NU U button to return to the previous menu Lock System Set Password Block Channel Movie Rating TV Rating Children TV Rating General Input Block Lock System Set Password Block Channel Movie Rating TV Rating Children TV Rating General...

Page 111: ...red item Press the G G button Press E EX XI IT T button to return to TV viewing INFO i TV GUIDE ENTER ENTER SAP CC RATIO POWER DAY DAY VCR TV DVD AUDIO CABLE STB MODE TV INPUT INPUT MENU MENU EXIT The Cable sub menu displays when inserting the CableCARDTM to the TV The CableCARDTM type is Motorola Scientific Atlanta SA or SCM etc The OSD On screen display is different from your TV according to you...

Page 112: ...wn to the right Let your cable TV service provider know the CableCARDTM ID and Host ID If your cable TV service provider registers the CableCARDTM ID and Host ID you can watch premium or high value channel If you are subscribed to them If you registered with the cable TV service provider you can watch premium or high value channel without a message If the certificates don t match between the TV an...

Page 113: ... if fi ic ca at ti io on n H Hu ur rr ri ic ca an ne e w wi il ll l b be e c co om mi in ng g If you select C Ch ha an nn ne el l E Ed di it t after running the EZ Scan without a CableCARDTM the cable channel list dis plays as in the picture below Insert the CableCARDTM After a few minutes about 2 3 minutes the TV receives a new cable channel list Occasionally more time will be needed EZ Scan G Ma...

Page 114: ...trol device to the RS 232C jack on the product back panel Note RS 232C connection cables are not supplied with the product HDMI IN 2 1 DVI DIGITAL AUDIO OUT OPTICAL RS 232C IN RS 232C IN CONTROL CONTROL SERVICE SERVICE Type of Connector D Sub 9 Pin Male No Pin Name 1 No connection 2 RXD Receive data 3 TXD Transmit data 4 DTR DTE side ready 5 GND 6 DSR DCE side ready 7 RTS Ready to send 8 CTS Clear...

Page 115: ...INFO i TV GUIDE ENTER ENTER SAP CC RATIO DAY DAY MENU MENU EXIT Communication Parameters Baud rate 9600 bps UART Data length 8 bits Parity None Stop bit 1 bit Communication code ASCII code Use a crossed reverse cable RS 232C Configurations EZ Scan Manual Scan Channel Edit DTV Signal Main Input Sub Input Input Label Set ID G 1 EZ Scan Manual Scan Channel Edit DTV Signal Main Input Sub Input Input L...

Page 116: ...al data At this time if the data is data read mode it indicates present status data If the data is data write mode it returns the data of the PC com puter E Er rr ro or r A Ac ck kn no ow wl le ed dg ge em me en nt t The TV transmits ACK acknowledgement based on this format when receiving abnormal data from non viable func tions or communication errors Data1 Illegal Code Data2 Not supported functi...

Page 117: ...x 0 05 5 V Vo ollu um me e M Mu ut te e C Co om mm ma an nd d2 2 e e To control volume mute on off You can also adjust mute using the MUTE button on remote control Transmission k e Set ID Data Cr Data 0 Volume mute off Volume on Data 1 Volume mute on Volume off Acknowledgement e Set ID OK NG Data x 0 06 6 V Vo ollu um me e C Co on nt tr ro oll C Co om mm ma an nd d2 2 f f To adjust volume You can ...

Page 118: ...Acknowledgement n Set ID OK NG Data x 1 15 5 P PI IP P P Po os si it ti io on n C Co om mm ma an nd d2 2 q q To select sub picture position for PIP Transmission k q Set ID Data Cr Data 0 Right down on screen Data 1 Left down on screen Data 2 Left up on screen Data 3 Right up on screen Acknowledgement q Set ID OK NG Data x 1 16 6 T Tr re eb bl le e C Co om mm ma an nd d2 2 r r To adjust treble You ...

Page 119: ... function on off Transmission j q Set ID Data Cr Data 0 Low power off 1 Low power on Acknowledgement q Set ID OK NG Data x 2 26 6 O Or rb bi it te er r T Ti im me e S Se et tt ti in ng g C Co om mm ma an nd d2 2 r r To adjust orbiter operation time term Transmission j r Set ID Data Cr Data Min 1 Max FE transmit by Hexadecimal code Unit Second Acknowledgement r Set ID OK NG Data x 2 27 7 O Or rb bi...

Page 120: ...Data1 Data2 Data3 Data4 x a Set ID NG Data0 x 2 29 9 C Ch ha an nn ne ell A Ad dd d D De ell C Co om mm ma an nd d m m b b To add and delete the channels Transmission m b Set ID Data Cr Data 0 Channel Delete Data 1 Channel Add Acknowledgement b Set ID OK NG Data x 3 30 0 K Ke ey y C Co om mm ma an nd d m m c c To send IR remote key code Transmission m c Set ID Data Cr s Data Key code Refer to page...

Page 121: ...2 D3 D4 D5 D6 D7 D0 D1 D2 D3 D4 D5 D6 D7 Lead code Low custom code High custom code Data code Data code Repeat code Tf 4 5 ms 9 ms 2 25 ms 9 ms 0 55 ms 0 56 ms 1 12 ms 0 56 ms 2 24 ms Tf Tf Tf 108ms 455KHz Bit 0 Bit 1 1 How to Connect Connect your wired remote control to the Remote Control port on the TV 2 Remote Control IR Codes Output waveform Single pulse modulated with 37 917KHz signal at 455K...

Page 122: ...emote control Button 60 PIP Remote control Button 72 PIPCH Remote control Button 71 PIPCH Remote control Button 61 PIP INPUT Remote control Button 63 SWAP Remote control Button 0A SAP Remote control Button CB ADJUST Remote control Button D6 TV Discrete IR Code TV Input Selection 5A AV1 Discrete IR Code AV1 Input Selection D0 AV2 Discrete IR Code AV2 Input Selection BF COMPONENT1 Discrete IR Code C...

Page 123: ...ently selected device button is illuminated If you don t press any button for 20 seconds the light on the mode button will be turned off In that case you have to repeat from step 2 Enter the appropriate code from the code table on the following pages When pressing the button the light blinks at a time If the device turned off the programming is successful Press the M ME EN NU U button to store the...

Page 124: ...9 MINOLTA 013 020 MITSUBISHI 013 020 045 046 049 051 059 061 151 MTC 034 040 MULTITECH 024 034 NEC 012 023 039 043 048 NORDMENDE 043 OPTONICA 053 054 PANASONIC 066 070 074 083 133 140 145 PENTAX 013 020 031 033 063 PHILCO 031 034 067 PHILIPS 031 033 034 054 067 071 101 PILOT 101 PIONEER 013 021 048 PORTLAND 108 PULSAR 072 QUARTZ 01 1 014 QUASAR 033 066 075 145 RCA 013 020 033 034 040 041 062 063 1...

Page 125: ... TOCOM 039 040 056 TOSHIBA 100 UNIKA 007 014 024 UNITED CABLE 004 053 UNIVERSAL 005 007 014 024 026 027 032 035 VIEWSTAR 012 015 018 086 087 088 089 ZENITH 100 1 14 060 093 ALPHASTAR DSR 123 AMPLICA 050 BIRDVIEW 051 126 129 CHANNEL MASTER 013 014 015 018 036 055 CHAPARRAL 008 009 012 077 CITOH 054 CURTIS MATHES 050 145 DRAKE 005 006 007 010 01 1 052 1 12 1 16 141 DX ANTENNA 024 046 056 076 ECHOSTA...

Page 126: ...04 MEMOREX 107 NAD 046 ONKYO 013 040 041 047 048 056 057 132 133 140 OPTIMUS 158 PANASONIC 007 033 064 1 13 142 220 241 251 PENNEY 104 PHILIPS 026 1 12 143 PIONEER 039 042 043 063 065 091 093 094 1 15 123 127 250 QUASAR 1 13 RCA 080 RCX 092 REALISTIC 103 106 SAMSUNG 124 145 146 182 193 194 195 203 204 244 245 246 SANSUI 01 1 135 138 144 SANYO 019 083 234 SCOTT 106 186 SHARP 031 032 051 052 072 082...

Page 127: ...st on station tuned with Auto off activated Check whether the product is turned on Try another channel The problem may be with the broadcast Is the power cord inserted into wall power outlet Check your antenna direction and or location Test the wall power outlet plug another product s power cord into the outlet where the product s power cord was plugged in This is normal the image is muted during ...

Page 128: ...No output from one of the speakers T Th he er re e i is s a a p pr ro ob bl le em m i in n P PC C m mo od de e O On nl ly y P PC C m mo od de e a ap pp pl li ie ed d Adjust resolution horizontal frequency or vertical frequency Check the input source Work the Auto configure or adjust clock phase or H V position Option Check the signal cable Reinstall the PC video card The signal is out of range Scr...

Page 129: ...e show is listed as a Reminder Highlight the show under Listings and do the following Press the Menu key on the remote Use the down arrow to highlight Edit Reminder and press E EN NT TE ER R Verify the Auto Tune option reads Yes The TV must be On at the scheduled time for Auto Tune Check the Schedule menu and verify that the show is listed as a Reminder Highlight the show under Listings and do the...

Page 130: ...tle fabric softener or dish washing detergent Wring the cloth until it s almost dry and then use it to wipe the screen Make sure the excess water is off the screen and then let it air dry before you turn on your TV Cleaning the Cabinet To remove dirt or dust wipe the cabinet with a soft dry lint free cloth Please be sure not to use a wet cloth Extended Absence G G If you expect to leave your TV do...

Page 131: ...nds 25 5 kg AC100 240V 50 60Hz NTSC M ATSC 64 256 QAM VHF 2 13 UHF 14 69 CATV 1 135 DTV 2 69 CADTV 1 135 75 ohm 32 104 F 0 40 C Less than 80 4 140 F 20 60 C Less than 85 Dimensions Width x Height x Depth Weight Power requirement Television System Program Coverage External Antenna Impedance Environment condition Including stand Excluding stand including stand excluding stand Operating Temperature O...

Page 132: ...512D 2 06 2 18 8 51 AM Page 128 ...

Page 133: ...512D 2 06 2 18 8 51 AM Page 129 ...

Reviews: