background image

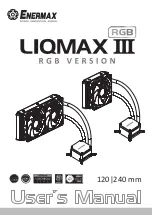
Summary of Contents for EXllusionm 240

Page 1: ......

Page 2: ...3 AM3 FM1 FM2 FM2 120 x 120 x 25 mm 500 1800 rpm 10 12 V 0 3 A 22 5 81 1 CFM 38 2 137 8 m3 h 0 2 2 8 mm H2O 14 30 dBA 4 pin PWM 2 years Copper Ceramic Bearing 50 000 hrs 4000 rpm 10 12 V 0 3 A 274 x 120 x 32 mm Aluminum PU Plastic ID 9 5mm OD 12 5mm 350 mm 1120 g Pump Cold Plate Radiator Tube Warranty Bracket Fan Model LPWEL240 HF Specification Some MB put the capacitors around the boarder of CPU ...

Page 3: ... Fan Screw 8 I Set Screw x 4 M Scraper x 1 N Thermal Grease x 1 O 24P power adaptor x 1 P Dye x 3 Q Coolant 500 ml x 1 R Filler tip x 1 S Fixed ring x 1 T Tray with hole x 1 U Tray x 1 V Indication sticker x 1 J Washer x 4 K PWM Y cable x 1 L Molex Adaptor x 1 E Position Screw x 4 Part list ...

Page 4: ...Installation ...

Page 5: ...y unit s 24P main power and water block s 3pin power connectors from MB Connect the above connectors to the included 24P power adaptor T O urn on the power supply unit this will also power on the pump Please perform this operation outside the chassis EN ...

Page 6: ...ap from the water block and drop the adequate dye coolan P t into the water block Firmly bolt the filler cap back to the water block Warning If the filler cap are not firmly bolt back the coolant might leak and cause damage to system components Such damage is not covered in the warranty EN ...

Page 7: ...Step 1 INSTALLATION H B A EN Attach the fan and the radiator to the case ...

Page 8: ...1156 1366 All AMD Socket LGA 1366 LGA 115X LGA755 All AMD socket E C EN If your CPU socket is Intel LGA 2011 please skip to step 2 B Install the scre E w E into the corresponding position hole on the back plate C f C or your CPU socket ...

Page 9: ...C J F Step 2 A 2 E Install the back plat C e C on the back of motherboard place the washer J in J to the position scre E w E and fix them with stand off F F EN ...

Page 10: ...Step 2 A 3 I D F Place position plate D on stand off F and use set screw I to fix I D F EN ...

Page 11: ...Step 2 B LGA 2011 2011 3 LGA 2011 2011 3 E D F Place position plate D on stand off F and use position screw E to fix Socket LGA 2011 does not require the back plate F D E EN ...

Page 12: ...Step 3 N M Apply the thermal grease on the CPU surface EN ...

Page 13: ...Step 4 Remove the protection film on the cold plate EN ...

Page 14: ...Step 5 Place the pump on the CPU and tighten the two screws EN ...

Page 15: ...nector to 3 pin or 4 pin connector on the motherboard Notice If you recognize that your mainboard s CPU fan or PWM sockets do not provide enough voltage to power the pump please use the included 4 pin Molex adaptor and connect the pump directly to your PSU EN ...

Page 16: ...Connect the fan connector to the 4 pin connector on the motherboard Step 7 B K EN ...

Page 17: ... card to isolate the possible leakage coolant from unsecure filler cap Warning If the filler cap are not firmly bolt back the coolant might leak and cause damage to system components Such damage is not covered in the warranty U EN ...

Page 18: ...lant If the water block is horizontally placed and the coolant volume is below this white indicator please refill the coolant If the water block is vertically placed and the coolant volume is below this white indicator please refill the coolant EN ...

Page 19: ...onnectors from power supply unit and water block s 3 pin power connector from MB 2 Bridge the power supply unit s MB 24 pin main connector and water block s power connectors via included 24P power adaptor O 3 Turn on the power supply unit this will also power on the pump O EN ...

Page 20: ...ay T and screw fixed ring S Refill the adequate Coolant Q into the water block After refilling remove tray fixed ring Firmly bolt the filler cap back to the water block Notice You must horizontally place your system with water block top side parallel to the ground for this operation S T Q ...

Page 21: ...EN Place tray U on VGA card in case the filler cap dose be bolted tightly Warning If the filler cap are not firmly bolt back the coolant might leak and cause damage to system components Such damage is not covered in the warranty U ...

Page 22: ......

Reviews: