CIAN Leica SP8 – short instructions, version 3.1, September 2015
page 1 of 10
SHORT INSTRUCTIONS FOR OPERATING Leica SP8 AT CIAN
Version 3.1, September 2015
1 - Equipment Setup
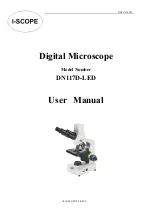
Fig 1
: Basic components of the Leica SP8 microscope
1:
Leica DMI 6000B
inverted microscope
2: Scan head
3: Anti-vibration table
4: EL6000
metal halide lamp for WFF
5:
CTR control box
for microscope stand
6:
Smart Move
joystick
7: Monitor
8: Control panel
9: Keyboard
10: Computer mouse
11: Computer table
12: Lasers in
Compact Supply Unit (CSU)
13: Supply Control
14: Workstation
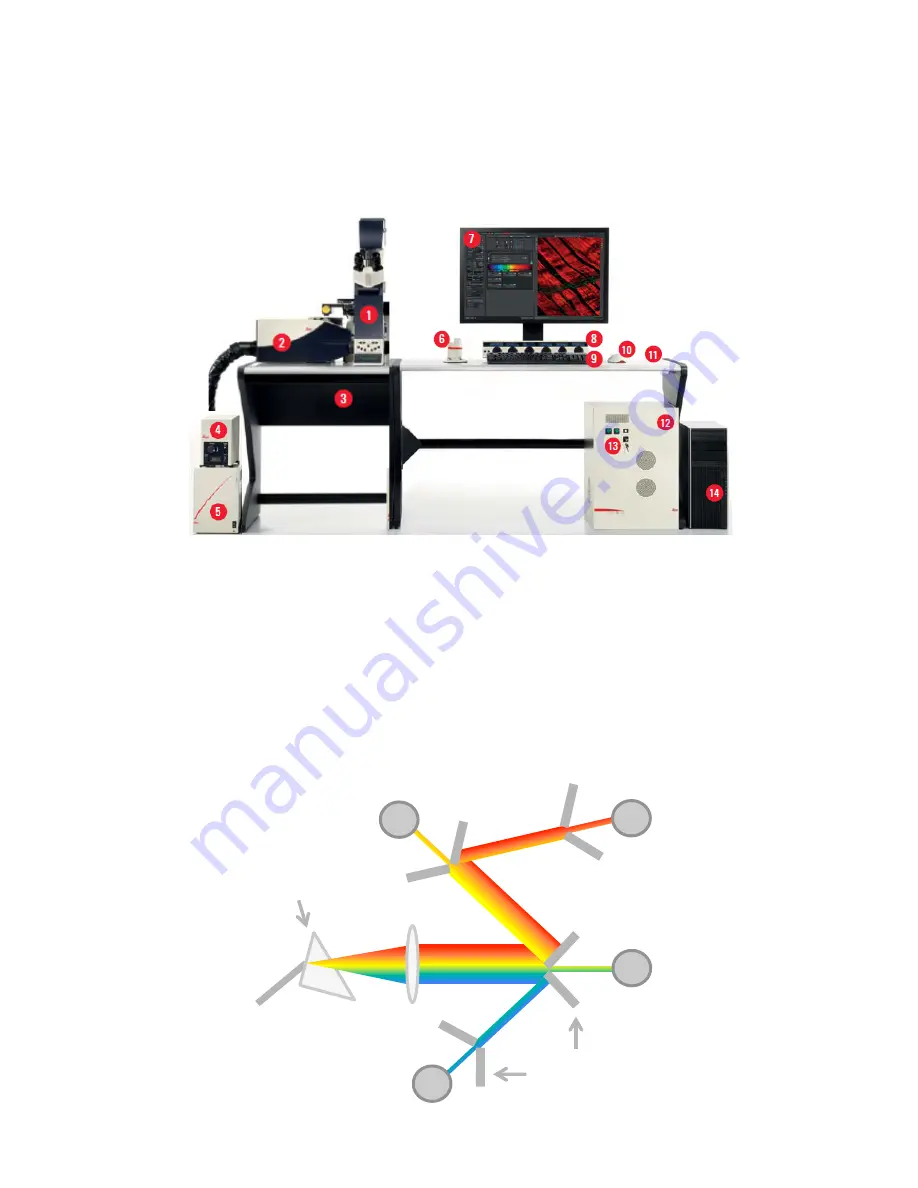
Fig 2
: Spectral detection system, schematic
Emission
Light
Prism
Sliders
2
1
3
4
PMT
PMT
PMT
HyD