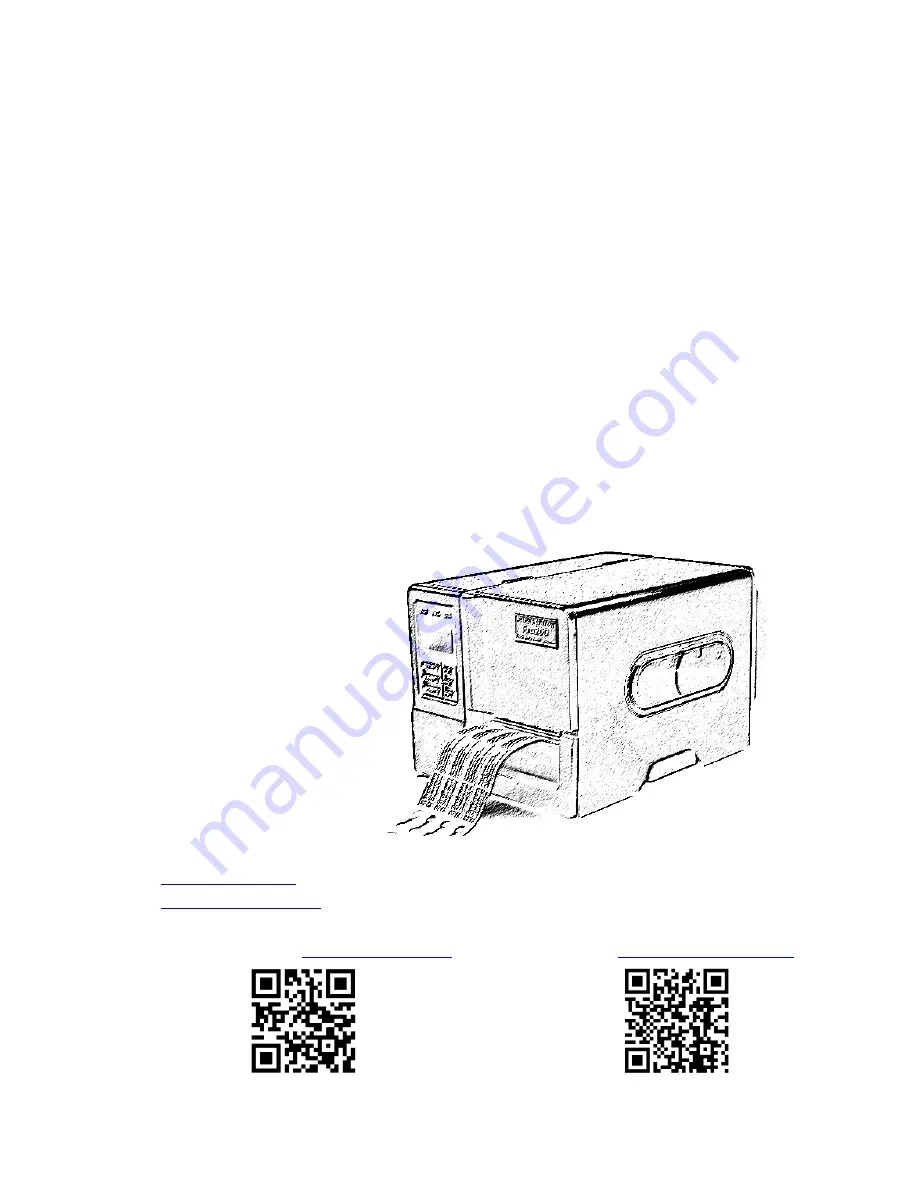
background image

LabelStations 


Pro 240


200 dpi


&

Pro 340 

300 dpi


USER MANUAL 


Advanced Labelling Limited 
58 Nuffield Road 
Poole 
Dorset 
BH16 6BW 
 

Tel. 01202 

683212 

Fax. 01202 

683089 

Email. 

[email protected]

[email protected]

Web. www.labelzone.co.uk 


(for product information)

www.labelstation.co.uk  

(for support and downloads)

JUMP TO CONTENTS

SALES 

SUPPORT

Summary of Contents for Pro 340

Page 1: ...abelling Limited 58 Nuffield Road Poole Dorset BH16 6BW Tel 01202 683212 Fax 01202 683089 Email info labelzone co uk support labelzone co uk Web www labelzone co uk for product information www labelst...

Page 2: ...A EN 55022 2006 A1 2007 EN 55024 1998 A1 2001 A2 2003 EN 61000 4 SERIES REQULATIONS FCC CFR Title 47 Part 15 Subpart B 2009 Section 15 107 and 15 109 ICES 003 Issue 4 2004 Class A AS NZS CISPR 22 2009...

Page 3: ...LabelStation Pro 240 Page 3 of 67 UL 60950 1 2nd Edition CSA C22 2 No 60950 1 07 2nd Edition EN 60950 1 A1 2010 IEC 60950 1 A1 2009 IEC 60950 1 2005 2nd Edition...

Page 4: ...an fold Label 19 2 6 3 Loading the Label in Peel off Mode the peeler is an optional extra 19 2 6 4 Loading the label in Cutter Mode the cutter is an optional extra 21 2 7 Print head Pressure Adjustmen...

Page 5: ...3 1 2 29 Static IP 48 3 2 File Manager 49 3 2 1 File List 49 3 2 2 Avail Memory 50 3 2 3 Del All Files 50 3 3 Diagnostics 50 3 3 1 Print Config 51 3 3 2 Dump Mode 51 3 3 3 Rotate Cutter 51 3 4 Languag...

Page 6: ...res the following Thermal transfer printing Direct thermal printing Die cast based print carriage Metal cover with large clear label view window Position adjustable gap sensor Position adjustable blac...

Page 7: ...Code 11 Logmars PDF 417 Maxicode DataMatrix QR code Aztec BITMAP BMP PCX Max 256 colors graphics 1 2 2 Printer optional features The printer offers the following optional features Product option feat...

Page 8: ...mm 1 mm 11 8 dots Print speed inches per second Up to 6 ips Up to 4 ips Max print width 104 mm 4 09 Max print length 2 286 mm 90 1 016 mm 40 1 6 Label Specifications Label Specifications 203 dpi model...

Page 9: ...de printer Please retain the packaging materials in case you need to reship the printer Unpacking the printer the following items are included in the carton One printer unit One Windows labeling softw...

Page 10: ...LabelStation Pro 240 Page 10 of 67 2 2 Printer Overview 2 2 1 Front View LED indicators Pause key Feed key Menu key Paper exit chute Label window LCD Cover lift handle...

Page 11: ...dle Ribbon supply spindle Print head pressure adjustment Knob Ribbon expired sensor Print head release lever Label roll guard 3 inch core adaptor Label supply spindle Ribbon guide bar Label guide bar...

Page 12: ...V1 0 V1 1 microSD 512 MB Panasonic V1 0 V1 1 microSD 1 GB Transcend Panasonic V2 0 SDHC CLASS 4 microSD 4 GB Panasonic V2 0 SDHC CLASS 6 microSD 4 GB Transcend V1 0 V1 1 miniSD 128 MB Transcend Panas...

Page 13: ...button Keys Function Feed key Advance one blank label Pause key Pause Resume printing LED indicators Keys Function Menu Enter exit menu or cancel setting and return to previous menu option Pause Pause...

Page 14: ...n POWER Off On Printer power off Printer power on ON LINE On Flashing Printer ready Printer paused or receiving data from PC ERROR Off On Blinking Printer is ready Carriage print head open or cutter f...

Page 15: ...ion indicated to release and lift the print head carriage 4 Thread the silver sometimes transparent ribbon leader around ribbon guide bar then through the slot fork of the ribbon sensor and on past th...

Page 16: ...il the ribbon leader has passed from view 7 Close the print head carriage making sure the latches are engaged securely SCHEMATIC 2 6 Installation of Label 2 6 1 Loading the Roll Label 1 Open the print...

Page 17: ...then flip it down 4 Place the roll of label on the label supply spindle Flip up the label roll guard Note When inserting the 3 inch core adapter to the spindle please make sure the arrow direction is...

Page 18: ...line sensor Make sure the label sensor indicated by the triangle traverses the label s gaps black lines or punched holes as appropriate This is important 7 Close the print head carriage making sure t...

Page 19: ...el through the rear aperture of the printer 6 Pull the fan fold label leading edge forward through the label guide bar label sensor and leave it resting on the platen roller 7 Adjust the label roll gu...

Page 20: ...ropriate sensor Refer to chapter 4 4 Pull the label through the front of the printer and remove some labels to expose the bare liner 5 Feed the bare liner through the peel off unit After changing labe...

Page 21: ...ke place when a label is printed Press the FEED button to test it 2 6 4 Loading the label in Cutter Mode the cutter is an optional extra 1 Install the label Refer to chapter 2 6 1 2 Lead the label thr...

Page 22: ...down where shown and make sure the green latch is engaged properly 5 Use the DiagTool or labelling software to set the printer to Cutter Mode Refer to chapter 4 Press the FEED button to test After ch...

Page 23: ...on wrinkle it might be necessary to increase pressure on the left hand side of the print head and or reduce pressure on the right hand side Of the five levels of pressure adjustment level one is the m...

Page 24: ...ion Pro 240 Page 24 of 67 3 1 Setup Menu Overview SET UP EXIT SERIAL COMM PRINTER SET UP SENSOR ETHERNET STATUS TSPL2 BAUD RATE STATUS ZPL2 CALIBRATION PARITY CONFIGURE EXIT EXIT DATA BITS EXIT STOP B...

Page 25: ...DE EXIT CUTTER OFFSET 000 SHIFT X 000 000 SHIFT Y 000 000 REFERENCE X 000 999 REFERENCE Y 000 999 CODE PAGE USA BRI GER FRE ITA SPA SWI DAN SWE 437 850 860 852 865 857 863 1250 1253 1251 1252 1254 125...

Page 26: ...1 2 Density Use this option to setup printing darkness The available setting is from 0 to 15 levels and the increment is 1 level Printer default density is 8 You may need to adjust your density based...

Page 27: ...to select a different print mode and press SELECT key to enable the setting Press MENU key to cancel the setting and return to the previous menu PRINTER MODE post print action DESCRIPTION None Trailin...

Page 28: ...to enter the value Press the MENU key to cancel the setting and return to the previous menu The default value is 000 Note These settings made at the printer will be over written by commands from the...

Page 29: ...Page DBCS code page number International Character Set code page number International Character Set 1252 Latin 1 950 Traditional Chinese Big5 1250 Central Europe 936 Simplified Chinese GBK 1253 Greek...

Page 30: ...ugoslavian 046 Swedish 351 Portuguese 031 Dutch 039 Italian 047 Norwegian 358 Finnish 032 Belgian 041 Switzerland 048 Polish 033 French France 042 Slovak 049 German 3 1 2 Printer Setup ZPL2 Print Setu...

Page 31: ...se the print speed and DOWN key to decrease it Press SELECT to enter the value Press MENU to cancel the setting and return to the previous menu Note These settings made at the printer will be over wri...

Page 32: ...module if fitted Cutter Enable the electric cutter if fitted Note These settings made at the printer will be over written by commands from the labelling software label template at print time unless th...

Page 33: ...e enough label to accommodate this information Press the SELECT key to begin 3 1 2 8 List Formats This feature is used to print out all available formats stored in the printer s DRAM Flash or optional...

Page 34: ...cursor from left digit to right digit and press the UP key to set the value from 0 to 9 or A to F Press the SELECT key to enter the value Press MENU key to cancel the setting and return to the previo...

Page 35: ...option is used to set the action of the media label when you close the print head The default setting is No Motion Press the UP key and DOWN key to select the mode and the SELECT key to enter the val...

Page 36: ...s used to adjust print position horizontally on the label The default value is 0000 and the range of settings is 9999 to 9999 dots Press the DOWN key to move the cursor from left digit to right digit...

Page 37: ...d DOWN key to scroll the cursor to the media type and press the SELECT key to enter the calibration mode Press MENU key to cancel the setting and return to the previous menu Note These settings made a...

Page 38: ...ng these steps to be completed Mode Actions Paper Len 00812 dot 1 Press the DOWN key to move the cursor from left digit to right digit and press the UP key to set the value from 0 to 9 and the dot mm...

Page 39: ...y the LCD screen will return to the previous menu A 3 Pre Printed This function sets the paper length and gap size before auto calibrating the sensor sensitivity It calibrates the sensor more accurate...

Page 40: ...and DOWN key to scroll the cursor to the sensor type Press the SELECT key to enter the black mark sensor calibration mode B 1 Automatic On selecting the Automatic option you see the following message...

Page 41: ...the bline size into the printer The width of the line in dots can be calculated as follows 200 dpi printer Width of line in mm x 7 87 300 dpi printer Width of line in mm x 11 81 BLine Mode Scan Mark I...

Page 42: ...for pre printed labels Entering the Pre Printed option displays the following message with steps which must be completed Mode Actions Paper Len 00812 dot 1 Press the DOWN key to move the cursor from l...

Page 43: ...e displays the following message and the printer calibrates the sensor sensitivity automatically When calibration is complete the LCD screen returns to the previous menu C 2 Manual In cases where Auto...

Page 44: ...sity X Ref Level XXX 1 Remove the continuous label Press the SELECT key to enter the value Cont Mode Scan Paper Intensity X Ref Level XXX 2 Put the continuous label under the media sensor Press the SE...

Page 45: ...o 240 Page 45 of 67 3 1 2 20 Serial Comm SERIAL COMM BAUD RATE DATA BITS PARITY STOP BIT S 1200 bps 7 None 2400 bps 8 Odd 4800 bps EXIT Even 9600 bps EXIT EXIT 1 2 EXIT 19200 bps 38400 bps 57600 bps 1...

Page 46: ...s option is used to set the RS 232 Data Bits The default setting is 8 Press the UP and DOWN keys to change the data bits and press the SELECT key to enter the value Press the MENU key to cancel the se...

Page 47: ...previous menu 3 1 2 26 Status IP Address MAC Use this menu to check Ethernet settings IP address information is displayed as above Please press the SELECT key or Menu key to return to the previous men...

Page 48: ...et the printer s IP address subnet mask and gateway Press the UP and DOWN keys to select the different options and press the SELECT key to enter the option Press the MENU key to cancel the setting and...

Page 49: ...ailable memory and list all stored files 3 2 1 File List Use this menu to show delete and run the files BAS saved in the printer s DRAM Flash Card memory To show the files Static IP Select Yes Menu No...

Page 50: ...e printer Press MENU to cancel the menu and go back to the previous menu 3 3 Diagnostics FLASH File List DEMO TTF DEMO BAS DEMO TTF 1 75MB DOWN Delete FLASH File List DEMO TTF DEMO BAS DEMO BAS 406 By...

Page 51: ...and the right column being their corresponding hexadecimal values This allows users and engineers to verify data and debug the program Please refer to section 4 2 Notes 1 Dump mode requires 4 100mm wi...

Page 52: ...nitialization The printer settings are restored to defaults once the printer is initialised Please refer to section 4 2 for the default settings Note After initialising it is necessary to re calibrate...

Page 53: ...ommands to a printer 4 1 Start the Diagnostic Tool 1 Double click on the Diagnostic tool icon to start the software 2 The utility provides four features Printer Configuration File Manager Bitmap Font...

Page 54: ...ation details Password Setup Set a password to protect the settings Note For more information about the Diagnostic Tool please refer to the diagnostic utility quick start guide on the CD that came wit...

Page 55: ...rnet settings Ethernet settings DOWNLOA 0D 0A 44 4F 57 4E 4C 4F 4I D TEST2 44 20 22 54 45 53 54 32 2E DAT 5 CL 44 41 54 22 2C 35 2C 43 4C S DOWNLO 53 0D 0A 44 4F 57 4E 4C 4F AD F TES 41 44 20 46 2C 22...

Page 56: ...art the Diagnostic Utility by double clicking on the icon Note This utility does not work with printers of early version firmware The printer must have V6 00 firmware or later 4 The Diagnostic Utility...

Page 57: ...he Ethernet Setup button from printer function of Printer Configuration tab to setup the IP address subnet mask and the gateway for the on board Ethernet 5 3 Using Ethernet interface to setup Ethernet...

Page 58: ...ck the Static IP radio button then enter the IP address subnet mask and gateway Click Set IP to enforce these settings 8 Users can also change the printer name by changing it in this fields and clicki...

Page 59: ...d power is switched on Printer status flagged as Head Open or Carriage Open Print head is lifted Close the print head close the carriage Printer status flagged as Ribbon End Err or Ribbon Encoder Err...

Page 60: ...rted at one or both ends Parallel lead not fully inserted at one or both ends Serial port not connected pin to pin Check all cable connections If using serial cable make sure it is wired pin to pin Ch...

Page 61: ...ssure If the pressure adjustment knob has been adjust to index 5 and the poor print quality is still at the left side of the printout pressure adjustment knob to index 1 and use the Z axis adjustment...

Page 62: ...g Label size specified incorrectly Gap sensor or Black Mark sensor needs recalibrating Optical window of Gap sensor or Black Mark sensor is dirty Check settings of label template Recalibrate the senso...

Page 63: ...er s offset directly using the keypad as follows MENU SELECT x 3 DOWN x 6 SELECT then adjust Shift Y Remember all settings in the printer are over ridden by label template settings at print time unles...

Page 64: ...ller is dirty Clean the print head Clean the platen roller Irregular printing The printer is in Hex Dump mode The RS 232 setting is incorrect Turn the printer off and on to skip the dump mode Change t...

Page 65: ...onger appears 2 If the above does not remove the wrinkle then try printing at a different speed or lower the print temperature sometimes called darkness or density Each print head pressure adjustment...

Page 66: ...t head 2 Allow the print head to cool for a minimum of one minute 3 Use a cotton swab and 100 ethanol to clean the print head surface Clean the print head when changing to a new label roll Print Head...

Page 67: ...of 67 Notes XDo not touch the print head with your hand If you accidentally touch it clean it with ethanol XUse only Ethanol DO NOT use medical alcohol which may damage the printer head XClean the pri...

Reviews: