Kronos Audio Kronos, Assembly Instructions Manual
Introducing the Kronos Audio Kronos, a revolutionary audio device designed to enhance your listening experience. For easy assembly, refer to our comprehensive Assembly Instructions Manual available for free download at manualshive.com. Unlock the full potential of this incredible product and enjoy superior sound quality at your convenience.
Share
Download


Reviews:
No comments
Related manuals for Kronos
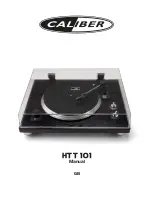
HTT 101
Brand: Caliber Pages: 16

TB85
Brand: Unitech Pages: 48

TB80
Brand: Unitech Pages: 87

TB120
Brand: Unitech Pages: 58

TB162
Brand: Unitech Pages: 2

TT10
Brand: Magenta Pages: 36

TVB00
Brand: FIC Pages: 50

CVUZ-74111
Brand: Chinavision Pages: 16

E8124
Brand: Asus Pages: 24

E8711
Brand: Asus Pages: 22

E8355
Brand: Asus Pages: 88

E9022
Brand: Asus Pages: 22

AAEON RTC-1010
Brand: Asus Pages: 55

ASUS VivoTab
Brand: Asus Pages: 78

ASUS Transformer AiO P1801
Brand: Asus Pages: 64

E8492
Brand: Asus Pages: 96

Asus Nexus 7
Brand: Asus Pages: 140

E8316
Brand: Asus Pages: 102


