background image

Operation manual

Bedienungshandbuch

Manual de instrucciones

Manuel d’utilisation

Brugermanual

Manuale operativo

᫽֌᡻޺

aCAPPELLA

Premium Bluetooth speaker

FLIP

 for Basic Functions

Summary of Contents for aCAPPELLA

Page 1: ...Operation manual Bedienungshandbuch Manual de instrucciones Manuel d utilisation Brugermanual Manuale operativo aCAPPELLA Premium Bluetooth speaker FLIP for Basic Functions ...

Page 2: ...2 ...

Page 3: ...ential requirements and other relevant provisions of Directive 2014 53 EU The declaration of conformity may be consulted at www kreafunk com declaration of conformity English 4 Deutsch 20 Español 36 Français 52 Dansk 70 Italiano 84 Chineseѝ᮷ 100 ...

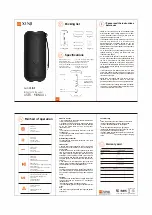
Page 4: ...4 English English Operation manual ...

Page 5: ...n plastic parts 5 Do not expose the product to extreme cold as it may damage the internal circuit board 6 Avoid liquids getting into the product 7 Do not throw with or stamp on the product This may damage the internal circuit board 8 Do not try to disassemble the product This must only be done by a professional 9 Do not use concentrated chemical products or detergent to clean the product 10 Keep t...

Page 6: ... any problems with your product please contact the retailer you purchased the product from The retailer will provide you with guidance and if that does not solve the problem the retailer will handle the claim directly with KREAFUNK ...

Page 7: ...7 English Reset 0 02 5W USB C 5V 1A ...

Page 8: ...8 English CONNECT PLAY 1 1x Press the multifunction button K to turn aCAPPELLA on The LED indicator will light up white and a sound prompt is heard ...

Page 9: ...JOEJDBUPS PO B 11 TUBSUT ˍBTIJOH XIJUF NBLF TVSF Bluetooth on your device is turned on Find the list of visible connected units on your device and select aCAPPELLA The LED indicator will turn solid white a sound prompt is heard and aCAPPELLA is ready to play ...

Page 10: ...ct to last connected device when turned on If you wish to connect a new device you can manually activate Bluetooth pairing mode Press and hold the multifunction button K to activate Bluetooth pairing NPEF 5IF JOEJDBUPS XJMM ˍBTI XIJUF BOE ZPV DBO OPX QBJS B 11 with a new device ...

Page 11: ...11 English MULTI FUNCTIONS 1x 2x 3x 0 02 ...

Page 12: ...12 English 1x 1x 0 02 ...

Page 13: ... by triple pressing the Play CVUUPO 5IF JOEJDBUPS XJMM ˍBTI XIJUF BOE UIF CVJMU JO NJDSPQIPOF XJMM pick up your voice commands When having two aCAPPELLAs playing in TWS mode only one aCAPPELLA can activate the microphone for Voice Assistant When activating your Voice TTJTUBOU UIF JOEJDBUPS XJMM ˍBTI XIJUF PO UIF TQFBLFS UIBU MJTUFOT UP your commands 3x ...

Page 14: ...14 English BATTERY AND CHARGING USB C 5V 1A Orange 0 99 Green 100 5W ...

Page 15: ... CHARGING aCAPPELLA can be charged via the USB C input or by being placed on a QI DFSUJˌFE XJSFMFTT DIBSHJOH QBE 8IFO B 11 JT DIBSHJOH DPSSFDUMZ UIF JOEJDBUPS XJMM ˍBTI PSBOHF 8IFO UIF CBUUFSZ JT GVMMZ DIBSHFE UIF indicator will turn solid green until aCAPPELLA is removed from the QI DFSUJˌFE DIBSHJOH QBE PS UIF DIBSHJOH DBCMF JT VOQMVHHFE IBSHJOH UJNF PO B 2 DFSUJˌFE DIBSHJOH QBE JT BQQSPYJNBUFMZ...

Page 16: ...Status 15 100 15 10 0 99 100 Red Flashing Red Orange Green When the battery level is below 15 the LED indicator turns solid red When UIF CBUUFSZ MFWFM JT CFMPX UIF JOEJDBUPS ˍBTIFT SFE B 11 XJMM BVUPNBUJDBMMZ TXJUDI Pˋ XIFO OPU JO VTF GPS NJOVUFT ...

Page 17: ... in True Wireless Stereo TWS Turn on both aCAPPELLAs Press and hold the multifunction button K on the primary speaker Simultaneously press the button to activate 584 QBJSJOH NPEF 5IF JOEJDBUPS PO UIF QSJNBSZ TQFBLFS OPX ˍBTIFT purple Press and hold the multifunction button on the secondary speaker to connect in TWS ...

Page 18: ...CAPPELLAs will automatically pair the LED indicator will turn solid white on both speakers and a sound prompt will be heard Make sure your device is paired to the primary speaker You are now ready to play in True Wireless Stereo ...

Page 19: ...19 English The two aCAPPELLAs will automatically reconnect in TWS mode when both speakers are turned on until TWS pairing mode is manually activated again on one of the speakers ...

Page 20: ...20 Deutsch Deutsch Bedienungshandbuch ...

Page 21: ...kt nicht extremer Kälte aus da dies die interne Leiterplatte beschädigen kann 6 Vermeiden Sie dass Flüssigkeiten in das Produkt gelangen 7 Nicht das Produkt werfen oder auf das Produkt draufstellen Dies könnte den internen Schaltkreis beschädigen 8 Versuchen Sie nicht das Produkt zu zerlegen Dies darf nur von einem Fachmann durchgeführt werden 9 Verwenden Sie keine konzentrierten chemischen Produk...

Page 22: ...e mit Ihrem Produkt haben wenden Sie sich bitte an den Händler bei dem Sie den Produkt gekauft haben Der Händler wird Sie beraten und wenn dies das Problem nicht löst wird der Händler die Reklamation direkt mit KREAFUNK abwickeln ...

Page 23: ...23 Deutsch Reset 0 02 5W USB C 5V 1A ...

Page 24: ...24 Deutsch VERBINDEN SPIELEN 1 1x Drücken Sie die Multifunktionstaste K um aCAPPELLA einzuschalten Die LED Anzeige leuchtet weiß und Sie hören einen Sound ...

Page 25: ...ELLA weiß zu blinken beginnt vergewissern Sie sich dass Sie Bluetooth auf Ihrem Gerät aktiviert haben ˋOFO 4JF BVG ISFN FS U EJF JTUF EFS TJDIUCBSFO WFSCVOEFOFO FS UF und wählen Sie aCAPPELLA Die LED Anzeige leuchtet durchgehend weiß es ertönt ein Sound und aCAPPELLA kann loslegen ...

Page 26: ... verbundenen Gerät wieder her Wenn Sie ein neues Gerät anschließen möchten können Sie den Bluetooth Pairing Modus manuell aktivieren Drücken und halten Sie die Multifunktionstaste K um den Bluetooth Pairing Modus zu aktivieren Die LED Anzeige blinkt weiß und Sie können jetzt ein neues Gerät mit einem aCAPPELLA koppeln ...

Page 27: ...27 Deutsch MULTI FUNKTIONEN 1x 2x 3x 0 02 ...

Page 28: ...28 Deutsch 1x 1x 0 02 ...

Page 29: ...indem Sie die Multifunktionstaste dreimal drücken Die LED Anzeige blinkt weiß und das eingebaute Mikrofon nimmt Ihre Sprachbefehle auf Wenn zwei aCAPPELLAs im TWS Modus abspielen kann nur ein aCAPPELLA das Mikrofon für Voice Assistant aktivieren Wenn Sie Ihren Voice Assistant aktivieren blinkt die LED Anzeige auf dem Lautsprecher der Ihre Sprachbefehle hört weiß 3x ...

Page 30: ...30 Deutsch AKKU UND AUFLADEN USB C 5V 1A Orange 0 99 Green 100 5W ...

Page 31: ...SES LADEN B 11 LBOO CFS EFO 64 JOHBOH PEFS CFS FJO 2 FSUJˌ JFSUFT kabelloses Ladegerät aufgeladen werden Wenn aCAPPELLA korrekt geladen wird blinkt die LED Anzeige orange Wenn der Akku vollständig aufgeladen ist leuchtet die LED Anzeige durchgehend grün bis aCAPPELLA WPO EFS 2 FSUJˌ JFSUFO BEFTDIBMF FOUGFSOU PEFS EBT BEFLBCFM abgezogen wird Die Ladezeit auf einem QI FSUJˌ JFSUFO BEFHFS U CFUS HU D...

Page 32: ...atus 15 100 15 10 0 99 100 Rot Rot blinkend Orange Grün Wenn der Akku bei unter 15 liegt leuchtet die LED Anzeige durchgehend rot Wenn der Akku bei unter 10 liegt blinkt die LED Anzeige rot aCAPPELLA schaltet sich bei Inaktivität nach 60 Minuten aus ...

Page 33: ...o TWS wiedergeben Schalten Sie beide aCAPPELLAs ein Halten Sie die Multifunktionstaste K am Primärlautsprecher gedrückt Drücken Sie gleichzeitig die Taste um den TWS Pairing Modus zu aktivieren Die LED Anzeige am Primärlautsprecher blinkt jetzt lila Halten Sie die Multifunktionstaste am sekundären Lautsprecher gedrückt um eine Verbindung mit TWS herzustellen ...

Page 34: ...tet weiß und es ertönt ein akustisches Signal Stellen Sie sicher dass Ihr Gerät mit dem primären Lautsprecher gekoppelt ist Sie können jetzt Ihre Musik in True Wireless Stereo abspielen Bis der TWS Pairing Modus an einem der Lautsprecher manuell aktiviert wird bleiben die beiden aCAPPELLAs automatisch im TWS Modus ...

Page 35: ...35 Deutsch ...

Page 36: ...36 Español Español Manual de instrucciones ...

Page 37: ...es plásticas 5 No exponga el producto al frío extremo ya que puede dañar la placa de circuito interna 6 Evite que el producto entre en contacto con líquidos 7 No arroje ni pise el producto Esto puede dañar la placa de circuito interna 8 No intente desarmar el producto Esto solo lo puede hacer un profesional 9 No use productos químicos concentrados o detergentes para limpiar el producto BOUFOHB MB ...

Page 38: ...lema con su producto póngase en contacto con la tienda donde compró el producto La tienda minorista le orientará sobre lo que debe hacer y si eso no resuelve el problema la tienda minorista manejará el reclamo directamente con KREAFUNK ...

Page 39: ...39 Español Reset 0 02 5W USB C 5V 1A ...

Page 40: ...40 Español CONECTAR Y JUGAR 1 1x Presione el botón multifuncional K para encender aCAPPELLA El indicador LED se iluminará en blanco y se escuchará un sonido de aviso ...

Page 41: ...mience a parpadear en blanco asegúrese de que la función Bluetooth de su dispositivo esté activada Busque la lista de equipos visibles conectados en su dispositivo y seleccione aCAPPELLA El indicador LED se pondrá blanco se escuchará un sonido de aviso y el aCAPPELLA estará listo para usar ...

Page 42: ...NEXIÓN CON BLUETOOTH 0 02 El aCAPPELLA siempre se volverá a conectar con el dispositivo con el que se conectó la última vez cuando lo encienda Si desea conectarlo a un dispositivo nuevo puede activar manualmente el modo de conexión con Bluetooth ...

Page 43: ...one y mantenga el botón multifuncional K para activar el modo de emparejamiento de Bluetooth El indicador LED parpadeará en blanco y ahora puede emparejar aCAPPELLA con un nuevo dispositivo MULTIFUNCIONES 1x 2x 3x 0 02 ...

Page 44: ...44 Español 1x 1x 0 02 ...

Page 45: ... botón de función multio tres veces El indicador LED parpadeará en blanco y el micrófono integrado captará sus comandos de voz Cuando tenga dos aCAPPELLAs reproduciendo sonido en modo TWS solo puede activar el micrófono para el asistente de voz en uno de los aCAPPELLAs Cuando active su asistente de voz el indicador LED parpadeará en blanco en el altavoz que escucha sus comandos de voz 3x ...

Page 46: ...46 Español BATERÍA Y CARGA USB C 5V 1A Orange 0 99 Green 100 5W ...

Page 47: ...ARGA INALÁMBRICA El aCAPPELLA se puede cargar a través de una entrada USB C o poniéndolo TPCSF VOB CBTF EF DBSHB JOBM NCSJDB 2 DFSUJˌDBEB VBOEP FM B 11 se carga correctamente el LED parpadeará en naranja Cuando la batería esté completamente cargada el indicador LED se pondrá verde hasta que lo SFUJSF EF MB CBTF EF DBSHB 2 DFSUJˌDBEB P EFTDPOFDUF FM DBCMF EF DBSHB M UJFNQP EF DBSHB FO VOB QMBUBGPSN...

Page 48: ... 10 0 99 100 Rojo Rojo intermitente Naranja Verde Si el nivel de carga de la batería es inferior al 15 el indicador LED se pone rojo Cuando es inferior al 10 el indicador LED comienza a parpadear en rojo El aCAPPELLA se apagará automáticamente cuando no se use por 60 minutos ...

Page 49: ...istema True Wireless Stereo TWS Encienda ambos aCAPPELLAs Mantenga presionado el botón multifun ción K en el altavoz principal Presione simultáneamente el botón para activar el modo de emparejamiento TWS El indicador LED en el altavoz principal ahora parpadea en púrpura Mantenga presionado el botón multifunción en el altavoz secundario para conectarse en TWS ...

Page 50: ...áticamente entre ellos el indicador LED se pondrá blanco en ambos altavoces y se escuchará un sonido de aviso Asegúrese de que su dispositivo esté emparejado con el altavoz principal Ahora está listo para reproducir sonido en el sistema True Wireless Stereo ...

Page 51: ...pañol Los dos aCAPPELLAs se volverán a conectar automáticamente en el modo TWS cuando ambos estén encendidos hasta que vuelva a activar manualmente el modo de conexión del sistema TWS en uno de los altavoces ...

Page 52: ...52 Français Français Manuel d utilisation ...

Page 53: ...exposez pas le produit à des températures extrêmement froides car cela pourrait endommager le circuit imprimé interne 6 Évitez que des liquides ne pénètrent dans l appareil 7 Ne jetez pas l appareil et ne montez pas dessus Cela pourrait endommager le circuit imprimé interne 8 N essayez pas de démonter l appareil Seul un professionnel est habilité à le faire 9 N utilisez pas de produits chimiques c...

Page 54: ...us rencontrez des problèmes avec votre produit veuillez contacter le revendeur auprès duquel vous avez l avez acheté Le revendeur vous guidera pour régler le problème ou traitera la réclamation directement avec KREAFUNK ...

Page 55: ...55 Français Reset 0 02 5W USB C 5V 1A ...

Page 56: ...56 Français CONNECT PLAY 1 1x Appuyez sur le bouton multifonction K pour activer aCAPPELLA Le voyant LED devient blanc et un signal sonore se fait entendre ...

Page 57: ... clignoter assurez vous que la fonction Bluetooth de votre appareil est activée Trouvez la liste des appareils visibles connectés sur votre appareil et sélectionnez aCAPPELLA Le voyant LED devient blanc et ne clignote plus un signal sonore se fait entendre et aCAPPELLA est prêt à lancer une piste audio ...

Page 58: ...MELAGE BLUETOOTH MANUEL 0 02 Le aCAPPELLA se reconnectera toujours au dernier appareil connecté lorsqu il est allumé Si vous souhaitez jumeler un nouvel appareil vous pouvez activer manuellement le mode de jumelage Bluetooth ...

Page 59: ...s Appuyez et maintenez sur le bouton multifonction K pour activer le mode de couplage Bluetooth Le voyant LED clignote en blanc et vous pouvez maintenant associer un aCAPPELLA à un nouvel appareil MULTI FONCTIONS ...

Page 60: ...60 Français 1x 2x 3x 0 02 ...

Page 61: ...61 Français 1x 1x 0 02 ...

Page 62: ...uyant trois fois sur le bouton de fonction multio Le voyant LED blanc clignotera et le micro intégré captera vos commandes vocales Lorsque deux aCAPPELLAs jouent en mode TWS un seul aCAPPELLA peut activer le micro de l assistant vocal Lorsque vous activez votre assistant vocal le voyant LED blanc clignote sur l enceinte qui capte vos commandes 3x BATTERIE ET CHARGE ...

Page 63: ...63 Français ...

Page 64: ...64 Français USB C 5V 1A Orange 0 99 Green 100 5W CHARGEMENT ...

Page 65: ...FIL Le aCAPPELLA peut être rechargé via l entrée USB C ou en étant placé TVS VODIBSHFVS TBOT ˌM DFSUJˌÄ 2 2VBOE B 11 TF SFDIBSHF correctement le voyant LED clignote en orange Lorsque la batterie est DPNQMÃUFNFOU DIBSHÄF MnJOEJDBUFVS EFWJFOU WFSU ˌYF KVTRVn DF RVF B 11 TPJU SFUJSÄ EV DIBSHFVS JOEVDUJPO DFSUJˌÄF 2 PV RVF MF D CMF de chargement soit débranché B EVSÄF EF DIBSHF TVS VO DIBSHFVS DFSUJˌÄ...

Page 66: ...Rouge Rouge clignotant Orange Vert Lorsque le niveau de la batterie est inférieur à 15 le voyant LED devient SPVHF ˌYF PSTRVF MF OJWFBV EF MB CBUUFSJF FTU JOGÄSJFVS MF WPZBOU LED clignote en rouge Le aCAPPELLA s éteint automatiquement lorsqu il n est pas utilisé pendant 60 minutes ...

Page 67: ... Allumez les deux aCAPPELLAs Appuyez et maintenez le bouton multifonction K sur le haut parleur principal Appuyez simultanément sur le bouton pour activer le mode d appairage TWS Le voyant LED de l enceinte principale clignote maintenant en violet Appuyez sur le bouton multifonction du haut parleur secondaire et maintenez le enfoncé pour vous connecter à TWS ...

Page 68: ...F Assurez vous que votre appareil est associé au haut parleur principal Vous êtes maintenant prêt à lancer une piste audio avec le True Wireless Stereo Les deux aCAPPELLAs se reconnecteront automatiquement en mode TWS lorsque les deux enceintes sont activées jusqu à ce que le mode de jumelage TWS soit à nouveau activé manuellement sur une des enceintes ...

Page 69: ...69 Français ...

Page 70: ...70 Dansk Dansk Brugermanual ...

Page 71: ...gå væsker kommer ind i produktet 7 Kast ikke med eller træd på produktet Dette kan beskadige det interne printplade 8 Prøv ikke at adskille produktet Dette må kun gøres af en professionel 9 Brug ikke koncentrerede kemiske produkter eller rengøringsmidler til at rengøre produktet PME PWFSˍBEFO WÁL GSB TLBSQF UJOH EB EJTTF LBO TLBEF QMBTUEFMFOF 11 Brug kun 5V 1A strømforsyninger Tilslutning af strøm...

Page 72: ...72 Dansk Reset 0 02 5W USB C 5V 1A ...

Page 73: ...73 Dansk TILSLUT AFSPIL 1 1x Tryk på Multifunktionsknappen K for at aktivere aCAPPELLA LED indikatoren lyser hvidt og der høres en lydprompt ...

Page 74: ...oren på aCAPPELLA begynder at blinke hvid skal du sørge for at Bluetooth på din enhed er tændt Find listen over synlige tilsluttede enheder på din enhed og vælg aCAPPELLA LED indikatoren bliver solid hvid der høres en lydprompt og aCAPPELLA er klar til afspilning ...

Page 75: ...UETOOTH FORBINDELSESTILSTAND 0 02 aCAPPELLA vil altid forbinde til den sidst tilsluttede enhed når den er tændt Hvis du ønsker at oprette forbindelse til en ny enhed kan du manuelt aktivere Bluetooth forbindelsestilstand ...

Page 76: ...76 Dansk Tryk og hold på Multifunktionsknappen K for at aktivere Bluetooth parringstilstand LEDindikatoren blinker hvidt og du kan nu parre aCAPPELLA med en ny enhed MULTI FUNKTIONER 1x 2x 3x 0 02 ...

Page 77: ...77 Dansk 1x 1x 0 02 ...

Page 78: ...dobbelt på Multifunktion knappen LED indikatoren vil blinke hvidt og den indbyggede mikrofon vil fange dine stemmekommandoer Når der er to aCAPPELLAs der afspiller i TWS tilstand kan kun den ene aCAPPELLA aktivere mikrofonen til Voice Assistant Når du aktiverer din Voice Assistant vil LED indikatoren blinke hvidt på den højtaler der lytter til dine kommandoer 3x ...

Page 79: ...79 Dansk BATTERI OG OPLADNING USB C 5V 1A Orange 0 99 Green 100 5W ...

Page 80: ...RÅDLØS OPLADNING aCAPPELLA kan oplades via USB C indgangen eller ved at blive placeret på FO 2 DFSUJˌDFSFU USÀEMÓT PQMBEOJOHTQMBEF ÀS B 11 PQMBEFS LPSSFLU blinker LED indikatoren orange Når batteriet er fuldt opladt lyser LED JOEJLBUPSFO TPMJE HSÓOU JOEUJM B 11 GKFSOFT GSB EFO 2 DFSUJˌDFSFEF opladningsplade eller opladningskablet trækkes ud 0QMBEOJOHTUJE NFE FO 2 DFSUJˌDFSFU USÀEMÓT PQMBEFS FS DB ...

Page 81: ...15 100 15 10 0 99 100 Rød Blinker rødt Orange Grøn Når batteriniveauet er under 15 skifter LED indikatoren til rød Når batteriniveauet er under 10 blinker LED indikatoren rødt aCAPPELLA slukker automatisk når den ikke har været i brug i 60 minutter ...

Page 82: ...True Wireless Stereo TWS Tænd for begge aCAPPELLAs Tryk og hold multifunktionsknappen K på den primære højttaler Tryk samtidigt på knappen for at aktivere TWS parringstilstand LED indikatoren på den primære højttaler blinker nu lilla Tryk og hold multifunktionsknappen på den sekundære højttaler for at oprette forbindelse til TWS ...

Page 83: ...øjtalere og en lydprompt høres Sørg for at din enhed er parret med den primære højttaler Du er nu klar til at afspille i True Wireless Stereo De to aCAPPELLAs vil automatisk forbinde I TWS tilstand når begge højtalere er tændte indtil TWS forbindelsestilstanden igen manuelt aktiveres på en af højtalerne ...

Page 84: ...84 Italiano Italiano Manuale operativo ...

Page 85: ...rre il prodotto al gelo in quanto potrebbe danneggiare il circuito interno 6 Evitare che il prodotto entri in contatto con liquidi 7 Non lanciare calpestare o esercitare una forte pressione sul prodotto in quanto potrebbe danneggiare il circuito interno 8 Non provare a smontare il prodotto Tale operazione deve essere eseguita esclusivamente da un professionista 9 Non utilizzare prodotti chimici co...

Page 86: ... con il tuo prodotto ti preghiamo di DPOUBUUBSF JM SJWFOEJUPSF QSFTTP DVJ IBJ FˋFUUVBUP MnBDRVJTUP M SJWFOEJUPSF provvederà a fornirti assistenza e nel caso in cui il problema non venga risolto il rivenditore gestirà il reclamo direttamente con KREAFUNK ...

Page 87: ...87 Italiano Reset 0 02 5W USB C 5V 1A ...

Page 88: ...88 Italiano CONNETTI E GIOCA 1 1x Premere il Pulsante multifunzione K per attivare aCAPPELLA L indicatore LED si illuminerà di bianco e verrà emesso un segnale acustico ...

Page 89: ...LA inizia a lampeggiare in bianco assicurarsi che il Bluetooth sul dispositivo sia acceso Trovare l elenco delle unità visibili collegate sul dispositivo e selezionare aCAPPELLA nJOEJDBUPSF EJWFOUFS CJBODP ˌTTP WFSS FNFTTP VO TFHOBMF BDVTUJDP F aCAPPELLA sarà pronto per la riproduzione ...

Page 90: ...vo connesso Se si desidera collegare un nuovo dispositivo è possibile attivare manualmente la modalità di connessione Bluetooth Tieni premuto il pulsante multifunzione K per attivare la modalità di associazione Bluetooth L indicatore LED lampeggerà in bianco e ora è possibile associare aCAPPELLA a un nuovo dispositivo ...

Page 91: ...91 Italiano MULTIFUNZIONE 1x 2x 3x 0 02 ...

Page 92: ...92 Italiano 1x 1x 0 02 ...

Page 93: ...emendo tre volte il pulsante multi funzione L indicatore LED lampeggerà in bianco e il microfono incorporato riceverà i comandi vocali Quando due aCAPPELLAs sono in modalità TWS solo un aCAPPELLA potrà attivare il microfono per l Assistente Vocale Quando si attiva l Assistente Vocale l indicatore LED lampeggerà in bianco sull altoparlante pronto a ricevere i vostri comandi 3x ...

Page 94: ...94 Italiano BATTERIA E RICARICA USB C 5V 1A Orange 0 99 Green 100 5W ...

Page 95: ... può essere ricaricato con USB C input o attraverso un tappetino EJ SJDBSJDB XJSFMFTT DFSUJˌDBUP 2 2VBOEP B 11 Ã DPSSFUUBNFOUF JO DBSJDB MnJOEJDBUPSF TBS BSBODJPOF ˌTTP 2VBOEP MB CBUUFSJB Ã EFM UVUUP DBSJDB MnJOEJDBUPSF EJWFOUFS WFSEF ˌTTP F SJNBSS UBMF ˌOP B RVBOEP B 11 WFSS SJNPTTP EBM UBQQFUJOP EJ SJDBSJDB XJSFMFTT DFSUJˌDBUP 2 P ˌOP B RVBOEP WFSS SJNPTTP JM DBWP EJ SJDBSJDB M UFNQP EJ SJDBSJDB...

Page 96: ... 100 Rosso Rosso lampeggiante Arancia Verde Quando il livello della batteria è inferiore al 15 l indicatore LED diventa SPTTP ˌTTP 2VBOEP JM MJWFMMP EFMMB CBUUFSJB Ã JOGFSJPSF BM MnJOEJDBUPSF LED lampeggia in rosso aCAPPELLA si spegnerà automaticamente se non utilizzato per 60 minuti ...

Page 97: ...WS Attiva entrambi gli aCAPPELLAs Premere e tenere premuto il pulsante multifunzione K sull altoparlante principale Premere contemporaneamente il pulsante per attivare la modalità di associazione TWS L indicatore LED sull altoparlante principale ora lampeggia in viola Tenere premuto il pulsante multifunzione sull altoparlante secondario per connettersi in TWS ...

Page 98: ...amente l indicatore LED EJWFOUFS CJBODP ˌTTP TV FOUSBNCJ HMJ BMUPQBSMBOUJ F WFSS FNFTTP VO segnale acustico Assicurarsi che il dispositivo sia associato all altoparlante principale Ora sarà possibile utilizzare gli altoparlanti in modalità True Wireless Stereo ...

Page 99: ... I due aCAPPELLAs si ricollegheranno automaticamente in modalità TWS RVBOEP FOUSBNCJ HMJ BMUPQBSMBOUJ TBSBOOP BDDFTJ ˌOP B RVBOEP MB NPEBMJU di abbinamento TWS verrà attivata manualmente su uno degli altoparlanti ...

Page 100: ...100 Chineseѝ᮷ ѝ᮷ Chinese ...

Page 101: ... 䈧यሶӗ 䮯ᰦ䰤 䵢 ⴤሴ䱣 ݹ лDŽ 儈 Պ㕙 ӗ Ⲵ ሯભˈ ൿ ᒦᢝᴢḀӋກᯉ䜘ԦDŽ 䈧यሶӗ 䵢 ᶱߧⲴ ຳѝˈ ࡉਟ㜭Պᦏൿ 䜘 䐟ᶯDŽ 䚯 ݽ փ ޕ ӗ 䈧यҡᢄᡆ ӗ кঠ DŽ 䘉ਟ㜭Պᦏൿ 䜘 䐟ᶯDŽ н㾱 㠚䈅 ӗ DŽ 䘉ᗵ享 уъӪ ᆼᡀDŽ 䈧य 㕙ॆᆖӗ ᡆ ࡲ ӗ DŽ 䈧 ᤱӗ 㺘䶒䘌 ቆ䭀 փˈഐѪ䘉ਟ㜭Պᦏൿກᯉ䜘ԦDŽ ӵ 9 ⓀDŽ 䘎᧕ Ⓚ 䗷儈ਟ㜭Պሬ㠤ѕ䟽ᦏൿDŽ 䈧य䲿 ђᔳᡆሶ䬲 㖞 Ⓚᡆ儈 䱴䘁ˈԕ ਁݽ ড 䲙噥 ྲ ᛘ ᇎ䙷ࡠӗ 䰞仈ˈ䈧㚄 ᛘ䍝Ҡӗ ᰦⲴ䴦 DŽ 䴦 ሶѪ ᛘᨀ ᤷሬˈྲ 䴦 н㜭䀓ߣ䰞仈ˈ䴦 ሶо 5 81 ⴤ᧕㚄 䰞仈DŽ ...

Page 102: ...102 Chineseѝ᮷ Reset 0 02 5W USB C 5V 1A ...

Page 103: ...103 Chineseѝ᮷ 䙓 䙓᧕і 1 1x лཊ 㜭 䡅 ᢃ䮻D 33 VDŽ ᤷ ሷӞ䎧ⲭ㢢і㚭ࡠ㚢 丣ᨀ DŽ ...

Page 104: ...104 Chineseѝ᮷ 2 Bluetooth Bluetooth 10 02 aCAPPELLA ᖃD 33 кⲴ ᤷ ᔰ 䰚 ⲭ ᰦˈ䈧 䇮 кⲴ㬍 ᐢᢃ ᔰDŽ 䇮 кḕⴻਟ㿱 ᐢ䘎᧕䇮 Ⲵࡇ㺘ˈ ਾ䘹ᤙĀD 33 ā DŽ ᤷ ਈѪⲭ ᑨӞˈੜࡠ༠丣ᨀ ˈԕ D 33 ቡ㔚DŽ ...

Page 105: ...105 Chineseѝ᮷ ࣘ㬍 ϟ䝽ሩ ᔿ 0 02 ᖃᢃᔰᰦˈD 33 ሶ 㓸䟽ᯠ䘎᧕ࡠк 䘎᧕Ⲵ䇮 DŽྲ ᛘ䴰㾱䘎 ᧕ᯠ䇮 ˈਟԕ ࣘ 㬍 ϟ䝽ሩ ᔿ տཊ 㜭 䡅ԕஏअ㯽 䝽ሽ ᔿDŽ ᤷ ሶ䰚 ⲭ㢢ˈᛘ ਟԕሶ 33 оᯠ䇮 䝽ሩDŽ ...

Page 106: ...106 Chineseѝ᮷ ཊ ཊ 㜭 1x 2x 3x 0 02 ...

Page 107: ...107 Chineseѝ᮷ 1x 1x 0 02 ...

Page 108: ...108 Chineseѝ᮷ 䈝 䈝丣ࣙ 㜭 䙊䗷D 33 кⲴ 㖞哖 ݻ 仾ˈᛘਟԕ 䇮 Ⲵ䈝丣ࣙ DŽ䙓 йл ཊ 㜭 䡅ԕ ᛘⲴ䃎丣ࣙ DŽ ᤷ ሶ䰚 ⲭ ˈ 㖞哖 ݻ 仾ሶ ਆᛘⲴ䈝丣ભԔDŽ ᖃ 7 6 ᔿл єњD 33 VᰦˈਚᴹањD 33 ਟԕ 哖 ݻ 仾ᔰ 䈝丣ࣙ 㜭DŽᖃ 䈝丣ࣙ 㜭ᰦˈ᧕ 䈝丣ભԔⲴᢜ༠ಘк ᤷ ሶ䰚 ⲭ DŽ 3x ...

Page 109: ...109 Chineseѝ᮷ о ݵ USB C 5V 1A Orange 0 99 Green 100 5W ...

Page 110: ...110 Chineseѝ᮷ ݵ ݵ 䲿䱴Ⲵ86 䘎᧕㓯 ݵ བྷ㓖㙇ᰦ ሿᰦDŽ ݵ ᰦˈ ᤷ 䰚 㢢DŽ ݵ ਾˈ ᤷ ਈѪ㔯 ᑨӞDŽ ᰐ㓯 ݵ D 33 ਟԕ䙊䗷86 䗃 ޕ ᡆ 4 ϟ䇔䇱Ⲵᰐ㓯 ݵ ᶯ䘋㹼 ݵ DŽᖃ D 33 ᑨ ݵ ᰦˈ ᤷ ሶ䰚 㢢DŽᖃ ݵ ᰦˈ ᤷ ሶਈѪ㔯 ᑨӞˈD 33 ᔰ4 ϟ䇔䇱Ⲵ ݵ ᶯᡆᤄл ݵ 㓯ᰦˈ ᤷ DŽ ݵ ᰦ䰤㓖Ѫ ሿᰦ ...

Page 111: ...111 Chineseѝ᮷ ᘱ ⲭ㢢 LED ᘱ 15 100 15 10 0 99 100 㓒㢢 䰚 㓒㢢 ᆀ 㔯㢢 ᖃ 䟿վҾ ᰦˈ ᤷ ਈѪ㓒㢢ᑨӞDŽᖃ 䟿վҾ ᰦˈ ᤷ 䰚 㓒 DŽ D 33 ᵚ 䫏ਾሶ㠚ࣘ ޣ 䰝DŽ ...

Page 112: ...112 Chineseѝ᮷ ⵏ ⵏᇎᰐ㓯 փ༠䝽ሩ 1 L R 0 02 1x 1 2 Purple D 33 ਟԕоਖањD 33 䝽ሩˈᒦ ⵏᇎᰐ㓯 փ༠ 7 6 ᔿ DŽ ஏ ػޙ D 33 VDŽ տѫᢜ༠ಘкⲴཊ 㜭 䫞 DŽ ᰦ л 䫞ԕ Ӕ᱃ᒣਠ䝽ሩ DŽ ѫᨊ㚢ಘкⲴ ᤷ 䮳 㢢DŽ տ䕄ࣙᨊ㚢ಘкⲴཊ 㜭 䡅ԕ䙓᧕7 6DŽ ...

Page 113: ...113 Chineseѝ᮷ 2 L R ػޙ D 33 Vሷ㠚अ䝽ሽˈ ػޙ ᨊ㚢ಘкⲴ ᤷ ሷ䆺 ⲭ㢢ˈ іфᴳ㚭ࡠ㚢丣ᨀ DŽ ᛘⲴ䁝 ۉ ᐢ㠷ѫᨊ㚢ಘ䝽ሽDŽᛘ ਟԕ 7UXH LUHOHVV 6WHUHRѝ ҶDŽ ػޙ ᨊ㚢ಘ䜭ᢃ䮻ᱲˈ ػޙ D 33 V ሷ 7 6 ᔿл㠚अ䟽ᯠ䙓 ᧕ˈⴤࡠ ަѝа ػ ᨊ㚢ಘк अ 7 6䝽ሽ ᔿDŽ ...

Page 114: ...erence in a residential installation This equipment generates uses and can radiate radio frequency energy and if not installed and used in accordance with the instructions may cause harmful interference to radio communications However there is no guarantee that interference will not occur in a particu lar installation If this equipment does cause harmful interference to radio or television recepti...

Page 115: ......

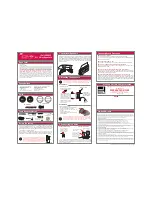
Page 116: ...1x 0 02 1x 0 02 1x 2x 3x 0 02 aCA1PELLA Basic Functions ...

Reviews: