background image

Kohler Co.

1

1083256-9-

A

SPRAYHEAD AND MEMBRANE

1083258, 1083260, 1092606, 1092607

SERVICE KIT INSTRUCTIONS

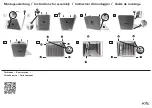
Remove the Escutcheon Assembly

†

Turn off the water supply before servicing the bodyspray.

†

Turn the escutcheon counterclockwise until it stops.

†

Lift and remove the escutcheon.

Purpose

This kit can be used to replace a bodyspray sprayhead and/or a spray
membrane for K-8013 and K-8014.

Tools

5/64" and 1/4" 
Hex Wrenches

Escutcheon

1083256-9-

A

1

Kohler Co.

Summary of Contents for 1083258

Page 1: ...n Assembly Turn off the water supply before servicing the bodyspray Turn the escutcheon counterclockwise until it stops Lift and remove the escutcheon Purpose This kit can be used to replace a bodyspray sprayhead and or a spray membrane for K 8013 and K 8014 Tools 5 64 and 1 4 Hex Wrenches Escutcheon 1083256 9 A 1 Kohler Co ...

Page 2: ...ray membrane as it tears easily If you are only replacing the spray membrane proceed to Replace the Spray Membrane section otherwise continue to Remove the Sprayhead section Remove the Sprayhead Insert a 1 4 hex wrench through the center of the sprayhead into the ball joint Turn the ball joint clockwise while holding the sprayhead stationary to remove the sprayhead and the clamp Remove the O ring ...

Page 3: ...d with the KOHLER logo aligned with one of the setscrew holes on the sprayhead Press the spray membrane seal into the sprayhead groove by applying pressure evenly This will ensure optimum performance Place the spray face over the sprayhead aligning the setscrew holes with the setscrew in the sprayhead Use a 5 64 hex wrench and turn each of the three setscrews counterclockwise backing them out unti...

Page 4: ...eaking components and reinstall or replace Locate the drain port on the escutcheon assembly Orient the escutcheon assembly so the drain port is centered on the mark at the 5 o clock position on the leak shield Insert the escutcheon assembly all the way into the leak shield Twist clockwise to align the drain port and lock in place Escutcheon Align drain port with mark Drain Port Setscrew Sprayhead ...

Page 5: ...ers la gauche jusqu à la fin Souleber et retirer l applique Objectif Ce kit peut être utilisé pour remplacer une tête de vaporisateur de jet corporel et ou membrane de jet pour K 8013 et K 8014 Outils Clés hexagonales de 5 64 et 1 4 Applique TÊTE DE VAPORISATEUR ET MEMBRANE 1083258 1083260 1092606 1092607 INSTRUCTIONS DU KIT DE SERVICE ...

Page 6: ...car elle casse facilement Au cas où la membrane du jet est uniquement remplacée procéder à la section Remplacer la membrane du jet sinon continuer à la section Retirer la tête du vaporisateur Retirer la tête du vaporisateur Insérer une clé hexagonale de 1 4 dans le centre de la tête du vaporisateur et dans la rotule Tourner la rotule vers la droite tout en maintenant la tête de vaporisateur immobi...

Page 7: ...is de retenue sur la tête de vaporisateur Presser la membrane de jet dans la rainure de tête de vaporisateur en appliquant également de la pression Ceci assurera une performance optimale Placer la face de vaporisateur sur la tête de vaporisateur en alignant les trous de vis de retenue avec la vis de retenue de la tête du vaporisateur Avec une clé hexagonale de 5 64 tourner chacune des trois vis de...

Page 8: ...uient et réinstaller ou remplacer Localiser le port du drain sur l ensemble d applique Orienter l ensemble d applique de manière à ce que le port du drain soit centré sur la marque position 5 heures sur l anti fuites Insérer l ensemble d applique à fond dans l anti fuites Torsader vers la droite pour aligner le port du drain et le verrouiller en place Applique Aligner le port du drain avec la marq...

Page 9: ...ierda hasta que no pueda girar más Levante y retire el chapetón Objetivo Este kit se puede utilizar para reemplazar la cabeza del rociador y o la membrana del rociador de un rociador corporal K 8013 y K 8014 Herramientas Llaves hexagonales de 5 64 y 1 4 Chapetón CABEZA DEL ROCIADOR Y MEMBRANA 1083258 1083260 1092606 1092607 INSTRUCCIONES DEL KIT DE SERVICIO ...

Page 10: ...mente Si sólo va a reemplazar la membrana del rociador continúe en la sección Reemplace la membrana del rociador de lo contrario continúe en la sección Retire la cabeza del rociador Retire la cabeza del rociador Inserte una llave hexagonal de 1 4 a través del centro de la cabeza del rociador y dentro de la articulación de bola Gire la articulación de bola hacia la derecha mientras sostiene fija la...

Page 11: ... los orificios para tornillo de fijación de la cabeza del rociador Presione el sello de la membrana del rociador aplicando presión uniformemente dentro de la ranura de la cabeza del rociador Esto asegurará un funcionamiento óptimo Coloque la placa exterior del rociador sobre la cabeza del rociador alineado los orificios para tornillo de fijación con el tornillo de fijación de la cabeza del rociado...

Page 12: ... de desagüe en el montaje del chapetón Oriente el montaje del chapetón de manera que el puerto de desagüe quede centrado en la marca en la posición de las 5 en punto en el protector contra fugas Inserte el montaje del chapetón completamente dentro del protector contra fugas Gire hacia la derecha para alinear el puerto de desagüe y fijar en su lugar Chapetón Alinee el puerto de desagüe con la marca...

Reviews: