Kogan 9 TU9220 Series, User Manual
The Kogan 9 TU9220 Series is a cutting-edge product designed to enhance your viewing experience. With its sleek design and superior picture quality, this TV will bring your favorite shows and movies to life. Don't forget to grab your free User Manual download from manualshive.com to fully unlock all the amazing features this TV has to offer.
Share
Download


Reviews:
No comments
Related manuals for 9 TU9220 Series

IN01-32U1B
Brand: I-Inc Pages: 1

Adagio ATC-AMFM2
Brand: Crestron Pages: 20

IS-TV040923
Brand: Insignia Pages: 40

PS1980
Brand: Magnavox Pages: 32
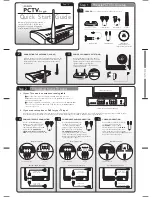
PCTV To Go
Brand: Pinnacle Pages: 2

NT-4901K
Brand: Naxa Pages: 16

FPMA-D400
Brand: NewStar Pages: 2

LT-22AM21
Brand: Sansui Pages: 56

HANNSPREE LT0G-15A1
Brand: HANNspree Pages: 73

CML8350-E
Brand: AVF Pages: 16

MLT1912 "B"
Brand: Memorex Pages: 17

NeoMounts FL40-450BL11
Brand: NewStar Pages: 8

DX-19E310NA15
Brand: Dynex Pages: 2

IS-TV040922
Brand: Insignia Pages: 29

CT-14GT9A
Brand: akira Pages: 28

L1927
Brand: Haier Pages: 34

65UF2505
Brand: Haier Pages: 24

PPM50H3X/XAA
Brand: Samsung Pages: 33


