Kodak Scan station Pro 550, User Manual
The Kodak Scan Station Pro 550 is a versatile document scanner that offers high-quality scanning and efficient data capture. For detailed instructions on how to use this product, download the free user manual from manualshive.com. Stay organized and maximize productivity with the help of this essential manual.
Share
Download


Reviews:
No comments
Related manuals for Scan station Pro 550

SCANZ
Brand: OBD2 Pages: 32

Pro Scanner Output Tray
Brand: HP Pages: 17

KV-SS50
Brand: Panasonic Pages: 1

KV-SS25D
Brand: Panasonic Pages: 1

KV-SS25D
Brand: Panasonic Pages: 4

KV-SS25
Brand: Panasonic Pages: 2

KV-S7075C
Brand: Panasonic Pages: 2

KV-S7075C
Brand: Panasonic Pages: 4

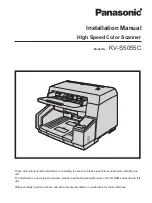
KV-S5055C
Brand: Panasonic Pages: 6

KV-SS25D
Brand: Panasonic Pages: 20

KV-S6040W - Document Scanner
Brand: Panasonic Pages: 8

KV-SS25
Brand: Panasonic Pages: 20

KV-S7075C
Brand: Panasonic Pages: 20

KV-SS080
Brand: Panasonic Pages: 32
KV-S5055C
Brand: Panasonic Pages: 24

KV-S7077
Brand: Panasonic Pages: 53

KV-S7075C
Brand: Panasonic Pages: 53

KV-Sl3056
Brand: Panasonic Pages: 73


