Kenmore 790.9740, Use & Care Manual
The Kenmore 790.9740 is a versatile kitchen appliance designed to simplify your cooking experience. To ensure its optimal use and longevity, refer to the comprehensive Use & Care Manual, available for free download from manualshive.com. This manual provides step-by-step instructions and expert tips to maximize your appliance's performance.
Share
Download


Reviews:
No comments
Related manuals for 790.9740

PRO-STYLE DUAL FUEL CONVECTION RANGES
Brand: Jenn-Air Pages: 72

ESI
Brand: Electrolux Pages: 20

ESIII
Brand: Electrolux Pages: 24

ES200/300
Brand: Electrolux Pages: 20

EW30DF65G S
Brand: Electrolux Pages: 28

ES200
Brand: Electrolux Pages: 25

ES510L
Brand: Electrolux Pages: 32

EW30DS65GS - 30" Slide-In Dual Fuel Range
Brand: Electrolux Pages: 44

EW30DS65GB3
Brand: Electrolux Pages: 52

Electric Slide-In Range
Brand: Electrolux Pages: 52

EOD6390
Brand: Electrolux Pages: 52

EW30DF65GBA
Brand: Electrolux Pages: 14
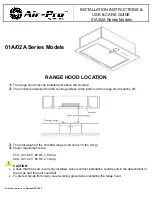
01A series
Brand: Air-Pro Pages: 18

Renaissance Series MRES30S
Brand: Dacor Pages: 16

SILVGRLINK 600
Brand: Lincat Pages: 8

IRIBT26WA
Brand: IKEA Pages: 33

CX65SP1 I /HA S
Brand: Hotpoint Ariston Pages: 60

RDV2
Brand: DCS Pages: 44


