Kapro Prolaser Electrota 8991, User Manual
The Kapro Prolaser Electrota 8991 is a precision laser level designed for use in construction and DIY projects. Ensure accurate measurements with this advanced tool by downloading the free User Manual from our website. Get step-by-step instructions and tips for optimal performance. Download now for easy access at manualshive.com.
Share
Download


Reviews:
No comments
Related manuals for Prolaser Electrota 8991
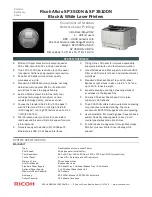
Aficio SP 3500N
Brand: Ricoh Pages: 2

KC-084
Brand: KeCheng Pages: 6

2603
Brand: FASTER TOOLS Pages: 17

72-300
Brand: NEO TOOLS Pages: 12

FX360G
Brand: Lasertec Pages: 20

TCL 80
Brand: THEIS Pages: 9

GRL20GSTDKT
Brand: General Pages: 16

GML3DRSTDKT
Brand: General Pages: 16

GML3DGPRMKT
Brand: General Pages: 16

MULTI-LINER FL 50
Brand: geo-FENNEL Pages: 8

FR 66-MM
Brand: geo-FENNEL Pages: 4

MULTI-LINER FLG-55 Green
Brand: geo-FENNEL Pages: 12

GeoTape 2in1
Brand: geo-FENNEL Pages: 10

Geo3X HP
Brand: geo-FENNEL Pages: 10

FLG 40-Green
Brand: geo-FENNEL Pages: 8

MULTI-LINER FL 55 PLUS HP
Brand: geo-FENNEL Pages: 16

Maxi-Liner FL 60
Brand: geo-FENNEL Pages: 14

Maxi-Liner FL 65 HP
Brand: geo-FENNEL Pages: 16


